- Prep
- 200 min
- Cook
- 40 min
- Total
- 360 min
- Serves
- 8
- Calories
- 120 kcal
- Carbs
- 25.00 g
On this page12 quick jumps
TOC
12 quick jumps
Introduction
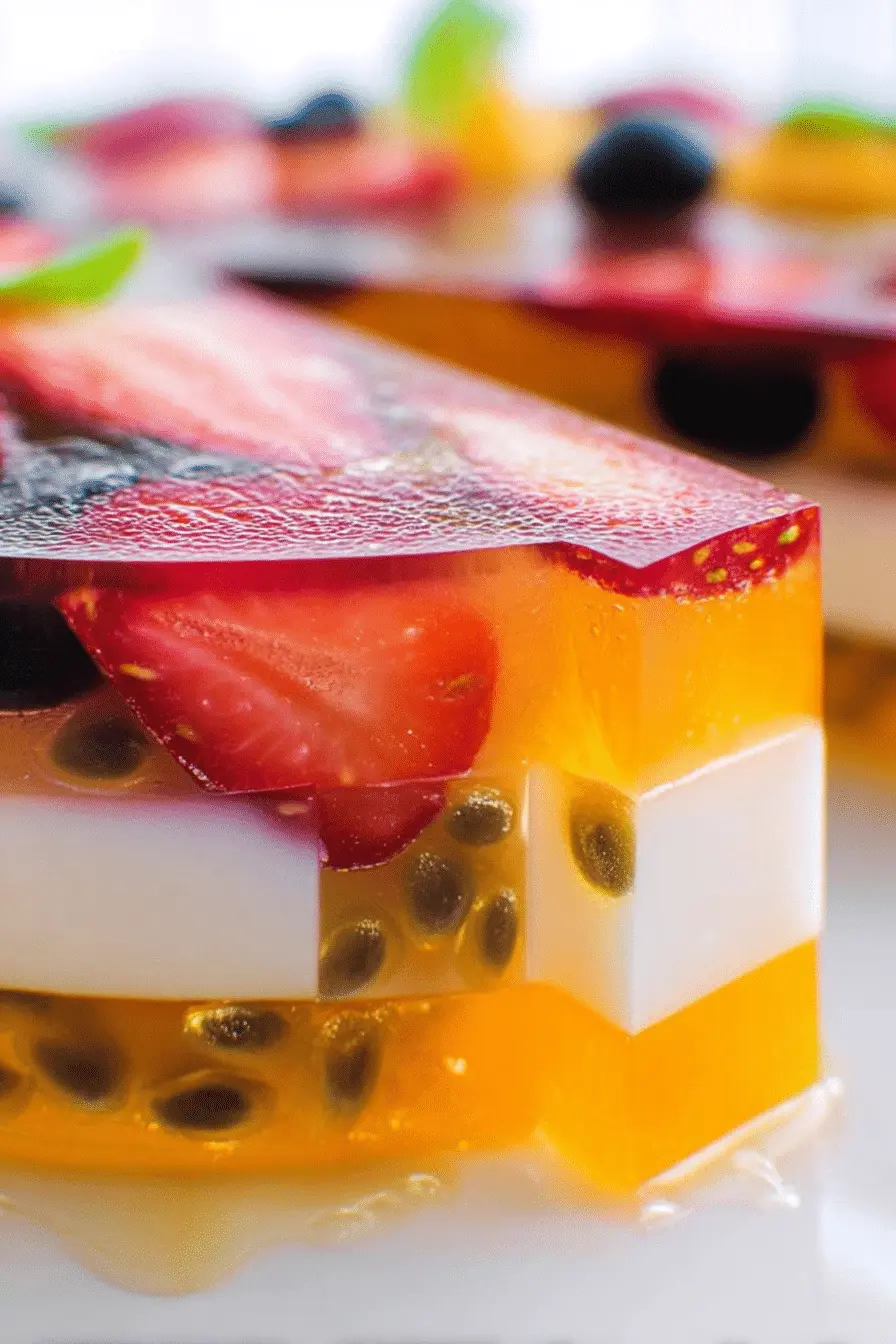
I first made this agar jelly fruit cake on a blistering June afternoon when my fridge was full of sun-ripe mangoes and a stack of party invitations. I remember standing at the counter, cutting bright cubes of fruit and lining them up like little jewels, thinking this would either be the hit of the party or a slippery mess. It turned out to be the former: a show-stopping centerpiece that sliced cleanly, tasted fresh, and went straight to the “how did you make this?” conversation starters.
I make this cake whenever I want a dessert that looks fancy but doesn’t demand last-minute fuss. The tropical perfume of coconut milk and, if you like, a ribbon of pandan, pairs perfectly with the tart brightness of berries or the mellow sweetness of mango. Best of all, the cake lives happily in the fridge for days, which means more time greeting guests and less time in the kitchen.
Over the years I learned the little things that turn this from a pretty idea into a reliable party staple: keep a steady boil when dissolving agar-agar, pat your fruit dry so the layers stay clear, and always pour the next layer when the previous one has a slight skin but is still warm enough to bind. Those tiny steps are the reason my guests think I spent hours on it—when really I spent my time arranging colors and sipping iced tea.
Pro-Tips, Troubleshooting, and Variations are presented as bulleted lists below for quick scanning so you can get this on the table with confidence.
Why this Agar Jelly Fruit Cake Recipe Is a Summer Party Essential
This cake is a visual magnet—layers of translucent jelly framing saturated fruit remind people of stained glass. I’ve watched kids press their faces against the cake tin and adults linger by the dessert table just to admire the colors. The visual appeal isn’t just for show: the fresh fruit and coconut layer add bright textures and tropical aromas that make the whole room feel like a summer celebration.
Using agar-agar makes this dessert naturally vegan and lighter than cream-based cakes, so it fits a wider range of diets without feeling like a compromise. I always appreciate that my vegetarian and dairy-free friends can scoop a portion without asking for a special version—one less thing for a host to worry about.
Most of all, this cake can be made ahead. I’ll often assemble it the day before a party and let it chill overnight; the flavors settle and the slices cut cleaner after a good rest in the fridge. That extra hour saved on party day is worth its weight in compliments.
Everything You Need for Agar Jelly Fruit Cake
- Agar-agar powder – The plant-based gelling agent that gives you firm, sliceable layers; it’s different from gelatin in how it sets and holds in heat.
- Fruit juice – Provides the clear colored layers; choose a juice that has good color and flavor so the layers sing.
- Fresh fruit pieces – Small, firm pieces that hold their shape and bring contrasting color and texture.
- Coconut milk – For the creamy layer; it adds fat and aroma so the cake isn’t just sweet and clear but also silky.
- Sugar – To balance tart juices and fruits; taste and adjust to keep the layers bright rather than cloying.
- Pandan leaf (optional) – Adds a gentle grassy aroma to the coconut layer if you have it on hand.
- Cold water – For blooming and dissolving the agar-agar powder evenly before heating.
- Kitchen tools – A small saucepan for each layer, a whisk, a fine-mesh strainer for exceptionally clear liquid, a shallow round mold (or similar), and a spoon to pour through when you need gentleness.
The Secret to Silky, Clear Jelly Layers
Clarity and silkiness come down to two things: how you dissolve the agar-agar and how gently you layer liquids. I always start by whisking the agar-agar into cold liquid until there are no lumps; this prevents undissolved specks that show up as cloudy bits. Then bring the mixture to a vigorous boil and keep it there long enough for the agar to fully dissolve—you’ll notice the liquid go from grainy to glassy.
Straining is an inexpensive trick that pays off if you want crystal-clear layers: pour the hot jelly through a fine-mesh strainer before it hits the mold to catch any stubborn particles or foam. Temperature control matters: pour the next layer when the previous one has a slight skin but is still warm to the touch—too hot and you’ll make a mess; too cold and the layers won’t bind.
To avoid clouding, minimize agitation. Rather than pouring directly onto the set layer, use the back of a spoon to gently drizzle the hot jelly. If you picture the surface as fragile glass, you’ll be more careful—and the result will be mirror-smooth slices.
Choosing Fruits & Colors That Pop
Choose fruits that bring bright, saturated color and a range of textures. In my kitchen I reach for mango for golden warmth, kiwi for a punch of green, pineapple for acidity and chew, papaya or peach for softness, and blueberries or raspberries for jewel-toned contrast. Avoid fruits that melt into mush after sitting in liquid for hours—very watery melon can make a layer weep.
Cutting matters as much as selection. Small uniform cubes or thin slices sit neatly in the jelly and give you attractive cross-sections when you slice the cake. I always pat the pieces dry with a paper towel so excess juice doesn’t cloud the surrounding jelly.
Place fruits deliberately: I group similar colors together and leave a few contrasting pops (a ring of blueberries or a slice of kiwi) to create focal points. For more ideas on pairing colors and fruit shapes, check this tip on selecting vibrant fruits that can add a splash of color and flavor:
Enhance your cake's presentation by selecting vibrant fruits that can add a splash of color and flavor.
Agar-Agar vs Gelatin: What You Need to Know
Agar-agar is a seaweed-derived powder that sets more firmly and at a higher temperature than animal-based gelatin. Because it’s plant-based, it’s an excellent choice if you’re serving guests who don’t eat animal products. The texture is different: agar gives a clean, slightly brisk snap and slices with precision, while gelatin yields a softer, jigglier mouthfeel that wobbles more in the plate.
If you’re experimenting with substitutions, remember the mouthfeel will change: a gelatin version will be silkier and softer, agar will be firmer and hold decorative layers better at room temperature. It’s important to understand the differences between agar-agar and gelatin when preparing your dessert.
How to Make Agar Jelly Fruit Cake (Step-by-Step)
- Prepare your fruit: wash, dry, and cut into small, uniform pieces. Remove any seeds or tough cores and set aside on paper towels.
- Make your first juice layer: whisk agar-agar into cold juice or a juice/water blend until smooth, then heat to a full boil while stirring. Boil briefly until the powder is completely dissolved, add sugar to taste, then pour a thin base layer into your mold and let it set until it forms a skin.
- Arrange fruit on the set base: working quickly but gently, press fruit into the surface so it anchors when you pour the next clear layer over it; distribute color evenly to create interest from every slice.
- Pour the remaining juice layer over the fruit: warm but not scalding, and pour slowly—use the back of a spoon if you need to; avoid trapping air bubbles around the fruit.
- Prepare the coconut layer: dissolve agar-agar into the coconut mixture and bring to a boil until clear, add a pinch of salt and sugar to balance, then cool slightly before testing the bottom layer. If the layer beneath is still soft, drizzle the coconut mixture over the back of a spoon to prevent breaking the fruit layer.
- Finish with the final juice layer if your design calls for it: ensure each layer is set enough to support the next (a slight skin is ideal) and pour gently.
- Chill the assembled cake: refrigerate until fully chilled and firm—this makes slicing neat and keeps the flavors melded.
Troubleshooting
- If the jelly is grainy, you probably didn’t boil long enough—return to the heat and bring to a full boil, stirring constantly until clear.
- If layers refuse to bind, they were too cold or too set; warm the top layer slightly before pouring or pour through the back of a spoon to reduce impact.
- If fruit bleeds color into the jelly, pat pieces thoroughly dry and use firmer fruit or quickly freeze delicate berries for a few minutes before placing in the mold.
- If air bubbles collect around fruit, tap the mold gently on the counter or use a skewer to coax bubbles to the surface while still warm.
Pro Tip for agar jelly fruit cake recipe: Layer Pouring & Timing
- Work in stages: aim for the previous layer to have a slight skin—set but still warm—before pouring the next; this keeps layers bonded without mixing.
- Pour slowly and close to the surface; use the back of a spoon to diffuse the flow of hot liquid and prevent disturbing arranged fruit.
- Keep your hot pans covered between pours to prevent skin from forming in the pot and to retain heat so the agar stays dissolved.
- Use a fine-mesh strainer for insanely clear layers and to remove any foam or undissolved particles.
- When in doubt, cool the jelly a touch before pouring—the liquid should still be pourable but not scalding, which can make the surface ripple.
How to Store and Make-Ahead Agar Jelly Fruit Cake (Plus Variations)
Store the cake in an airtight container in the refrigerator; placed on a flat shelf it will keep its shape for several days. I always slice one piece to taste after a few hours, then leave the rest chilled until serving—cold slices look clearer and cut cleaner. If you need to unmold the whole cake, briefly dip the outside of the mold in warm water to loosen the edges, then invert onto a plate.
For more on storing techniques and ideas for preparing this ahead of time, you can read about proper storage techniques that help keep your cake fresh:
Learn more about proper storage techniques for your cake to maintain its freshness.
Variations
- Make a coffee-and-cream version by swapping one juice layer for cooled, strong coffee and the coconut layer for sweetened cream—use firmer fruit like cherries.
- Go tropical with passion fruit or guava juice layers and a rim of toasted coconut on top for texture.
- For a holiday twist, use pomegranate seeds and ruby-red juice layers for a festive palette.
- Try a single-flavor jelly cake using citrus segments with a slightly thicker juice layer for extra zesty bite.
Serving this cake is a small theater: a clean slice on a white plate, the light catching the fruit like little lanterns, and the faint aroma of coconut or pandan. I love the moment when someone realizes the dessert is vegan—there’s genuine surprise, followed by praise. That never grows old.
Frequently Asked Questions
Can I use other fruits besides the ones listed in the recipe?
Absolutely! You can use any small fruit pieces that you enjoy. Just make sure they are vibrant and can hold their shape in the jelly.
Is agar-agar a good substitute for gelatin?
Yes! Agar-agar is a great vegan alternative to gelatin. Just keep in mind that it sets more firmly, so the texture will be slightly different.
How long does the agar jelly fruit cake last in the fridge?
The cake can last for about 3 to 5 days in the refrigerator. Just make sure to store it in an airtight container!
Do I really need pandan leaves for this recipe?
Pandan leaves add a lovely aroma and flavor, but if you can't find them, feel free to skip them. The jelly will still taste great!
What’s the best way to unmold the agar jelly fruit cake?
A gentle way to unmold is to run warm water over the outside of the mold for a few seconds. This helps loosen the jelly and makes it easier to pop out!
Ingredients
- 1 ⅓ cupswater
- 2/3 cupjuice from canned lychee (keep the fruit for the cake)
- ¼ cupsugar
- 1¾ tspagar agar powder (buy it online)
- ~2 cupssmall fruit pieces of your choice (e.g. mango, pineapple, kiwi)
- ¾ cupcoconut milk
- ¼ cupwater (for the coconut layer)
- ¾ tspagar agar powder (for the coconut layer)
- 3 Tbspsugar (for the coconut layer)
- A pinchsalt
- ~4 inchespandan leaf (optional)
- ¾ cupjuice of your choice (e.g. mango juice)
- ¼ cupwater (for the juice layer)
- ¾ tspagar agar powder (for the juice layer)
Instructions
- 1
In a small pot add COLD water, lychee juice, agar agar powder, and whisk until there are no more lumps. Bring to a boil, stirring constantly.
- 2
Once boiling, let it boil for a minute or so, until agar agar powder is completely dissolved.
- 3
Add sugar and stir until dissolved, then remove from heat and immediately pour about 1/4-inch of the agar into your mold. Place fruit pieces in the mold.
Taste as you go. Recipes are a guide, not a contract.
- 4
Let the first layer sit until firm, then prepare the coconut layer.
- 5
Combine coconut milk, water, agar agar powder in a pot and bring to a boil. Add sugar and a pinch of salt, then remove from heat.
- 6
Check if the bottom layer is ready, then GENTLY pour the hot coconut layer on top.
- 7
Make the juice layer and let it set on top of the coconut layer. Refrigerate until cold.
- 8
Unmold carefully and enjoy!
Recipe Card
The Agar Jelly Fruit Cake Recipe I Bring to Summer Parties
Keep it handy for later, send it to someone cooking with you, or open the clean print view.
- Prep
- 200 min
- Total
- 360 min
- Serves
- 8
You might also like
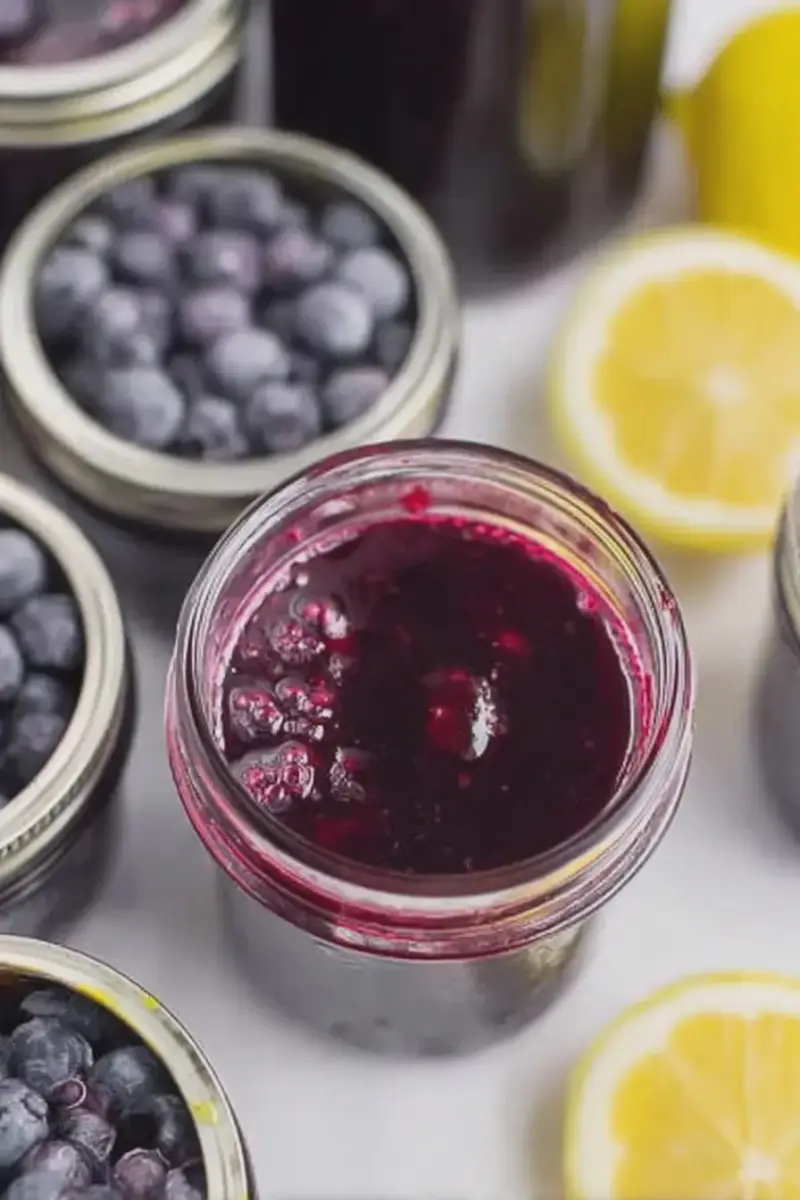
How I Make Quick Blueberry Lemon Jam — Canning in 1 Hour
May 21, 2026
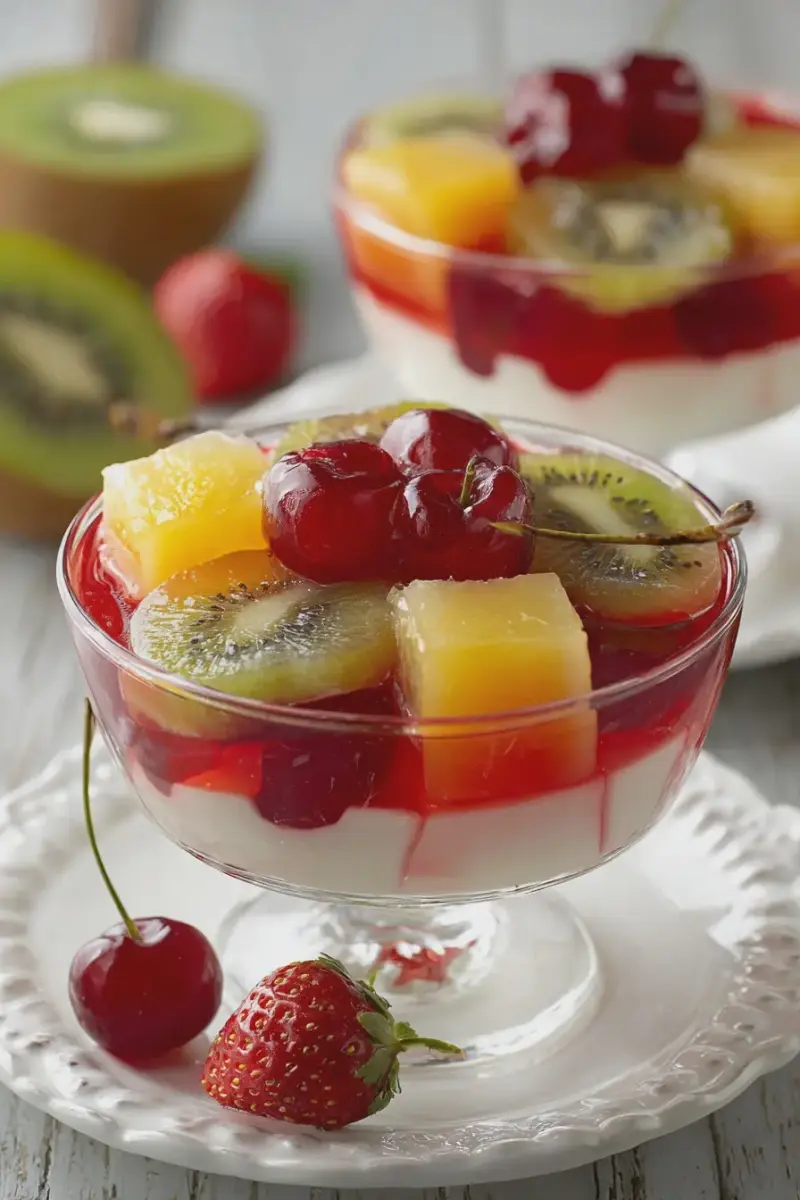
The 5-Ingredient Japanese Jelly Dessert I Make All Summer
May 21, 2026
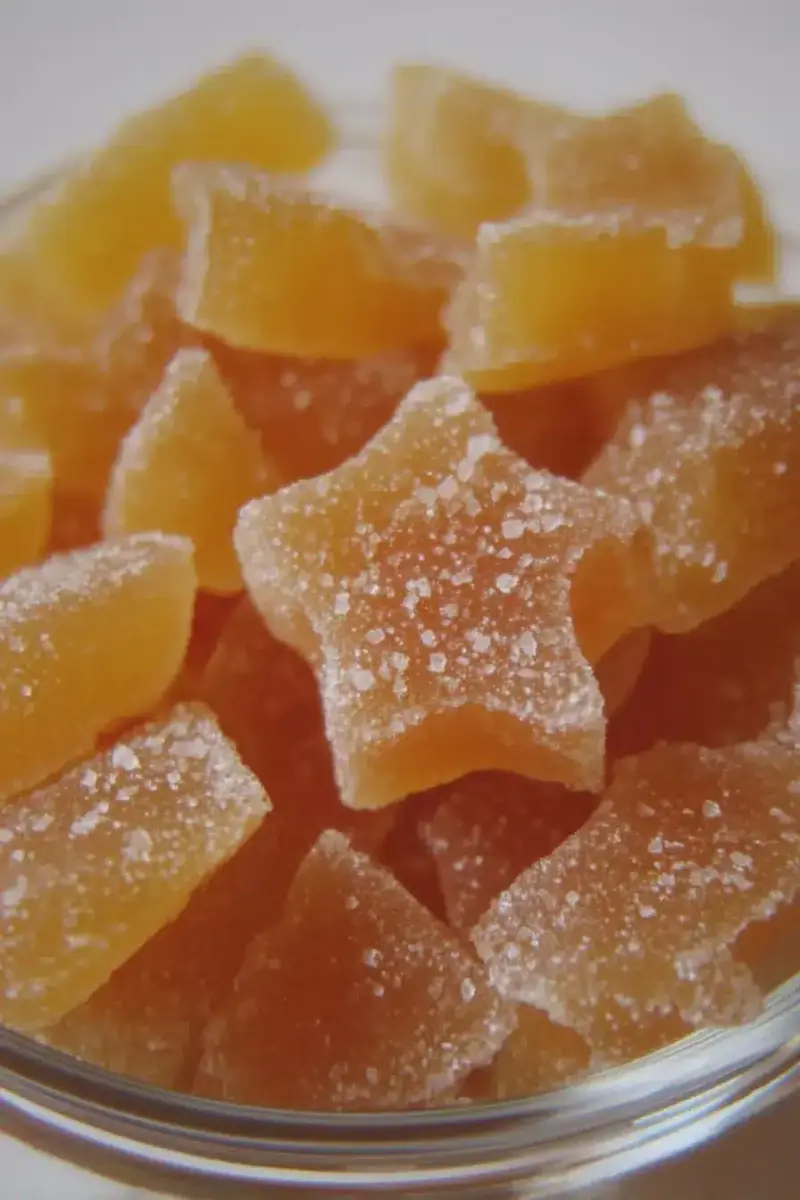
The Homemade Peachy Gummies My Kids Love — Fun, Simple Treat
May 21, 2026
How I Make Green Tea Lemon Ginger Gummies for Daily Immune Support
May 21, 2026
Reviews
Be the first to review this.