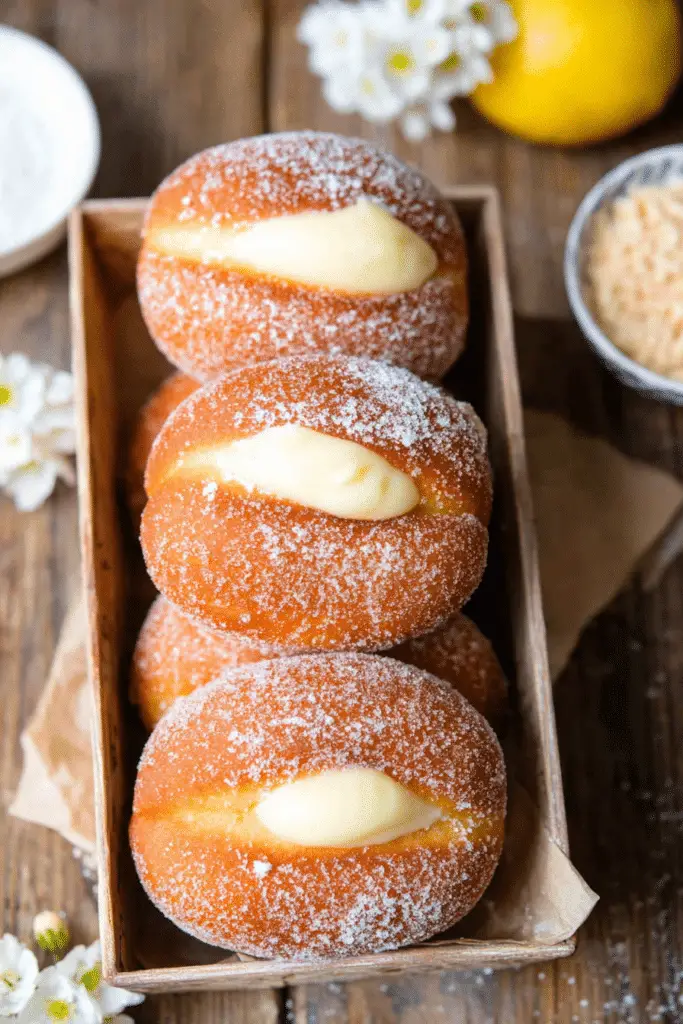
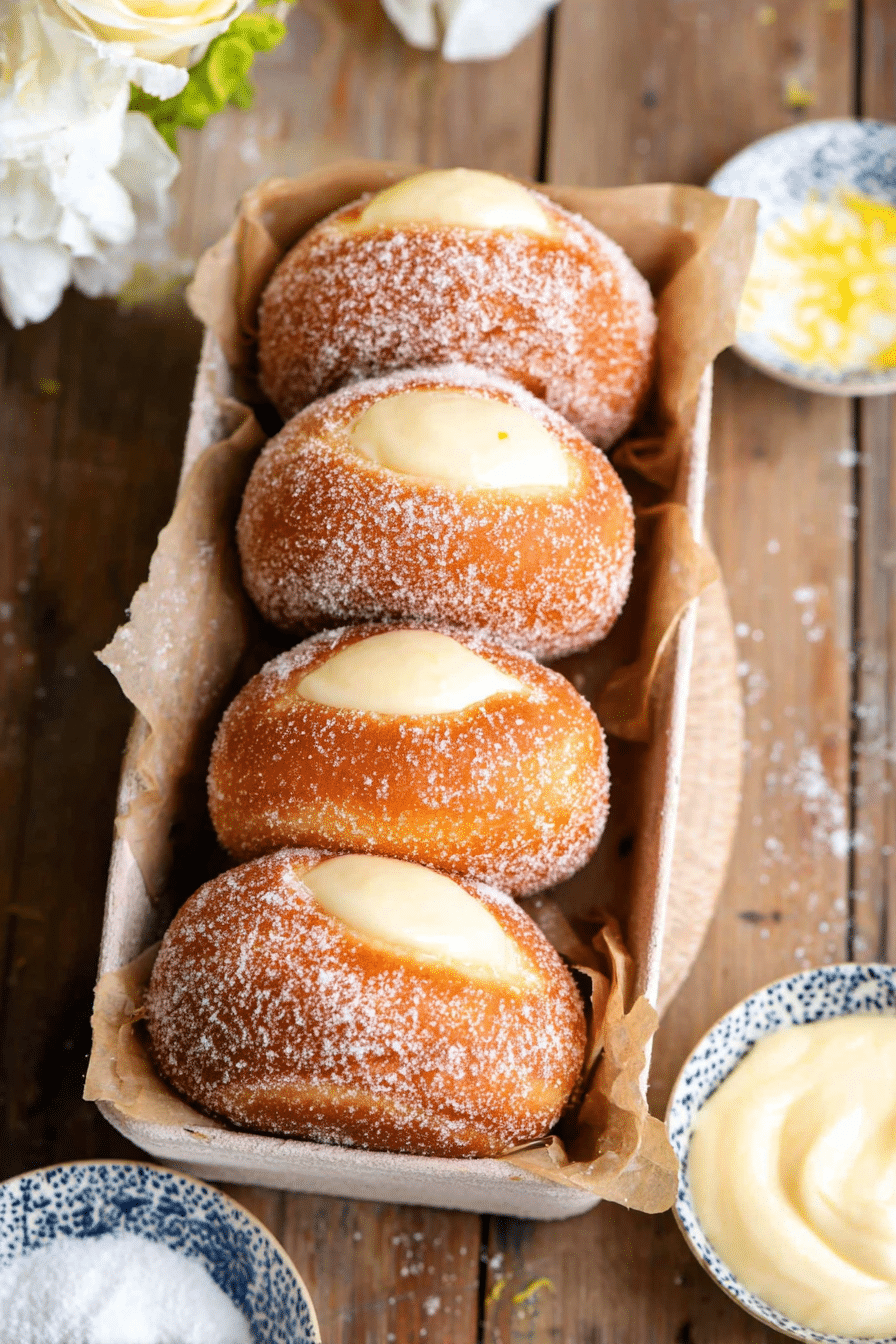
I remember the first time I bit into a warm bombolone from a street vendor in Rome — the sugar dusting whispered on my fingers, the outside gave a gentle, buttery crackle, and the inside was an impossibly soft cloud filled with sweet crema pasticciera. These filled Italian doughnuts, bomboloni (plural), are a simple pleasure: yeasted, rich dough fried until puffed and golden, then rolled in sugar and filled with pastry cream, jam, or chocolate. They’re irresistibly fluffy and have a comforting mouthfeel that makes them perfect for weekend mornings or festive gatherings at home. Yield-wise, this version makes about 10–12 large doughnuts, which is the amount I usually make when friends pop by for coffee.
In this post I’ll walk you through the dough, the proving, the tell-tale signs that you’ve nailed the texture, the moment the frying oil smells warm and inviting, and how to rescue a batch if something goes sideways. I’ve cooked and tested this recipe several times in my own kitchen; I’ll share what worked, what didn’t, and the small tricks that matter — like why a slightly tacky dough produces the lightest bomboloni, or how the smell of gently caramelizing butter in the dough signals it’s ready to fry.
History and Cultural Significance
Bomboloni have their roots in Italy as a beloved sweet treat associated with celebrations, street fairs, and winter markets. They’re cousins to other European fried sweets but stand apart because of their rich, yeasted dough and their typical filling with crema pasticciera. Historically, families would make them for Carnevale and other celebrations when a richer dough (with eggs and butter) was a special indulgence. Over the years regional variations cropped up: in some northern towns you’ll find them filled with custard, down south they may be doused in local citrus zest or stuffed with ricotta-sweetened fillings.
They’re the kind of pastry that shows up at family tables — a dozen in the center, disappearing fast as people reach in. To explore traditional Italian ricotta fillings that inspire some sweet bomboloni variations, see our ricotta-based cannoli filling ideas.
Ingredients You’ll Need
- Bread flour / 00 or all-purpose flour – the structure for the dough; bread flour gives more chew while 00 keeps it tender.
- Eggs – enrich the dough and help create that tender crumb and golden color.
- Butter – adds richness and a soft texture; use softened butter for easy incorporation.
- Sugar – sweetens the dough slightly and is what you’ll roll the finished doughnuts in for that classic sparkle.
- Milk – lukewarm milk hydrates the dough and helps activate the yeast; swap for plant milk for dairy-free versions.
- Yeast – fast-action or active dry yeast will work; follow the packet instructions for activation.
- Vanilla – paste or extract brightens the dough and the filling.
- Salt – a pinch to balance sweetness and strengthen the dough’s flavor.
- Oil for frying – a neutral oil like sunflower or vegetable oil for a clean, high-smoke point fry.
- Pastry cream / filling – classic crema pasticciera (egg yolks, milk, sugar, cornstarch) or alternatives like Nutella, jam, or flavored creams.
- Cornstarch – used in the pastry cream to stabilize and give it that silky texture.
- Lemon zest – optional but wonderful in the pastry cream for freshness.
- Gluten-free flour blend (optional) – use a 1:1 blend with xanthan gum for gluten-free bombs; expect a slightly different texture.
- Dairy-free swaps – plant-based milk and vegan butter work; for pastry cream, use cornstarch-thickened plant milk and extra flavor.
Step-by-Step Instructions
I’m including both the original method I tested and plenty of small cues — how the dough should feel, how the surface of the oil should behave, and what to do if proofing takes longer than expected. For extra guidance on shaping and frying yeast dough, reference our classic doughnut recipe that covers many of the same techniques used for bomboloni.
- Prepare the yeast. Check your yeast packet — some fast-action yeasts can be mixed directly with the dry ingredients, others you’ll want to bloom in a little lukewarm milk first. If using active dry yeast, sprinkle it into lukewarm milk (not hot) with a pinch of sugar and wait until it becomes frothy, about 5–10 minutes. If nothing froths, your yeast may be inactive; start again with fresh yeast. This is the most common failure point: dead yeast equals no rise.
- Make the dough. In the mixer bowl combine the flours, sugar, and yeast (or add activated yeast in liquid form if your packet requires activation). Scatter small cubes of softened butter over the flour, then add the room-temperature eggs, the lukewarm milk, vanilla, and a small pinch of salt. Attach the dough hook and knead on low speed for 10 minutes. After about 6–7 minutes you’ll notice the dough coming together; by 10 minutes it should be smooth, elastic, and slightly tacky — not sticky and wet, but springy to the touch.
- First proof. Shape the dough into a smooth ball, transfer to a lightly oiled bowl, cover with plastic wrap, and leave to prove in a warm, draft-free spot for 2–3 hours or until tripled in size. In my kitchen that’s often the oven with the light on (no heat) or a sunny windowsill. The dough will smell slightly sweet and yeasty when it’s ready; a gentle poke should leave an indentation that springs back slowly.
- Shape the rounds. Once risen, tip the dough onto your work surface, knock out the air and knead it a couple of times. Flatten with your hands and roll to about 1/2 inch thickness. Use a 3.5-inch round cutter (or a glass) to cut circles. Transfer circles to a sheet of parchment and cover loosely with plastic wrap for the second proof — 1–1.5 hours or until noticeably puffed and nearly doubled (the recipe calls for tripling again). Keep an eye: over-proofed rounds will spread excessively during frying and can be flat rather than pillowy.
- Prepare your frying oil. Heat a large, deep pan of oil to 170°C/337°F. If you don’t have a thermometer, test by dropping a small piece of dough into the oil — it should bubble steadily and rise slowly rather than scorching. Too hot and the outside will brown before the center cooks; too cool and they’ll absorb oil and become greasy. Maintain consistent heat; adjust your burner as needed.
- Fry the bomboloni. Cut the parchment into squares and place each round on its own piece. Carefully drop the doughnuts into the oil, then immediately remove the parchment with tongs so it doesn’t burn. Fry for about 2 minutes, then turn and fry another 2 minutes on the other side. The total time may vary slightly with the size of your doughnuts; you want an even, golden-brown color. Drain briefly on paper towels — about 2 minutes — then roll in caster or confectioners’ sugar while still warm so it adheres nicely.
- Fill the bomboloni. Let them cool slightly. To fill, make a small incision in the side using a paring knife and work the tip around to create a pocket, or insert a piping tip. Fill a piping bag with chilled pastry cream (or Nutella/jam) and pipe into the side until you feel a slight resistance; the doughnut should feel plump but not bursting. Serve immediately for the best mouthfeel — warm, pillowy, and slightly sticky in the center.
- Make the pastry cream (crema pasticciera). While the dough proofs, whisk together egg yolks, sugar, and cornstarch. Warm milk with vanilla and lemon zest until just simmering, then slowly temper into the yolks, return to the pan, and cook gently until thick and glossy. The cream will smell bright from the lemon and vanilla; if it looks thin at first, keep stirring — it will thicken as it reaches a simmer and will set further as it cools. Chill to firm up before piping.
Variations and Flavor Ideas
Bomboloni are a blank canvas — here are flavor directions I’ve tested or seen at markets and local bakeries. Small tweaks dramatically change the experience.
- Classic pastry cream – vanilla pastry cream with a little lemon zest is the traditional choice and gives a silky, custardy center.
- Chocolate-hazelnut – Nutella or melted dark chocolate mixed with a touch of cream for pipeable texture.
- Jam-filled – raspberry, apricot, or any seasonal jam; warm the jam slightly so it pipes cleanly.
- Pistachio cream – pistachio paste folded into pastry cream for a nutty, green filling.
- Glazed bomboloni – dip warm bomboloni in a thin sugar glaze for a shiny finish. If you want a glazed variation, try the glazing method in our Krispy Kreme–style glazed donuts post — it works beautifully on filled doughnuts too.
- Savory experiment – for an adventurous twist, fill with a herbed ricotta and serve as part of a brunch spread.
- Use a custard recipe – for a very silky filling, use the vanilla custard (pastry cream) recipe from our site to make a perfect cream center.
Tips for Perfect Texture and Flavor
From my tests, these are the non-negotiables that make the difference between a flat doughnut and a cloud:
- Knead until elastic. Ten minutes on a mixer hook produces a dough that’s smooth and slightly tacky. Under-kneading yields dense bomboloni; over-kneading is rare with this recipe but will make the dough too tight.
- Control proofing temperature. A warm, draft-free environment helps the dough rise. If your kitchen is cold, expect longer proofing times. Don’t rush the rise with too-high heat — that can kill the yeast or give off flavors.
- Watch the oil temperature. 170°C/337°F is the sweet spot. Use a thermometer. If the oil dips too low, remove the pan briefly from the burner to bring it back up; if it spikes, lower the heat. Small adjustments keep the fritters evenly browned.
- Drain and sugar while warm. Rolling in sugar while the doughnuts are warm helps the granules stick and creates that classic shimmer.
- Chill pastry cream. Make the cream ahead and chill thoroughly; warm filling will soften the doughnut and make piping messy.
- Troubleshooting flat doughnuts. If your rounds spread and are flat after frying, they were likely over-proofed or rolled too thin. Next time keep them slightly thicker and watch the second proof.
Serving Suggestions and Pairings
Serve bomboloni warm or at room temperature. I like them dusted heavily with caster sugar and placed on a platter for people to grab. They’re great with espresso; the bright acidity of the coffee cuts the richness. For a dessert pairing try a dessert wine or an orange-forward liqueur. If serving at a party, arrange a small station with pastry cream, jam, and chocolate so guests can fill their own for a fun experience.
FAQs About Bomboloni
- What is the best filling for bomboloni? Classic fillings include Italian pastry cream (crema pasticcera), Nutella or chocolate-hazelnut spread, jam, or flavored creams like pistachio or chocolate pastry cream. You can also enjoy bomboloni unfilled. To fill, make a small incision in the side and pipe in your filling.
- Can I make bomboloni gluten-free or dairy-free? Yes — for gluten-free, use a good 1:1 gluten-free flour blend with xanthan gum and expect a slightly different texture and possibly adjusted liquid. For dairy-free, swap milk and butter for plant-based milk and vegan butter and use a dairy-free pastry cream (cornstarch + plant milk). Note that egg-free versions need recipe adjustments (egg replacers or aquafaba) and may change rise and texture.
- How should I store and reheat bomboloni? Unfilled bomboloni keep in an airtight container at room temperature for 1–2 days. If filled with pastry cream, store them refrigerated and eat within 48 hours. To refresh, briefly warm unfilled doughnuts in a 150°C/300°F oven for a few minutes or microwave a filled one for 10–15 seconds — avoid overheating to prevent a soggy texture or melted filling.
- How do I know when the dough is properly proofed? The dough should be soft, puffy and noticeably larger — this recipe calls for the dough to triple in size during the first prove and again for the cut rounds to triple. A gentle poke should leave an indentation that springs back slowly. Proofing time varies with room temperature: usually 2–3 hours for the first rise and 1–1.5 hours for the second.
- What’s the difference between beignets and bomboloni? Beignets originate from France and are typically small, light, and crisp on the outside with an airy interior. Bomboloni are Italian, made from a richer yeasted dough, are soft and doughy, and are almost always filled.
Conclusion and Final Thoughts
Making bomboloni at home is one of those kitchen projects that rewards a little patience with truly memorable results. Expect sticky fingers, a kitchen that smells faintly of vanilla and lemon, and warm mouths asking for seconds. I make these when I want something comforting but celebratory — they’re worth the couple hours of proofing because the payoff is a tender, filled doughnut that brings people together. If a batch doesn’t come out perfect the first time, tweak your proofing environment, check your yeast, and try again — small adjustments fix most issues. I hope you make a batch, share them, and tell me how you filled yours.
Bomboloni - Italian Doughnuts
Ingredients
Method
- Activate the yeast if necessary and mix the flour, sugar, and yeast in the mixer bowl.
- Add butter, eggs, milk, vanilla, and salt; knead the dough.
- Let the dough rise until tripled in size.
- Shape and cut dough into doughnuts, let them rise again.
- Fry the doughnuts until golden brown and drain them.
- Fill the doughnuts with pastry cream and serve immediately.