I still remember tearing open a foil package as a kid—the smell of cinnamon sugar hitting the air, the little steam cloud when it came out of the toaster, and that toothy edge where the frosting met the pastry. Making brown sugar cinnamon pop-tarts at home is that exact nostalgia, but amplified: warmer, fresher, and with a buttery flake you just can’t get from a box.
I’ve made these on a rainy Saturday with coffee, on a holiday morning with the kids rolling out dough on the counter, and on a weeknight when I wanted something comforting that didn’t take all evening. There’s something quietly joyful about cutting rectangles, crimping edges with a fork, and watching the cinnamon-scented steam escape through vent holes. Homemade pop-tarts are also a great way to control the sweetness and ingredients—no mystery oil or preservatives, just butter, flour, and real brown sugar.
Ingredients Needed for Brown Sugar Cinnamon Pop-Tarts
- All-purpose flour – the base of the dough; gives structure while still allowing for flake when handled cold.
- Granulated sugar – a touch in the dough for balance and slight browning.
- Salt – tiny but essential to lift all the flavors, especially in sweet pastry.
- Unsalted butter – cold and cubed; the secret to flakiness. Use real butter for flavor.
- Egg – helps bind the dough and makes the egg wash for a glossy, golden top.
- Milk – a little in the dough and egg wash to bring dough together and thin the glaze.
- Light brown sugar – the heart of the filling: deep caramel notes and moisture.
- Cinnamon – warm spice profile; try Ceylon for a milder, more delicate flavor or Saigon for a bolder hit.
- Flour (for filling) – a spoonful in the filling helps it hold together and prevents seepage.
- Powdered sugar – for the glaze to finish the pop-tarts with a sweet sheen.
- Vanilla extract – optional in the glaze for a soft, rounded sweetness.
Notes on choices and substitutions: pick a good-quality light brown sugar (moist with real molasses) for the classic flavor. For cinnamon, Ceylon is subtler, true to baker’s spice, while Saigon/Chinese cinnamon is more aromatic and intense. If you need gluten-free, use a 1:1 gluten-free flour blend and add a quarter-teaspoon of xanthan gum if your blend lacks it. For lower sugar, reduce the brown sugar in the filling by a quarter or experiment with erythritol/monk fruit—expect a slightly different texture.
Step-by-Step Guide to Making the Dough
I’ve tested this dough multiple times to get a balance of ease and flake. The key through every version: cold butter, minimal handling, and chilling between steps.
- Mix dry ingredients: Whisk together the flour, granulated sugar, and salt in a large bowl. This distributes the salt and sugar so you don’t get pockets of either.
- Cut in the butter: Add cold, cubed unsalted butter. Use a pastry cutter, two forks, or your fingertips to work the butter into the flour until the mixture resembles pea-sized crumbles. It should still have visible butter bits. Those little clumps are what melt in the oven and create flake.
- Add egg and milk: Whisk your egg and milk together, then drizzle into the flour-butter mixture. Use a fork to gently bring it together. Stop as soon as the dough clumps; you want it shaggy, not smooth. If you overwork it, you’ll develop gluten and end up with a tough crust.
- Form discs and chill: Gather the dough with minimal kneading into two 1-inch-thick discs, wrap tightly in plastic, and chill for at least 2 hours. I usually make this the night before—keeps my morning stress-free and gives the dough time to relax so it rolls perfectly.
Why chilled matters: cold butter equals flake. If the butter warms up before baking, it will smear into the flour rather than staying as discrete pockets, and the pastry becomes dense. Also, chilling relaxes gluten so the dough is easier to roll without springing back.
Troubleshooting:
- If the dough is too sticky to roll after chilling, dust your surface lightly with flour and give it just a minute at room temperature—15 minutes is often enough.
- If the dough cracks badly when you roll, it’s too dry. Work in a teaspoon of milk and press it back together.
- If you over-rolled and the dough feels elastic, wrap it and chill another 20–30 minutes to relax the gluten.
Preparing the Filling: Brown Sugar and Cinnamon
The filling is intentionally simple—brown sugar and cinnamon with a touch of flour to stabilize. It should be moist and spreadable, not slurry.
Here’s the tested filling ratio I use every time: half a cup of light brown sugar mixed with two teaspoons of cinnamon and a tablespoon of flour. Stir until evenly combined. If you want a smoother, slightly saucier filling, a teaspoon of melted butter can add silkiness and help it caramelize in the oven.
Creative variations:
- Add a splash of vanilla or a pinch of nutmeg to round the spice and deepen the flavor.
- For a fall twist, swap in a teaspoon of pumpkin pie spice and reduce the cinnamon slightly.
- Prefer fruit? Use a couple tablespoons of thick fruit preserves in place of some brown sugar, but keep the filling relatively dry (thicker preserves like apple butter or fig jam work best).
- Chocolate lovers: mix in a tablespoon of cocoa powder and a handful of mini chocolate chips for a melty center.
What to watch for: if the filling looks wet and shiny like caramel, you’ve added too much liquid (or your preserves are too runny). Add a pinch more flour or reduce the quantity you spoon into each tart—about one tablespoon of filling per tart is a good target to avoid leaking.
Assembling the Pop-Tarts: Tips for Sealing and Baking
Assembly is honestly the most fun part—like pastry Lego.
- Roll one disc: Let one dough disc sit at room temperature for 10–15 minutes so it’s easier to roll. Roll it on a lightly floured surface (or between parchment sheets) into a 9×12-inch rectangle about 1/8 inch thick.
- Cut shapes: Cut into roughly 3×4-inch rectangles. This recipe yields nine pop-tarts.
- Chill on a sheet: Place these bottom pieces on a parchment-lined baking sheet and refrigerate while you roll the second disc.
- Egg wash the bottoms: Whisk an egg with a bit of milk for an egg wash. Brush the top of each bottom piece lightly—this acts like glue so the filling and top layer adhere.
- Portion the filling: Spoon about 1 tablespoon of the brown sugar-cinnamon filling into the center of each bottom rectangle and gently spread, leaving a border so the filling won’t ooze out when sealed.
- Top and seal: Top each with a second rectangle (egg-wash side down). Press the edges with your fingertips, then crimp all the way around with a fork to make a tight seal. Use a toothpick to poke 8–10 small vents in the top to allow steam to escape—this prevents bursting and leaking.
- Chill again: Refrigerate assembled pop-tarts for at least 20 minutes. This firms up the butter again so they keep their shape and won’t ooze during baking.
Tools that help: a bench scraper for straight edges, a pastry brush for even egg wash, and a ruler if you want exact rectangles. If your tarts leak during the first bake, you likely overfilled them or didn’t seal the edges firmly enough.
Baking Time: Achieving the Perfect Golden Color
Preheat your oven to 350°F (177°C). Just before baking, brush the tops with more egg wash for that classic glossy, golden finish.
Bake for 22–26 minutes. Watch for the edges to turn a warm golden brown and the tops to puff slightly and become firm. The filling may bubble a little through the vents; that’s fine—tiny bubbles mean the sugar is caramelizing inside. If the tops brown too quickly, tent with foil for the last few minutes.
Fresh vs. frozen: When baking from frozen, add 4–6 minutes to the bake time and bake straight from the freezer—no need to thaw. Fresh assembled tarts will be done in the 22–26 minute window. If the pastry still seems doughy in the center, give it an extra 2–3 minutes; always check the underside for a pale golden color.
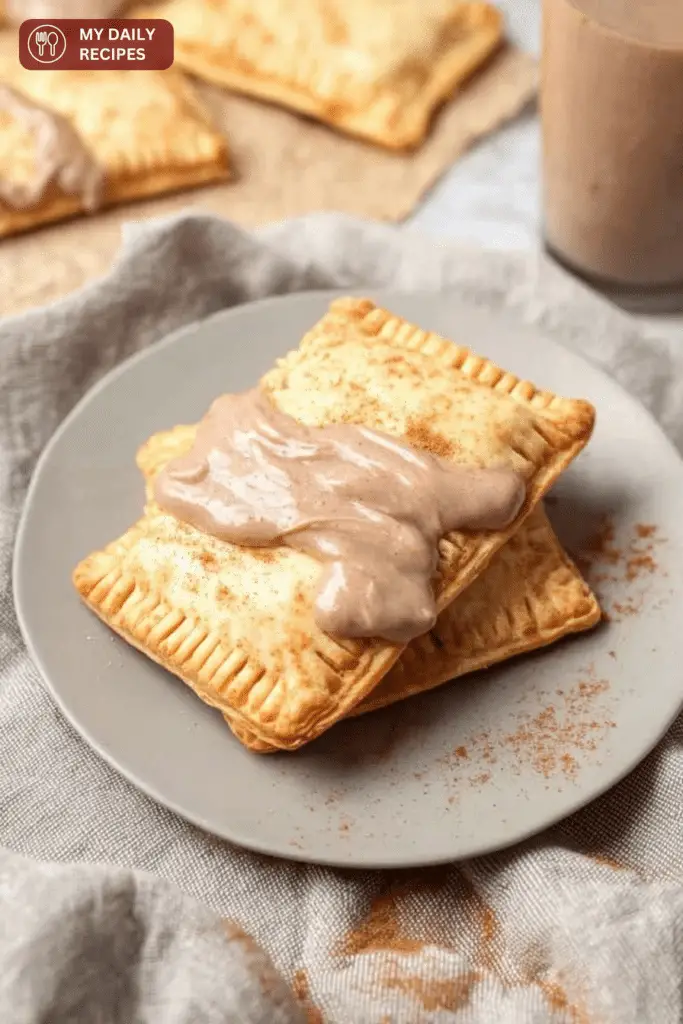
Glazing and Customizing Your Pop-Tarts
Once cooled slightly (warm is okay, but a hot pastry will melt the glaze away), whisk together the glaze ingredients until smooth: about three-quarters of a cup of powdered sugar, a tablespoon of milk, a half-teaspoon of cinnamon, and half a teaspoon of vanilla. You want a spreadable but not runny consistency. Spoon or spread onto each tart and decorate.
Customization ideas:
- Sprinkles – straight onto the glaze while wet for a fun pop. I like a tiny scattering of crushed, toasted pecans for texture.
- Chocolate drizzle – melt a couple ounces of chocolate and thin with a teaspoon of oil for a chocolate-cinnamon riff.
- Fruit – top with a few thin slices of dried apple or a dot of jam under the glaze for seasonal flair.
- Dairy-free – use almond or oat milk in the glaze and for the egg wash substitute (see note below about browning differences).
Glaze behavior: powdered sugar glazes set as they cool, getting slightly tacky but not rock-hard. If your glaze is too thin, add a tablespoon more powdered sugar; too thick—thin with milk a few drops at a time.
Storage: How to Keep Your Pop-Tarts Fresh
These keep surprisingly well.
- Room temperature: Store in an airtight container for up to 3 days. They stay soft and spoonable rather than crunchy.
- Refrigerator: Keep in an airtight container for up to one week. The filling will firm up and the pastry will be a bit sturdier.
- Freezing: Freeze unglazed pop-tarts in a single layer on a baking sheet until firm, then transfer to an airtight container or bag. To reheat, thaw at room temperature and bake at 350°F (177°C) for 8–10 minutes, or microwave in 15–30 second bursts if you want quick warmth. If reheating from frozen, bake for about 10–12 minutes.
Real-life note: I freeze half of a batch most weekends. They thaw perfectly next morning and I pop them into a hot oven for 6–8 minutes to refresh the flake and warm the filling—it’s almost identical to freshly baked.
Conclusion: Why You Should Try This Recipe
Make these because they’re comforting, customizable, and because the process is brimming with small, satisfying moments—rolling, crimping, that first cinnamon-scented bite. This recipe makes nine generous pop-tarts; it’s a nice middle ground—enough to share, keep, or freeze without overwhelming the kitchen.
I come back to this version in winter mornings when I want something comforting or on slow Sunday brunches. It’s forgiving, and once you learn the techniques—cold butter, minimal handling, and good sealing—you’ll find it easy to swap flavors and make these your own.
FAQ
Can I make these pop-tarts gluten-free or lower in sugar?
Yes. For gluten-free use a 1:1 gluten-free all-purpose flour blend (add 1/4 tsp xanthan gum if your blend needs it) and keep butter very cold. For lower sugar, reduce the brown sugar in the filling or try erythritol/monk-fruit blends, but note texture and sweetness will differ.
How do I keep the dough flaky and not tough?
Use cold butter and minimal handling: cut butter into pea-sized pieces, mix until just combined, chill the dough well, and avoid overworking while rolling. Chill between steps to keep butter firm for flakiness.
Can I freeze the pop-tarts and how should I reheat them?
Yes. Freeze unglazed pop-tarts in a single layer on a sheet until firm, then transfer to an airtight bag or container. Thaw at room temperature and reheat in a 350°F (177°C) oven for 8–10 minutes or microwave 15–30 seconds for a quick warm-up.
My pop-tarts puff up or the filling leaks — how can I prevent that?
Don’t overfill (about 1 tbsp per tart), brush egg wash on the bottom piece before adding filling, press edges firmly and crimp with a fork, poke 8–10 vent holes on top, and chill the assembled tarts before baking to help them hold shape.
Can I customize the filling or glaze?
Absolutely. Try adding vanilla or nutmeg to the brown sugar filling, swap in fruit preserves, pumpkin spice, chocolate, or cream cheese mixtures. For glaze variations, use dairy-free milk or add flavors like maple or espresso. Reduce wet fillings to avoid leaking.
Thanks for reading—if you make these, celebrate the little successes: the smell that fills your kitchen, the way the glaze sets with a soft sheen, and the first warm bite that tastes like childhood with a grown-up twist. Happy baking!

Brown Sugar Cinnamon Pop-tarts
Ingredients
Equipment
Method
- Make the dough: whisk together the flour, sugar, and salt. Add in the cold cubed butter and cut in using a pastry cutter or forks until it forms pea-sized crumbles. Whisk together the egg and milk and add to the dough, mixing until it clumps together.
- Roll out the dough on a floured surface and form into two discs. Wrap in plastic wrap and refrigerate for at least 2 hours.
- Take a disc of dough from the fridge and roll into a 9x12 inch rectangle. Cut into 3x4 inch rectangles for the pop-tart bases.
- Place the rectangles on a lined baking sheet and refrigerate. Repeat with the second disc.
- Make the filling by combining brown sugar, cinnamon, and flour. Brush the prepared rectangles with egg wash and add the filling.
- Top with another rectangle, seal the edges, and poke holes in the tops.
- Refrigerate for 20 minutes, then preheat your oven to 350°F.
- Bake the pop-tarts for 22-26 minutes until golden.
- Make the glaze by whisking together the glaze ingredients, and apply to cooled pop-tarts.
- Store in an airtight container for 3 days or in the fridge for a week.