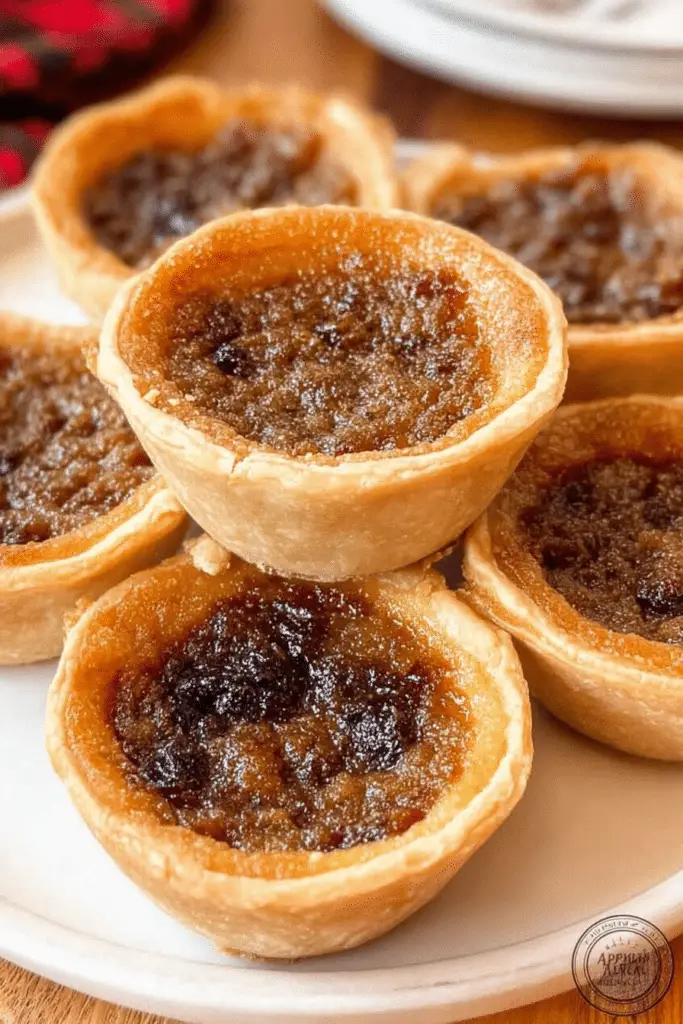
Butter tarts are one of those small, unapologetically sweet desserts that make you slow down — the golden, slightly blistered edges of pastry, the little domes of glossy filling that tremble when you tap the tin. Growing up, I remember my grandmother setting a muffin tin on the kitchen windowsill to cool and the whole house smelling of warm butter and caramel. I still make these on cold afternoons when I want something comforting that comes together without fuss. The first time I tried baking them exactly as my notes say now, the filling was too runny; after a few tweaks (extra cornstarch and a short freeze of the shells), they came out perfectly gooey in the middle and set at the edges.
I baked the batch for this post in my small home oven that runs a touch hot; I learned to cut five degrees off my listed temperature after seeing the crust brown too quickly on earlier tests. You’ll find little, practical adjustments scattered through the instructions — they come from actually standing at the counter, watching, and tasting. By the way: this recipe makes 12 tarts, which is a perfect amount for a family dessert or to bring to a potluck without showing up with too many leftovers.
Ingredients Needed
- All-purpose flour – forms the flaky tart shell; handle gently for tender pastry.
- Salt – brightens the sweetness in both the crust and filling.
- Cold butter – cubed into the dough to create pockets of steam and a flaky texture.
- Very cold water – pulls the dough together without melting the butter.
- Corn syrup (light/golden) – gives the filling its glossy, chewy structure and classic flavor.
- Light brown sugar – adds depth and a hint of molasses to the filling.
- Unsalted butter (melted) – enriches the filling; adjust salt to taste.
- Large egg – binds the filling and helps it set to that perfect gooey-but-not-runny texture.
- Vanilla extract – rounds the filling with warmth and aroma.
- Cornstarch – a stabilizer; prevents the filling from staying overly liquid once cooled.
- Ground cinnamon & nutmeg – subtle warm spices that lift the sweetness without overpowering it.
- Raisins (optional) – traditional add-in; plump them if you like or leave them out for a purer caramel filling.
- Gluten-free flour – an easy swap for the crust if you need to avoid gluten; use a blend designed for pastries.
- Vegan substitutes – plant butter and a flax or chia egg plus a syrup like golden syrup or light corn syrup can replicate the filling reasonably well.
Step-by-Step Instructions
For a straightforward recipe, check out our easy classic butter tarts, which provides detailed steps to perfect this Canadian treat.
Below is the tested, exact recipe I used when I photographed these tarts. Read through the entire method before you start — pastry rewards preparation.
- Make the pastry: In a large bowl whisk together 1 ½ cups all-purpose flour and ¼ teaspoon salt. Cut in ½ cup cold, cubed salted butter until the mixture looks like coarse crumbs with some pea-sized pieces. If you use a food processor, pulse in short bursts to avoid warming the butter.
- Bring the dough together: Add 4–5 tablespoons very cold water a tablespoon at a time, mixing just until the dough is shaggy and holds together when pinched. Form into a flat disc, wrap in plastic, and chill for at least 2 hours. Chilling firms the butter so you get flakes in the crust.
- Roll and shape: Roll the chilled dough out to about 1/8” thickness. Cut into 4” circles and press each circle into the cavities of a 12-count muffin tin, pressing up the sides. Gather scraps, reroll once, and fill the tin. Don’t overwork the scraps — too much re-rolling tightens gluten and makes a tougher crust. Pop the filled tin into the freezer while you make the filling so the crust stays cold and bakes up flaky.
- Preheat the oven: Set your oven to 400°F (200°C). If you have a fan (convection) oven, 180°C is the usual setting. Because ovens vary, position your rack in the middle of the oven for even heat.
- Make the filling: In a medium bowl whisk together ½ cup light corn syrup, ⅓ cup light brown sugar, 3 tablespoons melted and cooled unsalted butter, 1 large room-temperature egg, 1 teaspoon vanilla extract, ½ teaspoon cornstarch, ¼ teaspoon ground cinnamon, ¼ teaspoon salt, and ⅛ teaspoon ground nutmeg until smooth. The mixture should be glossy and pourable.
- Add raisins if using: Divide about ½ cup raisins among the chilled tart shells first so the fruit sits at the bottom. Then pour the filling into each shell only halfway — the filling will rise and settle during baking, and overfilling causes spills and very thin tops.
- Bake: Bake in the preheated 400°F oven for 5 minutes, then immediately reduce the heat to 350°F and bake an additional 15–20 minutes, or until the filling is bubbling and the crust is golden. Watch the edges: you want the crust golden brown, not dark brown. If your oven runs hot, start checking at 12 minutes on the second stage.
- Cool carefully: Let the tarts cool in the pan for at least 15 minutes before running a butter knife around the edges to remove them. The filling will continue to set as they cool; it should be slightly soft in the center but not runny.
Yield: 12 tarts.
Tips for Perfect Butter Tarts
I’ve tested several versions of this recipe, and a few small habits save a lot of disappointment. Here are the practical, experience-driven tips I rely on every time I bake these tarts.
- Measure flour correctly: Spoon and level the flour into your cup rather than scooping directly from the bag. Overpacked flour gives a dense crust.
- Keep everything cold: Cold butter and chilled shells yield flaky pastry. If your kitchen is warm, chill the dough and muffin tin between steps.
- Don’t overfill the shells: Fill about halfway. The filling puffs while baking and settles as it cools. Overfilling causes thin tops and lava-like spills.
- Watch the oven closely: The crust can go from golden to too-dark fast. If your edges brown before the filling bubbles, tent the pan with foil and continue until the filling sets.
- Fix a runny filling: If your filling stays too liquid after cooling, next time add a touch more cornstarch (an extra 1/4 teaspoon). You can also bake a little longer at the lower temperature, but keep an eye on the crust color.
- Texture cues: The filling should be glossy and jiggle gently when done, like a well-set custard. If it sloshes freely, it needs more time.
- Crust won’t lift? Run a thin blade under the edge, then lift gently. If the bottom sticks, give them a few more minutes in the pan; sometimes cooling creates suction that releases after a short rest.
Variations and Customization Options
If you want to change things up, butter tarts are wonderfully adaptable — keep the technique and tweak the mix-ins or flavorings.
Incorporate delightful flavors by trying our mini pecan pie cheesecakes for a fun twist on traditional tarts.
- Pecan butter tarts – fold chopped pecans into the filling or sprinkle on top before baking for a nutty crunch.
- Chocolate chip – add a tablespoon of mini chocolate chips to each shell for a chocolatey surprise that contrasts with the caramel notes.
- Maple and pecan – use a bit of pure maple syrup in place of some corn syrup and top with toasted pecans for a Canadian spin.
- Fruit-infused – swap raisins for plumped dried cherries or small pieces of apple; fruit adds brightness but can change the moisture balance, so don’t overdo wet add-ins.
- Gluten-free crust – use a reliable gluten-free pastry blend and chill the dough well; the behavior is similar, though GF doughs can be more fragile.
- Vegan version – plant butter, a flax egg (1 tbsp ground flax + 3 tbsp water per egg, chilled), and golden syrup or brown rice syrup can replicate the filling texture fairly well; expect slight differences in flavor.
Cultural Significance of Butter Tarts
Butter tarts are a beloved Canadian dessert with a long, sweet lineage. They’re often cited as a staple at bake sales, church socials, and holiday tables across Canada. The simple combination of butter, sugar, and eggs wrapped in pastry likely traces back to early European settlers; the FAQ below notes connections to New France in the 1600s. Over time the tart evolved into regional favorites — some families insist on raisins, others forbid them, and some bakers add pecans, giving rise to friendly debates about the “proper” butter tart.
On a personal level, these tarts are how I mark certain celebrations. I’ve seen them handed around at neighbourhood potlucks, stuffed into picnic baskets, and arranged on holiday platters. Each bite feels like a small bit of culinary history — a portable dessert that’s equal parts humble and indulgent.
Serving Suggestions and Pairings
Enhance your tart experience with our serving suggestions for desserts that perfectly complement sweet treats like butter tarts.
- Warm with ice cream: A scoop of vanilla ice cream melting over a warm butter tart is one of my favorite ways to serve these. The contrast of cold and warm is blissful.
- With coffee or tea: A strong black coffee or a robust tea balances the sweetness nicely. Try a medium-roast coffee or a black tea with a hint of bergamot.
- Dessert wines: A late-harvest riesling, tawny port, or a mellow sherry complements the caramel notes.
- Fruit and cream: Serve with lightly sweetened whipped cream and fresh berries to cut through the richness.
Nutrition Information
To better understand the nutritional profile of your favorite desserts, check out our resource on nutrition information for desserts.
Per serving (one tart): approximately 239 kcal, 11 g fat, 34 g carbohydrates, 2 g protein. These tarts contain common allergens: wheat, eggs, and dairy. Using vegan and gluten-free substitutions will change the nutritional profile — for example, swapping in a plant butter typically lowers saturated fat, while using a gluten-free flour can alter carbohydrate and fiber content. If you’re watching sugar intake, reducing the brown sugar or choosing a sugar substitute will affect texture; the filling’s chewiness depends on the sugar and syrup chemistry, so modest swaps can work but may change the final mouthfeel.
Conclusion
Butter tarts are one of those recipes that reward patience and small adjustments. Keep the pastry cold, don’t overfill the shells, and watch the oven closely. The first time I got the bake and texture right I felt a small, proprietary pride — the kind of success that keeps you making them again and again. Share them warm or pack them up for a neighbor; they travel well and stories are often exchanged with each tin. Try the base recipe as written, then experiment with pecans, chocolate, or maple to make it your own. If you do make these, tell me what you changed — I love hearing which twists become family traditions.
FAQ
What are butter tarts called in the US?
The closest American equivalent to butter tarts is the Pennsylvania Dutch shoo-fly pie, which is similarly gooey and sweet, often described as a pecan pie without the pecans.
Are butter tarts a Canadian thing?
Yes! Butter tarts are a beloved Canadian dessert, with origins dating back to the late 1600s when young French women were sent to New France, now Quebec, to help populate the colony.
Are butter tarts available in the USA?
Yes, you can find butter tarts in the USA! Many bakeries offer full-size, award-winning butter tarts made with a buttery crust and gooey filling.
What does a butter tart taste like?
Butter tarts have a unique flavor that’s similar to both Sugar Pie in Quebec and Pecan Pie in the US. Picture a flaky mini pie shell filled with a rich mixture of butter, sugar, eggs, vanilla, and syrup—deliciously gooey and sweet!
Can I make butter tarts ahead of time?
Absolutely! You can make the tart shells and filling in advance. Just store the shells in an airtight container and keep the filling in the fridge. Assemble and bake them right before serving for the best texture!

Butter Tarts
Ingredients
Method
- In a large bowl, whisk together the flour and salt. With a pastry cutter, cut in the butter until only pea sized pieces remain. You can also use a food processor to do this.
- Add 4 tablespoons of water and mix, add the water a little more at a time until the dough is shaggy and sticks together. Form into a flat disc and cover with plastic wrap. Chill in the refrigerator for at least 2 hours.
- Once the dough is ready, roll into ⅛” thickness and cut into 4” circles. Press into the cavities and up the sides of a 12-count muffin tin.
- Preheat the oven to 400°F (200°C), or 180°C if you have a fan oven.
- In a medium bowl, whisk together the corn syrup, brown sugar, butter, egg, vanilla, cornstarch, cinnamon, salt and nutmeg until smooth.
- If using raisins, divide them among the chilled tart shells first. Then add the filling to the tart shells, only filling about 1/2 way.
- Bake in the preheated oven for 5 minutes, then reduce the heat to 350 and bake an additional 15-20 minutes, or until the filling is bubbling and the crust is golden.
- Allow to cool for at least 15 minutes before using a butter knife to help remove them from the pan.