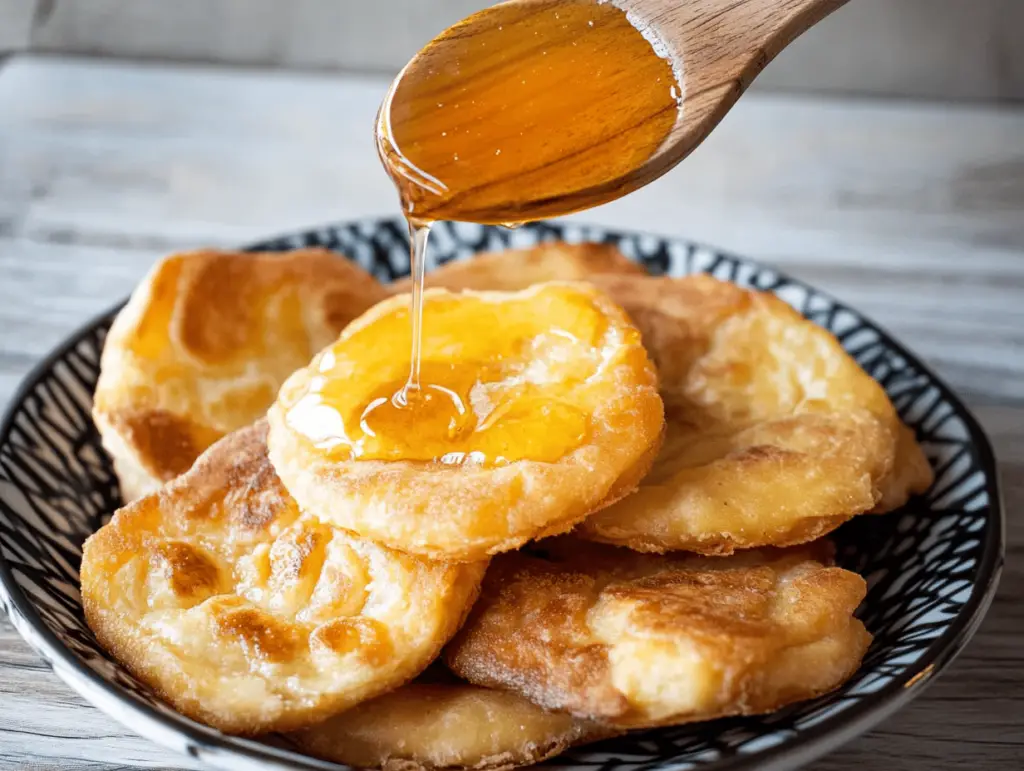
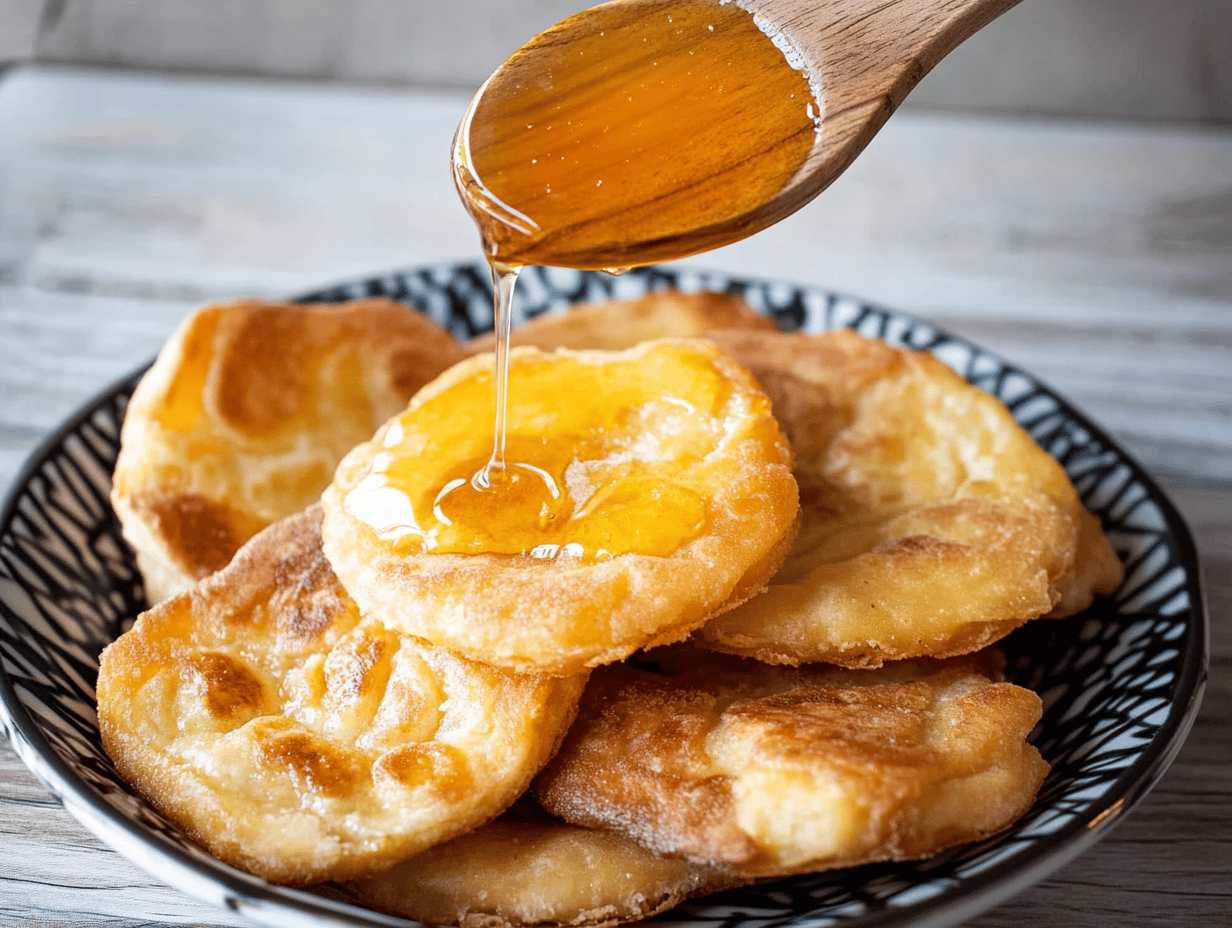
Are you looking for a unique and delightful dish that can serve as both a dessert and an appetizer? Look no further than Chilean pumpkin sopaipillas! These delightful pastries are incredibly versatile, rich in flavor, and easy to make from scratch. Made primarily from pumpkin, flour, and a few simple ingredients, they offer a warm and comforting experience with every bite. Drizzled with honey, they transform into a sweet treat that is perfect for any occasion.
In this article, we will explore the delightful world of Chilean sopaipillas, uncovering their cultural significance and the simple ingredients that make them special. You will also learn step-by-step instructions for making them at home, variations to suit different tastes, and presentation ideas that will impress your guests.
Understanding the Recipe
Sopaipillas have a rich history in Chilean cuisine, often enjoyed during celebrations and family gatherings. These delicious fried pastries have roots that can be traced back to indigenous cultures and have evolved over the centuries to become a beloved dish in Chile. They are traditionally made with pumpkin, which not only adds flavor but also provides a lovely orange hue to the dough.
What makes these pumpkin sopaipillas so special is their comforting texture—crispy on the outside and soft on the inside. They can be served plain, drizzled with honey, or paired with various toppings, making them a versatile addition to any meal. Whether you are enjoying them at a festive gathering or as a sweet snack during the day, sopaipillas bring a warm, nostalgic feeling that is hard to resist.
Ingredient Breakdown
To make authentic Chilean pumpkin sopaipillas, you will need the following ingredients:
- 2 cups all-purpose flour (plus an additional ¼ cup for kneading) – The foundation of the dough, providing structure and texture.
- 400 grams pumpkin (or 1 cup pumpkin puree) – Adds flavor, moisture, and a vibrant color to the sopaipillas.
- 3 tablespoons butter – Provides richness and contributes to the lovely texture of the dough.
- 1 teaspoon baking powder – Helps the sopaipillas to rise and become light and airy.
- ½ teaspoon salt – Enhances flavor and balances the sweetness of the dish.
- Honey (to taste) – The heavenly drizzle that completes these sopaipillas, adding sweetness and flavor.
- Oil for frying – Essential for creating that crispy outer layer; a neutral oil works best.
When preparing this recipe, using fresh, high-quality ingredients is key to achieving the best flavor and texture. If you have dietary restrictions, consider using gluten-free flour for a gluten-free version or making a vegan adaptation by substituting the butter with a plant-based alternative. Enjoy the process of creating these delightful treats while customizing them to fit your needs!
Step-by-Step Instructions
Ready to make your own pumpkin sopaipillas? Follow these detailed instructions for a perfect result:
- Prepare the Pumpkin: Start by boiling 400 grams of fresh pumpkin until it is fork-tender. This usually takes about 15-20 minutes. Once cooked, drain, cool, and mash it into a smooth puree. If using pumpkin puree, ensure it is of good quality.
- Mix the Dry Ingredients: In a medium bowl, combine 2 cups of all-purpose flour, 1 teaspoon of baking powder, and ½ teaspoon of salt. Mix well to ensure the baking powder is evenly distributed.
- Combine Pumpkin and Butter: In a separate bowl, melt 3 tablespoons of butter and slowly add it along with the pumpkin puree to the dry ingredients. Use a spatula to fold the mixture until everything is just combined. If the mixture is too sticky, adjust the consistency by adding a little more flour or the reserved pumpkin water as needed.
- Let the Dough Rest: Once the dough is mixed, cover the bowl with a clean kitchen towel and let it rest for 30 minutes. This allows the gluten to relax and makes the dough easier to work with.
- Knead the Dough: After resting, sprinkle some flour on a clean surface and knead the dough for a few minutes until it becomes bouncy. Be careful not to over-knead as this can make the sopaipillas tough.
- Roll and Cut: Roll out the dough to approximately ¼ inch thick. Using a round cookie cutter or a glass, cut out circles. You can also make other shapes if desired.
- Fry the Sopaipillas: In a deep skillet or frying pan, heat oil over medium heat. Carefully place the dough circles into the hot oil, frying until they become golden brown and crispy, about 2-3 minutes per side. Use a slotted spoon to transfer them to a plate lined with absorbent paper to drain excess oil.
- Serve: While still warm, drizzle the sopaipillas with honey to taste. They are best enjoyed fresh and warm!
Variations and Customizations
One of the best things about sopaipillas is their versatility! Here are a few ways you can customize your dish:
- Sweet Variations: Instead of honey, try drizzling with maple syrup or agave nectar for a different sweetness. You can also sprinkle cinnamon sugar over the warm sopaipillas for an extra touch of flavor.
- Savory Options: For a versatile twist, consider adding spices like cumin or paprika to the dough for a savory flavor profile. You can also stuff the sopaipillas with cheese, herbs, or finely minced vegetables before frying!
- Gluten-Free Adaptation: Swap the all-purpose flour for a gluten-free flour blend to make these gluten-free without sacrificing taste or texture.
- Low-Calorie Alternative: For a lighter version, consider baking the sopaipillas instead of frying. Brush them with a bit of oil on each side and bake at 350°F (175°C) for about 20-25 minutes or until golden brown.
Serving Suggestions
When it comes to serving your delicious sopaipillas, the possibilities are endless! Here are some suggestions:
- Pair them with a light salad for a refreshing appetizer.
- Serve alongside other Chilean dishes like pebre or aji sauce for dipping.
- For a sweet treat, enjoy them at breakfast with coffee or as an afternoon snack.
- They make excellent party food and can be a fun addition to a buffet-style meal.
Don’t forget to garnish your sopaipillas with a sprinkle of powdered sugar or a dollop of whipped cream for an extra special touch, especially if you’re serving them as a dessert!
Tips for Success
To ensure your sopaipillas turn out perfectly every time, keep these tips in mind:
- Oil Temperature: Make sure your oil is hot enough before frying. A little test by dropping a small piece of dough should cause it to sizzle. If the oil is too cool, the sopaipillas will absorb too much oil and become greasy.
- Kneading Technique: Knead the dough just until it is smooth and elastic. Over-kneading can lead to tough textures, which you want to avoid.
- Leftovers: Store leftover sopaipillas in an airtight container at room temperature for up to two days. They can also be frozen for up to three months—just make sure to separate layers with parchment paper!
- Reheating: To reheat, place them in a preheated oven at 350°F (175°C) for about 10 minutes until warmed through and crispy again.
FAQs
Can I use pumpkin puree instead of fresh pumpkin?
Yes, you can absolutely use 1 cup of pumpkin puree in place of fresh pumpkin. Just ensure it is of good quality for the best flavor!
What other flours can I use for a gluten-free version?
You can use a gluten-free all-purpose flour blend that is designed for baking, which should yield similar results to regular all-purpose flour.
How can I store leftovers?
Store any leftover sopaipillas in an airtight container, and they will keep well at room temperature for 1-2 days. For longer storage, freeze them for up to three months.
Can I fry these in advance and reheat them later?
Yes, you can fry them in advance; however, they are best enjoyed fresh. If reheating, bake them in the oven to restore some of their crispiness.
What can I use if I don’t have honey?
If you don’t have honey, maple syrup or agave nectar makes a great substitute. You can also serve the sopaipillas plain for a less sweet version!
Conclusion
Making authentic Chilean pumpkin sopaipillas is a delightful culinary adventure. Not only do they offer an incredible flavor experience, but they also connect you to a rich cultural tradition. By following this guide, you can easily create these delicious, golden pastries at home. Whether you enjoy them as a sweet treat or a savory snack, sopaipillas are sure to impress your family and guests alike.
So gather your ingredients and give this recipe a try! Don’t forget to share your experience and thoughts in the comments below or on social media. Happy cooking!
Chilean Pumpkin Sopaipillas With Honey
Ingredients
Method
- Prepare the Pumpkin: Start by boiling 400 grams of fresh pumpkin until it is fork-tender. This usually takes about 15-20 minutes. Once cooked, drain, cool, and mash it into a smooth puree. If using pumpkin puree, ensure it is of good quality.
- Mix the Dry Ingredients: In a medium bowl, combine 2 cups of all-purpose flour, 1 teaspoon of baking powder, and ½ teaspoon of salt. Mix well to ensure the baking powder is evenly distributed.
- Combine Pumpkin and Butter: In a separate bowl, melt 3 tablespoons of butter and slowly add it along with the pumpkin puree to the dry ingredients. Use a spatula to fold the mixture until everything is just combined. If the mixture is too sticky, adjust the consistency by adding a little more flour or the reserved pumpkin water as needed.
- Let the Dough Rest: Once the dough is mixed, cover the bowl with a clean kitchen towel and let it rest for 30 minutes. This allows the gluten to relax and makes the dough easier to work with.
- Knead the Dough: After resting, sprinkle some flour on a clean surface and knead the dough for a few minutes until it becomes bouncy. Be careful not to over-knead as this can make the sopaipillas tough.
- Roll and Cut: Roll out the dough to approximately ¼ inch thick. Using a round cookie cutter or a glass, cut out circles. You can also make other shapes if desired.
- Fry the Sopaipillas: In a deep skillet or frying pan, heat oil over medium heat. Carefully place the dough circles into the hot oil, frying until they become golden brown and crispy, about 2-3 minutes per side. Use a slotted spoon to transfer them to a plate lined with absorbent paper to drain excess oil.
- Serve: While still warm, drizzle the sopaipillas with honey to taste. They are best enjoyed fresh and warm!