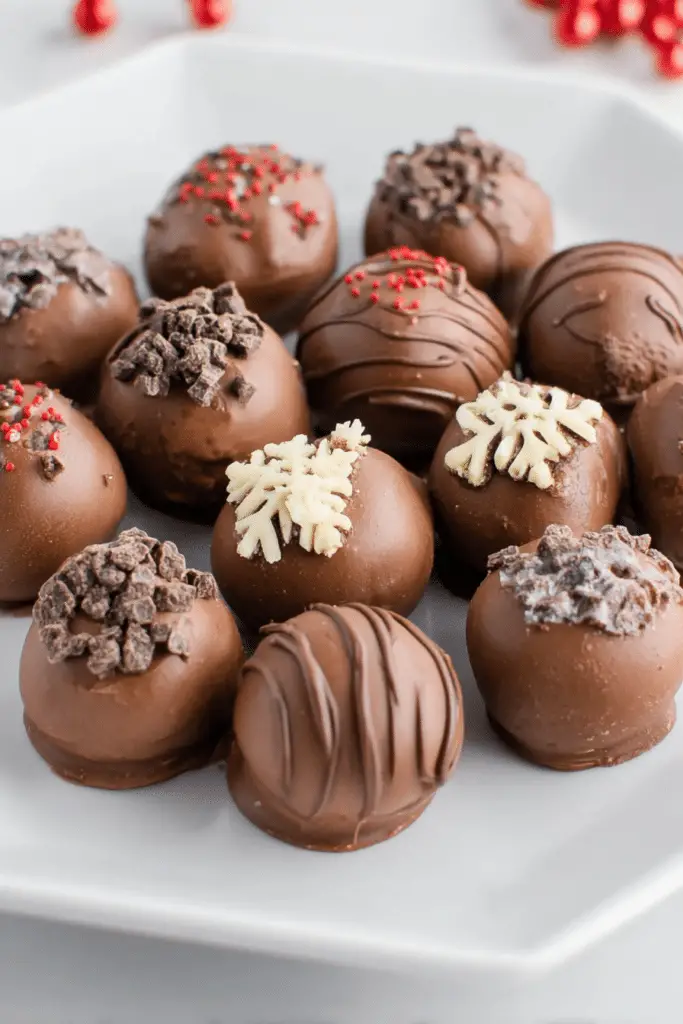
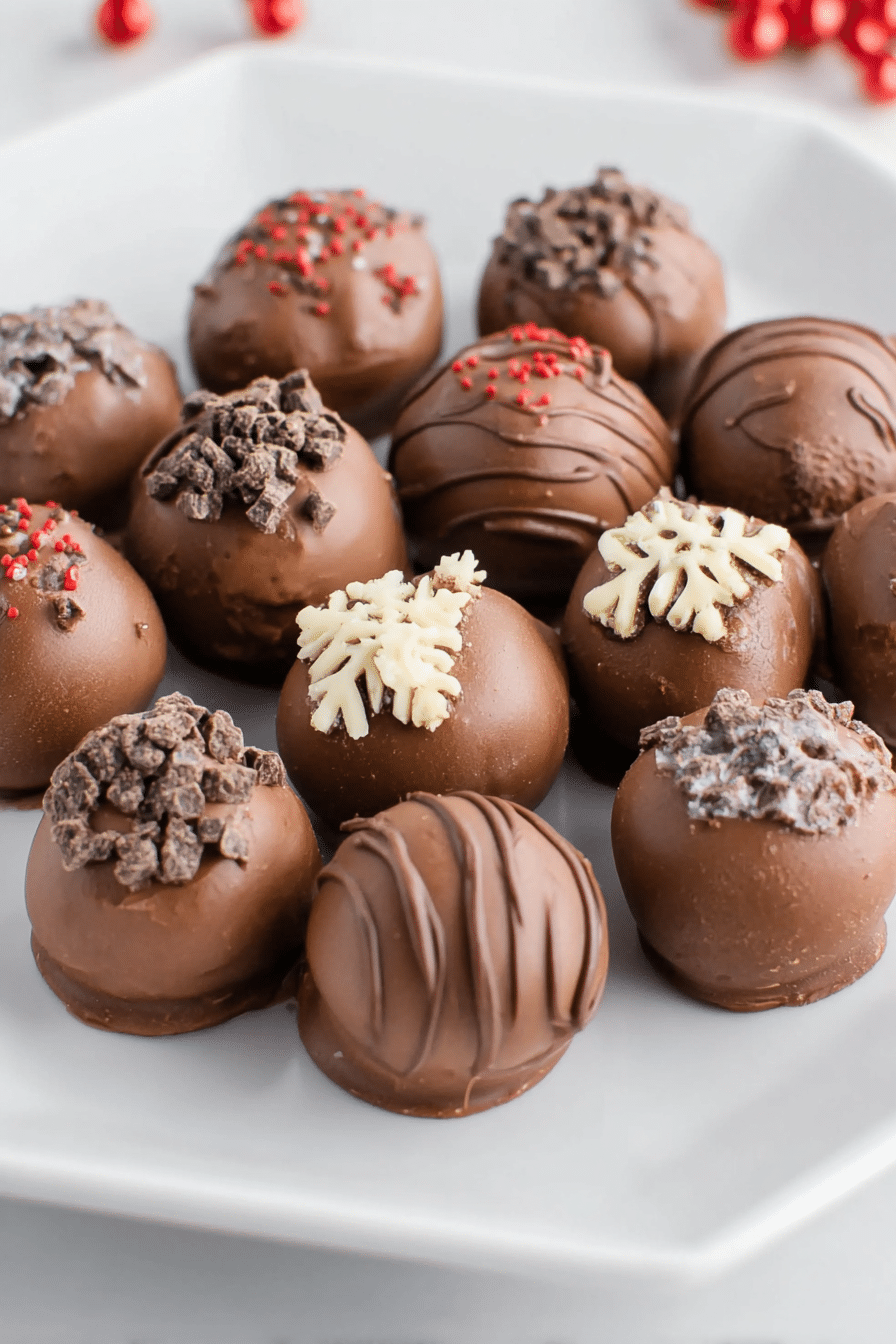
I still remember the first time I made these chocolate cream cheese truffles: it was late December, the kitchen smelled like cocoa and orange zest, and I was testing a simple no‑bake treat to bring to a neighborhood cookie swap. The filling was so silky and tangy from the cream cheese that each bite felt like a tiny, luxurious cheesecake covered in chocolate. They’re that sort of dessert — deceptively simple but utterly moreish.
These truffles are no‑bake, come together mostly in a bowl, and make about 36 pieces — enough to share, or to strategically hide in the back of the fridge (don’t worry, I won’t tell). The contrast of the slightly tangy cream cheese filling with the glossy chocolate shell is what keeps me making them over and over. They work for last‑minute desserts, holiday platters, or just a quiet treat with coffee on a rainy afternoon.
Ingredients Overview
- Brick style cream cheese – provides the tangy, creamy base that gives the truffle its cheesecake‑like bite; softened so it blends smooth.
- Powdered sugar – sweetens and firms the filling without graininess; also helps the mixture hold shape when chilled.
- Chocolate chips – melted into the cream cheese for deep chocolate flavor; use dark, semi‑sweet, or milk depending on how sweet you like it.
- Chocolate candy melts – an easy coating that sets shiny and crisp; white, milk, or dark provide different looks and flavors.
- Sprinkles or toppings – optional finishing touches that add color, crunch, or contrast to the smooth shell.
Step-by-Step Instructions
Below is the tested process I use in my kitchen. I include exact amounts and timing here so you get the same result I do: about 36 truffles, roughly 60 minutes prep and about 80 minutes total including chilling.
- Start by beating the cream cheese: in a large bowl, beat 8 ounces of brick‑style cream cheese (softened to room temperature) until smooth and aerated. I usually take it out of the fridge 30–60 minutes ahead so it’s pliable but not melty. The texture should be lump‑free — if you still see small clumps, scrape the bowl and beat a little longer.
- Add the powdered sugar: gradually add 2 cups of powdered sugar while continuing to beat until the mixture is light and fluffy. Powdered sugar brings body and stability; if you add it too fast you’ll get a cloud of sugar everywhere (ask me how I know). Scrape the bowl once or twice to ensure even mixing.
- Melt the chocolate chips: melt 2 cups of chocolate chips (dark, semi‑sweet, milk, or a mix) either in a double boiler over simmering water or in the microwave in 20–30 second bursts, stirring between bursts until smooth. If you’re using the microwave, stop stirring before it looks completely melted — residual heat finishes it. Keep water away from the chocolate to prevent seizing.
- Combine chocolate and filling: pour the melted chocolate into the cream cheese mixture and stir until fully smooth and uniform. The bowl will feel noticeably cooler after you add the chocolate; that’s fine. If the mixture seems too loose, chill it briefly — the goal is a scoopable, pipeable texture.
- Add flavorings if you want: this is where you can fold in a teaspoon or two of extract (vanilla, mint, or orange) or a small splash of liqueur. Be conservative with liquids — too much will make the filling soft and harder to roll. If you add liqueur, compensate with a little extra powdered sugar if needed.
- Chill the filling: cover the bowl and refrigerate for 20–30 minutes so the filling firms up enough to roll. If you’re short on time, 10–15 minutes in the freezer works, but watch closely — you don’t want it to freeze solid. The filling should be cold and slightly firm to the touch but still malleable.
- Form the truffles: remove the chilled filling and, using a melon baller or small cookie scoop, portion 1/2 to 1‑inch balls. Roll between your palms quickly — hands warm things up, so work briskly. If the filling softens while you’re working, pop the tray back in the fridge for 10 minutes. Arrange the formed balls on a silicone mat or parchment‑lined sheet.
- Melt the coating: melt about 1 cup of chocolate candy melts per batch (adjust depending on how many truffles you’re dipping) in the microwave or over a double boiler until glossy and smooth. Candy melts set faster and are forgiving; if you prefer a really thin, shiny shell, temper real chocolate or add a teaspoon of neutral oil to the melted coating.
- Dip the truffles: lower each ball into the melted coating with a fork or dipping tool, tap off excess, and place back on the silicone mat. If you dip too slowly the shell can get heavy; if you tap too hard, the shell can crack. Practice on one or two first to get the rhythm.
- Decorate and set: if you want sprinkles, add them before the coating firms. Let the shells harden completely (about 20–30 minutes at room temperature, faster in the fridge). Once set, transfer truffles to an airtight container and refrigerate. Yield: about 36 truffles.
If you want an easy no‑bake method, try our no-bake cake batter truffles as a quick alternative to chilling and rolling cream cheese truffles.
Flavor Variations and Add‑Ins
These truffles are a forgiving platform for lots of flavors and textures. I often split my batch into three bowls to try different versions — it’s a great way to see what guests like.
- Orange‑chocolate – fold in a teaspoon of orange extract or a tablespoon of finely grated orange zest for a bright, citrus lift.
- Mint – add a half to one teaspoon of peppermint extract for an Andes‑style bite; start small so it doesn’t overpower the chocolate.
- Liqueur‑infused – stir in 1–2 teaspoons of liqueur (rum, Kahlúa, or Grand Marnier) for adult truffles; remember less is more.
- Raspberry or fruit – fold in 2 tablespoons of freeze‑dried fruit powder for intense flavor without adding moisture.
- Nutty – roll the finished truffles in finely chopped toasted hazelnuts, almonds, or pistachios for crunch and richness.
- Crunchy coatings – use crushed cookies, cocoa powder, or chopped candy for textural contrast.
For a seasonal twist, consider swapping in pumpkin spice to make pumpkin cheesecake balls that use a similar cream cheese base.
If you like contrasting textures, check out our chocolate rice krispie balls for ideas on crunchy coatings and mix‑ins.
Dietary Considerations
I often get requests for vegan or gluten‑free options, and yes — these are adaptable. Be aware changes will affect texture and firming times, so follow these tips:
- Gluten‑free – the base is naturally gluten‑free if you use gluten‑free chocolate and check sprinkles/coatings for cross‑contamination.
- Dairy‑free & vegan – swap regular brick cream cheese for a firm dairy‑free cream cheese (coconut, cashew, or almond‑based). Use vegan chocolate and candy melts. Expect the filling to be slightly softer; chill longer and add powdered sugar if necessary.
- Sugar substitutes – powdered sugar can be replaced with a powdered erythritol blend designed for baking, but texture and sweetness intensity will differ; add slowly and test.
- Allergies – for nut allergies, avoid nutty mix‑ins and check labels; for egg allergies (not an issue in this recipe), ensure coatings and sprinkles are egg‑free.
Serving Suggestions
Presentation turns these from a pantry snack into a standout dessert. I keep a small box of muffin liners and a wooden serving board ready for guests.
- On a platter – arrange truffles on a decorative platter with alternating coatings for color contrast (white chocolate, dark chocolate, sprinkles).
- Individual cups – serve in mini paper cups for parties or as after‑dinner sweets; they look neat and are easy to pick up.
- Gift box – layer with parchment in an airtight box. To create an elegant gift box, pair or alternate your truffles with homemade turtles candy for a mix of chocolate, caramel, and nuts.
- Pairings – these truffles go beautifully with strong coffee, espresso, dessert wines (like port or tawny), or a robust black tea. The tang of the cream cheese cuts through rich chocolate.
Storage and Shelf‑Life Tips
Proper storage keeps textures right and flavors fresh. From experience, the biggest problem is soggy shells from condensation — here’s how I avoid that.
- Refrigerator – store truffles in a single layer or separated by parchment in an airtight container for up to 1 week. Bring to room temperature for 10–15 minutes before serving so the center softens slightly.
- Freezer – freeze on a tray until firm, then transfer to a sealed container. They keep well for up to 3 months. Thaw in the fridge overnight to avoid condensation on the shell.
- Containers – use rigid containers to avoid crushing. If stacking, separate layers with parchment and label with date and flavor.
- Avoiding odor transfer – seal tightly; chocolate easily picks up fridge smells. If you must store with strong cheeses, keep truffles in a tightly sealed box or in a separate shelf.
Frequently Asked Questions
- My truffle filling is too soft or runny. How can I fix it?Chill the filling in the fridge for another 20–30 minutes (or 10–15 minutes in the freezer) so it firms up. If it’s still too soft, mix in extra powdered sugar a little at a time (about 1–2 tablespoons) until it holds shape. Working in a cool room and using colder tools (chilled bowl or melon baller) also helps.
- What’s the best way to melt chocolate without it seizing?Use a double boiler or microwave in short 20–30 second bursts, stirring between each burst. Keep all water away from the chocolate (even a drop can cause seizing). For ease, candy melts are forgiving; for smoother sheen, add a teaspoon of neutral oil if needed.
- How long can I store these truffles and can I freeze them?Store truffles in an airtight container in the refrigerator for up to 1 week. You can freeze them up to 3 months—arrange in a single layer on a tray, freeze until firm, then transfer to a sealed freezer container. Thaw in the fridge before serving.
- Can I add flavors or alcohol to the truffles?Yes — add extracts (vanilla, mint, orange) or 1–2 teaspoons of liqueur for flavor. Add liquids sparingly (too much liquid will soften the filling), or compensate by adding a bit more powdered sugar. You can also fold in finely chopped nuts, cookie crumbs, or crushed freeze‑dried fruit for texture.
- Are there vegan, dairy‑free, or gluten‑free options?Yes. Use a dairy‑free cream cheese (coconut, almond, or cashew‑based) and vegan chocolate/candy melts. Powdered sugar is often vegan but check labels; sprinkles and coatings should be checked for gluten if needed. Expect slight texture differences and firm up in the fridge, adjusting powdered sugar if necessary.
- Why did my shells crack after dipping?Rapid temperature changes cause cracking. If the coating is very cold when it hits a warm truffle, it can crack as it firms. Try chilling the filled balls well so the temps are closer, and allow the coating to cool a little before dipping. Also don’t overwork the truffles while the shell is setting.
- How do I achieve a glossy, thin shell?Use tempered chocolate or candy melts and don’t overheat. Adding a teaspoon of neutral oil to melted chocolate can thin it for a smoother dip. Work quickly and let the shell set without moving the tray.
These chocolate cream cheese truffles are one of my go‑to make‑ahead treats. They travel well, please a crowd, and are forgiving enough for beginners yet flexible enough for tinkering. If you try them, start with the classic chocolate shell, then experiment with one small change at a time — I find that’s how the best variations are discovered. Happy dipping!
Recipe yield: ~36 truffles. Prep time: about 60 minutes (including chilling); total time: about 80 minutes.
Chocolate Cream Cheese Truffles
Ingredients
Method
- Begin by beating the cream cheese in a large bowl, then slowly add the powdered sugar and beat until light and fluffy.
- Melt the chocolate chips in a double boiler over the stove or in the microwave, then add to the cream cheese mixture and mix until smooth.
- If you want different flavours, you can add a teaspoon or two of extract. Or divide the batter and make several flavours.
- Place the bowl in the fridge for 20-30 minutes to allow the filling to firm up so you can roll it.
- Remove the truffle filling from the fridge and roll into balls between 1/2 and 1 inch in size and place on a baking sheet lined with a silicone mat.
- Melt the chocolate candy melts in the microwave or double boiler and then dip the truffle balls in the melted chocolate.
- Move back to the silicone baking sheet to allow the chocolate shell to harden. If you want to decorate with sprinkles, do so before the chocolate sets.
- Once the shell has hardened, move the truffles to an air-tight container and store in the refrigerator.