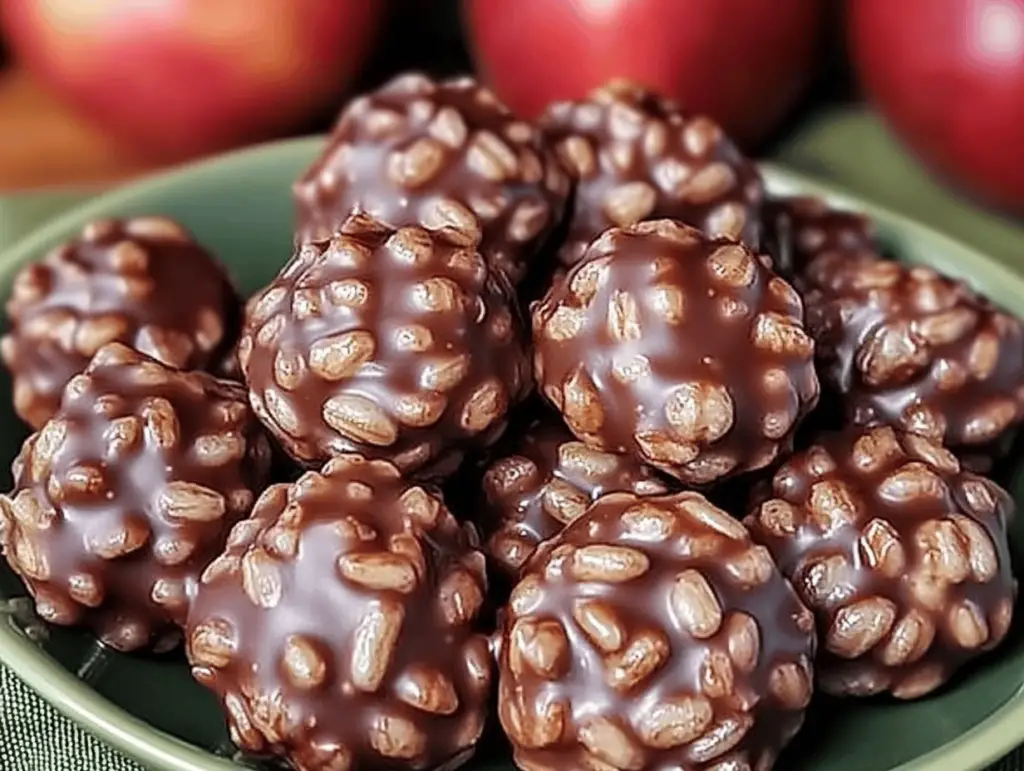
Indulging in a sweet treat doesn’t have to be a complicated affair. Enter Chocolate Rice Krispie Balls, a delightful blend of crunchy rice cereal and rich chocolate that promises to satisfy your sweet tooth without the fuss of baking. These no-bake treats are perfect for any occasion, whether you need a quick snack, a party platter, or a portable dessert for a picnic. With just a few simple ingredients and minimal prep time, you’ll have an irresistible chocolatey treat that delights every age group.
This article will guide you through the charming world of Chocolate Rice Krispie Balls, detailing their appeal, providing a comprehensive ingredient breakdown, and offering step-by-step instructions to ensure you create these decadent bites successfully. Get ready to discover the joy of crafting these simple, delicious snacks!
Understanding the Recipe
Chocolate Rice Krispie Balls are not just a delicious treat; they carry a nostalgic charm that resonates with many people. This simple recipe hails from the classic American dessert traditions, where sweets are often celebrated at gatherings and holidays. Growing up, many of us have fond memories associated with Rice Krispies, whether it was the signature snap, crackle, and pop sounds from the cereal, or the joy of forming those crispy treats into creative shapes.
These treats are versatile, allowing for customizations that cater to individual preferences. The incorporation of chocolate and optional peanut butter takes these delightful bites to another level, providing both texture and flavor that appeals to chocolate lovers of all ages. Beyond their irresistible taste, they are quick to prepare, making them a fantastic option for busy parents or anyone looking to whip up something special in a short time. It’s this combination of nostalgia, simplicity, and flavor that makes Chocolate Rice Krispie Balls a beloved recipe.
Ingredient Breakdown
Here’s what you’ll need to make the perfect Chocolate Rice Krispie Balls:
- 3 cups Rice Krispies cereal: This is the base of our treats, providing the signature crunch that makes these bites so enjoyable.
- 1 cup milk chocolate chips: The star ingredient that brings sweetness and richness, melting into a smooth coating for the Rice Krispies.
- 1/2 cup peanut butter (optional): This adds a creamy texture and nutty flavor that complements the chocolate beautifully. For a nut-free option, you can use sun butter or omit it altogether.
- 1/4 cup butter: Essential for binding and enriching the chocolate and peanut butter mixture, providing a silky smooth texture.
- 1 tsp vanilla extract: This enhances the overall flavor profile, giving a hint of warmth and depth to the sweet mixture.
Using high-quality ingredients is crucial for achieving the best flavor and texture. Consider using organic or artisanal chocolate chips and natural peanut butter for superior taste. If any dietary restrictions are a concern, feel free to substitute the peanut butter with alternatives that suit your needs, ensuring everyone can enjoy these delectable bites.
Step-by-Step Instructions
Follow these simple steps to create your own batch of Chocolate Rice Krispie Balls:
- Prepare your workspace: Gather all your ingredients and tools. You will need a saucepan, spatula, mixing bowl, and a parchment-lined baking sheet.
- Heat the mixture: In a saucepan, combine 1 cup of milk chocolate chips, 1/2 cup of peanut butter (if using), and 1/4 cup of butter. Melt these over low heat, stirring continuously until smooth and fully combined.
- Add flavor: Remove the saucepan from heat and stir in 1 teaspoon of vanilla extract, mixing until well combined.
- Incorporate the Rice Krispies: Gradually add 3 cups of Rice Krispies cereal to the chocolate mixture, stirring gently but thoroughly until all the cereal is evenly coated with the chocolate mixture.
- Form the balls: Allow the mixture to cool slightly so it’s manageable. Once cool enough, use your hands to roll the mixture into bite-sized balls and place them on a parchment-lined baking sheet.
- Chill and set: Refrigerate the prepared balls for 20-30 minutes until they firm up and set properly.
- Serve and enjoy: After chilling, serve the Chocolate Rice Krispie Balls as a delightful treat! Be sure to store any leftovers in an airtight container to keep them fresh.
Variations and Customizations
While the classic Chocolate Rice Krispie Balls are undeniably delicious, there’s always room for creativity. Here are a few variations to consider:
- Nut-Free Version: If you’re catering to nut allergies, simply skip the peanut butter or replace it with sun butter, which gives you a similar nutty flavor without the nuts.
- Vegan Option: Use dairy-free chocolate chips and vegan butter to create a plant-based version of these treats.
- Flavor Infusions: Consider adding a pinch of sea salt or sprinkle some lightly toasted coconut flakes into the mixture for a delightful twist!
- Decorative Touch: Roll the finished balls in crushed nuts, sprinkles, or even shredded coconut for visual appeal and additional texture.
- Flavorful Additions: Mix in mini marshmallows or dried fruit for extra flavor and fun textures.
Serving Suggestions
Chocolate Rice Krispie Balls are versatile and can be served in various ways to impress your guests or satisfy a crowd. Here are some serving suggestions:
- Presentation: Arrange the balls on a decorative platter, perhaps with fresh fruit or greenery to elevate the presentation.
- Garnishes: Drizzle melted chocolate over the top of the balls or dust them lightly with powdered sugar for a touch of elegance.
- Pairings: Serve alongside a glass of cold milk, a steaming cup of cocoa, or even a scoop of vanilla ice cream for the ultimate indulgence.
- Occasions: These treats are ideal for birthday parties, holiday gatherings, or just as a sweet snack after school. They also make great gifts when packaged in elegant containers!
Tips for Success
To ensure your Chocolate Rice Krispie Balls turn out perfectly, consider these helpful tips:
- Ingredient Temperature: Make sure the chocolate and peanut butter mixture isn’t too hot when combining with Rice Krispies; this way, the cereal will retain its crunch.
- Cooling Time: Don’t rush the cooling process; letting the balls sit in the fridge helps them firm up for easier handling and a better texture.
- Storage: Store any leftovers in an airtight container in the fridge for up to a week. You can also freeze them for longer storage; just make sure to wrap them well to avoid freezer burn.
- Cleanup Tip: Use cooking spray on your hands while rolling the balls to prevent sticking.
FAQs
Here are some frequently asked questions about Chocolate Rice Krispie Balls:
- Can I substitute the chocolate chips? Yes, you can use dark chocolate or white chocolate chips, depending on your preference. Just remember that different chocolates will yield different sweetness levels.
- Can I make this recipe gluten-free? Absolutely! Rice Krispies are typically gluten-free, but always check the label for certification to ensure the brand you choose has no gluten contamination.
- What if I don’t have Rice Krispies? As an alternative, you can use other puffed cereals or even granola, although this may alter the texture slightly.
- How do I store these treats for longer periods? To freeze, place the balls on a baking sheet in a single layer until firm, then transfer them to a resealable freezer bag. They will keep for about 2-3 months.
- Can I make these ahead of time? Yes! These treats hold up well in the fridge, and you can prepare them a few days in advance.
Conclusion
Creating delicious Chocolate Rice Krispie Balls can be an enjoyable and fulfilling experience. Not only are they quick and easy to prepare, but they also cater to a variety of dietary preferences and occasions. Their irresistible combination of chocolate and crunch makes each bite delightful, and you can have fun adding your own twists and variations. We hope you feel inspired to try making these delightful treats yourself and share your creations with family and friends. Don’t forget to let us know how they turn out!

Chocolate Rice Krispie Balls
Ingredients
Method
- Prepare your workspace: Gather all your ingredients and tools. You will need a saucepan, spatula, mixing bowl, and a parchment-lined baking sheet.
- Heat the mixture: In a saucepan, combine 1 cup of milk chocolate chips, 1/2 cup of peanut butter (if using), and 1/4 cup of butter. Melt these over low heat, stirring continuously until smooth and fully combined.
- Add flavor: Remove the saucepan from heat and stir in 1 teaspoon of vanilla extract, mixing until well combined.
- Incorporate the Rice Krispies: Gradually add 3 cups of Rice Krispies cereal to the chocolate mixture, stirring gently but thoroughly until all the cereal is evenly coated with the chocolate mixture.
- Form the balls: Allow the mixture to cool slightly so it’s manageable. Once cool enough, use your hands to roll the mixture into bite-sized balls and place them on a parchment-lined baking sheet.
- Chill and set: Refrigerate the prepared balls for 20-30 minutes until they firm up and set properly.
- Serve and enjoy: After chilling, serve the Chocolate Rice Krispie Balls as a delightful treat! Be sure to store any leftovers in an airtight container to keep them fresh.