
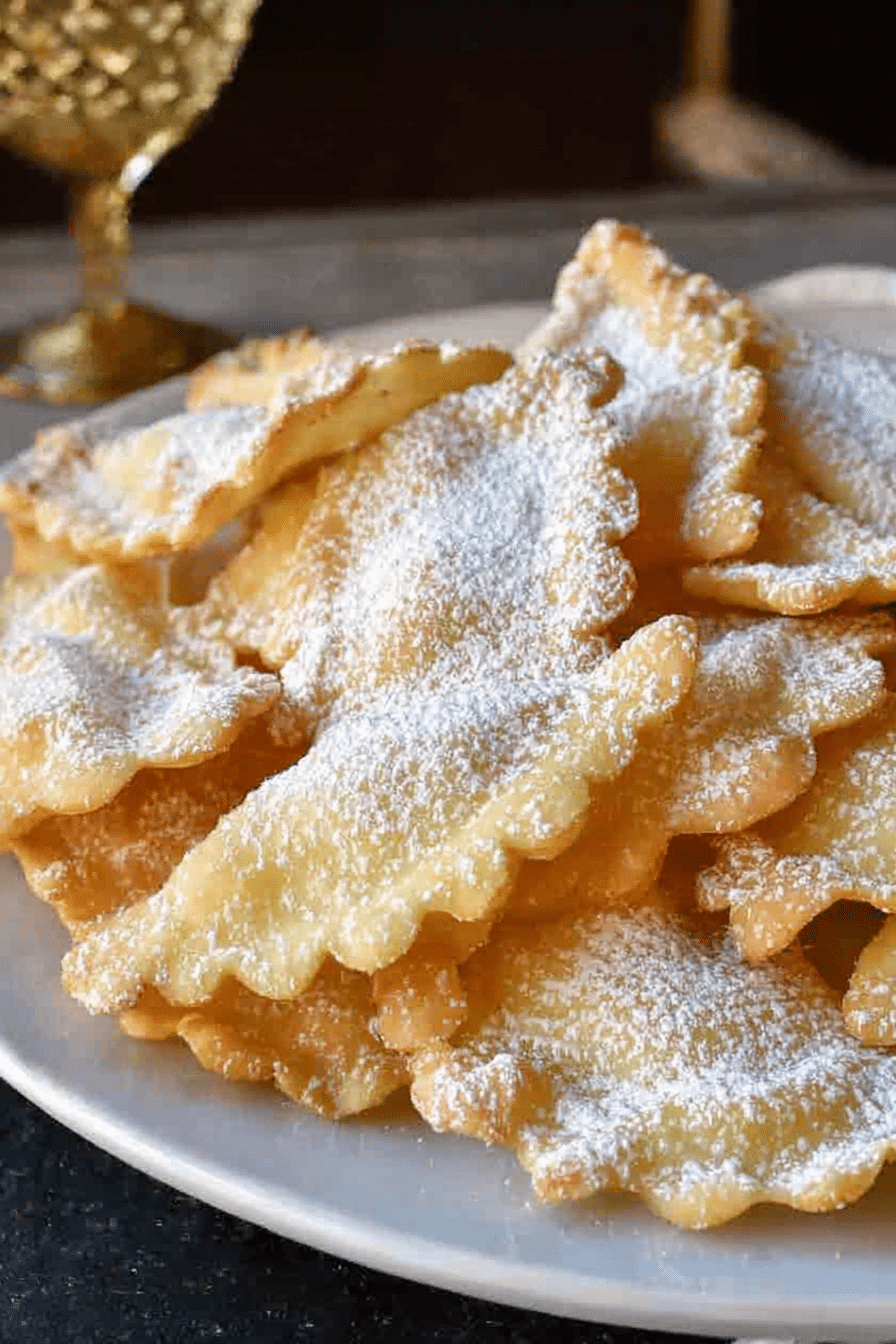
There’s a moment in my kitchen every winter when the house smells like warm butter, citrus, and frying dough — that’s crostoli season. These thin, crispy fried ribbons of dough, dusted with clouds of powdered sugar, are the sort of pastry you think will be easy to stop eating but never can. Popular around Carnevale and during festive gatherings, crostoli (also called chiacchiere, angel wings, bugie, and more depending on where you are in Italy) are a tiny celebration in every bite: delicate, airy, and just a little flaky.
When I first made these with my Nonna’s guidance, the dough felt fragile under my hands and the frying took me by surprise — tiny bubbles, a quick flip, and then the hush as they cooled and crisped. Over the years I refined a few habits that keep the results consistent: a short rest for the dough, rolling the sheets paper-thin, checking oil with a wooden spoon instead of guessing, and resisting the urge to add powdered sugar while they’re still steaming. Below is everything I’ve learned from actually making crostoli dozens of times — what to expect, what can go wrong, and how to fix it.
Ingredients Needed
Here are the ingredients grouped so you can gather everything before starting. I describe their purpose and offer easy swaps if you’re out of something.
- All-purpose flour – the backbone of the dough; it gives structure but you want just enough so the dough stays tender. Use a 00 flour for silkier results if you have it.
- Eggs – provide richness and bind the dough. Whole eggs plus an extra yolk make the crostoli tender but still hold shape.
- Granulated sugar – a touch of sweetness in the dough; not enough to make them pastry-sweet but just to balance the fried flavor.
- Butter – a little softened butter adds tenderness and flavor; you can swap for a neutral oil if needed, but butter gives the classic mouthfeel.
- Brandy (or other liquor) – a splash adds aroma and helps create a lighter texture; limoncello or grappa are regional alternatives.
- Vanilla extract – rounds out the flavor; optional but familiar and comforting.
- Salt – key to lifting the flavors; don’t skip it even though the dough is slightly sweet.
- Peanut oil (or neutral frying oil) – for frying; peanut oil is traditional in many kitchens because it’s neutral and tolerates high heat, but sunflower or canola work fine (see allergy note below).
- Powdered sugar – the classic finish; it melts slightly into the hot pastry, leaving a snowy coating.
Step-by-Step Instructions
Below I list the exact measured ingredients I use every time so you can replicate the recipe precisely, followed by step-by-step instructions with lots of practical tips.
- 2 cups (250 grams) plain all purpose flour
- 2 whole eggs
- 1 egg yolk
- 2 tablespoon granulated white sugar
- 2 tablespoons (1 ounce/30 grams) butter (slightly softened)
- 1 tablespoon (15 mls) brandy
- 1 teaspoon vanilla extract
- ¼ teaspoon salt
- 2 cups peanut oil, for frying
- powdered sugar (for dusting)
- Make the dough on the work surface: Mound the flour on a clean counter and make a well in the center. Add the eggs, egg yolk, sugar, butter, brandy, vanilla, and salt. I prefer doing this by hand — you feel the dough change. Use your fingertips or a fork to slowly pull in flour until the mixture just begins to come together. If the dough feels very dry and cracks when you press a bit, add another teaspoon of brandy or a tiny splash of water. It’s better to under-add liquid and incorporate than to make the dough sticky.
- Knead until smooth: Knead about 5 minutes until elastic and smooth. The dough should feel supple, not stiff; pressing a finger should leave a slight indentation that springs back. If it’s gummy, you’ve overworked it or added too much liquid — fold in a tablespoon of flour and rest 10 minutes.
- Rest the dough: Wrap it or cover with a bowl and let it rest for 30 minutes. This relaxes the gluten so the dough rolls out paper-thin without snapping back.
- Roll thin or use a pasta machine: I usually use my pasta roller. Cut a small portion off the mother dough, flatten it slightly, and pass it through the widest setting a few times, folding once or twice to make it smooth. Then gradually reduce the roller until the thinnest setting. With my KitchenAid I often pass the sheet twice through the thinnest setting — you want the dough almost translucent. If rolling by hand, use a floured surface and rolling pin and stretch carefully until very thin.
- Cut and shape: Cut the long sheets into strips roughly 2 inches wide and 4–6 inches long. Make a small slit in the center of each piece and pull one end through to make the classic twisted bow. The cut and twist keep the crostoli from puffing into a ball and let them cook evenly.
- Prepare to fry: Heat a heavy, high-sided skillet or a small pot with peanut oil to about 350°F (180°C). If you don’t have a thermometer, test the oil by dipping the handle of a wooden spoon — small steady bubbles should form around it. I start with a medium flame and adjust to keep the temperature steady; crostoli cook quickly so small fluctuations matter.
- Fry quickly and in small batches: Slide 3–4 pieces in at a time depending on pan size. They take about 30 seconds (or less) per side if oil is at the right temperature. You’ll see lots of tiny bubbles and the dough will puff slightly. Turn once the first side shows a light golden color. If they brown fast and darken, lower the heat — that’s a sign the oil is too hot and the outside is burning before the inside sets.
- Drain and cool: Remove cooked crostoli with a slotted spoon and let them drain on paper towels. They’ll be a little soft while warm but crisp up as they cool — that’s normal. Don’t dust with powdered sugar while they’re still steaming; it will dissolve into a paste. Wait until they’re cool and handled easily.
- Dust generously and store: Once cool, dust with powdered sugar and serve. Stored in an airtight container, they keep up to two weeks in a dry place. If you live in a humid climate, add a packet of dry rice in a cheesecloth bag to the container to help absorb moisture.
Frying Technique and Tips
Frying is where crostoli either sing or sulk. I’ve burned my fair share of batches learning the hard way that the right oil temperature and small batches are everything.
- Best oil: Neutral high-smoke point oils are ideal — peanut oil is traditional and forgiving, but sunflower, safflower, or light olive oil (not extra virgin) work. Avoid butter-only frying; it burns too quickly.
- Temperature control: Aim for 350°F (180°C). A kitchen thermometer is worth its weight here. If the oil is cooler the crostoli will absorb oil and be greasy; if hotter they brown and burn too fast. I keep a candle flame low under my pan to maintain even heat and move the pan off the burner for a few seconds if it spikes.
- Testing oil: If you don’t have a thermometer, dip a tiny corner of dough in the oil: it should bubble steadily and rise to the surface within a second or two. Or use a wooden spoon handle: small consistent bubbles should form around it.
- Avoid overcrowding: Fry in small batches — putting too many pieces in lowers the oil temperature and the result will be floppy and greasy. Three or four in a medium pan is a good rule of thumb.
- Timing: About 25–45 seconds per side is typical depending on thickness. Watch for a light golden color. Brown means overcooked; they should be pale gold and crisp after cooling.
- Draining: Use a slotted spoon and drain on paper towels or a wire rack set over a tray. Shift the crostoli occasionally so steam doesn’t make them soggy.
- Allergy note: If you have peanut allergies, use a neutral oil alternative and clean the pan and utensils thoroughly if they’ve come into contact with peanut oil previously.
Serving Suggestions and Variations
Crostoli are classically served simply dusted in powdered sugar, but they’re a great vehicle for playful variations.
For a delightful dessert pairing, consider serving crostoli with our classic tiramisu for an authentic Italian experience.
Why not accompany your crostoli with mini cannoli cups for a delightful mix of textures and flavors?
- Traditional: Dust with powdered sugar and serve with espresso. The contrast between the crisp, slightly oily pastry and the bittersweet coffee is addictive.
- Citrus twist: Add finely grated lemon or orange zest to the dough or dust finished crostoli with a citrus-scented powdered sugar for a bright note.
- Chocolate-dipped: Dip one end into melted dark chocolate and let it set on parchment; the crunch meets creamy chocolate — perfect for parties.
- Savory take: Make a slightly less sweet dough, add cracked black pepper and grated Parmesan, and fry small strips as a savory accompaniment to soups or salads.
- Spiced sugar: Mix powdered sugar with a pinch of cinnamon or nutmeg for an autumnal twist.
- Make-ahead: You can roll and cut the dough ahead of time and keep the raw strips chilled for a day. Fry just before serving for the freshest crunch.
Crostoli History and Cultural Significance
Crostoli have a long life in Italian kitchens. Thought to originate in the Veneto region, these ribbons of fried dough show up in homes and bakeries across Italy under many names. Each region — and often each family — has a little variation in technique or flavoring: some add lemon zest, some a splash of wine or grappa in place of brandy, and others sprinkle them with a flavored sugar. The tradition is especially strong around Carnevale, the boisterous festival before Lent when rich and fried foods are celebrated.
Just like crostoli, Nonnas Italian apple cake also holds a special place in Italian culinary traditions.
In my family, crostoli always meant cousins clustered around the table, someone manning the fryer, and a stack of plates for the golden strips. There’s a small ritual quality to it: rolling, cutting, frying, cooling, and dusting — and the shared pride when the platter goes around the room. Those sensory memories — the fizz of the oil, the sweet cloud of powdered sugar — are part of what keeps these simple cookies alive across generations.
Nutritional Information
Traditional crostoli are a fried pastry treat — meant to be enjoyed in small quantities. The recipe’s approximate nutrition per crostoli (single piece) is:
- Calories – about 14 kcal
- Fat – roughly 1 g (mostly from frying and a touch from the butter)
- Carbohydrates – about 2 g
- Protein – about 1 g
If you want a lighter version, try these adjustments: bake very thin shapes brushed with a little oil at high heat until crisp, or shallow-fry instead of deep-frying and blot thoroughly. For gluten-free crostoli, substitute a tested gluten-free all-purpose blend and allow extra rest time; sometimes a small extra egg white helps bind the dough. Swapping brandy for a non-alcoholic citrus extract reduces alcohol content while keeping aromatic lift.
FAQ
What is crostoli made of?
Crostoli are made from a simple mixture of eggs, flour, butter, sugar, and brandy. These ingredients are combined to create a delicate dough that is then fried to a crispy perfection and dusted with powdered sugar.
What does crostoli mean in English?
In English, crostoli refers to crispy fried Italian pastries that are similar to bow tie cookies or angel wing cookies. They are popular during festive occasions like Carnevale and are enjoyed during Christmas and other celebrations.
Where do crostoli originate?
Crostoli are believed to originate from Italy’s Veneto region. They are a traditional treat enjoyed during Carnevale and evoke fond memories of family and celebration.
How can I store leftover crostoli?
Leftover crostoli should be stored in an airtight container. They can remain fresh for up to two weeks. Be sure to keep them away from moisture to maintain their crispy texture.
Can I make crostoli gluten-free?
Yes, you can make gluten-free crostoli by substituting the all-purpose flour with a gluten-free flour blend. Just make sure to check the flour mixture for the right balance of ingredients to achieve the desired texture.
If you try this recipe, leave a note about how you shaped them or what flavor you added — I love hearing which family tricks make them extra special. Buon appetito!
Conclusion and Final Thoughts
Making crostoli from scratch is a little like making music with your hands — repetitive, simple motions that add up to something festive and delicate. Expect a bit of trial and error at first when dialing in the oil and thickness, but once you find the rhythm it’s an easy, joyful thing to do for a crowd. They’re perfect for sharing: little, crisp, and nostalgic. Give the dough time to rest, roll it paper-thin, and don’t rush the frying. Your patience shows in the light, crackly bite.
Completing your Italian feast with an Italian grinder salad will elevate the culinary experience further.
Crostoli
Ingredients
Method
- Place the all purpose flour on a clean work surface and make a well in the center. Add the eggs, egg yolk, sugar, butter, brandy, vanilla extract, and salt.2 whole eggs, 1 whole egg yolk, 2 tablespoons granulated white sugar, 2 tablespoons butter, 1 tablespoon brandy, 1 teaspoon vanilla extract, ¼ teaspoon salt
- Use your fingertips or a fork to gradually blend the wet ingredients, slowly gathering in flour until the dough starts to come together. Knead for about 5 minutes until smooth and elastic.
- Rest the dough for 30 minutes.
- Using a pasta machine, flatten the dough and pass it through the machine on the widest setting, dusting with flour as needed.
- Cut the dough into strips about 2 inches wide and make a small cut in the middle of each piece to twist one end through the cut.
- Heat oil in a frypan to 350°F (180ºC) and fry crostoli until light golden, about 30 seconds on each side. Drain on absorbent paper and dust with powdered sugar when cool.