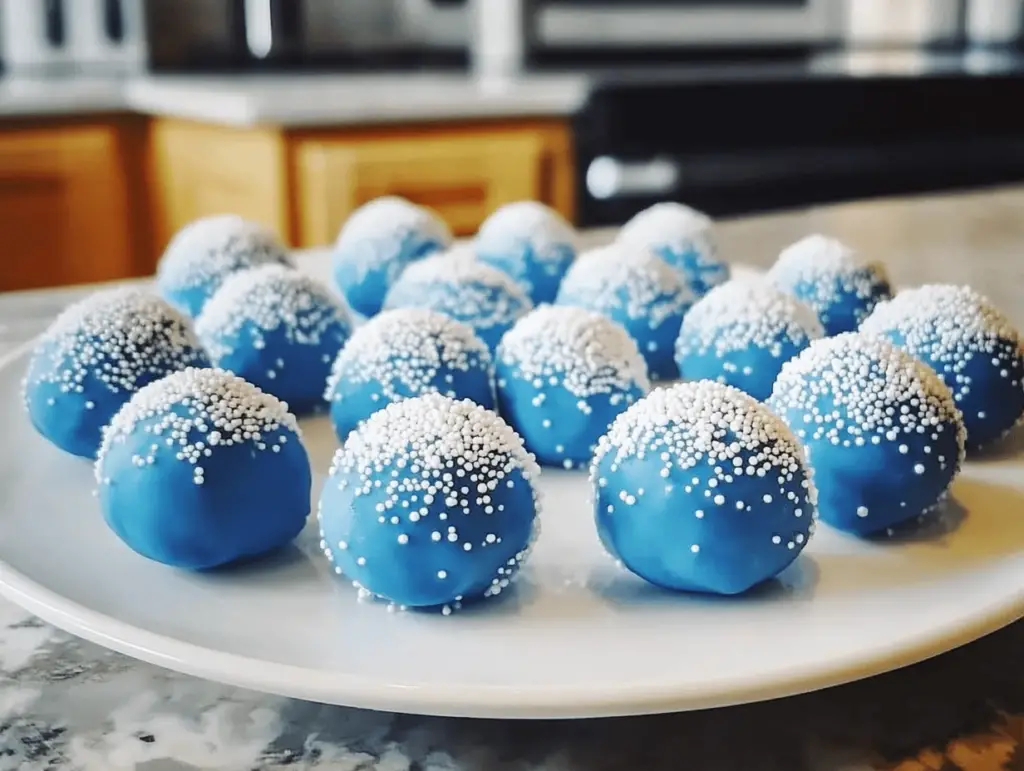
As the holiday season approaches, our senses are heightened with delightful tastes and mesmerizing aromas. One of the most enchanting treats to grace your festive table are Blue Christmas Truffles. The unique combination of ingredients not only elevates the flavors but adds a visually striking appeal to your holiday festivities. These truffles, embellished with a pop of blue, encapsulate the spirit of the season, making any celebration more special. Whether you’re sharing them at a holiday gathering or adding a personal touch to your dessert table, these truffles are easy to prepare, ensuring you can focus on the joy of the season rather than the stress of cooking. In this article, you’ll discover the cultural significance of these truffles, a breakdown of ingredients, step-by-step instructions to create them perfectly, and tips to make your festive gatherings even more memorable.
Understanding the Recipe
Truffles are a classic confection that has captivated hearts across many cultures. Traditionally made with chocolate and cream, truffles are known for their rich, smooth texture. Blue Christmas Truffles, however, add a festive twist to this classic treat, drawing inspiration from the vibrant celebrations of the holidays. The use of Blue Curacao not only infuses the truffles with a unique flavor but also gives them a dazzling hue that symbolizes winter festivities. Many families have their signature sweets they prepare during this time of year, and these blue delights could easily become yours. Whether it’s a joyous holiday party or a quiet family gathering, these truffles can evoke fond memories of togetherness while satisfying your sweet tooth. You’ll learn how to create this delightful dessert, impress your guests, and perhaps even spark new family traditions.
Ingredient Breakdown
Here’s what you’ll need to make your Blue Christmas Truffles:
- 2 cups white chocolate chips: The base of your truffles, providing a creamy and sweet flavor profile.
- 2 tbsp heavy cream: This rich cream is vital for creating a smooth, luxurious texture that binds the chocolate and adds depth.
- 2 tbsp Blue Curacao: A vibrant orange-flavored liqueur that not only brings a unique taste but also transforms your truffles into a festive treat.
- 1/2 cup sanding sugar: This sugary coating not only adds sweetness but also gives the truffles a delightful crunch and sparkle.
When preparing these truffles, it is essential to use high-quality ingredients to achieve the best flavor and texture. If you’re looking for alternatives, consider using dairy-free chocolate chips and a suitable plant-based cream for a vegan option. Furthermore, if you wish to abstain from alcohol, non-alcoholic blue syrup can serve as a flavorful substitute. No matter your choices, ensuring the quality of your ingredients will enhance this indulgent treat.
Step-by-Step Instructions
Here’s how to prepare your Blue Christmas Truffles:
- Melt the Chocolate: In a microwave-safe bowl, combine 2 cups of white chocolate chips and 2 tablespoons of heavy cream. Heat in the microwave at 30-second intervals, stirring well after each interval until the mixture is completely smooth and melted, akin to a silky sauce.
- Add Blue Curacao: Once your chocolate mixture is smooth, gently mix in 2 tablespoons of Blue Curacao, ensuring that it is fully incorporated for a beautiful, even color throughout.
- Chill the Mixture: Cover the bowl with plastic wrap or a lid and place it in the refrigerator for 2 hours. This step is crucial as it allows the mixture to firm up, making it easier to roll into truffles.
- Prep for Rolling: While waiting for the mixture to chill, line a baking sheet with parchment paper and pour 1/2 cup of sanding sugar into a shallow bowl. This will prepare your workspace for shaping the truffles.
- Form the Truffles: Using a teaspoon, scoop heaping spoonfuls of the chilled mixture and roll them gently between your palms to form balls. The size is up to you, but approximately 1-inch balls are ideal. Once formed, roll each ball in the sanding sugar, ensuring an even coating for a beautiful finish.
- Set the Truffles: Place the coated truffles onto the prepared baking sheet, giving them a bit of space. Once all truffles are formed, return them to the refrigerator and chill for an additional 1 hour to set completely.
- Store: If you don’t plan to serve the truffles immediately, keep them in the refrigerator until serving. Leftovers can be stored in an airtight container to maintain their freshness.
Variations and Customizations
One of the most exciting aspects of making Blue Christmas Truffles is the flexibility to customize according to your preferences or dietary needs. Here are several ways to change it up:
- Add a tiny pinch of sea salt on top of each truffle for a delightful contrast to the sweetness.
- Experiment with a different base by using milk chocolate or dark chocolate chips to alter the flavor profile.
- If you prefer nutty flavors, consider incorporating finely chopped nuts into the mixture before chilling.
- For a unique twist, replace Blue Curacao with a flavored syrup like raspberry or pomegranate for different colors and tastes.
- For a festive touch, incorporate softened cream cheese into the chocolate mixture for a tangy variation.
Serving Suggestions
These delightful Blue Christmas Truffles are not only pleasing to the palate but also visually attractive, making them perfect for various occasions. Here are some serving suggestions:
- On a Platter: Arrange the truffles on a decorative platter, garnished with fresh mint leaves or edible glitter for an extra festive touch.
- With Beverages: Pair these truffles with hot cocoa, coffee, or a glass of sparkling cider to complement their sweetness.
- As Party Favors: Package these truffles in cute holiday-themed boxes or bags to give as thoughtful party favors.
- At Gatherings: These truffles are an excellent addition to holiday potlucks, family get-togethers, or office parties, sparking conversation and delight!
Tips for Success
To ensure your Blue Christmas Truffles turn out wonderfully, keep these tips in mind:
- If the chocolate mixture is too soft after refrigeration, it may need to chill longer or be returned to the refrigerator briefly before rolling.
- Use a cookie scoop for even portions when forming truffles, ensuring they are uniformly sized for better presentation.
- Store leftovers in an airtight container in the refrigerator for up to two weeks, though they may not last that long—they’re that good!
- To freeze the truffles, place them in a single layer on a baking sheet until firm, then transfer to an airtight container, lasting up to three months. Thaw in the refrigerator before serving.
FAQs
Can I use other types of chocolate?
Yes! While this recipe calls for white chocolate, feel free to substitute milk or dark chocolate for a richer flavor. Just be mindful that this change will alter the final taste and appearance.
Is there a non-alcoholic option for the Blue Curacao?
Absolutely! You can use a non-alcoholic blue syrup or blue sports drink to mimic the flavor and color without the alcohol.
Can I make these truffles in advance?
Yes, these truffles can be made ahead of time and stored in the refrigerator. They actually improve with resting time as the flavors meld!
What can I do if my chocolate isn’t melting smoothly?
Make sure you are heating the chocolate in short intervals and stirring thoroughly. Adding a touch more heavy cream can also help achieve a smoother consistency.
How should I store leftover truffles?
Store leftover truffles in an airtight container in the refrigerator, and they should remain fresh for up to two weeks.
Conclusion
Blue Christmas Truffles are not just a feast for the eyes; they are a delicious delight that embodies the spirit of the festive season. With their unique flavor from Blue Curacao and the smooth richness of white chocolate, these truffles are bound to impress friends and family alike. By following the steps outlined in this article, you’ll create a dessert that’s perfect for any holiday gathering or cozy family celebration. Don’t hesitate to experiment with variations to find your perfect twist on this festive treat. We encourage you to try making these truffles and share your experiences—whether through comments or social media. Happy holiday baking!
Print
Delicious Blue Christmas Truffles
Description
Treat yourself to delicious blue Christmas truffles—rich, creamy, and perfect for holiday gifting or festive celebrations. A sweet seasonal treat.
Ingredients
- 2 cups white chocolate chips: The base of your truffles, providing a creamy and sweet flavor profile.
- 2 tbsp heavy cream: This rich cream is vital for creating a smooth, luxurious texture that binds the chocolate and adds depth.
- 2 tbsp Blue Curacao: A vibrant orange-flavored liqueur that not only brings a unique taste but also transforms your truffles into a festive treat.
- 1/2 cup sanding sugar: This sugary coating not only adds sweetness but also gives the truffles a delightful crunch and sparkle.
Instructions
- Melt the Chocolate: In a microwave-safe bowl, combine 2 cups of white chocolate chips and 2 tablespoons of heavy cream. Heat in the microwave at 30-second intervals, stirring well after each interval until the mixture is completely smooth and melted, akin to a silky sauce.
- Add Blue Curacao: Once your chocolate mixture is smooth, gently mix in 2 tablespoons of Blue Curacao, ensuring that it is fully incorporated for a beautiful, even color throughout.
- Chill the Mixture: Cover the bowl with plastic wrap or a lid and place it in the refrigerator for 2 hours. This step is crucial as it allows the mixture to firm up, making it easier to roll into truffles.
- Prep for Rolling: While waiting for the mixture to chill, line a baking sheet with parchment paper and pour 1/2 cup of sanding sugar into a shallow bowl. This will prepare your workspace for shaping the truffles.
- Form the Truffles: Using a teaspoon, scoop heaping spoonfuls of the chilled mixture and roll them gently between your palms to form balls. The size is up to you, but approximately 1-inch balls are ideal. Once formed, roll each ball in the sanding sugar, ensuring an even coating for a beautiful finish.
- Set the Truffles: Place the coated truffles onto the prepared baking sheet, giving them a bit of space. Once all truffles are formed, return them to the refrigerator and chill for an additional 1 hour to set completely.
- Store: If you don’t plan to serve the truffles immediately, keep them in the refrigerator until serving. Leftovers can be stored in an airtight container to maintain their freshness.
