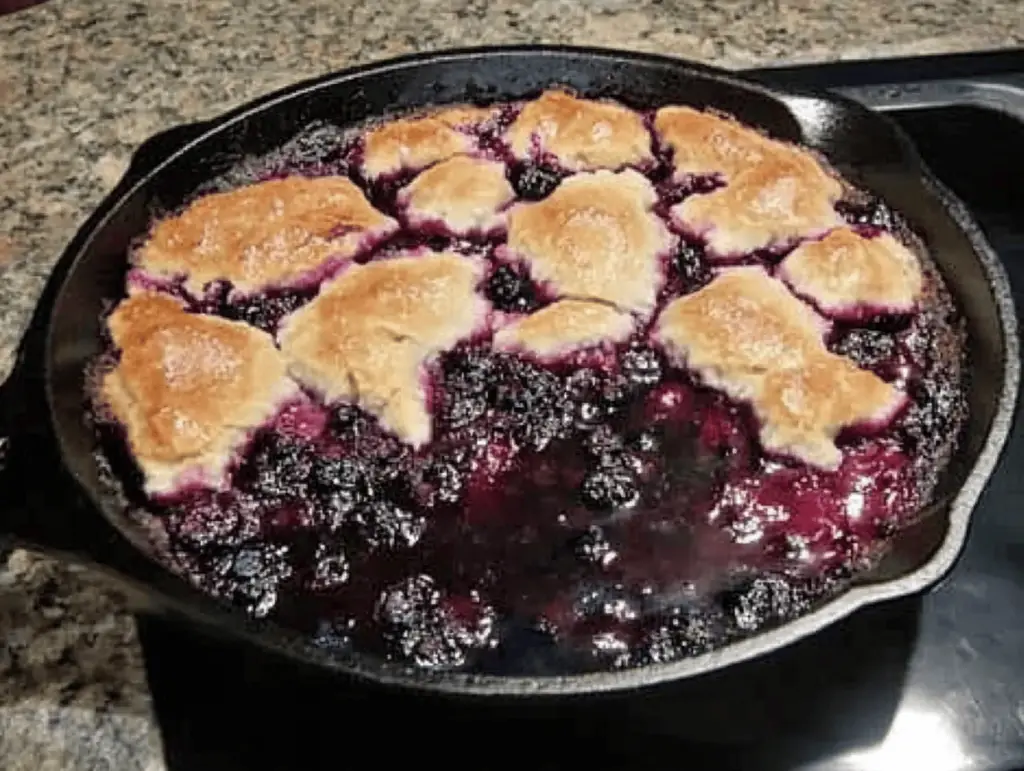
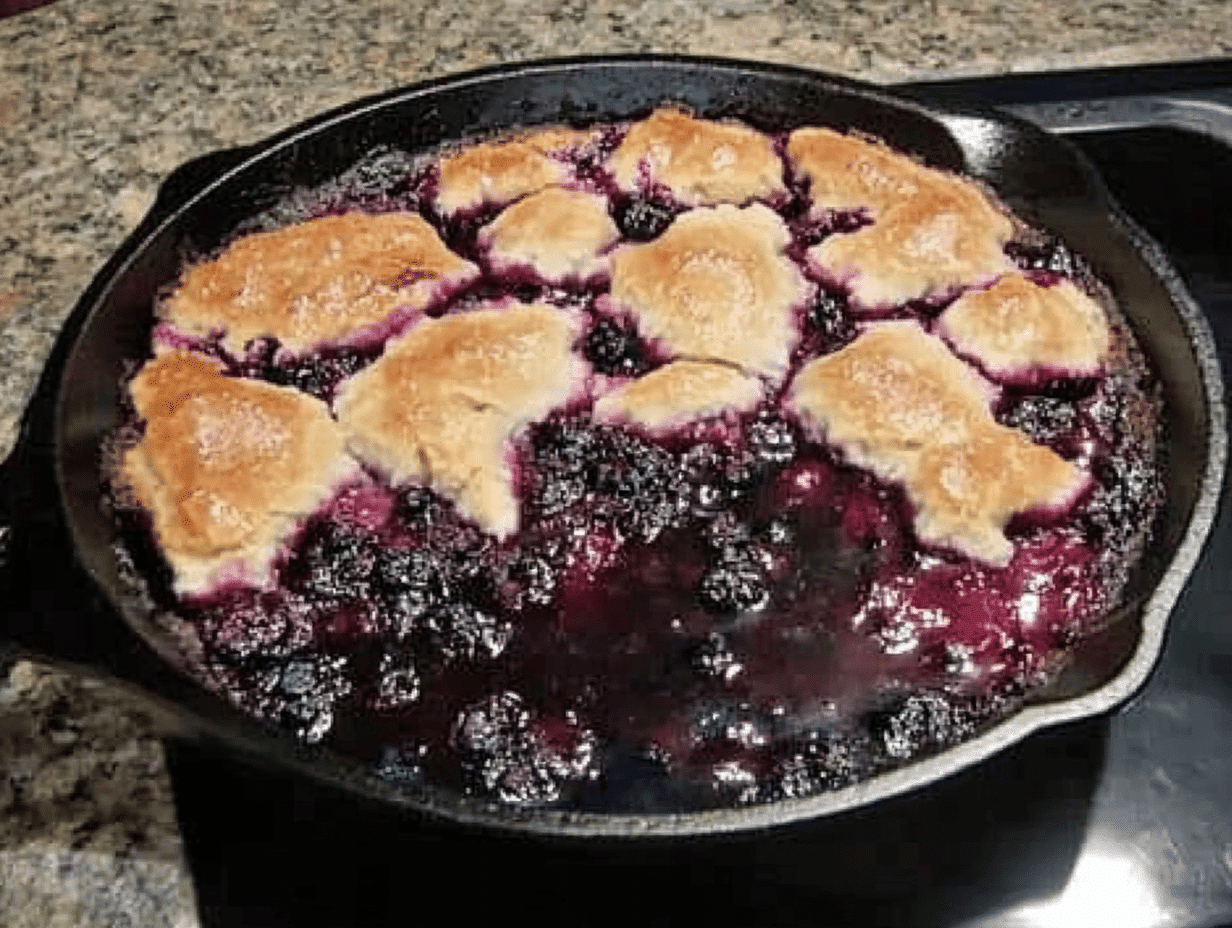
There’s nothing quite like the satisfaction of a freshly baked dessert, and blackberry cobbler is a timeless classic that delivers deliciousness in every bite. This beloved dish, with its warm, gooey blackberries topped with a buttery, cake-like crust, evokes feelings of nostalgia with every spoonful. Whether you’re relaxing at home, celebrating a family gathering, or looking for a sweet treat to share with friends, this homemade blackberry cobbler is the perfect recipe to whip up. In this article, you’ll learn about the rich history of this comforting dessert, a detailed breakdown of the ingredients, step-by-step instructions, variations to suit your taste, and tips for serving and storage to ensure your cobbler is a hit on any occasion.
Understanding the Recipe
The roots of blackberry cobbler can be traced back to the early settlers in America, blending influences from British puddings and Native American cuisine. This dish became particularly popular in the Southern United States, where blackberry bushes grew abundantly. Making cobbler is more than just a cooking method; it’s an invitation to gather around the table, share stories, and create lasting memories. The use of fresh blackberries not only adds vibrant color but also offers a sweet-tart flavor that balances beautifully with the richness of the crust. This delightful dessert is especially comforting at family gatherings, where the aroma wafts through the air, drawing everyone to the kitchen. By the end of this article, you’ll have all the knowledge you need to create your own blackberry cobbler, bringing a piece of Southern tradition to your home.
Ingredient Breakdown
To create a delicious blackberry cobbler, high-quality ingredients play a crucial role. Here’s a closer look at each one:
- 2 1/2 cups fresh blackberries: These juicy fruits are the star of the dish. They add sweetness and a tart flavor that contrasts wonderfully with the crust. Fresh blackberries yield the best results, but you can also use frozen blackberries if fresh ones are unavailable.
- 1 cup sugar: This ingredient is essential for sweetening the blackberries as they macerate and helps form a delightful syrup during baking.
- 1 cup all-purpose flour: The flour forms the basis of the batter, providing structure and texture to the cobbler.
- 2 teaspoons baking powder: The leavening agent ensures that the batter rises and becomes fluffy, creating a perfect contrast with the tender blackberries.
- 1/2 teaspoon salt: A pinch of salt amplifies the sweetness of the dish and balances the flavors beautifully.
- 1 cup milk: Milk adds moisture to the batter, allowing it to blend smoothly and bake into a cake-like consistency.
- 1 stick of unsalted butter, melted: Butter contributes richness and flavor, creating a delicious crust that pairs perfectly with the juicy filling.
For those with dietary restrictions, consider using alternative sweeteners like agave or coconut sugar for a lower-glycemic option. If you’re looking for a gluten-free option, substitute all-purpose flour with a 1:1 gluten-free flour blend, keeping in mind that it may slightly alter the texture. Regardless of the variations, using quality ingredients will yield a delicious cobbler.
Step-by-Step Instructions
Ready to bake? Follow these simple steps to create your homemade blackberry cobbler:
- Prepare the blackberries: In a large bowl, combine 2 1/2 cups fresh blackberries and 1 cup sugar. Stir gently and let the mixture sit for 25-30 minutes to allow the blackberries to macerate, releasing their juices and creating a delightful syrup.
- Preheat the oven: Set your oven to 375°F (190°C) to ensure it’s ready for the cobbler when it’s time to bake.
- Make the batter: In another bowl, combine 1 cup all-purpose flour, 2 teaspoons baking powder, 1/2 teaspoon salt, and 1 cup milk. Stir the mixture until thoroughly combined. Then, pour in 1 stick of melted unsalted butter and stir until the batter is smooth.
- Assemble the cobbler: Grease a baking dish lightly (no need for excessive grease!) and pour the batter into the dish, spreading it evenly. This forms the base for the blackberry topping.
- Add the blackberries: Carefully pour the macerated blackberries with their syrup over the batter, spreading them evenly on top. Do not stir; the blackberries will settle into the batter during baking.
- Bake: Place the baking dish in the preheated oven and bake for 45 minutes to 1 hour or until the top is golden brown and the cobbler is set, with bubbling juices around the edges. A toothpick inserted into the center should come out clean.
- Cool and serve: Once baked, remove the cobbler from the oven and let it cool for at least 15 minutes before serving, allowing the flavors to settle.
Enjoy your cobbler warm or at room temperature, and consider serving it with a dollop of whipped cream or a drizzle of warm cream for that extra touch of indulgence!
Variations and Customizations
This blackberry cobbler recipe is delightful as is, but there are plenty of ways to customize it to suit your taste and dietary preferences:
- Fruity twists: Experiment with other fruits like raspberries, blueberries, or chopped peaches. You can even blend different fruits for a unique flavor experience.
- Spiced addition: For added warmth and flavor, incorporate spices such as cinnamon or nutmeg into the batter or sprinkle them on top of the blackberries before baking.
- Dairy alternatives: For a dairy-free cobbler, substitute milk with almond milk, oat milk, or coconut milk. Make sure to use a vegan butter substitute to keep it fully dairy-free.
- Gluten-free option: As previously mentioned, using a gluten-free flour blend will cater to those avoiding gluten. You might need to adjust the baking powder to suit the specific flour blend used.
No matter how you choose to customize your blackberry cobbler, the key is to have fun and enjoy the baking process!
Serving Suggestions
Your blackberry cobbler will be a hit served straight from the oven, but there are plenty of creative ways to present this delicious dessert:
- Garnishes: A sprinkle of powdered sugar, a scoop of vanilla ice cream, or a dollop of whipped cream elevates the dish’s presentation and adds creamy textures.
- Pairing sides: Serve with a light fruit salad or a scoop of yogurt to balance the sweetness of the cobbler. A warm cup of tea or freshly brewed coffee makes for a lovely accompaniment.
- Occasions: This cobbler is perfect for family dinners, potlucks, or gatherings. It’s equally delightful during summer BBQs, holiday celebrations, or cozy evenings on the couch.
No matter the occasion, serving your blackberry cobbler warmly will create a warm and inviting atmosphere for all your guests!
Tips for Success
To ensure your blackberry cobbler turns out perfectly, consider the following tips:
- Quality ingredients: Always opt for fresh, high-quality blackberries. The flavor and sweetness can make a significant difference in the final product.
- Mixing the batter: Do not overmix the batter; a few lumps are okay. Overmixing can lead to a dense texture instead of the light and fluffy result you’re aiming for.
- Cooling time: Avoid serving the cobbler immediately out of the oven. Allow it to cool for a good 15-30 minutes to set, making it easier to serve and enhancing its flavor.
- Storage: Store any leftovers in an airtight container at room temperature for 2-3 days. It can also be refrigerated if you want to extend its shelf life. For longer storage, consider freezing the cobbler.
When reheating, simply warm it in the oven at a low temperature, and enjoy it all over again!
FAQs
Here are some frequently asked questions about making blackberry cobbler:
- Can I use frozen blackberries? Absolutely! Frozen blackberries can be used in place of fresh. Just add a few extra minutes to the cooking time to account for the extra moisture.
- What if I don’t have all-purpose flour? You can substitute with a gluten-free flour blend or whole-wheat flour. The flavor and texture might change slightly, but the dish will still be delicious.
- Can I make the cobbler ahead of time? Yes! You can prepare the cobbler and store it in the fridge before baking. Just bring it back to room temperature before placing it in the oven.
- What’s the best way to store leftover cobbler? Cover the cobbler with plastic wrap or transfer it to an airtight container. It will stay fresh for up to three days at room temperature or can be kept longer in the fridge.
- Can I add other flavors? Definitely! Consider adding lemon zest, almond extract, or even vanilla to the batter for a unique flavor profile.
Conclusion
Homemade blackberry cobbler is more than just a dessert; it’s a piece of culinary history that brings warmth and comfort to any table. With its juicy blackberries and delightful crust, it’s a recipe that anyone can master and enjoy. The detailed steps, ingredient insights, and serving suggestions provided in this article will ensure you create a beautifully baked cobbler that dazzles your taste buds. So gather your ingredients, embrace the joy of baking, and share your cobbler with loved ones. We can’t wait to hear about your delicious results and see how you make this recipe your own!
Homemade Blackberry Cobbler
Ingredients
Method
- Prepare the blackberries: In a large bowl, combine 2 1/2 cups fresh blackberries and 1 cup sugar. Stir gently and let the mixture sit for 25-30 minutes to allow the blackberries to macerate, releasing their juices and creating a delightful syrup.
- Preheat the oven: Set your oven to 375°F (190°C) to ensure it’s ready for the cobbler when it’s time to bake.
- Make the batter: In another bowl, combine 1 cup all-purpose flour, 2 teaspoons baking powder, 1/2 teaspoon salt, and 1 cup milk. Stir the mixture until thoroughly combined. Then, pour in 1 stick of melted unsalted butter and stir until the batter is smooth.
- Assemble the cobbler: Grease a baking dish lightly (no need for excessive grease!) and pour the batter into the dish, spreading it evenly. This forms the base for the blackberry topping.
- Add the blackberries: Carefully pour the macerated blackberries with their syrup over the batter, spreading them evenly on top. Do not stir; the blackberries will settle into the batter during baking.
- Bake: Place the baking dish in the preheated oven and bake for 45 minutes to 1 hour or until the top is golden brown and the cobbler is set, with bubbling juices around the edges. A toothpick inserted into the center should come out clean.
- Cool and serve: Once baked, remove the cobbler from the oven and let it cool for at least 15 minutes before serving, allowing the flavors to settle.