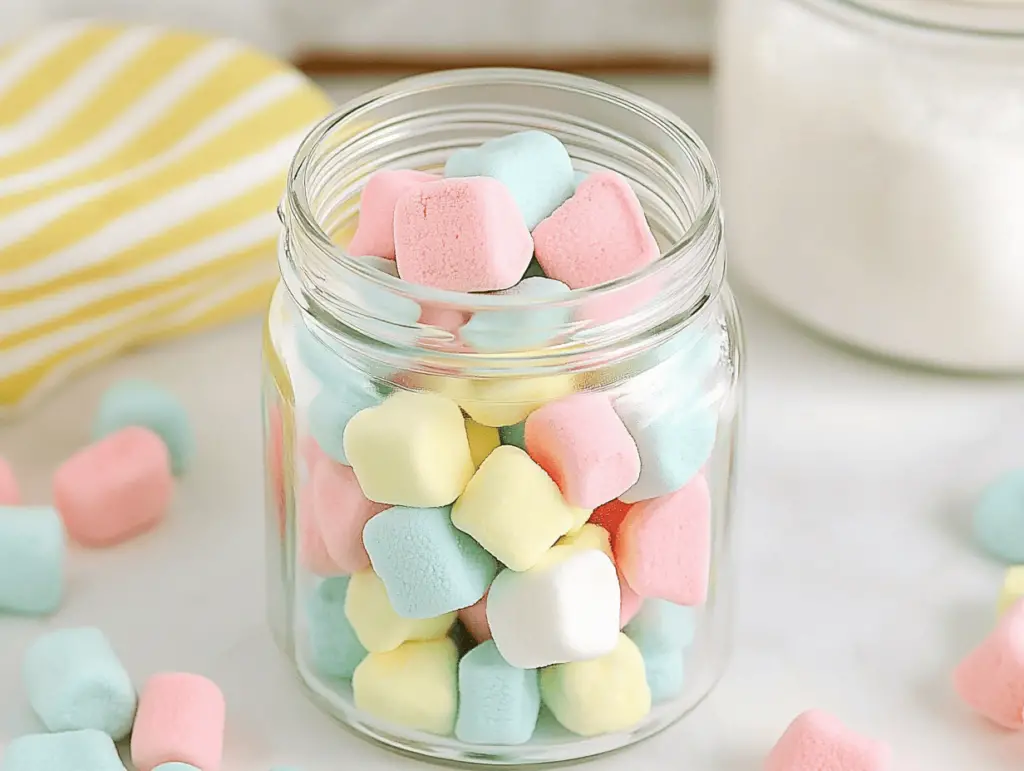
Homemade Butter Mints are the perfect sweet indulgence that everyone can enjoy. With their creamy texture and refreshing peppermint flavor, these mints are not only delightful after-dinner treats but also make for charming party favors. Whether you’re planning a baby shower, hosting a wedding, or celebrating a holiday gathering, these mints will surely impress your guests. The best part is, they melt in your mouth, leaving behind a satisfying taste that keeps you coming back for more. In this article, you will learn how to make these delicious butter mints from scratch, get insights on their cultural significance, and discover tips and variations to customize this simple yet delightful treat.
Understanding the Recipe
Butter mints hold a unique place in American culinary tradition, often associated with celebrations and joyful gatherings. They were widely popularized in the mid-20th century, especially at weddings and formal events, as a sweet and refreshing end to a meal. The combination of butter and peppermint offers a creamy, melt-in-your-mouth experience that excites the palate. As a child, I remember my grandmother making these mints during holiday seasons, filling our house with a sweet aroma that signified the joy of togetherness and celebration. Homemade Butter Mints are comforting in their simplicity, yet they provide an elegant touch to any occasion. In this recipe, we will explore how to create these delightful mints at home using just a few basic ingredients.
Ingredient Breakdown
To create your own batch of Homemade Butter Mints, here’s what you’ll need:
- 1 stick (½ cup) unsalted butter: The star of this recipe, butter provides creaminess and a rich flavor. Using unsalted butter allows for better control of the overall taste.
- 1 tbsp whipping cream: This ingredient adds a light texture and helps the mints remain soft and creamy, contributing to their melt-in-your-mouth quality.
- 4 cups powdered sugar (plus more for dusting): The sweet base of the mints. Powdered sugar dissolves easily and aids in achieving the desired consistency.
- ½ tsp pure peppermint extract: This provides the refreshing flavor that makes these mints special. Opt for high-quality, pure peppermint extract for the best taste.
- 1-4 drops food coloring (optional): Used for aesthetic purposes to brighten the mints and add a playful touch. Choose colors that align with the theme of your event.
High-quality ingredients are essential for obtaining the best flavor and texture. If you have specific dietary restrictions, you can substitute the unsalted butter with a dairy-free butter alternative, and powdered sugar can be replaced with powdered coconut sugar for a slightly different flavor profile.
Step-by-Step Instructions
Here’s how to make Homemade Butter Mints step by step:
- Mix the Base: In a stand mixer, combine 1 stick (½ cup) unsalted butter, 1 tbsp whipping cream, 1 cup powdered sugar, and ½ tsp pure peppermint extract. Beat until the mixture is smooth and creamy.
- Incorporate More Sugar: Gradually add the remaining 3 cups powdered sugar, a little at a time, until the dough pulls away from the sides of the bowl and is not sticky.
- Divide and Color: Divide the dough into sections based on how many colors you’d like. If using, add 1-4 drops of food coloring to each section and knead until the color is evenly distributed.
- Chill the Dough: Wrap each colored portion in plastic wrap and place them in the refrigerator to chill for about 1 hour. This helps firm up the dough, making it easier to roll.
- Shape the Mints: Remove the dough from the refrigerator and roll each portion into ropes approximately ½ inch in diameter. Cut the ropes into bite-sized pieces, about ½ inch long.
- Dry and Store: Place the cut pieces on a parchment-lined baking sheet and let them dry for about 12 hours at room temperature. Once dried, store the mints in an airtight container at room temperature for up to 2 weeks.
For best results, ensure the butter is softened to room temperature before mixing, as this creates a better emulsification and a smoother texture for your mints. Additionally, if the dough seems too sticky, feel free to add more powdered sugar until you reach the desired consistency.
Variations and Customizations
While this recipe is delightful as is, you can customize your Homemade Butter Mints in several ways:
- Flavor Variations: Instead of peppermint extract, try using other flavors such as lemon, almond, or orange extract to create a unique twist.
- Color Themes: Use seasonal colors to match holidays or special events. For example, use red and green for Christmas or pastel colors for Easter.
- Textured Mints: For a different texture, you can add finely crushed peppermint candies to the dough before rolling.
- Vegan Option: Substitute unsalted butter with a plant-based alternative and use coconut cream instead of whipping cream to create a delicious vegan version.
- Healthier Choice: Consider using organic powdered sugar or coconut sugar to boost the nutritional profile of your mints.
Serving Suggestions
Homemade Butter Mints can be presented beautifully for any occasion. Here are some serving suggestions:
- Garnishes: Dust the mints with a sprinkle of powdered sugar for a charming finish.
- Ideally Paired Beverages: Serve these mints alongside coffee, tea, or hot chocolate, as they complement the beverages perfectly.
- Perfect Occasions: These mints are an excellent addition to wedding receptions, baby showers, holiday parties, or even casual family dinners. They can be presented in decorative tins or jars as party favors, adding a personal touch.
Tips for Success
To help you make the best Homemade Butter Mints, here are some practical tips:
- Consistency Check: Ensure the dough is kneaded enough; it should not stick to your hands or the work surface. If necessary, use additional powdered sugar.
- Storage: Keep mints in an airtight container at room temperature. If storing leftovers, ensure they are completely dried before transferring to avoid clumping.
- Freezing Tips: To freeze, place mints in airtight containers or freezer bags and consume within 2 months for best flavor and texture. Thaw them at room temperature before serving.
FAQs
Here are some frequently asked questions about making Homemade Butter Mints:
- Can I use margarine instead of butter? While margarine can be used, it may alter the flavor and texture of the mints. Unsalted butter is preferred for the best results.
- What can I use if I don’t have peppermint extract? If you don’t have peppermint extract, you can substitute it with other extracts like spearmint, vanilla, or any flavor you enjoy!
- How do I store leftover mints? Store leftover mints in an airtight container at room temperature for up to 2 weeks. Ensure they are completely dry before storage to prevent sticking.
- Can I use liquid food coloring? Yes, liquid food coloring can be used, but be careful with the amount to avoid altering the dough’s consistency.
- Is it necessary to chill the mints after making them? Yes, chilling helps set the mints and makes them easier to shape and cut. It also improves their texture.
Conclusion
In conclusion, Homemade Butter Mints are a delightful treat that can elevate any gathering, whether it’s a formal event or a casual get-together. Their creamy texture and refreshing flavor offer a sweet ending to meals, while their customizability makes them perfect for various occasions. By following this recipe, you will impress your family and friends with a charming and delicious handmade confection. So gather your ingredients, roll up your sleeves, and enjoy making these delightful mints at home. Don’t forget to share your experiences and variations with fellow mint enthusiasts through comments or social media!
Print
Homemade Butter Mints
Description
Make delicious homemade butter mints that melt in your mouth. Perfect for parties, weddings, or a sweet treat any time.
Ingredients
- 1 stick (½ cup) unsalted butter: The star of this recipe, butter provides creaminess and a rich flavor. Using unsalted butter allows for better control of the overall taste.
- 1 tbsp whipping cream: This ingredient adds a light texture and helps the mints remain soft and creamy, contributing to their melt-in-your-mouth quality.
- 4 cups powdered sugar (plus more for dusting): The sweet base of the mints. Powdered sugar dissolves easily and aids in achieving the desired consistency.
- ½ tsp pure peppermint extract: This provides the refreshing flavor that makes these mints special. Opt for high-quality, pure peppermint extract for the best taste.
- 1–4 drops food coloring (optional): Used for aesthetic purposes to brighten the mints and add a playful touch. Choose colors that align with the theme of your event.
Instructions
- Mix the Base: In a stand mixer, combine 1 stick (½ cup) unsalted butter, 1 tbsp whipping cream, 1 cup powdered sugar, and ½ tsp pure peppermint extract. Beat until the mixture is smooth and creamy.
- Incorporate More Sugar: Gradually add the remaining 3 cups powdered sugar, a little at a time, until the dough pulls away from the sides of the bowl and is not sticky.
- Divide and Color: Divide the dough into sections based on how many colors you’d like. If using, add 1-4 drops of food coloring to each section and knead until the color is evenly distributed.
- Chill the Dough: Wrap each colored portion in plastic wrap and place them in the refrigerator to chill for about 1 hour. This helps firm up the dough, making it easier to roll.
- Shape the Mints: Remove the dough from the refrigerator and roll each portion into ropes approximately ½ inch in diameter. Cut the ropes into bite-sized pieces, about ½ inch long.
- Dry and Store: Place the cut pieces on a parchment-lined baking sheet and let them dry for about 12 hours at room temperature. Once dried, store the mints in an airtight container at room temperature for up to 2 weeks.
