
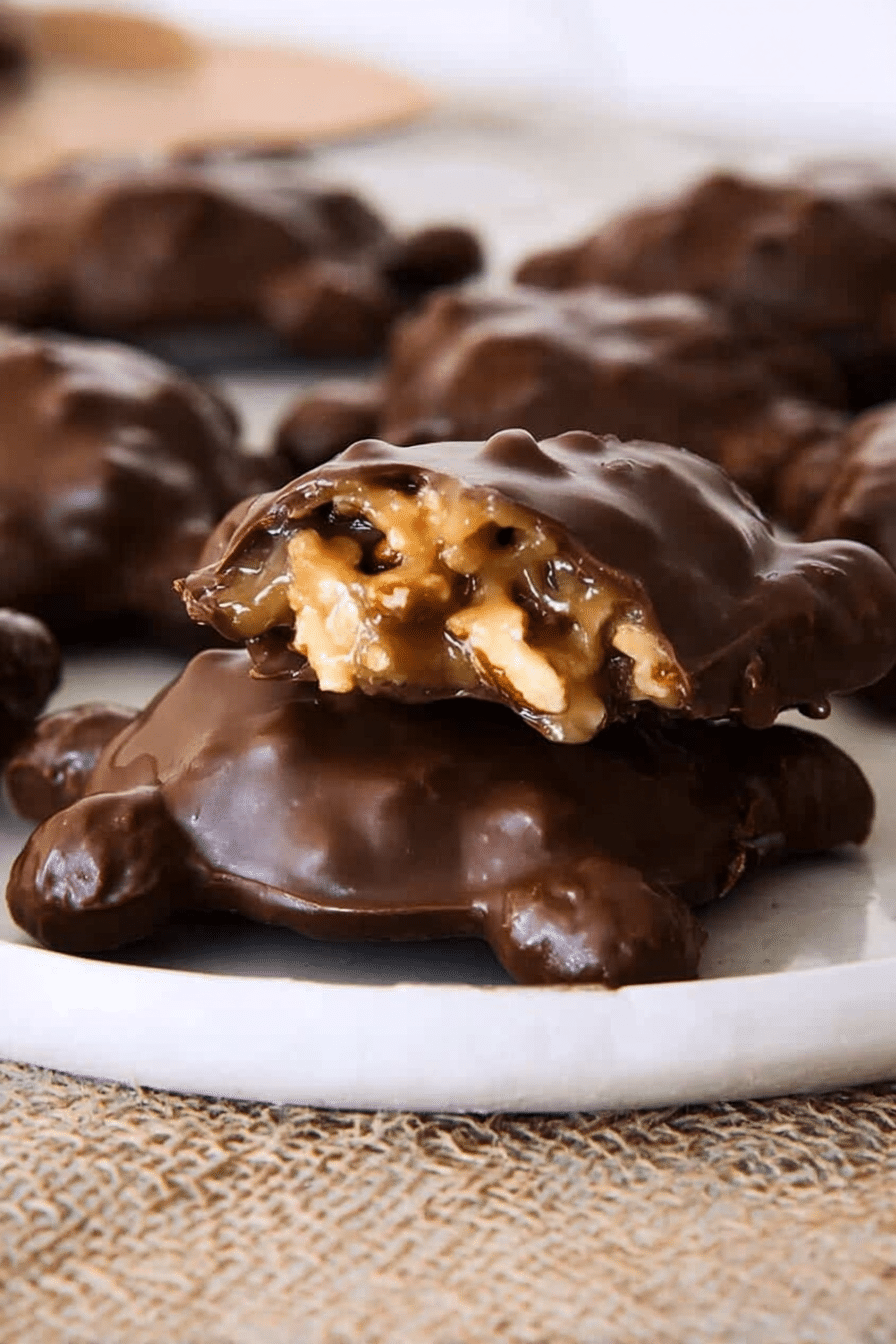
Chocolate turtles are one of those candies that throw you straight back to holiday cookie trays and classroom party swaps: glossy chocolate, buttery caramel, and a cluster of toasted pecans that crack when you bite into them. I first made these in a cramped apartment kitchen with a crooked baking sheet and a single microwave-safe bowl, and the smell of hot caramel filled the hallway — my neighbor knocked on the door asking if they could buy a few. Making turtles at home is part nostalgia, part chemistry, and all comfort. You get to control the chocolate, the caramel depth, and how generously you pile on the pecans.
Learn how to make turtle candy with a recipe for Turtle Candy with Pecans and Caramel that’s sure to evoke nostalgic memories.
Over the years I’ve tuned this microwave-caramel approach so it’s quick enough for weeknight projects but stable and polished enough for gift boxes. Below I walk you through the exact steps I used last holiday season when I made three batches in one afternoon — there are notes about what I saw, smelled, and fixed as I went, so you don’t have to discover the pitfalls the hard way.
Ingredients Needed for Chocolate Turtles
- Butter – adds richness to the caramel base and helps the caramel set with a smooth mouthfeel; use salted for balanced flavor or unsalted if you prefer control.
- Brown sugar – gives the caramel a deeper, molasses-like flavor and helps with chewiness.
- Granulated sugar – provides sweetness and structure in the caramel.
- Sweetened condensed milk – keeps the microwave caramel creamy and glossy; it shortens cooking time and prevents grainy texture.
- Corn syrup – inhibits crystal formation so your caramel stays smooth instead of becoming gritty.
- Vanilla extract – brightens and rounds the caramel flavor at the end.
- Pecan halves – the classic choice; toast them to deepen the flavor and add crunch. Walnuts are a fine substitute if you prefer.
- Almond bark or high-quality chocolate – use almond bark for convenience (it melts smoothly and sets quickly) or a good chocolate (dark, milk, or a mix) for superior flavor — temper if you’re after a shiny snap.
Pair your turtle candies with a rich dessert like our Chocolate-Peanut Butter Cake for an indulgent experience.
Step-by-Step Instructions on Making Chocolate Turtles
Below is the tested recipe I used, with accurate amounts and times. I include microwave timings, an alternate skillet step for toasting nuts, and a tempering method so your turtles look professional.
- Preheat the oven to 350°F (175°C) if you plan to toast pecans in the oven. Toss pecan halves on a rimmed baking sheet in a single layer.
Toast and chop pecans: bake for 5–10 minutes, stirring once, until toasted and fragrant but not burned. (If you prefer, toast them in a dry skillet over medium heat, stirring constantly for about 5 minutes until they smell toasty. I do the skillet when I’m making a small batch — it’s faster and you get more control.) Once cooled, roughly chop and set aside.
- Line a baking sheet with parchment paper or a silpat and set aside. This is essential — the caramel will stick to bare metal and be a nightmare to remove.
- Microwave Caramel: In a large microwave-safe bowl, melt the butter first so you don’t scorch the sugars. Add 6 tablespoons salted butter, 1/2 cup packed light brown sugar, 1/2 cup granulated sugar, 1/2 cup sweetened condensed milk, and 1/2 cup light corn syrup. Stir to combine.
Return the bowl to the microwave and cook on HIGH in 1-minute bursts at first, stirring between bursts. Total time should be about 6–8 minutes, but microwave power varies. I check at 6 minutes with an instant-read thermometer — you’re aiming for about 235°F (soft-ball stage). If you don’t have a thermometer, use the ice-water test described below.
Ice water test: spoon a small amount into a cup of ice water and pinch — it should form a soft ball that can be pressed. If it’s still too runny, microwave 20–30 seconds more and test again. I keep a bowl of ice water by the microwave and test every 20–30 seconds once I’m close; it’s surprisingly fast to jump from underdone to perfect.
- Remove bowl carefully with hot pads. Immediately stir in 1/2 teaspoon vanilla extract and then fold in the chopped pecans. The caramel is hot and glossy; the steam rising smells like browned butter with a hint of toffee. At this point the mixture should be thick enough to hold shape but still pliable.
- Form turtles: Using two spoons (or an ice cream scooper for more uniform size), drop large spoonfuls of the caramel-pecan mixture onto the prepared sheet to make individual mounds. I usually get about 20 mounds with the given quantities — the recipe’s yield is around 20, depending on how large you mound them.
Refrigerate the sheet until the caramel mounds set, roughly 20 minutes. They’ll be firm to the touch but still slightly yielding in the center. This chill step makes the dipping stage much cleaner.
- Melt the chocolate or almond bark: place 16 ounces almond bark or chopped high-quality chocolate in a microwave-safe bowl. Microwave at 50% power in 30-second intervals, stirring between intervals, until smooth. Alternatively, use a double boiler: simmer a small amount of water in a saucepan and set the bowl on top, making sure the water does not touch the bowl.
If you’re using real chocolate and want a glossy snap, temper it — see the tempering tips below.
- Dip: Using a fork, drop a caramel-pecan mound into the melted chocolate and coat it completely. Lift it out, tap the fork on the bowl edge to let excess chocolate fall back, then transfer the turtle to the parchment-lined sheet. Repeat until everything is coated. The chocolate will firm up as it cools — if you see streaks or bloom later, it probably wasn’t tempered.
- Store: Keep turtles in an airtight container at room temperature or chill if you prefer a firmer bite. They keep 2–3 weeks in the fridge or about 1–2 weeks at cool room temperature. I pack them in layers separated by parchment for gifting.
Tempering Chocolate (Optional, for a Professional Finish)
If you want turtles with a glossy shine and a clean snap that won’t bloom as they age, temper the chocolate. Here’s the seed method I use — it’s forgiving and works on the stovetop or in a microwave.
- Chop 75% of your chocolate finely and place in a heatproof bowl. Reserve 25% of the chocolate as ‘seed’ (small pieces).
- Gently melt the 75% chocolate over simmering water (double boiler) or carefully in the microwave at 50% power in short bursts, stirring frequently. Heat dark chocolate to about 115°F–120°F, milk and white chocolate slightly lower (around 105°F–110°F).
- Remove from heat and stir in the reserved seed chocolate, lowering the temperature to about 88°F–90°F for dark chocolate (a bit higher for milk chocolate). Stir constantly until all the seed has melted and the chocolate looks smooth and glossy.
- Keep the tempered chocolate at that working temperature. If it cools too much, rewarm very gently; if it gets too warm, add more seed chocolate to bring it back down.
Tempered chocolate requires a little practice, but even a slightly under-tempered chocolate will still taste great — it just might not be quite as shiny or have as clean a snap.
Tips for Perfecting Your Homemade Chocolate Turtles
- Avoid seizing chocolate – Chocolate seizes if it gets water in it. Keep all utensils dry. If it does seize, add a teaspoon of neutral oil (like vegetable) or a little warm cream and stir; it will loosen, though texture can change.
- Caramel consistency – The caramel must reach soft-ball stage (~235°F) for the right chew. Undercook it and your turtles will be too soft and sticky; overcook it and they’ll be hard and brittle. Use an instant-read thermometer or the ice-water test for accuracy.
- Nut adhesion – If your pecans slide off, the caramel either wasn’t hot enough to stick to them when formed, or the chocolate was too runny and pushed them away. Toast pecans for better grip and allow caramel mounds to cool enough that they keep shape but still have some tack.
- Work in batches – Chocolate firms up as it cools. Melt more chocolate than you think you’ll need or keep leftovers warm by placing the bowl over a barely-warm water bath.
- Patience – Let the caramel cool slightly before dipping. If it’s too hot the chocolate will become thin and runny, and the finished look will be messy.
- Fixing grainy caramel – If the caramel becomes grainy, it usually indicates sugar crystallization. A short, gentle reheat with a tablespoon of corn syrup stirred in can help smooth it out.
- Serving temperature – These taste best at cool room temperature. Straight from the fridge they’re firmer and more candy-like; off the shelf they’re softer and chewier.
Unique Variations on the Classic Recipe
If you love turtles, try our No-Bake Turtle Mini Cheesecakes for a refreshing twist on the classic treat.
- Dark chocolate + sea salt – Swap some or all of the chocolate for a 70% dark variety and sprinkle flaky sea salt on top right after dipping for a salty-sweet contrast.
- Espresso turtles – Add a teaspoon of instant espresso powder to the caramel for a coffee-kissed depth that cuts through the sweetness.
- Peppermint turtles – Add a drop or two of peppermint extract to the chocolate and top with crushed candy cane for a holiday version. Be conservative—peppermint can overpower.
- Mixed nuts – Replace pecans with a mix of almonds and hazelnuts for a different crunch and flavor profile; note that almonds are firmer and change the mouthfeel.
- White chocolate drizzle – Finish dark-chocolate-coated turtles with a thin drizzle of melted white chocolate for contrast and pretty presentation.
For another delightful option, consider our Turtle Bars that combine the same delicious flavors in a different form.
Gift Packaging Ideas for Chocolate Turtles
- Simple cello bags – Put 6–8 turtles in a clear cellophane bag, tie with twine and a hand-written tag. Add a sprig of rosemary for a holiday touch.
- Decorative boxes – Line a small box with parchment and stack turtles in layers separated by parchment squares. This prevents sticking and looks tidy.
- Glass jars – Fill a mason jar with turtles and add a festive fabric lid cover. Jars are great for shipping short distances since the rigid container protects the candies.
- Labels and notes – Include a brief note with storage instructions (“Store in a cool, dry place or refrigerate for a firmer bite”) and an ingredients list to help recipients with allergies.
- Temperature concerns – If shipping in warm weather, use insulated packaging and cold packs. Chocolate melts easily and your recipient will appreciate the effort.
Nutritional Information
A rough breakdown per turtle (using the recipe yield of ~20) based on the original recipe: about 317 kcal, 18 g fat, 39 g carbohydrate, 2 g protein. These numbers will shift if you use dark chocolate (a little more fat, less sugar per ounce) or reduce the number of pecans per turtle.
Swapping to almond bark generally increases saturated fats; using real dark chocolate increases flavor intensity so you may be satisfied with smaller portions. For vegan versions, choose vegan chocolate and coconut condensed milk alternatives — calories will be similar but ingredient composition differs.
Frequently Asked Questions
How to make homemade turtle chocolates from scratch?
To make homemade turtle chocolates, start by creating mounds of about 5 pecans each and topping them with caramel sauce. Melt 25 caramel squares with 1/4 cup of cream in the microwave or on the stove. After drizzling the caramel over the pecans, cover the entire mound with melted chocolate.
How long do homemade turtles last?
Homemade turtles can be stored in an airtight container in the fridge for up to 2-3 weeks. If kept at room temperature in a cool environment, they usually last for 1-2 weeks. Be sure to place parchment or wax paper between layers to avoid sticking!
How to soften caramels for turtles?
To soften caramels, place them in a microwave-safe bowl with a splash of milk. Microwave on HIGH for 2-1/2 to 3 minutes, stirring after each minute until the caramels are completely melted and smooth.
Can I use different types of chocolate for my turtles?
Absolutely! You can use dark chocolate, milk chocolate, or even white chocolate for your homemade turtles. Each type adds a unique flavor and sweetness to the candies, so feel free to experiment!
What are some good alternatives for dietary restrictions?
For a vegan option, try using vegan chocolate and coconut cream instead of regular cream. For a gluten-free version, ensure that all ingredients, including the chocolate and caramel, are labeled gluten-free.
Final note: This is a recipe I’ve made dozens of times. Expect sticky fingers, a little attentive stirring, and a stubborn piece of caramel that always seems to adhere to the mixing spoon — that’s part of the charm. The reward is worth it: glossy chocolate, warm caramel notes, and crunchy toasted nuts. Make a batch, tuck them into boxes, and you’ll see why these turtles keep popping up at parties and holiday mornings.
Homemade Chocolate Turtles
Ingredients
Method
- Preheat oven to 350 degrees F.
- Toast and chop pecans: spread pecans out onto a baking sheet and bake for 5-10 minutes, stirring once, until toasted and fragrant. Once cooled, roughly chop the pecans and set aside.
- Line a baking sheet with parchment paper or a silpat liner. Set aside.
- Microwave Caramel: Place butter in a large microwave safe bowl and heat in microwave until melted. Add brown sugar, granulated sugar, sweetened condensed milk, and corn syrup and stir well to combine. Return bowl to microwave and cook mixture on HIGH power for about 6-8 minutes, or until it reaches about 235 degrees on an instant read thermometer.
- Stir vanilla into hot caramel. Stir in chopped pecans.
- Drop large spoonfuls of the mixture onto the parchment paper lined baking sheet to create individual mounds of caramel candy. Refrigerate until set, about 20 minutes.
- Melt almond bark or chocolate in microwave, stirring every 30 seconds until melted and smooth.
- Drop a pecan cluster into the melted chocolate and coat it all over. Place dipped clusters on the parchment paper to set up.
- Store turtles in an airtight container at room temperature or in the fridge for 2-3 weeks.