
I grew up on boxed pop tarts—those bright foil packets and sugary frosting—but making them at home changed how I think about this childhood treat. The first time I made these from scratch, the smell of warm butter and jam drifting through the kitchen felt like memory therapy: sweet, comforting, and a little bit ridiculous. This recipe is an homage to that feeling and a practical guide for anyone who wants to take the nostalgia up a notch by customizing flavors, textures, and glazes.
I make these when I want something both simple and a little showy—perfect for weekend brunch or a cozy afternoon snack. Over the years I tested small tweaks (more butter, less rolling, different jams) and settled on a version that reliably gives a flaky crust and a jammy center without a soggy middle. I’ll walk you through why each step matters and what to watch for so your first batch is a success.
Ingredients You’ll Need
- All-purpose flour – forms the base of the dough; gives structure while allowing flakiness when chilled butter is used.
- Granulated sugar – a touch in the dough for balance and to feed the crust’s color in the oven.
- Table salt – sharpens the flavors and enhances sweetness.
- Eggs – one goes into the dough for richness and structure; the other is for an egg wash to get a golden finish.
- Unsalted butter – cold and chunked; this is the secret to flaky layers when it remains in small pieces through chilling and baking.
- Ice cold water – helps bring the dough together without melting the butter.
- Jam or preserves – your filling—choose high-quality fruit preserves for bright flavor; thick preserves help avoid soggy centers.
- Powdered sugar – for a smooth, sweet icing that dries with a pretty sheen.
- Whole milk – thins the icing to the right glue-like consistency; plant milk works for vegan icing.
- Food coloring – optional, for festive colors.
- Sprinkles – purely decorative, add them immediately to the icing before it sets.
Step-by-Step Instructions
Below I give the precise recipe I use when I make a batch of eight pop tarts. I include the original amounts, baking times, and a lot of small notes about what I look for at each step.
- Make the dough in a food processor: In the bowl of a food processor fitted with the dough attachment (or using the regular blade), add 2 cups all-purpose flour, 2 teaspoons granulated sugar, and 1/4 teaspoon table salt. Pulse a few times to combine.
Why this matters: pulsing blends dry ingredients quickly and avoids overworking the flour. Overworking creates more gluten and a tougher crust.
- Add egg, butter, and water: Add 1 egg to the processor and pulse a few more times. Next add 1 cup (16 tablespoons) unsalted butter, cut into 1/2″ chunks, and 3 tablespoons ice cold water, pulsing until the dough just comes together.
Chef’s note: Don’t let the dough form a tight ball in the processor. You want visible butter bits — that’s how you get a flaky texture. If it looks too wet, pulse less; if it’s too dry, add a teaspoon of cold water at a time.
- Turn out and chill: Turn the dough out onto a lightly floured surface and knead briefly until smooth but still with visible chunks of butter. Wrap in plastic and refrigerate for 30 minutes.
Observation: The dough firms up a lot in the fridge. If it’s too soft to roll, give it another 10–15 minutes. Working with cold dough keeps the butter solid and creates the flaky layers we want.
- Roll and cut: Once chilled, divide the dough in half. Roll each half into a rectangle about 1/4″ thick. Cut each into 8 rectangles roughly 3 x 4 inches; you should end up with 8 assembled pop tarts. Reroll scraps as needed.
Tip: I keep my rolling pin and bench lightly floured, and I rotate the dough as I roll so the rectangles stay even. If your edges get ragged, trim with a knife — neat edges seal better.
- Assemble: Place 8 bottom rectangles on a parchment-lined baking sheet. Add about 1 rounded teaspoon of jam to the center of each. Cover with the matching rectangle, press edges together with your fingertips to push out air, and seal by pressing with the tines of a fork to create a neat crimped edge.
Crucial note: Use a modest amount of filling. Too much jam causes leakage and soggy middles. Dock (prick) the top of each tart with a fork or knife so steam has a route out.
- Chill before baking: Refrigerate the assembled and docked pop tarts uncovered for 30 minutes.
Why this helps: Chilling firms up the butter and dough again so the shape holds and the edges don’t slip during baking. I’ve skipped this step before and the tarts puffed oddly and leaked.
- Preheat and egg wash: Preheat your oven to 350°F (180°C). In a small bowl whisk the remaining egg and brush the tops of the pop tarts lightly.
Watch for: An egg wash gives color and sheen; brush too thickly and it can drip into seams and glue things shut, trapping steam. A light, even coat is all you need.
- Bake: Bake until golden brown, about 20 minutes. Remove to a wire rack to cool.
At the oven: The smell shifts from raw pastry to warm, nutty butter. The edges should be golden and the centers set but not rock-hard. If the tops are coloring too quickly, lower the rack in the oven for the final minutes.
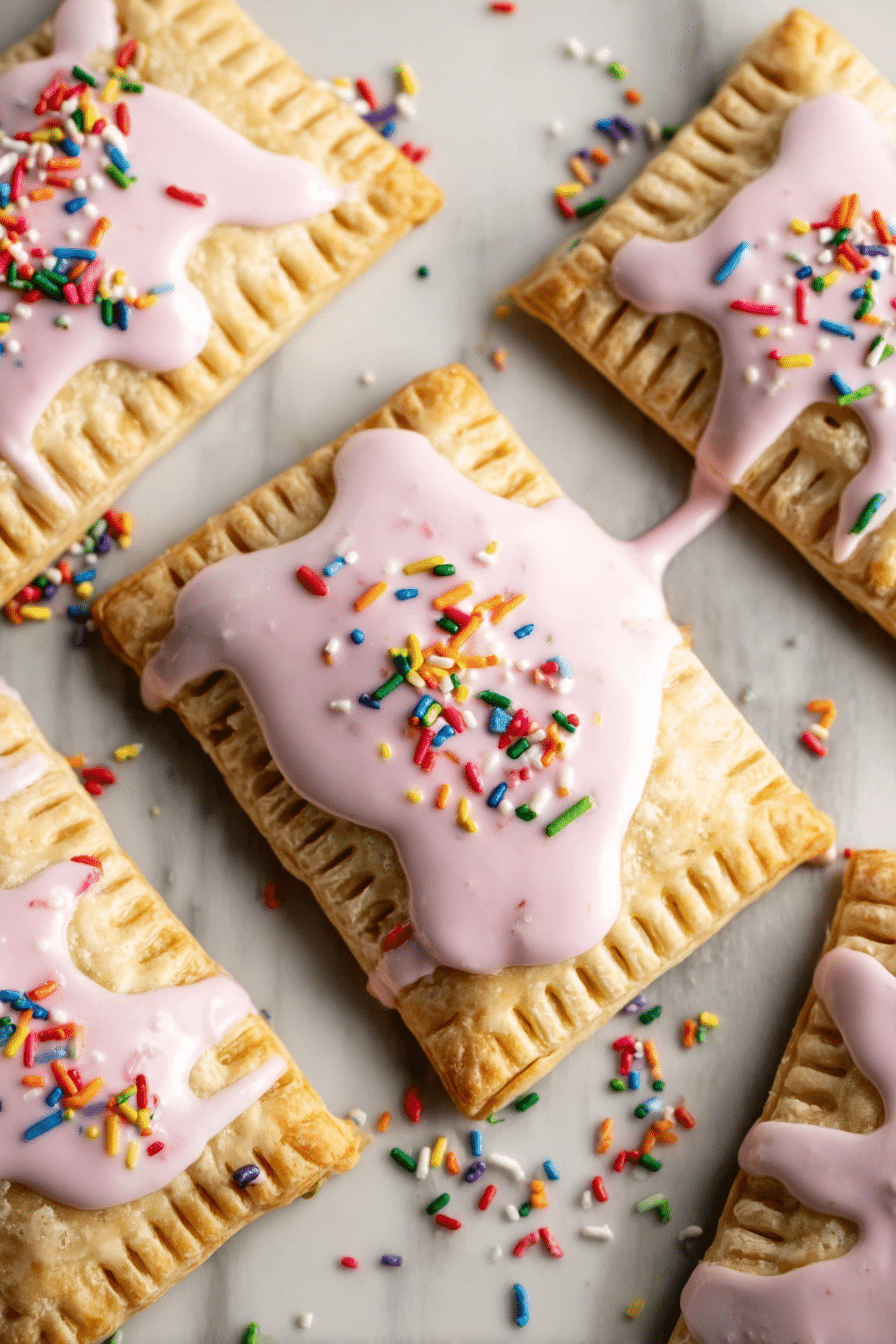
- Make the icing: In a small bowl whisk together 1 cup powdered sugar and 2 teaspoons whole milk until smooth and the consistency of glue. Add food coloring if desired and whisk again. Spread on cooled pop tarts and add sprinkles while the icing is wet.
Icing tip: If your icing is too thick, add a few drops of milk; if it’s too thin, sift in more powdered sugar a tablespoon at a time. The icing should be thick enough to hold sprinkles but spreadable.
Creative Filling Ideas
Once you’ve nailed the basic technique, the fillings are where you can go wild. I like to make small batches with different fillings and line them up on a plate for a playful brunch. Here are ideas that work well without making the center soggy:
- Classic fruit preserves — strawberry, raspberry, apricot; choose thicker preserves to avoid runny centers.
- Chocolate-hazelnut spread for an indulgent treat; warm it slightly so it’s spreadable but not runny.
- Peanut butter and honey — a creamy, slightly sticky filling that pairs well with a vanilla icing.
- Sweetened cream cheese mixed with lemon zest — tangy and rich, it needs only a small spoonful.
- Savory idea: sharp cheddar and caramelized onion in a savory dough variant (see variations below).
Try a warm, spiced filling inspired by our brown sugar cinnamon pop tarts for a cozy twist on the classic.
For a chocolate-hazelnut option, consider the indulgent filling used in our Nutella pop tarts.
Make a batch of homemade apple butter ahead of time to use as a rich, spreadable filling.
Customizable Icing Recipes
Icing is where pop tarts get playful. The basic powdered sugar-and-milk glaze is my go-to because it’s simple and sets with a glossy finish. But here are variations I frequently use.
- Classic vanilla glaze – powdered sugar whisked with a little whole milk and a drop of vanilla extract. Thick enough to hold sprinkles, smooth and sweet.
- Chocolate glaze – whisk powdered sugar with a tablespoon of unsweetened cocoa powder, a little milk, and a splash of vanilla. For richer flavor melt a small amount of dark chocolate and stir into the glaze.
- Citrus icing – powdered sugar mixed with lemon or orange juice instead of milk for a bright zing that pairs well with berry fillings.
- Colored celebration icing – divide the basic glaze into bowls and add food coloring. Pipe stripes with a spoon or a zip-top bag with a corner snipped for a homemade decorated look.
Healthier Alternatives to Classic Pop Tarts
If you want a lighter breakfast treat, these swaps keep the spirit of pop tarts while reducing refined sugar and boosting whole grain or plant-based options.
- Whole-grain pastry – substitute half the all-purpose flour with whole wheat pastry flour for more fiber. The crust will be slightly nuttier and denser; don’t overwork the dough.
- Natural sweeteners – use fruit preserves with no added sugar or make a fruit compote with dates or maple syrup to control sweetness.
- Gluten-free – use a 1:1 gluten-free all-purpose blend; add xanthan gum if your blend lacks it to help with elasticity. Chill the dough thoroughly before rolling to keep it manageable.
- Vegan – swap vegan butter and use flax or chia ‘eggs’ (1 tablespoon ground flaxseed + 3 tablespoons water, chilled) for the dough; use plant milk in the icing.
If you’re after a lighter breakfast, check out our healthy blueberry oat bars for nutritious inspiration and flavor ideas.
Serving Suggestions and Pairings
Pop tarts are flexible: serve them warm for that just-baked, slightly gooey center, or cool for a clean slice and tidy presentation. Here are pairing ideas I use when serving guests:
- Warm with a scoop of plain or vanilla ice cream for an indulgent dessert.
- Room temperature with a dollop of whipped cream and fresh berries for brunch.
- Cut into smaller bites and serve on a pastry board alongside coffee, tea, or a latte for a casual gathering.
- Savory versions work well with a green salad and a spicy mustard dip.
Practical serving tip: If you’re stacking them on a dessert table, let the icing set fully first, then stack with parchment sheets between to avoid sticking.
Tips for Perfect Pop Tarts
- Keep ingredients cold – cold butter and cold water are essential for flakiness. If your kitchen is warm, chill the bowl and the rolling surface.
- Don’t overfill – use about a rounded teaspoon of filling. Too much causes leaks and sogginess.
- Chill before baking – chilling assembled tarts helps them hold shape and prevents seam slip or leakage.
- Dock the tops – pricking the top with a fork lets steam escape, preventing pockets of air that burst and leak.
- Watch the oven – 20 minutes at 350°F is a guideline; ovens vary. Look for golden edges and a set center.
- Fixing a soggy center – If the middle feels too soft after baking, return the tart to the oven for 3–5 minutes. If the jam leaked, next time reduce filling slightly and seal edges more firmly.
- Make ahead & freezing – you can freeze assembled, unbaked pop tarts on a tray until firm, then wrap and store. Bake from frozen, adding a few minutes to the baking time.
Real Kitchen Notes (What I Noticed While Testing)
When I first tried substituting softened butter for cold chunks, the crust turned out greasy and flat. Going back to the chunked, cold butter fixed that instantly—there’s a real difference. Also, some jams have too much syrup; I learned to blot very wet preserves on a paper towel before using them, which saves the tarts from turning soggy. One batch I forgot to dock properly and got a few little explosions of jam on my oven floor—annoying but fixable and a lesson to dock well.
Another sensory detail: when the pop tarts come out of the oven, the butter smell is richer, and the edges have a satisfying crackle when you bite into them. The center should be soft and jammy, not runny. I prefer the icing slightly set so it doesn’t smear—waiting 10–15 minutes after icing keeps them pretty and portable.
FAQ
- Can I make the dough ahead of time?Yes — the dough can be refrigerated for up to 2 days or frozen for up to 1 month. Thaw in the fridge overnight before rolling and keep it cold while working so the butter stays in pieces for a flaky crust.
- How do I prevent the filling from leaking or the center from getting soggy?Use a modest amount of filling (about a rounded teaspoon), press and crimp edges firmly with a fork, dock the top so steam can escape, and chill the assembled tarts before baking to help them hold their shape.
- Can I make these gluten-free or vegan?Yes. For gluten-free, use a 1:1 gluten-free all-purpose flour blend (add xanthan gum if your blend lacks it). For vegan, swap in vegan butter and replace the eggs with flax or chia ‘eggs’ and use plant milk in the icing.
- How should I store and reheat leftover pop tarts?Store cooled pop tarts in an airtight container at room temperature for 1–2 days or in the fridge up to a week. Freeze up to 1 month. Reheat in a toaster oven or regular oven at 350°F (175°C) for 5–8 minutes, or microwave briefly until warm.
- Can I freeze the pop tarts before or after baking?Both work. Freeze assembled, unbaked pop tarts on a tray until solid, then wrap and store; bake from frozen, adding a few minutes to the baking time. Or bake, cool, then freeze baked pop tarts and reheat when needed.
Conclusion and Encouragement to Try
These homemade pop tarts are one of those recipes that feel fancy but are utterly approachable. You get a flaky homemade pastry, a jammy center, and a glossy icing—everything that was fun about the boxed version but better because you control the ingredients. I make these in small batches and always find tasting “one more” justified—it’s part of the testing. Try one classic flavor and one oddball combo; that’s how I discover winners. If you give this a go, you’ll quickly learn which fillings and icings your household prefers. Have fun with it and don’t be afraid to experiment—the dough is forgiving, and the rewards are absolutely worth it.
Yield: 8 pop tarts. Prep time: ~40 minutes (plus chilling). Cook time: ~20 minutes. Total time about 1 hour.
Ingredients
Method
- In the bowl of a food processor fitted with the dough attachment add the flour, sugar and salt. Pulse a few times to combine.
- Add one egg to the food processor and pulse a few more times. Next, add the butter and water pulsing until the dough just comes together.
- Turn the dough out onto a clean lightly floured workspace and knead until the dough is smooth but there are still visible chunks of butter. Wrap the dough in plastic wrap and refrigerate for 30 minutes.
- Once it has chilled, divide the dough in half and roll each half out into a rectangle about ¼” thick. Cut each piece of dough into 8 rectangles about 3” x 4” in size. You may have to reroll the scraps to make 8.
- Place 8 of the rectangles on a parchment paper lined baking sheet. Add a rounded teaspoon of jam into the center of each rectangle. Place a second rectangle of dough over the top and use your fingertips to press the edges of the dough together.
- Use the tines of a fork to seal the edges and make indents around the edges of the dough. Prick the top of each tart with the fork or using a knife so that steam can escape. Refrigerate uncovered for 30 minutes.
- Preheat oven to 350ºF (180ºC).
- In a small bowl whisk the remaining egg and brush on the top of the pop tarts. Bake until golden brown, about 20 minutes. Remove to a wire rack to cool.
- In a small mixing bowl whisk together the sugar and milk until it is completely smooth and the consistency of glue. If using food coloring add it now and whisk to combine.
- Spread the icing on top of each pop tart then add sprinkles if desired. Serve warm or at room temperature.