I make this jalapeño popper stuffed chicken on nights when time is tight but everyone still wants something a little special on the table. The first time I tried it, the smell of sizzling bacon and melting cream cheese filled my kitchen and my kids were already circling the counter. It’s one of those meals that looks impressive without stealing your whole evening.
I love that it’s protein-forward — the chicken and bacon give a solid hit of protein while the cream cheese keeps the filling rich and satisfying. I usually assemble it while the oven preheats, which makes this doable on school nights. Little wins like that matter a lot when you’re juggling homework, after-school activities, and whatever else is on the calendar.
Over the years I’ve made a few tweaks to keep the chicken juicy and the crust reliably crispy without frying. Below I walk you through what to buy, how to get a golden toasted panko crust, and simple swaps if someone at your table needs a gluten-free or dairy-free option. If you want another fast, tasty weeknight chicken dish, try our creamy garlic chicken that pairs perfectly with a busy schedule.
Why This Jalapeño Popper Stuffed Chicken Is Perfect for Busy Weeknights
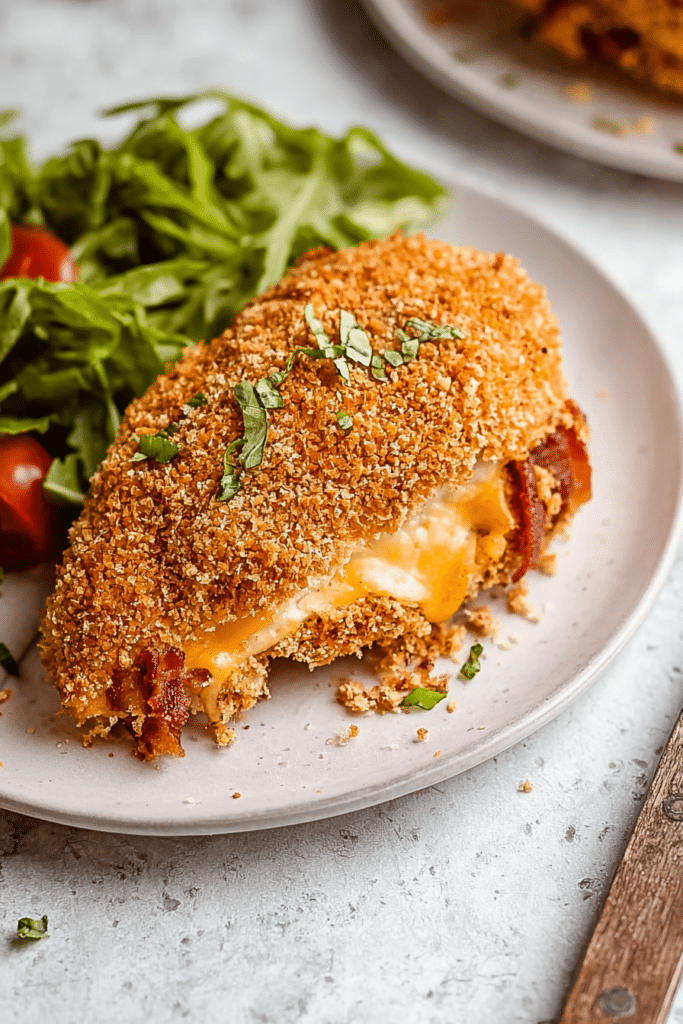
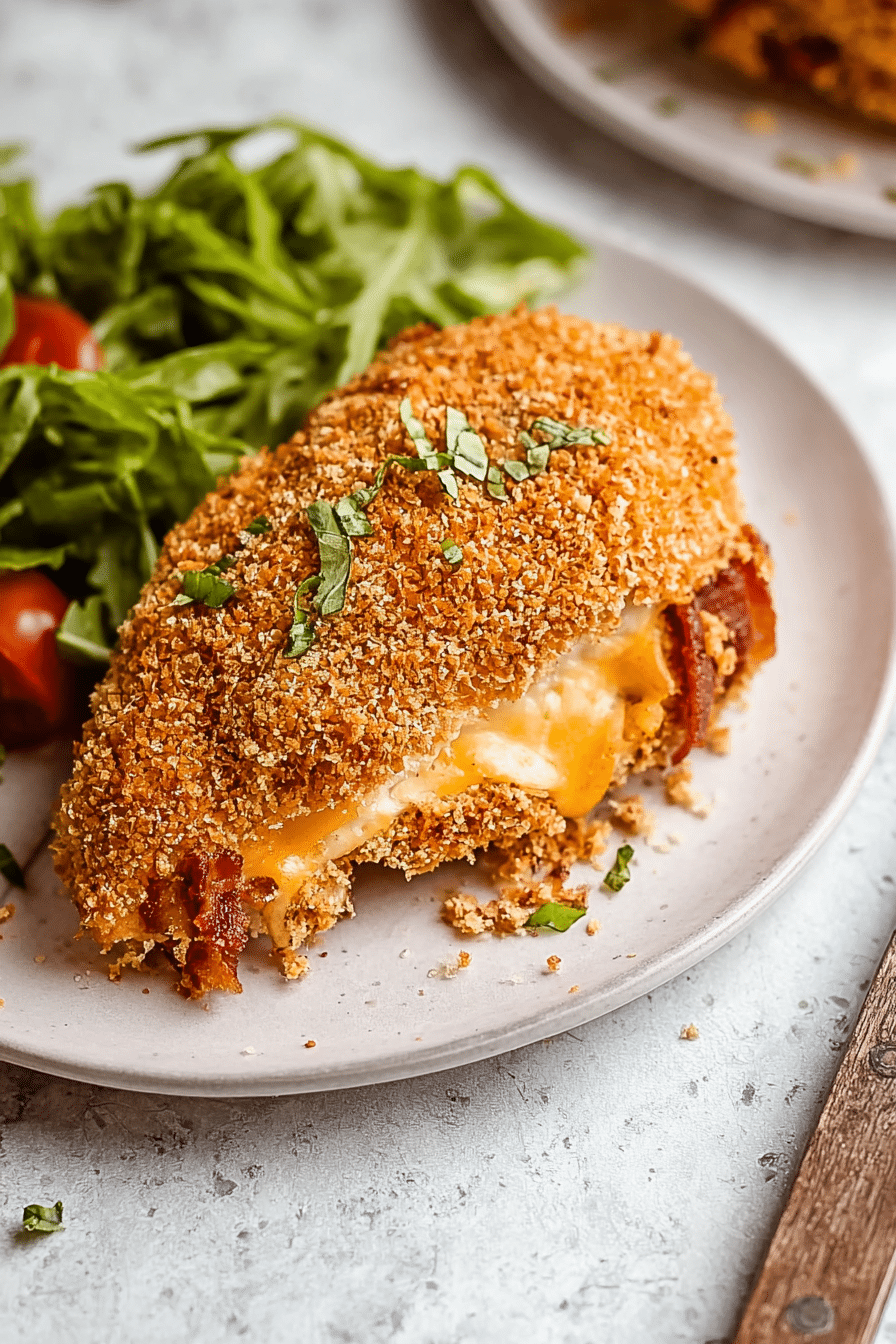
This recipe hits a few must-have boxes for weeknight dinners: it’s quick to prep, bakes in under an hour total, and tastes like you spent more time on it than you did. The contrast of crispy exterior and soft, cheesy interior makes it especially kid-friendly while still appealing to adults who like a little heat.
Sensory snapshot: you’ll notice the warm, smoky aroma of bacon as the filling comes together and the sharp, melty cheese scent as the chicken finishes in the oven — all terrific signals that dinner is almost ready.
Everything You Need for Jalapeño Popper Stuffed Chicken
Below I talk about the ingredients conversationally so you know what each one does and what to swap if needed. You can skim this and then jump into the steps when you’re ready to cook.
- Chicken breasts – The protein base; choose even-sized pieces so everything cooks at the same rate.
- Cream cheese – The binding, creamy element for the filling; a softened block gives the best texture.
- Bacon – Adds smoky crunch and savory depth; cooked crisp and chopped before mixing into the filling.
- Jalapeños – For fresh heat and bright color; seeds and membranes control the spice level.
- Green onions – Add fresh brightness and a pop of color when stirred into the filling and used as a garnish.
- Sharp cheddar – A melty, flavorful slice tucked over the filling for an extra cheesy layer.
- Panko breadcrumbs – Give the exterior a light, airy crunch compared with finer breadcrumbs.
- Egg wash – Helps the panko adhere and gives the crust a golden finish.
- Salt and spices – Simple seasonings like paprika, garlic, and onion powder lift the crust and tie flavors together.
Presentation idea: slice the breasts on a diagonal to show off the creamy filling and sprinkle extra green onions for color. If you want more make-ahead convenience, assemble the stuffed breasts and keep them covered in the fridge until you’re ready to bake.
Crispy Crust Without Frying: Toasted Panko Trick
To get a truly crispy crust without deep-frying, I toast the panko first so it browns quickly in the oven and resists turning soggy from the filling’s moisture. Panko is larger and flakier than regular breadcrumbs, which is why it creates that light, crackly texture.
- Spread the panko in an even layer on a baking sheet and spray lightly with oil so it browns evenly.
- Bake briefly until the crumbs are golden, then stir or shake the pan so any paler bits get a turn to toast; watch closely — it goes from golden to burnt fast.
- Once toasted, mix in the dry seasonings so every breadcrumb carries flavor into the crust.
- When you dredge the chicken, press the toasted panko gently so it sticks; it will crisp up more in the oven and stay crunchy longer because it already started to brown.
Sensory note: the toasted panko should smell nutty and look uniformly golden — that’s your cue it’s ready. This prep step takes just a few minutes but makes a big textural difference.
Control the Heat: Adjusting Jalapeño Spice Levels
Jalapeños vary — some are mild, others will light your tongue on fire — so adjust to your family’s preference. The easiest way to reduce heat is to remove the seeds and inner white membranes where most of the capsaicin lives. If you want no heat at all, swap in diced bell pepper or use only the mild green part of a green onion for color without burn.
Tips to customize heat:
- Remove seeds and membranes to reduce spiciness dramatically.
- Use fewer jalapeños or mix jalapeño with a sweeter pepper to balance heat.
- For more kick, include some finely chopped membrane or add a pinch of cayenne or a sprinkle of crushed red pepper to the filling.
Sensory focus: watch for the quick sizzle when chopping and tossing jalapeños into the warm cream cheese — that first aromatic hit tells you flavor is building.
Make-It-High-Protein Tips: Bigger, Juicier Chicken Every Time
I brine chicken when I can spare a little prep time — even a short salt brine helps meat hold moisture so the breast stays juicy after baking. Another easy trick is to pick chicken breasts that are similar in thickness; if one is much thicker, pound it lightly so they bake evenly.
Other protein-boost ideas I use when I want to stretch the meal or vary flavors:
- Mix in shredded rotisserie chicken or chopped ham into the filling for extra protein and texture.
- Use a thicker-cut chicken breast or double up with a slice of lean ham beneath the filling to increase protein per serving.
- Consider a quick brine (salt and water) for 15–30 minutes to lock in juices if you have time ahead of baking.
Sensory cue: perfectly cooked chicken should be tender and juicy when you slice it, not stringy or dry. I always rely on a thermometer to hit a safe temperature without overcooking.
How to Make Jalapeño Popper Stuffed Chicken (Step-by-Step)
- Preheat oven and prepare a greased baking dish so everything moves fast once the chicken is stuffed.
- Cook the bacon until crisp, chop it, and combine with softened cream cheese, diced jalapeño (adjust seeds to taste), and green onions; mix until even.
- Use a sharp knife to cut a deep pocket into each chicken breast without cutting through; spoon in the cream cheese mixture and tuck a slice of cheddar on top of the filling.
- Set up a dredging station: whisk eggs with a splash of milk in one shallow bowl and place toasted, seasoned panko in another bowl.
- Dip each stuffed breast into the egg wash, then press into the toasted panko so the crust adheres evenly; place breasts spaced apart in the baking dish. Use toothpicks if needed to keep the filling sealed.
- Bake until the crust is golden and the internal temperature reads 165°F; let rest briefly before slicing so the filling settles.
Timing tip: if you’re short on time, assemble ahead and refrigerate the stuffed breasts, then coat and bake when you’re ready to eat.
Pro Tip for jalapeño popper stuffed chicken: Gluten-Free & Dairy-Free Swaps
- Gluten-free crust: use certified gluten-free panko or crushed gluten-free crackers in place of regular panko; press firmly so the crumbs adhere.
- Dairy-free filling: use a plant-based cream cheese and a dairy-free melty slice instead of cheddar; the texture will be slightly different but still creamy.
- Egg substitute: for an egg-free adhesive, try a thin slurry of dairy-free milk mixed with a bit of mustard or a commercial egg replacer to help crumbs stick.
- Make-ahead hack: assemble the stuffed breasts and wrap individually for a grab-and-bake meal later; for a fun appetizer, considermini jalapeno popper egg rolls that cater to gluten-free guests.
How to Store, Reheat, and Make-Ahead Jalapeño Popper Stuffed Chicken
- Store cooked chicken in an airtight container in the refrigerator for up to 3–4 days; keep extra green onions separate to preserve color.
- To reheat without losing too much crisp, warm in a low oven or toaster oven until heated through; a quick blast under the broiler for a minute can recrisp the panko.
- Make-ahead: assemble the stuffed breasts, cover, and refrigerate for up to 24 hours before coating and baking; this is great for saving time on busy nights.
- Freezing: wrap individually and freeze before baking for up to 2 months; thaw overnight before baking and adjust cooking time as needed.
Variations and Customizations
- Cheese swaps: use Monterey Jack for a milder melt, Pepper Jack for extra heat, or smoked cheddar for depth.
- Vegetarian twist: replace the chicken with halved, thick portobello caps stuffed with the same filling and baked until tender.
- Alternate proteins: try turkey breasts or thick-cut pork chops as a different canvas for the popper filling.
- Cooking method swaps: you can air-fry the coated breasts for a crisper exterior in less time or grill them (using a foil packet) for smoky flavor.
- Pairings: serve with a simple green salad, roasted veggies, or a cool cucumber-ranch slaw to balance the richness; add a twist to your dinner rotation with our buffalo chicken zucchini boats for a spicy alternative.
Pro-Tips
- I always use a meat thermometer — it removes guesswork and prevents overcooking; aim for 165°F and then rest the chicken briefly.
- Toast the panko ahead of time so the crust browns quickly and stays crunchy after baking; this small step transforms texture.
- If the coating slips, press the panko into the egg-washed chicken and give it a few minutes in the fridge before baking to set the crust.
- For extra flavor, add a touch of smoked paprika to the breadcrumb mix; it pairs wonderfully with bacon and cheddar. For more crispy exterior ideas, check out crispy garlic parmesan chicken.
Troubleshooting
- If the chicken is dry: try a short brine next time or reduce oven time slightly and check thickness — thicker breasts need more time but also benefit from a brief brine; I learned this the hard way when I first overcooked a batch.
- If the coating doesn’t stick: make sure the egg wash covers the entire surface, press the panko firmly, and allow coated breasts to rest chilled for a few minutes before baking.
- If filling leaks: don’t cut the pocket too large; pack the filling snugly and use toothpicks to secure any seams until the crust sets.
- If the crust browns too fast: tent loosely with foil partway through baking so the filling finishes without burning the panko.
Frequently Asked Questions
Can I make jalapeño popper stuffed chicken ahead of time?
Absolutely! You can assemble the stuffed chicken breasts in advance and store them covered in the refrigerator. Just bake them when you’re ready to serve!
How can I adjust the spiciness of the dish?
To control the heat, make sure to remove the seeds and inner membranes of the jalapeños. If you prefer a milder flavor, you can also use fewer jalapeños or substitute them with a milder pepper.
Can I use a different type of cheese?
Yes, feel free to experiment! Cream cheese is essential for the filling, but you can substitute cheddar with other cheeses like Monterey Jack or Pepper Jack for a different flavor profile.
What are some gluten-free alternatives for this recipe?
You can use gluten-free panko breadcrumbs instead of regular ones. Additionally, make sure that any other ingredients you use, like the bacon and seasonings, are gluten-free.
How do I know when the chicken is done cooking?
The chicken is fully cooked when it reaches an internal temperature of 165 degrees F. Use a meat thermometer to check for doneness, and make sure the juices run clear!
jalapeño popper stuffed chicken
Ingredients
Method
- Cook bacon according to package directions, chop it, and mix it with cream cheese, jalapeños, green onion, and garlic powder.4 slices Bacon, 4 ounces Cream Cheese, 2 Jalapeño Peppers, 2 Green Onions, 0.5 teaspoon Garlic Powder
- Preheat oven to 400°F, grease a baking dish, and cut pockets into chicken breasts, stuffing them with the cream cheese mixture and a slice of cheddar.4 6 ounce Chicken Breasts, 2 slices Cheddar Cheese
- Toast panko breadcrumbs, then mix with spices in a shallow bowl; also prepare an egg and milk mixture for dredging.1.5 cups Panko Breadcrumbs, 0.75 teaspoon Salt, 1 teaspoon Black Pepper, 1 teaspoon Onion Powder, 1 teaspoon Paprika, 0.5 teaspoon Garlic Powder, 2 Eggs
- Dredge chicken in the egg mixture and coat with breadcrumbs. Bake for 25-35 minutes until cooked through.4 6 ounce Chicken Breasts, 2 slices Cheddar Cheese, 0.5 teaspoon Garlic Powder