I make lemon bars whenever I want an easy dessert that still feels special. Over the years I’ve learned which steps matter — the small changes that keep the curd glossy and the crust tender — and which ones don’t. In my kitchen these bars are the answer when I need something bright, sweet, and quick to pull together between work and life.
I love that lemon bars come together with pantry-friendly ingredients and mostly hands-off time. You can prep the crust, pulse the zesty sugar for the filling, and pop everything in the oven while you tidy up. When they come out, the kitchen smells like fresh lemon, and that zingy aroma makes everyone hover a little longer.
I’ve burned edges, ended up with curd that’s too runny, and once overmixed a filling until it was rubbery. Those mistakes taught me what to watch for: oven temperature, room-temperature eggs, and respectful cooling time. Follow a few simple rules and you’ll get glossy, spreadable curd and a shortbread base that flakes perfectly with every bite.
Below I’ll walk you through what I bring to the counter, the little tricks I use for a smooth filling, and easy swaps for gluten-free or vegan versions so you can make these lemon bars your own.
Why these lemon bars are perfect for busy home bakers
Lemon bars are quick to prep, require only a handful of ingredients, and you can make them ahead. That makes them ideal if you want a dessert ready for evenings, potlucks, or last-minute guests. The bright yellow filling cuts through rich meals and the shortbread adds a buttery contrast.
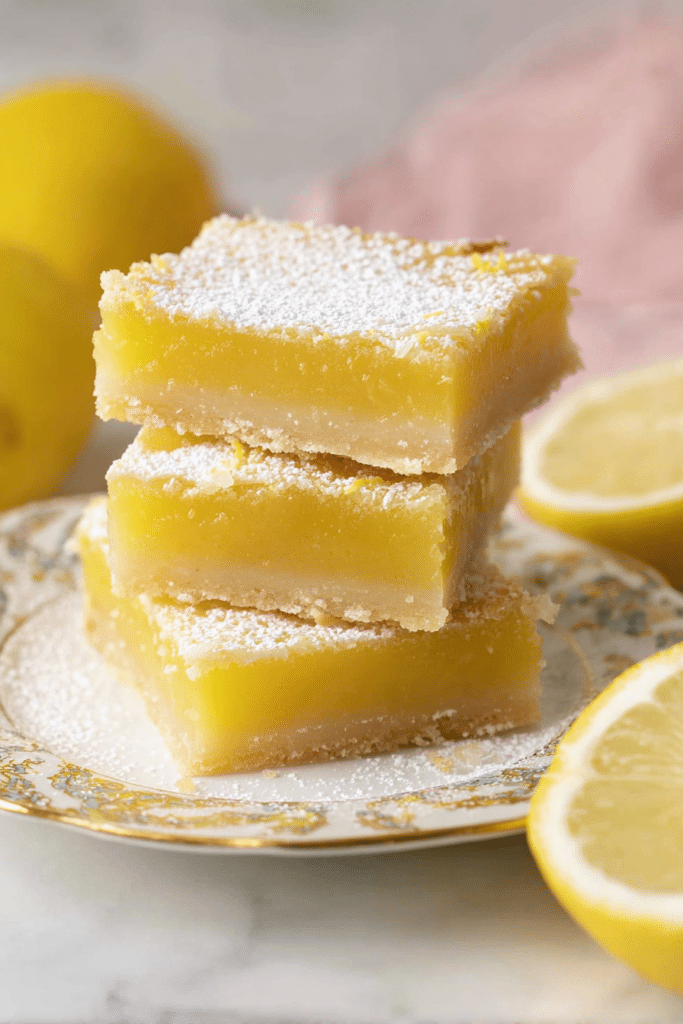
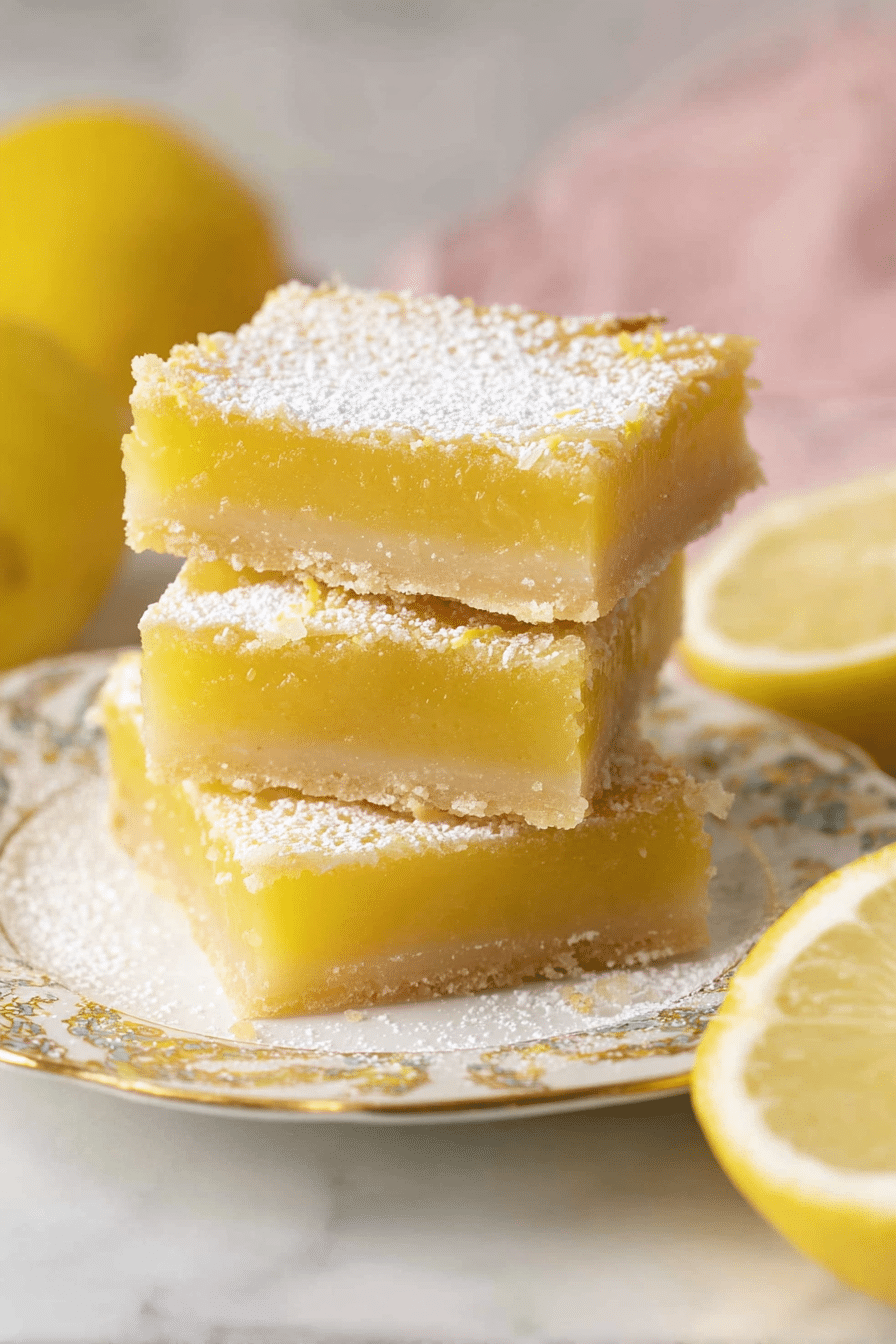
Think about the sensory payoff: a sunny yellow filling with a glossy surface, the fresh scent of lemon zest while you pulse the sugar, and a buttery shortbread that crumbles under your fork. Those moments are worth the few minutes of active work.
Because they keep well in the fridge, lemon bars are a reliable weekend bake: make them the day before to let flavors settle and textures firm up so you can serve chilled slices any time.
Everything You Need for Lemon Bars
Here’s what I like to have on the counter before I start. I focus on tools and ingredient roles so you feel ready and organized.
- All-purpose flour – Provides structure for the crust and a bit for the filling; choose a reliable brand and avoid scooping too aggressively.
- Powdered sugar – Helps the shortbread stay tender and keeps the crust from feeling grainy.
- Granulated sugar – Sweetens the filling and, when pulsed with zest, carries bright lemon oil throughout.
- Unsalted butter – The backbone of the crust; melted butter gives a tender, pressable base.
- Fresh lemons – For both zest and juice; fresh juice gives the best brightness and consistency in the curd.
- Eggs (room temperature) – They help the filling set and create a smooth, creamy texture when mixed gently.
- Salt – A small pinch lifts the lemon flavor and balances the sweetness.
- Baking dish and parchment – A light-colored pan bakes more evenly; parchment makes removal and slicing much easier.
If you want to make this recipe accessible for dietary needs, I’ll cover swaps in the variations section below so you can see which ingredients to replace and how those changes affect texture and flavor.
The Secret to a Smooth, Spreadable Lemon Curd
- Start with room-temperature eggs so they blend smoothly and emulsify with the sugar and juice; cold eggs can seize and produce a curd with tiny lumps.
- When you zest the lemons, mix the zest into the sugar until the sugar turns pale and fragrant; that distributes the oils and gives a brighter, more uniform lemon flavor. For a playful twist, try these lemon curd tartlets in a smaller format:
For a delicious twist on lemon flavors, try making lemon curd tartlets that are perfect for any occasion.
- Combine the sugar mixture with lemon juice and eggs; mix until smooth but avoid aggressive whipping once the eggs are added — overaeration can lead to tiny bubbles and a less glossy finish.
- Bake the filling just until it’s set at the edges and slightly jiggly in the center; it will continue to firm as it cools. Overbaking makes the curd dry and rubbery.
- Cool first on the counter, then chill to fully set the curd — this sequence keeps the texture creamy and easy to slice.
Why the Shortbread Crust Makes (or Breaks) Your Bars
- Melted butter versus softened butter: I use melted butter so the crust presses together and bakes into a tender, shortbread-like base. Softened butter gives a different texture and can make the crust cakier.
- Powdered sugar in the crust keeps it tender and less gritty than granulated sugar would. It blends into the flour and butter more smoothly.
- Press the dough evenly into the pan for an even bake; thin spots will brown faster and can lead to an uneven bake.
- Watch for a light golden color — that buttery smell and slight browning at the edges mean the crust is ready for the filling. If it’s too brown, the crust will taste overly toasty under the curd.
Temperature & Timing: What I Watch For Every Bake
- Preheat your oven so the crust starts baking immediately; an unheated oven can make the crust slack and greasy.
- Know your oven’s quirks — if it runs hot, lower the temperature slightly and check earlier than the recipe suggests.
- Use visual cues: a pale golden crust and a filling that’s set at the edges but slightly wobbly in the center are the signs I rely on, not just the clock.
- Let the pan cool partially on the counter before chilling — moving too soon can cause the filling to ripple or crack.
How to Make Lemon Bars (Step-by-Step)
- Preheat the oven and line your baking dish with parchment so you can lift the bars out cleanly once chilled.
- Mix the dry ingredients for the crust, add melted butter, and blend until everything comes together into a pressable dough.
- Press the dough evenly into the prepared pan and bake until it’s a light golden color and fragrant.
- While the crust bakes, zest the lemons into the sugar by pulsing in a food processor or rubbing zest into the sugar by hand until the sugar looks pale and fragrant.
- Whisk the zested sugar with lemon juice and room-temperature eggs; stir gently until smooth and uniform but not foamy.
- Pour the filling over the warm crust and bake until the edges are set and the center has a slight jiggle.
- Cool on the counter until no longer piping hot, then chill in the refrigerator to let the filling fully set for clean slices.
- Before slicing, dust with powdered sugar if you like and use a sharp knife dipped in warm water for cleaner cuts; wipe the knife between slices.
- For visual learners, take photos at each major step — crust pressed, zested sugar, poured filling — so you can compare and learn what the right stages look like.
Pro Tip for lemon bars: Prevent a Runny Lemon Curd
- Use fresh lemon juice for reliable acidity and a thicker set; bottled juice can be more variable.
- Don’t overmix after adding the eggs — gentle, steady stirring avoids whipping in air that causes a bubbly or unstable set.
- Test doneness with a gentle jiggle test: edges should be set and the center should move only slightly.
- Allow full chilling time. I often wait the recommended chill period plus a little extra if the curd still feels soft; patience pays off for cleaner slices.
Troubleshooting
- If the curd is too runny, it probably needed more time in the oven or more chilling time; give it a few extra minutes baked and a longer chill.
- If the curd has small lumps, your eggs may have been too cold — let eggs come to room temperature next time or strain the filling before baking.
- If the crust is soggy, the filling was too hot when poured — cool the crust slightly before adding the filling, or blind-bake the crust a touch longer.
- If the crust burned at the edges, press the dough evenly and watch the color closely toward the end of the bake; using a slightly lower oven temperature can help.
- If your slices are messy, chill longer and use a hot, wiped knife for each cut to get neat edges.
Easy Variations to Try: Gluten-Free, Vegan & Seasonal Twists
- Gluten-free crust: Swap in a 1:1 gluten-free flour blend and add a touch more fat or an extra egg yolk equivalent to help bind; expect a slightly different crumb but a tasty result. If you’re curious about other lemon bakes, try a lemon pound cake as a larger, softer alternative:
If you’re a fan of lemon desserts, don’t miss out on our lemon pound cake for a delightful variation.
- Vegan option: Replace butter with a solid vegetable shortening or coconut oil in the crust, and use a thickener like cornstarch plus a chickpea brine (aquafaba) or a commercial egg replacer for the filling — texture will be different but still bright.
- Berry twist: Add a thin layer of raspberry or blueberry jam between the crust and filling or swirl fresh berry purée into the filling for a marbled look and tart-sweet contrast.
- Herb lift: Fold finely chopped basil or thyme into the crust or sprinkle a few leaves on the finished bars for an unexpected savory note.
How to Store, Chill, and Slice Lemon Bars
- Chill the bars fully before slicing — this firms the filling and gives clean, neat slices.
- Store in the refrigerator, covered, for a couple of days for the best texture. If you need longer storage, wrap tightly and freeze; thaw in the fridge before serving.
- For neat slices, use a hot, clean knife and wipe it between cuts. A damp cloth on the blade helps with very sticky fillings.
- Bring bars to just-chilled before serving if you prefer a slightly softer bite; fully cold is ideal for events where you want tidy presentation.
Beverage Pairing Suggestions
Lemon bars pair beautifully with a variety of drinks that balance their bright acidity. Try a light herbal tea to soothe the tartness, or a chilled glass of iced tea for a classic combination that keeps things refreshing.
For an elevated dessert course, a sweet dessert wine or a bubbly with off-dry notes complements the citrus without overpowering it. If you want a savory contrast on the table, consider pairing with a lemon-forward seafood dish for a coordinated menu — a sharp, buttery pairing can be surprisingly satisfying:
For a perfect pairing with your lemon bars, consider enjoying them with a refreshing dish like garlic butter crab.
Enhance your lemon bar experience with a side of lemon garlic lobster tails for a delightful seafood pairing.
Frequently Asked Questions
Can I make lemon bars ahead of time?
Absolutely! Lemon bars can be made a day or two in advance. Just store them in the refrigerator, tightly covered, to keep them fresh.
How do I know when my lemon bars are done baking?
Lemon bars are done when the filling is set but still slightly jiggly in the center. They will firm up as they cool.
What can I use instead of fresh lemon juice?
While fresh lemon juice is best for flavor, you can use bottled lemon juice in a pinch, though the taste may be slightly less vibrant.
Can I freeze lemon bars?
Yes! Lemon bars freeze well. Just wrap them tightly in plastic wrap and store in an airtight container. Thaw in the refrigerator before serving.
How do I cut lemon bars neatly?
For clean cuts, use a sharp knife that is slightly damp. Wipe the knife between cuts to maintain clean edges!
Lemon Bars
Ingredients
Method
- Heat oven to 350F and line a 9x13 baking dish with parchment paper.
- Whisk together 2 1/2 cups of flour with the powdered sugar and salt, then pour in the melted butter and mix until combined.
- Sprinkle the dough into your lined pan and press down into a flat layer. Bake at 350F for about 20 minutes or until a light golden color.
- While the crust is baking, add the sugar to a food processor with the lemon zest. Pulse until the zest is fully incorporated and sugar is a light yellow color.
- Add the sugar and remaining half cup of flour to a large bowl and mix well.
- Pour in the lemon juice and add the eggs, then mix very well until completely combined.
- Pour the filling onto the warm crust, then transfer to the oven and bake for about 25 minutes, removing halfway to turn.
- Remove from oven and allow to cool for an hour before chilling in the refrigerator for two hours.
- Dust with powdered sugar and cut into bars using a clean, sharp, damp knife.