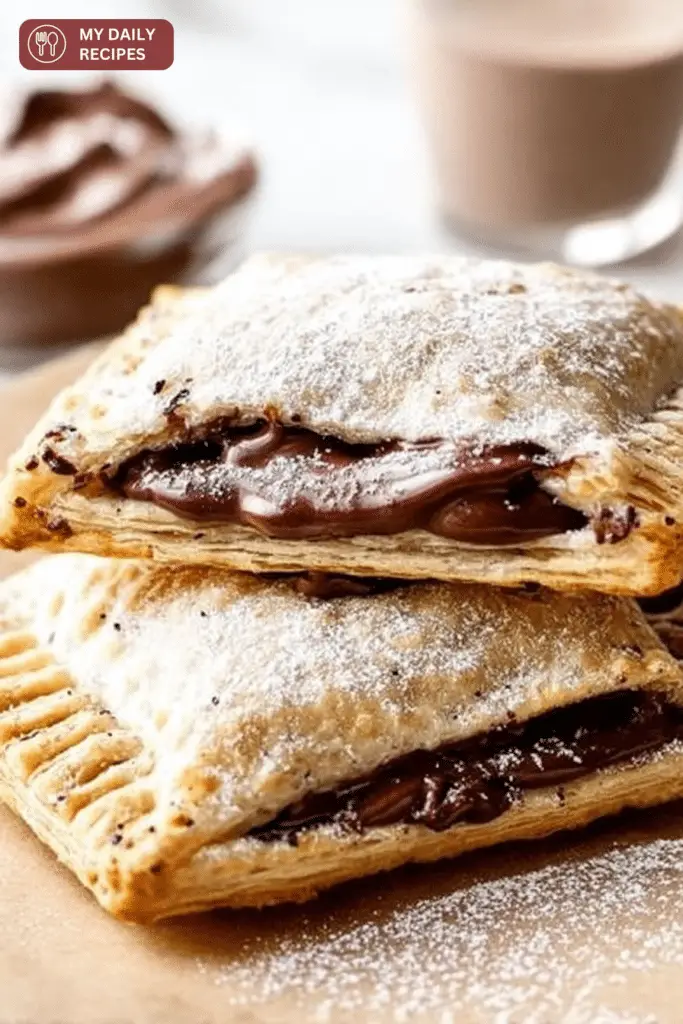
I make these Nutella Pop Tarts every few weeks — sometimes for a sleepy weekend breakfast, sometimes to impress friends at a casual brunch. They hit that sweet spot of nostalgia (who didn’t grow up with boxed Pop-Tarts?) and grown-up indulgence thanks to Nutella’s hazelnut chocolate richness. The dough comes together like a forgiving pie pastry, the filling stays soft and gooey, and the glaze dries to a thin shell that crackles a little when you bite into it.
When I first tested this recipe I was worried Nutella would leak or the pastry would be greasy. After several small adjustments — chilling the dough, using a short burst of pulse in the food processor, and resisting the urge to overfill — I landed on the method below. You’ll get nine pop tarts that are lightly golden, slightly crisp at the edges, and soft in the center where the Nutella pools. Expect warm chocolate aroma while they bake and a faint cinnamon-sugar scent from the sprinkle. It’s an easy project if you follow the chilling and sealing steps closely.
Ingredients You’ll Need
- All-purpose flour – forms the tender, flaky base of the pastry; you can swap a 1:1 gluten-free flour if needed.
- Granulated sugar – adds a touch of sweetness to the pastry dough and helps browning.
- Salt – balances the sweetness and enhances flavor.
- Very cold unsalted butter – cold butter creates steam pockets for flakiness; keep pieces small and cold.
- Vegetable shortening – helps create a tender, slightly sturdier dough than butter alone; can be swapped with more butter for extra flavor.
- Ice cold water – brings the dough together without heating the butter; add slowly so you don’t overwork the dough.
- Nutella – the star filling; thick, chocolate-hazelnut spread that stays soft after baking.
- Brown sugar – mixed with cinnamon for a warm, caramel-like sprinkle under the filling.
- Cinnamon – adds a subtle warmth that pairs beautifully with hazelnut chocolate.
- Egg – used as an egg wash to seal and gloss the pastries.
- Powdered sugar – for the glaze; combines with milk and vanilla for a thin, crackly finish.
- Milk – thins the glaze to a spreadable consistency; use more or less to adjust thickness.
- Vanilla extract – brightens the glaze with a familiar bakery aroma.
Step-by-Step Instructions
I’ve kept the structure of the original recipe intact because the amounts and times were tested. Below I add practical notes — what to watch for and why each step matters.
- Make the dough: Add the flour, sugar and salt to a food processor and pulse a few times to evenly combine. Add the butter and shortening and pulse about 8 times, just enough to cut butter into smaller pieces. With the processor running, pour ice cold water down the feed tube and pulse until the dough begins to clump together.
Note: You want pea-sized bits of butter in the dough, not fully incorporated. Those small bits melt during baking and make flaky layers. If the dough seems too dry, add a teaspoon of cold water at a time — too much water will make it tough.
- Chill the dough: Turn the dough onto a floured surface and gather into a ball. Divide into 2 even portions and flatten or roll each portion into an approximate 6-inch disc and wrap tightly with plastic wrap. Chill at least one hour in the refrigerator.
Why: Chilling relaxes gluten and firms the butter. I usually chill for 90 minutes if I have time — it’s simply easier to roll. If you skip this, the dough will be sticky and hard to shape.
- Prep baking sheets: Line two baking sheets with parchment paper and set aside. Remove 1 disc of dough from the refrigerator and let rest 10 minutes to soften (keep the other disc in the refrigerator).
Tip: Ten minutes softens the dough just enough to roll without letting the butter melt. If it gets too warm and sticky, pop it back in the fridge for 10 minutes.
- Roll and cut: On a lightly floured cutting board, roll the dough into a little larger than a 9×12-inch rectangle in order to create nine 3×4-inch rectangles. Using a ruler and a pizza cutter, cut three 3-inch rows across the 9-inch side. Across the 12-inch side, cut four 4-inch rows. Transfer the 9 rectangles to one of the baking sheets and place in the refrigerator. Repeat with remaining dough to create 9 more rectangles then transfer them to the other baking sheet.
Note: Use a light touch when rolling — overworking compresses the layers. A ruler helps you get even rectangles so they bake uniformly.
- Fill: To these rectangles, brush egg wash over all of the edges. Add 1 tablespoon Nutella down the center of each rectangle, leaving at least a ½ inch dough perimeter. Whisk 3 tablespoons brown sugar and 1 teaspoon cinnamon together in a small bowl then evenly sprinkle over Nutella centers.
Warning: Don’t overfill. Nutella will spread as it warms. A good test when assembling the first tart is to fold a top piece over and press gently — you should still have a visible border to crimp.
- Seal: Remove the other baking sheet from the refrigerator and brush the entire surface of all of the rectangles with egg wash and place them WASH SIDE DOWN over each Nutella rectangle. Press the edges firmly together all the way around to seal in the Nutella. Use the tines of a fork to double-seal the perimeter of each of the pastries. Prick the top of each pastry several times with a fork, or use a toothpick to prick about 8 times. Freeze pastries for 30 minutes or refrigerate up to 1 hour.
Technique: Egg wash acts like glue. Fork crimping not only seals but creates that classic Pop-Tart look. The freeze step is crucial if your kitchen is warm; it helps the dough hold shape and prevents early leakage.
- Bake: When ready to bake, brush the tops of each pastry with remaining egg wash. Bake at 350 degrees F for 25 to 30 minutes or until lightly golden, rotating once while baking. Let the pop tarts cool for 5 minutes then transfer to a wire rack to cool completely before glazing.
Watch for visual cues: tops should be lightly golden — not too brown. If edges brown too quickly, tent with foil. Cool fully before glazing so the glaze doesn’t slide off.
- Make glaze: Whisk together all of the glaze ingredients until smooth, adding a teaspoon more milk at a time if needed to reach spreadable consistency.
Consistency tip: You want a glaze that spreads without running off the edges. It should puddle slightly but then begin to set after 20–30 minutes. If it’s grainy, whisk longer or strain.
- Finish: When pop tarts are cool, spread glaze over the top. Glaze will begin to harden after 30 minutes, but I can never wait that long. Store in an airtight container.
Serving: They’re wonderful warm; the Nutella will be molten. Let them set for a few minutes if you want cleaner slices.
Tips for Perfect Pastry Texture
Good pastry texture comes down to a few controllable factors. These are the things I learned the hard way and now always follow:
- Keep ingredients cold: Cold butter and cold water keep the butter in distinct pieces. That gives flakiness. If your hands warm the dough too much, chill briefly before continuing.
- Don’t overwork the dough: Over-kneading or over-rolling develops gluten and makes the crust tough. Roll just enough to get the rectangle shape.
- Use short pulses in the food processor: If you run the processor too long, the butter will get too small and you’ll lose flakiness.
- Chill after assembly: Freezing or refrigerating the sealed pastries for 30–60 minutes sets the butter and helps them keep shape — this prevents Nutella from oozing out.
- Mind the oven temperature: Bake at 350°F. Too-hot ovens will brown outside before the layers set; too cool and the dough won’t rise or brown properly.
- Fixing common problems: If your dough is sticky, chill it. If Nutella leaks, it was likely overfilled or not sealed well; salvage by trimming browned edges and re-sealing next time, or transform leaking ones into freeform turnovers and bake a few minutes less.
Flavor Variations and Filling Ideas
Once you’ve mastered the classic, try these tested variations. I’ve made many of them and they all work with the same dough — only the filling changes.
- Peanut butter & banana – smear peanut butter and a few thin banana slices; bake and glaze as usual (best eaten the day you make them).
- Strawberry jam & cream cheese – mix softened cream cheese with a little powdered sugar and swirl with jam for a lush, slightly tangy filling.
- Apple cinnamon – cook diced apples with brown sugar and cinnamon until just soft; cool before filling to prevent sogginess.
- S’mores – Nutella, a few mini marshmallows, and a sprinkle of graham cracker crumbs for texture.
- Salted caramel & chocolate chips – a spoon of caramel topped with a few mini chips for molten good bites.
- Seasonal themes – pumpkin spice in fall, lemon curd in spring, or cranberry-orange preserves in winter.
Fun Decorating Ideas for Kids
Decorating is where these become party food. Kids love the hands-on part, and these ideas are simple and low-mess if you plan ahead.
- Simple drizzle: Thin the glaze slightly and let kids drizzle using a spoon — zigzags are fast and forgiving.
- Sprinkles station: Have a few bowls of nonpareils, stars, and colored sugar. Let kids press sprinkles into the wet glaze.
- Stamps and shapes: Before baking, use small cookie cutters to make tiny window cutouts on the tops so jam peeks through (kids think it’s magic).
- Themed colors: Tint glaze with a drop of food coloring for holidays — pink for Valentine’s, green for St. Patrick’s, pastel for Easter.
- Edible glitter or sanding sugar: For birthdays, a quick shimmer makes them feel special. Add this immediately after glazing so it sticks.
Nutritional Information
Per serving (one tart), approximate nutrition for the classic version:
- Calories – 471 kcal
- Fat – 25 g
- Carbohydrate – 57 g
- Protein – 5 g
Notes: These are indulgent treats — fairly high in sugar and fat due to Nutella, butter, and glaze. Gluten-free or vegan swaps will change texture and calorie breakdown slightly. For a lighter version, reduce the glaze or skip the brown sugar sprinkle; using a thinner layer of Nutella cuts sugar per serving but changes mouthfeel.
FAQs about Nutella Pop Tarts
- How should I store leftover Nutella Pop Tarts and how long will they keep?Store cooled pop tarts in an airtight container at room temperature for up to 2 days (frosted ones are best eaten within 1 day). Refrigerate up to 1 week — they’ll firm up. You can freeze unfrosted or fully cooled pop tarts for up to 2 months—freeze unfrosted or freeze before glazing and add glaze after thawing.
- Can I make these Nutella Pop Tarts gluten-free or vegan?Yes. For gluten-free, use a reliable 1:1 gluten-free flour blend (with xanthan gum) and expect to chill the dough a bit longer. For vegan, swap dairy butter for vegan butter and use a vegan-friendly shortening; replace the egg wash with aquafaba or non-dairy milk plus a little maple syrup, and use non-dairy milk in the glaze. Texture may vary slightly — often a little more fragile but still tasty.
- What’s the best way to reheat them so they stay crisp?Reheat in a toaster oven or regular oven at about 325°F (160°C) for 5–10 minutes until warm and crisp. Avoid the microwave unless you don’t mind a softer, chewier crust.
- My Nutella leaked out during baking — how can I prevent that?Don’t overfill (about 1 tablespoon per rectangle as in the recipe), leave a 1/2-inch border, brush the edges with egg wash to help them stick, press/crimp edges with a fork, and chill or briefly freeze assembled tarts before baking to help the dough hold its shape.
- Can I use store-bought puff pastry instead of making the dough?Yes—puff pastry is an easy shortcut and gives flakier layers. Thaw according to package directions, cut into rectangles, add filling (don’t overfill), seal edges, and bake until golden (follow package timing as a guide and watch closely).
Conclusion
These Nutella Pop Tarts are a cozy, slightly nostalgic treat that’s rewarding to make from scratch. They’re forgiving if you follow a few key rules: keep things cold, don’t overfill, and chill before baking. Whether you make them as a weekend indulgence, a cute party snack, or a hands-on project with kids, they’ll deliver warm, gooey centers and that bakery-style satisfaction. Try a few flavor swaps, decorate for the season, and share what you made — I love seeing variations and small fixes that readers discover. Happy baking!

Ingredients
Method
- Add the flour, sugar and salt to a food processor and pulse a few times to evenly combine. Add the butter and shortening and pulse about 8 times, just enough to cut butter into smaller pieces. With the processor running, pour ice cold water down the feed tube and pulse until the dough begins to clump together.
- Turn the dough onto a floured surface and gather into a ball. Divide into 2 even portions and flatten or roll each portion into an approximate 6-inch disc and wrap tightly with plastic wrap. Chill at least one hour in the refrigerator.
- Line two baking sheets with parchment paper and set aside. Remove 1 disc of dough from the refrigerator and let rest 10 minutes to soften (keep the other disc in the refrigerator).
- On a lightly floured cutting board, roll the dough into a little larger than a 9x12-inch rectangle in order to create nine 3x4-inch rectangles. Cut into rectangles and transfer to baking sheets, chilling them as necessary.
- Brush egg wash over the edges of each rectangle and fill with Nutella and brown sugar mixture. Seal the rectangles and freeze for 30 minutes.
- Preheat the oven and brush the tops with egg wash before baking until golden.
- Cool the pop tarts and glaze them before serving.