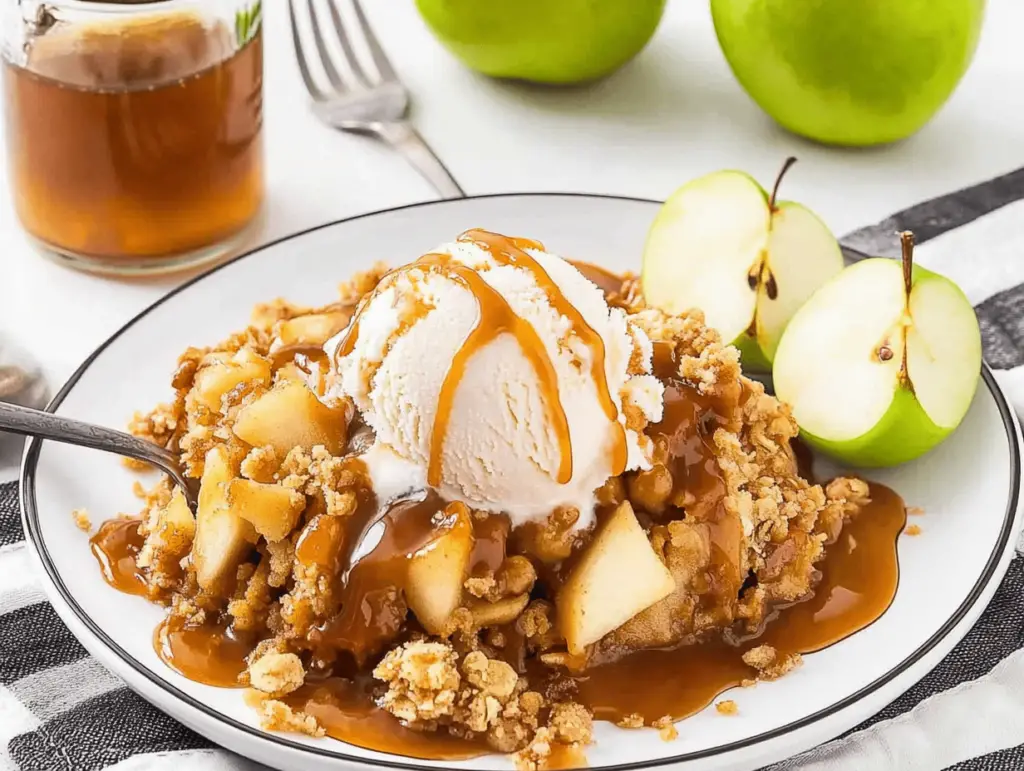
When it comes to comfort food, few desserts can compare to the warmth and satisfaction of a homemade apple crisp. This Old Fashioned Easy Apple Crisp is an incredibly simple yet indulgent dish that showcases the vibrant flavors of fresh Granny Smith apples, perfectly balanced with a rich, buttery oat crumble. Perfect for family gatherings, cozy evenings at home, or as a delightful treat for special occasions, this recipe is not only delicious but also an easy way to impress guests. The combination of sweet and tart apples with a crunchy topping creates a heavenly contrast that is simply irresistible. In this article, you will learn about the origins of apple crisp, a detailed ingredient breakdown, step-by-step cooking instructions, possible variations, serving suggestions, and helpful tips for success.
Understanding the Recipe
The history of apple crisp dates back to the 19th century, with roots deeply embedded in American cuisine. Often thought of as a quintessential dessert in many households, apple crisp has become a staple, especially during the autumn months when apples are in season. The dish reflects a simpler time when home-cooked meals were cherished, and families would gather around the table to share stories and enjoy homemade delights. This recipe stands out not just for its flavor, but for the nostalgia it evokes, reminding many of the comfort of Grandma’s kitchen. Whether you have fond memories of baking with family or you’re looking to create new traditions, this easy apple crisp recipe is sure to warm your heart and home.
Ingredient Breakdown
To make the perfect apple crisp, you will need the following ingredients:
- Apple Filling:
- 10 cups Granny Smith apples (about 7-8 apples)
- ½ cup light brown sugar
- ⅓ cup all-purpose flour
- ¼ cup granulated sugar
- 2 tsp ground cinnamon
- ½ tsp ground nutmeg
- 1 tsp vanilla extract
- Crisp Topping:
- 1⅓ cups quick-cooking oats
- 1⅓ cups all-purpose flour
- 1 cup light brown sugar
- 1½ tsp ground cinnamon
- ½ tsp salt
- ½ tsp baking powder
- ¾ cup unsalted butter (melted)
Each ingredient plays a crucial role in enhancing the overall flavor and texture of the dish. The Granny Smith apples provide a perfect balance of tartness and sweetness, making them an ideal choice for apple desserts. The light brown sugar used in both the filling and topping lends a rich, caramel-like flavor, while the mixture of spices adds warmth and depth. Quality ingredients, especially fresh apples and unsalted butter, will greatly elevate your dish’s taste. For those with dietary restrictions, consider using gluten-free flour and oats for a gluten-free version, or substitute coconut oil for butter for a dairy-free option.
Step-by-Step Instructions
Now that we have our ingredients ready, let’s dive into the step-by-step process of making this irresistible apple crisp:
- Preheat your oven to 350°F (175°C). Grease a 9×13-inch baking dish with non-stick spray to prevent sticking.
- In a large mixing bowl, combine the following for the apple filling:
- 10 cups sliced Granny Smith apples
- ½ cup light brown sugar
- ⅓ cup all-purpose flour
- ¼ cup granulated sugar
- 2 tsp ground cinnamon
- ½ tsp ground nutmeg
- 1 tsp vanilla extract
Gently fold the ingredients together until the apple slices are thoroughly coated. The flour will help thicken the juices released during baking.
- Spread the apple mixture evenly in the prepared baking dish, making sure to distribute the slices for even cooking.
- For the crisp topping, combine the following in a separate mixing bowl:
- 1⅓ cups quick-cooking oats
- 1⅓ cups all-purpose flour
- 1 cup light brown sugar
- 1½ tsp ground cinnamon
- ½ tsp salt
- ½ tsp baking powder
Mix these dry ingredients well. Then, add ¾ cup melted unsalted butter and stir until everything is evenly combined. The mixture will be crumbly.
- Sprinkle the crisp topping evenly over the apples in the baking dish, ensuring full coverage.
- Bake in the preheated oven for 40-45 minutes. The apple crisp is done when the topping is golden brown and the apple filling is bubbly. You may want to check on it halfway through to avoid over-browning.
- Allow the dish to cool for about 5 minutes before serving. This cooling time helps the filling set slightly, making it easier to serve.
Variations and Customizations
Your apple crisp can easily be customized to suit your taste or dietary needs. Here are some ideas to get you started:
- Fruit Combinations: While Granny Smith apples are a classic choice, consider mixing different varieties such as Honeycrisp or Fuji for added sweetness. You can also add berries like blueberries or raspberries for a delightful twist.
- Nutty Topping: For a crunchier texture, incorporate chopped nuts such as walnuts or pecans into the crisp topping. About ½ cup of chopped nuts works well.
- Healthier Alternatives: Substitute whole wheat flour for all-purpose flour in the topping for added fiber, or use maple syrup instead of granulated sugar to reduce refined sugars.
- Spice It Up: Experiment with spices by adding cardamom, ginger, or cloves to the apple filling for a unique flavor profile.
Serving Suggestions
Now that your apple crisp is baked to perfection, it’s time to serve it up! For an appealing presentation, consider these serving suggestions:
- Garnishes: Top your apple crisp with a scoop of vanilla ice cream or a dollop of whipped cream for a decadent treat. A sprinkle of cinnamon on top adds an extra touch of flavor.
- Pairing Suggestions: This dessert pairs beautifully with coffee, hot cider, or a glass of dessert wine, like Riesling or Moscato.
- Occasions: Serve this delightful apple crisp during family dinners, as a sweet ending to Thanksgiving feasts, or for casual gatherings with friends. It’s also perfect for potlucks!
Tips for Success
To ensure your apple crisp turns out perfectly every time, here are some helpful tips:
- Choosing Apples: Always opt for firm apples that hold their shape during baking. Granny Smith apples are tart, while others like Fuji or Honeycrisp can add sweetness.
- Overmixing: When combining the crisp topping, avoid overmixing to prevent a dense texture. It should remain crumbly.
- Storage: If you have leftovers, store the apple crisp in an airtight container in the refrigerator for up to 3 days. To reheat, place it in the oven at 350°F until warmed through.
- Freezing Instructions: To freeze, let the apple crisp cool completely, then cover it tightly with plastic wrap and aluminum foil. It can last up to 3 months in the freezer. Bake from frozen at 350°F for approximately 60-70 minutes.
FAQs
Here are some common questions answered regarding the Old Fashioned Easy Apple Crisp recipe:
- Can I substitute other fruits? Absolutely! Peaches, cherries, or pears can be used in place of apples. Adjust the sugar based on their sweetness.
- Is there a vegan option for this recipe? Yes! Substitute the unsalted butter with coconut oil or vegan butter and use maple syrup instead of granulated sugar for the filling.
- Can I make this apple crisp ahead of time? Yes, you can prepare the apple mixture and topping separately a day in advance. Refrigerate both, then assemble and bake just before serving.
- What can I serve with apple crisp? Apple crisp pairs well with vanilla ice cream, whipped cream, or even a drizzle of caramel sauce. A savory dish like roasted chicken can also complement the sweetness perfectly.
Conclusion
In conclusion, this Old Fashioned Easy Apple Crisp is a delightful dessert that embodies comfort, nostalgia, and simplicity. With its tart apple filling and buttery oat topping, it’s easy to see why this recipe is a favorite in many households. By following the straightforward steps outlined above, you’ll create a dessert that not only tastes fantastic but also brings family and friends together around the table. So gather those delicious ingredients and try your hand at making this apple crisp today. Share your experiences and variations with us, and let this recipe become a part of your cherished culinary traditions!
Print
Old Fashioned Easy Apple Crisp
Description
Ingredients
- Apple Filling:
- 10 cups Granny Smith apples (about 7–8 apples)
- ½ cup light brown sugar
- ⅓ cup all-purpose flour
- ¼ cup granulated sugar
- 2 tsp ground cinnamon
- ½ tsp ground nutmeg
- 1 tsp vanilla extract
- Crisp Topping:
- 1⅓ cups quick-cooking oats
- 1⅓ cups all-purpose flour
- 1 cup light brown sugar
- 1½ tsp ground cinnamon
- ½ tsp salt
- ½ tsp baking powder
- ¾ cup unsalted butter (melted)
Instructions
- Preheat your oven to 350°F (175°C). Grease a 9×13-inch baking dish with non-stick spray to prevent sticking.
- In a large mixing bowl, combine the following for the apple filling:
- 10 cups sliced Granny Smith apples
- ½ cup light brown sugar
- ⅓ cup all-purpose flour
- ¼ cup granulated sugar
- 2 tsp ground cinnamon
- ½ tsp ground nutmeg
- 1 tsp vanilla extract
Gently fold the ingredients together until the apple slices are thoroughly coated. The flour will help thicken the juices released during baking.
- Spread the apple mixture evenly in the prepared baking dish, making sure to distribute the slices for even cooking.
- For the crisp topping, combine the following in a separate mixing bowl:
- 1⅓ cups quick-cooking oats
- 1⅓ cups all-purpose flour
- 1 cup light brown sugar
- 1½ tsp ground cinnamon
- ½ tsp salt
- ½ tsp baking powder
Mix these dry ingredients well. Then, add ¾ cup melted unsalted butter and stir until everything is evenly combined. The mixture will be crumbly.
- Sprinkle the crisp topping evenly over the apples in the baking dish, ensuring full coverage.
- Bake in the preheated oven for 40-45 minutes. The apple crisp is done when the topping is golden brown and the apple filling is bubbly. You may want to check on it halfway through to avoid over-browning.
- Allow the dish to cool for about 5 minutes before serving. This cooling time helps the filling set slightly, making it easier to serve.
