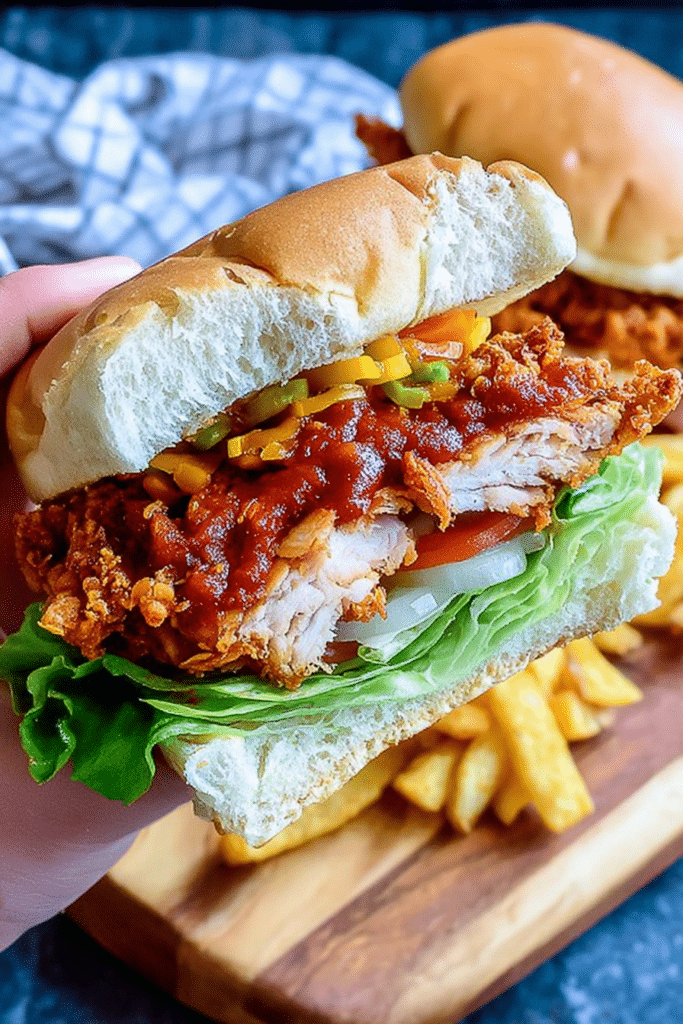
There’s something about a good spicy crispy chicken burger that pulls me right back into the kitchen: the crack of the crust when you bite in, the steam that rises and fogs your glasses for a second, and the balance of creamy sauce cooling the heat from red pepper flakes. I first started tweaking this after craving KFC’s Zinger and remembering the bright, smashed chili crunch of Indonesian ayam geprek — I wanted a sandwich with serious crunch and a spice that lingers without shutting down the flavors beneath.
This post is my kitchen-tested, honest guide to making a spicy crispy chicken burger that holds up on a plate and in your memory. I’ll walk you through the ingredients I reach for, exactly how I bread and fry (and how I bake when I want fewer dishes), sauces that make the sandwich sing, and common mistakes I’ve made — so you don’t have to. Expect sensory cues, timing, and swaps for different diets.
Ingredients You Need for the Perfect Burger
- Boneless chicken thighs – my go-to for juicy, forgiving meat that stays tender under high heat; breasts work, but need care.
- Egg whites – help the dry mix adhere and give a lighter crust than whole eggs.
- Flour (all-purpose or alternative) – forms the base of the dredge; swap with rice or gluten-free flour for GF versions.
- Gochugaru – Korean red pepper flakes with a smoky, slightly sweet heat; you can sub cayenne+papprika if needed.
- Paprika – adds color and a sweet pepper warmth; smoked paprika gives depth.
- Garlic powder – amplifies savory notes without the burn of fresh garlic in the dredge.
- Onion powder – optional, but rounds out the dry seasoning like a chef’s secret.
- Baking powder – tiny help for an extra-crisp crust by introducing air pockets in the breading.
- Japanese mayo – rich and slightly tangy, a creamier base for spicy sauces; regular mayo works too.
- Sweet chili and Sriracha – balance sweet, sticky heat with vinegary chile punch in the sauce.
- Soy sauce and rice vinegar – add umami and bright acidity to cut through the fat.
- Ice cold water – used for the double-dredge technique; the cold helps the flour cling and puffs the crust when fried.
- Burger buns – soft, toasted buns absorb some sauce without falling apart; brioche or potato rolls are ideal.
- Lettuce and cheese – provide cool crunch and melty richness; American or pepper jack are great choices.
Below is the exact ingredient list I used in testing so you can follow measurements precisely when you want to duplicate my results.
- 4 boneless chicken thighs
- 2 egg whites
- 1 tbsp flour (for wet seasoning)
- 2 tbsp gochugaru + extra in dry mix
- 1 tbsp paprika
- 1 tbsp garlic powder
- 1/2 tsp salt and 1/2 tsp sugar (in wet seasoning)
- 2 cups flour for dredge
- 1 tbsp onion powder (optional), 1 tsp baking powder, 1/4 tsp salt, 1/2 tsp sugar (dry mix)
- 2 tbsp Japanese mayo, 1 tbsp sweet chili sauce, 1 tbsp Sriracha, 1/2 tbsp light soy sauce, 1/2 tbsp rice vinegar, 1/2 tbsp chili flakes (for sauce)
- 3 cups ice cold water (for double-dredge process)
- Burger buns, lettuce, American cheese slices
Step-by-Step Instructions for Cooking
I always prep my station before touching the chicken — set the dredge bowl, the ice water, the resting rack, and an instant-read thermometer within reach. This recipe uses a double-dredge with an ice water step that gives the crispest, crackliest crust without needing eggs in the batter.
- Make the wet seasoning: Whisk egg whites with a spoonful of flour, the gochugaru, paprika, garlic powder, salt, and a touch of sugar. This is your marinade and adhesive. The paste will smell bright and garlicky; if it smells too sharp, it usually needs more sugar or a splash of vinegar.
- Marinate the chicken: Add the chicken thighs, making sure each piece is fully coated. I press the mixture into the nooks and folds of the thighs. Marinate at least 3 hours in the fridge, ideally overnight. In testing, overnight yielded deeper flavor but three hours still gave excellent spice adhesion.
- Make the dry mix: In a separate bowl combine the dredge flour, extra gochugaru, paprika, garlic powder, onion powder (if using), baking powder, salt, and a little sugar. The baking powder is subtle but crucial — it lightens the crust. Whisk and press out any lumps.
- Prepare your ice bath: Fill a shallow bowl with ice cold water. Cold water is the trick for crunch: it momentarily rehydrates the flour layer and creates a foamy reaction when it hits hot oil, puffing the crust.
- First dredge: Lightly dust each marinated thigh in the dry mix so every inch is covered. Press the flour into the meat rather than shaking it off — you want a substantial first layer.
- Dip quickly: Dip the floured piece into the ice water for about 5 seconds — just enough to moisten the flour, not wash it away. Don’t rub the surface; you’ll dislodge the crust. Lift and wait ~10 seconds so excess water drips off.
- Second dredge: Return the damp piece to the dry mix and coat it thoroughly. In my kitchen I repeat for every piece, using fresh ice water as needed — it keeps the crust aggressively crunchy.
- Rest: Let the coated pieces rest on a wire rack for 5 minutes to let the layers set. This prevents the crust from slipping in the oil.
- Frying method (my preferred): Heat oil to medium (350–360°F / 175–180°C if you use a thermometer). Fry the thighs until golden brown — about 10–15 minutes depending on thickness. The center should read 165°F (74°C). I fry at medium rather than high: high heat will brown the crust before the inside reaches temperature.
- Extra-crisp option: For military-level crunch, let the fried thighs rest 3–4 minutes, then fry again for 5–8 minutes. It adds fat but the texture is unbeatable.
- Baking alternative: If you want less oil, bake at 425°F (220°C) for 20–25 minutes, flipping halfway, and brush lightly with oil. The crust won’t be identical to deep frying but will be satisfyingly crisp.
- Season and rest: Once out of the oil, sprinkle a pinch of salt and, if you like, a dusting of gochugaru. Let the chicken rest 3 minutes before assembling so the cheese melts but juices don’t flood the bun.
- Toast buns and assemble: Lightly toast the buns until golden. Spread the homemade sauce (recipe below) on both halves, place the chicken on the bottom bun, top with a slice of cheese and lettuce, then crown with the top bun. Press lightly and serve immediately.
Unique Flavor Combinations to Try
I like to think of the spicy crispy chicken burger as a blank canvas for regional flavors. Here are combos I’ve tested and loved:
- Pineapple salsa and jalapeño: The sweetness of pineapple salsa brightens the fat of the fried chicken and the fresh jalapeño adds crisp heat — works great on a toasted brioche.
- Mango chutney and cilantro: A sweet, tangy chutney cuts through the spice and adds tropical perfume. Try a smear of it under the chicken and cilantro on top.
- Avocado cream and lime zest: Blend ripe avocado with lime, a little yogurt, and salt for a cool, fatty counterpoint to the heat.
- Cheese plays: Pepper jack ups the heat and melts beautifully; blue cheese adds a tangy, savory contrast that I reach for when serving the burger alongside bitter greens.
- International twists: A gochujang glaze (Korean) or adobo-spiked mayo (Mexican) both amplify umami and dimension — a tablespoon of either in the sauce transforms the profile instantly.
Homemade Sauces to Elevate Your Burger
Sauces are where you can make this burger yours. The combination of creaminess, tang, and heat makes the sandwich complete. Here are my tested sauces — quick, balanced, and reliable.
Don’t forget to whip up a batch of homemade spicy ketchup to really flavor up your spicy crispy chicken burger.
- Spicy mayo (my go-to) – Mix Japanese mayo with sweet chili sauce and Sriracha. Taste and adjust: if it’s too fiery, add more mayo; if flat, add vinegar or a pinch of sugar. The mayo keeps the sauce silky and helps with mouthfeel.
- Garlic aioli – Whisk mayo, minced roasted garlic, lemon juice, and a pinch of salt. Roast the garlic first: it turns sweet and caramelized, which rounds the sauce and keeps it from tasting raw when paired with fried food.
- Tangy barbecue-sriracha – Combine ketchup or tomato base with soy, rice vinegar, a touch of honey, and Sriracha. This balances sweet, savory, and heat for guests who like sticky, tangy bites.
Healthy Variations of the Spicy Chicken Burger
I test lighter versions when I’m meal prepping. You can trim calories and still keep texture if you follow a few rules.
- Bake instead of fry – Bake at 425°F and flip halfway. Brushing with a small amount of oil helps mimic the crust.
- Gluten-free dredge – Use rice flour or a certified gluten-free blend; add a little cornstarch for extra crunch.
- Lettuce wrap – Substitute a large romaine leaf or butter lettuce for the bun for a low-carb version. Keep sauces on the lighter side (Greek yogurt base) to avoid sogginess.
- Portion control – Use 3-ounce portions of chicken thigh and whole-grain buns to keep the meal balanced. Add leafy greens and tomato slices for nutrients and freshness.
- Meal prep – Cook chicken as directed, cool, then store in airtight containers for up to 3 days. Reheat briefly in a hot skillet to restore some crispness rather than microwaving, which softens the crust.
Ideal Sides and Dips for Your Burger
Choose sides that complement fat and spice: something sweet, something acidic, and something cool.
Pair your spicy crispy chicken burger with a slice of spicy jalapeno cornbread for an added kick of flavor.
For a tasty combination, try serving our buffalo chicken meatballs as a delicious side dish.
- Sweet potato fries – Their natural sweetness offsets heat; toss with a little smoked paprika for continuity.
- Classic coleslaw – A vinegar-based slaw keeps things bright and crunchy; creamy coleslaw also works if you prefer mellowed heat.
- Corn on the cob – Grilled with lime and butter; the corny sweetness pairs perfectly with fried chicken.
- Dips – A creamy ranch, chipotle crema, or the spicy mayo from above are ideal for dunking fries and taming heat between bites.
Tips for Making the Best Chicken Burger
I’ve made every mistake so you don’t have to. Here are the small decisions that change a good sandwich into a great one.
Enhance your cooking skills by checking out our recipe for garlic parmesan chicken skewers for perfect grilling techniques.
- Marinate long enough – At least 3 hours, preferably overnight. The longer the chicken sits in the wet seasoning, the deeper the spice penetrates.
- Temperature control – Medium oil temperature keeps the crust from burning while the inside cooks. Use an instant-read thermometer; 165°F (74°C) is the safe internal temp.
- Don’t overcrowd the pan – Fry in batches so the oil temperature recovers quickly; overcrowding makes the crust soggy.
- Let it rest – Rest the fried chicken briefly before assembly. Resting keeps the juices from soaking the bun and allows cheese to melt evenly.
- Use cold water for the double-dredge – The trickiest but most effective step. If the crust slips, you dipped too long or rubbed it while wet.
- Adjust seasoning last – If the sandwich tastes flat, add salt or an acidic element like vinegar or lemon; don’t automatically add sugar or more spice.
- Reheating – Warm in a 375°F oven on a rack to restore crispness rather than microwaving.
Conclusion and Serving Suggestions
This spicy crispy chicken burger is one of those recipes I find myself making when friends drop by or when I want a satisfying solo dinner I can eat with my hands. The double-dredge plus the cold-water trick creates a crust that crackles, while the hot spice and creamy sauce balance each other in every bite. Serve it with a sweet or acidic side to round out the plate, and plan for leftovers because the flavors actually deepen overnight.
Occasions: great for summer barbecues, casual weeknight dinners, or game-day spreads. If you try it, toast the buns well, slice the chicken carefully so it sits comfortably in the bun, and share any variations — I love hearing what works in other kitchens.
FAQ
- How long should I marinate the chicken for the spicy crispy chicken burger? For the best flavor, marinate the chicken thighs for at least 3 hours, but overnight is even better!
- Can I use chicken breasts instead of thighs? Yes, you can use chicken breasts, but keep in mind they may cook faster and could end up drier, so monitor them closely.
- What can I substitute if I don’t have gochugaru? If you don’t have gochugaru, you can use a mix of cayenne pepper and sweet paprika for a similar flavor and spice level.
- Can I bake the chicken instead of frying it? Absolutely! You can bake the chicken at 425°F (220°C) for about 20-25 minutes, just make sure to flip them halfway through for even cooking.
- What are some recommended sides to serve with the spicy crispy chicken burger? Some great sides include sweet potato fries, coleslaw, or a refreshing corn salad to complement the flavors of the burger.

Spicy Crispy Chicken Burger
Ingredients
Method
- Mix all the wet seasoning together in a bowl.
- Add chicken thigh and coat every single piece with the marinade.
- Marinate for at least 3 hours or overnight.
- Mix all the dry mix ingredients in a bowl.
- Mix all the sauce ingredients together in a bowl.
- Take a piece of chicken thigh and lightly dredge it in the dry mix, ensuring it is fully coated.
- Dip the chicken in ice cold water for 5 seconds, careful not to rub off the flour coat.
- Allow the chicken to rest for 10 seconds before placing it back into the dry mix.
- Dredge the chicken again, making sure every inch is coated. Repeat until done.
- Let it rest for 5 minutes before frying.
- Deep fry in hot oil over medium heat until golden brown (about 10-15 minutes).
- Optional: Fry for another 5-8 minutes for extra crispy chicken.
- Remove from oil and let it rest; sprinkle a pinch of salt and more gochugaru if desired.
- Toast the burger buns.
- Spread sauce on both burger buns; add chicken, cheese, lettuce, and top bun. Serve and enjoy!