
I’ve made this strawberry tart countless times for backyard dinners and summer brunches, and it’s the dessert people remember long after the last slice is gone. In my kitchen the tart begins with the smell of butter browning in the oven and ends with a shine of warm glaze across jewel-bright berries. Those simple moments are exactly why I reach for this recipe when I want something both pretty and reliably delicious.
Over the years I learned the small details that make a big difference: keeping the butter cold for a flaky crust, bringing the cream cheese to room temperature so the filling whips smooth, and brushing a thin coat of jam so the strawberries sparkle without getting soggy. I also learned which shortcuts are worth taking and which will cost you texture or flavor.
Whether you’re hosting a formal garden party or a relaxed weekend gathering, this tart dresses your table without feeling fussy. I’ll walk you through everything I do in my kitchen so you can feel confident assembling a show-stopping dessert that stays fresh and impressive through service.
Why This Strawberry Tart Is Perfect for Summer Parties
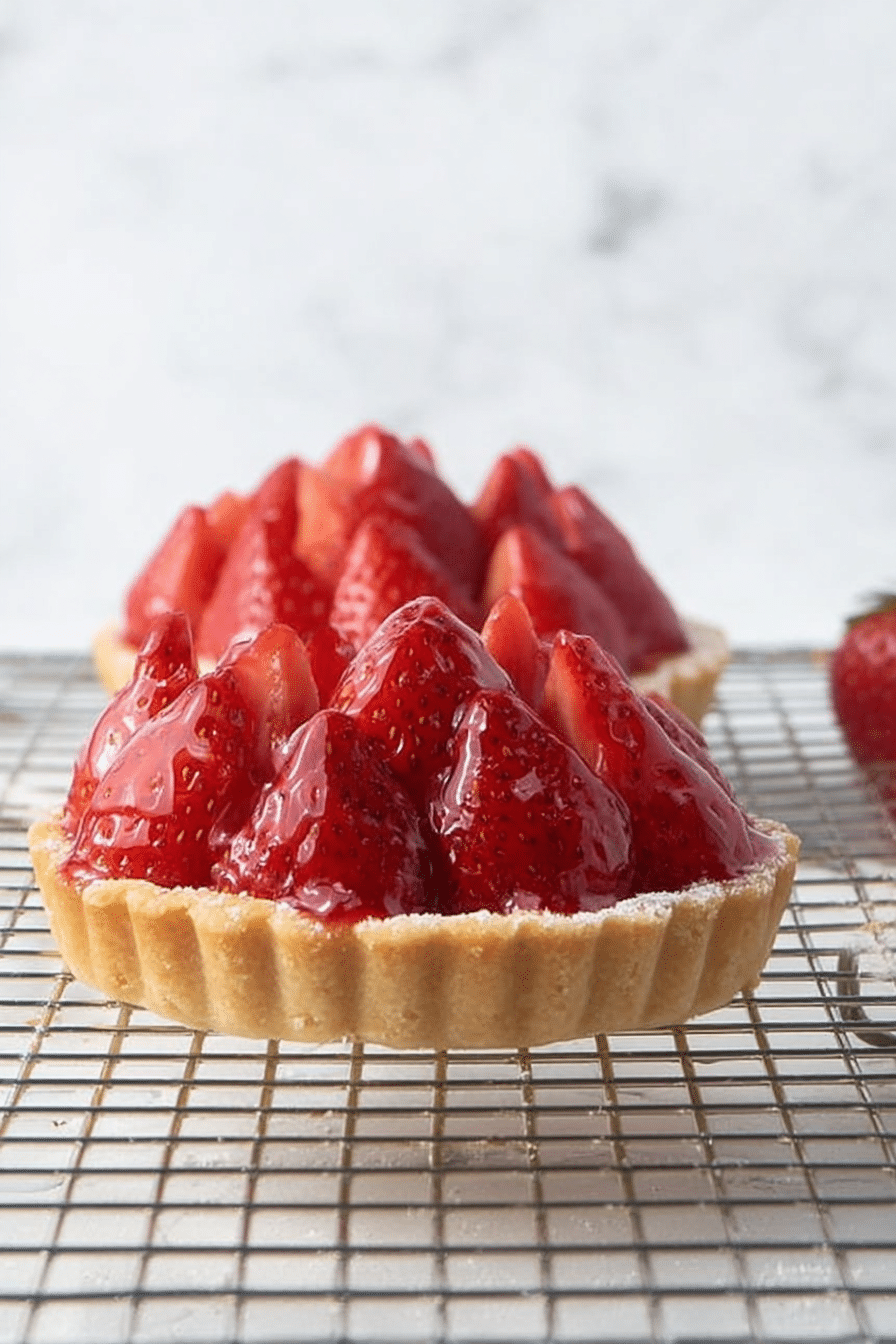
The visual contrast between a golden, buttery shell and glossy red strawberries makes this tart a natural centerpiece on a summer table. The bright color palette pairs well with casual place settings and dressier gatherings alike, and guests always comment on how fresh it looks.
The flavor is balanced: a tender, slightly sweet pastry; a cool, lightly tangy cream cheese filling; and the juicy sweetness of ripe strawberries. That balance keeps the tart from feeling too heavy after a long meal, which is exactly what you want for an alfresco party. If you enjoy strawberry desserts, you might also like a lighter handheld option like strawberry shortcake cheesecake rolls for a change of pace:
strawberry shortcake cheesecake rolls
Finally, this tart invites conversation: everyone wants to know how you got the berries to shine so perfectly. The glazing step is simple but gives a professional finish, and it’s a great moment to pause while your guests admire the result.
Everything You Need for Strawberry Tart
Below I explain the role of each ingredient and the kitchen tools that make this recipe easy to execute. You’ll find sensible substitutions for dietary needs so you can adapt the tart without losing texture or flavor.
- All-purpose flour – The structure of the crust comes from flour; for a tender crust, use a standard all-purpose or a lower-protein pastry flour.
- Butter (frozen is preferred) – Cold, solid butter creates flaky layers as it melts during baking; use a good-quality unsalted butter for clean flavor. For a dairy-free option, use a firm vegan butter substitute that performs similarly when cold.
- Sugar – Sweetens the crust and filling; you can swap for a fine sugar alternative if you need to reduce refined sugar.
- Salt – Balances and enhances the other flavors; don’t skip it even in sweet bakes.
- Ice water – Brings the dough together without warming the butter; add gradually until the dough just holds.
- Cream cheese – Gives the filling its tang and silkiness; for a non-dairy tart use a high-quality plant-based cream cheese and adjust sugar to taste.
- Sour cream or similar – Adds a little acidity and loosens the filling; mascarpone is a richer substitute if you want a milder tang.
- Egg yolk – Helps the filling set and adds richness; for vegan versions, a thick cashew cream or stabilized vegan custard can replace the yolk.
- Vanilla and citrus zest – Small aromatics that brighten the filling; don’t skip the lemon zest for contrast with the strawberries.
- Fresh strawberries – Choose firm, deeply colored berries for the best presentation and flavor; see the selection section below for staging tips.
- Fruit jam for glaze – A neutral seedless jam or red currant/apricot jam thinned with a little water gives the strawberries a glossy finish without adding too much extra sweetness.
- Essential tools – A food processor to cut butter into flour, a rolling pin, a removable-bottom tart pan for clean edges, and a small pan or brush for the glaze. A mixer speeds up the filling, but you can also whisk by hand.
The Secret to a Flaky, Buttery Tart Crust
The crust’s texture comes down to temperature and gentle handling. Use frozen or very cold butter and work quickly so the butter stays in small, cold pieces throughout the dough. Those pockets of butter steam in the oven and create the flaky layers you want.
Chill the dough after you form it, and again after it’s pressed into the pan if your kitchen is warm. Chilling relaxes the gluten so the crust doesn’t shrink and keeps the butter firm so it flakes properly when baked. I always press the dough into the tart pan rather than stretching it — pressing avoids overworking it and gives even thickness.
Flour quality matters: a lower-protein flour produces a more tender crust. If you only have strong flour, rest the dough longer in the fridge to let the gluten relax. The tactile change from crumbly mix to a smooth disc is always my cue that the dough is ready to rest.
Why Temperature Matters for the Cream Cheese Filling
If your cream cheese is cold it will clump and leave little pockets that never smooth out. Bring cream cheese to room temperature so it blends into a silky, lump-free filling. I usually take it out of the fridge about an hour before I plan to beat it.
Work in stages: beat the cream cheese until smooth, then add sour cream and egg yolk before stirring in sugar and aromatics. This order helps the mixture incorporate evenly and prevents overbeating. The filling sets as it bakes; don’t expect it to be rock firm when it comes out of the oven, but it should no longer wobble.
Temperature also affects flavor: chilling the tart allows the filling’s tang to calm and become more rounded, so the tart tastes more balanced the next day.
Selecting and Arranging Strawberries for Maximum Visual Impact
Look for strawberries with a deep red color and a glossy sheen — avoid pale or green-tipped berries. The best berries feel firm but yield slightly to pressure and smell fragrant at the stem.
Slice some berries thinly for overlapping patterns and leave others halved or whole to add height and contrast. Start in the center and work outward in concentric circles for a classic look, or fan slices from one side for a modern, asymmetrical arrangement. Lightly pat the berries dry before arranging so they don’t introduce extra moisture to the filling.
For interest, you can layer a ring of thin slices standing on their edges around the perimeter to give the tart more dimension. A final skim of warm jam will make the colors pop and add a bit of shine without weighing the fruit down.
How to Make Strawberry Tart (Step-by-Step)
- Preheat your oven and prepare the tart pan so you’re ready when the dough is chilled.
- Make the crust: pulse flour, sugar, salt and frozen butter until crumbs form, then add ice water a little at a time until the dough just comes together. Form into a disc and chill until firm.
- Roll the dough to an even thickness and press into your tart pan, trimming the edges level with the rim. Prick the bottom with a fork to prevent bubbling.
- Blind-bake the shell until it’s pale golden; cool slightly before filling to prevent the cream from breaking.
- Beat room-temperature cream cheese until smooth, then add sour cream, egg yolk, sugar, salt, vanilla and lemon zest. Blend until silky and pour into the pre-baked shell so the layer is even.
- Bake again just until the filling is set — it should be slightly jiggly in the center but not liquid. Let it cool completely to room temperature before adding fruit.
- Arrange the strawberries on the cooled filling, starting from the center and working outward for a neat pattern, or create height with alternating slices and halves.
- Warm jam with a splash of water and brush over the fruit for shine and a protective layer that keeps berries fresh longer.
- Remove from the tart pan base and refrigerate until ready to serve. If you want another strawberry treat while prepping, try these easy strawberry cream puffs for a complementary dessert: easy strawberry cream puffs.
Pro Tip for strawberry tart: Make-Ahead & Last-Minute Assembly
- I often bake the crust a day ahead and keep it well wrapped in the fridge — it stays crisp if sealed from humidity.
- I’ll make the filling earlier in the day and keep it chilled; bring it to just below room temperature and whisk briefly before pouring to remove any air pockets.
- Assemble the tart with fruit and glaze within a few hours of serving to keep the berries looking their best. For a party, I’ll do final glazing at the last moment so the shine is fresh.
- If you need handheld dessert options for your guests, I sometimes serve strawberry cheesecake tacos alongside the tart for a playful summer spread: strawberry cheesecake tacos.
How to Store, Make Ahead, and Serve Strawberry Tart
Store the tart in the refrigerator in an airtight container or cover it loosely with plastic wrap. The glaze will help protect the berries, but the tart is best eaten within two to three days for peak texture and flavor.
If you make components ahead: keep baked shells at room temperature in a sealed container for up to a day, refrigerate the filling, and keep washed strawberries uncut and dry in the fridge until assembly. When serving, let the tart sit at room temperature for 10–15 minutes so the filling softens slightly — that brings out the creaminess without making the crust soggy.
Easy Variations: Vegan, Gluten-Free, and Other Fruit Toppings
- Vegan crust – Use a firm vegan butter and a plant-based cream cheese for the filling; thick cashew cream can replace egg yolk for structure.
- Gluten-free crust – A blend of gluten-free all-purpose flour and a bit of almond flour makes a tender shell; chill thoroughly to prevent crumbling.
- Nut-based filling – For a dairy-free creamy option, use a sweetened cashew cream or a coconut-based crème for a different flavor profile.
- Other fruit toppings – Try raspberries, blueberries, or sliced stone fruit in season. For a tangy twist, consider a strawberry-rhubarb topping for more complexity: strawberry rhubarb pie inspiration.
Troubleshooting Common Issues with Strawberry Tart
- My crust turned soggy — I recommend blind-baking the shell until it’s set and golden, and brushing the baked crust with a thin layer of melted chocolate or a simple egg wash before adding the filling to create a moisture barrier.
- The filling didn’t set — make sure the filling ingredients are at proper temperature and avoid overwhipping. If it’s still soft after baking, chill the tart longer; sometimes a few extra hours in the fridge will firm it up.
- Strawberries sliding off the tart — pat the fruit dry before arranging and use a thin layer of filling or a small dam of pastry cream around the edge to help keep larger pieces in place.
- Edges browned too quickly — shield the crust edge with foil or an adjustable pie shield during baking so the rim doesn’t overbake while the filling sets.
- Glaze too thick or sticky — warm the jam with just enough water to brush easily; if it cools and stiffens, reheat gently and thin with a little more water.
With a little planning you can turn this tart into a reliable showpiece for summer gatherings. I keep the process straightforward so you can enjoy the party as much as your guests.
Frequently Asked Questions
How long does it take to make the strawberry tart? The total time to make the strawberry tart is about 90 minutes, which includes 60 minutes of prep time and 30 minutes of cook time.
Can I use frozen strawberries for this tart? Fresh strawberries are recommended for the best flavor and texture, but if frozen strawberries are all you have, make sure to thaw and drain them well before using.
What can I use instead of cream cheese in the filling? You can use mascarpone or a vegan cream cheese alternative if you want a non-dairy option. Adjust the sugar based on the sweetness level of the substitute.
How do I store leftover strawberry tart? Store any leftover strawberry tart in the refrigerator in an airtight container. It’s best enjoyed within 2-3 days for optimal freshness.
Can I prepare the strawberry tart in advance? Yes! You can make the tart crust and filling a day in advance. Just assemble the tart with the strawberries and glaze right before serving for the best presentation.
Strawberry Tart
Ingredients
Method
- Preheat oven to 375 degrees F.
- Combine all ingredients except water in a food processor. Pulse together until crumbs are formed.
- Gradually, a tablespoon at a time, pour in water while pulsing. Pulse until dough turns light yellow and begins to form a clump.
- Form mixture into a ball and flatten the all. Wrap in plastic wrap and refrigerate for at least 30 minutes.
- Roll dough out to about 1/8 inch thick, into a circle about 1 1/2 inches bigger around than your tart pan.
- Place dough into a removable bottom tart pan or pans and press into bottom and up the sides of pan. Remove excess dough, dough should be even with the top of the pan.
- Use a fork to prick the bottom of the dough. Bake for 15-20 minutes or until begins to turn golden brown. Allow to cool before filling with cream cheese filling.
- Place cream filling ingredients into a bowl and mix until smooth and creamy.
- Add cream cheese filling to tart pan, mixture should be about 1/2 inch thick.
- Bake for another 12-15 minutes until filling is set and crust is browned. Allow to cool.
- Add berries to cream cheese layer. Start in the middle and work around in a circle.
- Heat jam and water in a saucepan cool slightly and then brush over the fruit.
- Remove from tart pans and keep refrigerated until ready to serve.