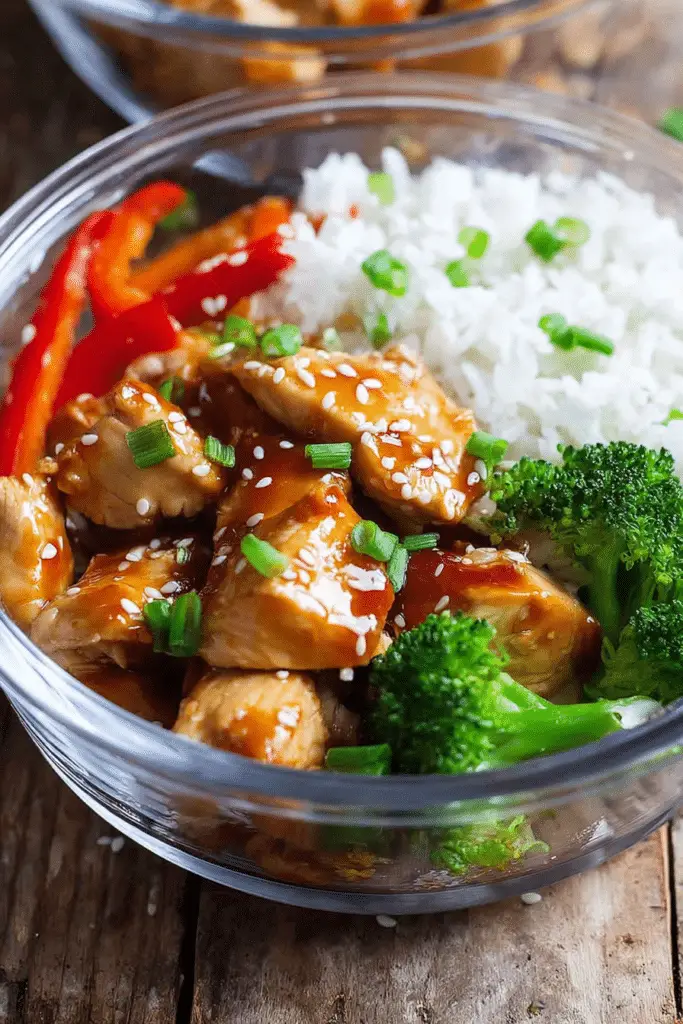
Teriyaki chicken is a comforting, savory-sweet dish that started in Japan as a simple method of glazing grilled items with a soy-sweet sauce and has since become a global favorite. Turning it into meal prep bowls is one of my favorite shortcuts for busy weeks: the rich, sticky glaze makes plain rice and roasted vegetables feel special, and the whole tray-bake method is forgiving when you’re short on time. I first started making these bowls when I needed predictable lunches for a hectic month of late meetings — now they show up in my fridge most weeks.
In my kitchen the smell is the first giveaway: warm ginger, mellowed garlic, and the caramel notes of honey hitting the hot pan. The sauce begins runny and then becomes thick and almost jam-like in the baking dish — that’s when you know it’s going to cling to the chicken. I make four bowls from this recipe, which is perfect for weekday lunches, and I like that the assembled bowls keep me honest about portions without feeling like a diet. Below I’ll walk you through every step, what to watch for, and how to adapt the bowls to your pantry and dietary needs.
Ingredients Needed for the Recipe
- Chicken breasts – the main protein; they bake through quickly and soak up the teriyaki glaze. Substitute with thighs if you prefer juicier meat.
- Soy sauce – provides the salty, savory backbone of the teriyaki. For gluten-free, use tamari or coconut aminos.
- Mirin – a sweet rice wine that gives the glaze its authentic depth and slight acidity. If you don’t have mirin, a splash of rice vinegar plus a touch of sugar works in a pinch.
- Honey – lends sweetness and helps the sauce caramelize; you can swap maple syrup for a different profile.
- Fresh ginger – adds a bright, spicy lift. Grated ginger melts into the sauce and keeps the flavor fresh.
- Garlic – brings savory warmth; use more if you like a garlic-forward glaze.
- Cornstarch – used as a slurry to thicken the sauce into that glossy, clingy finish.
- Rice (Jasmine or Basmati) – the neutral, fragrant base that soaks up sauce. Swap for brown rice, quinoa, or cauliflower rice if you want lower carbs.
- Broccoli florets – provide color, crunch, and vitamin C; they roast beautifully and hold up in the fridge.
- Red bell peppers – add sweetness, color, and vitamin A; they caramelize at the edges when roasted.
- Avocado oil – a neutral oil with a high smoke point for roasting; olive oil works too but has a stronger flavor.
- Sesame seeds – for finishing texture and a toasty, nutty note.
- Spring onions (scallions) – bright garnish that cuts through the sweet glaze with a little oniony crispness.
- Salt & pepper – simple seasoning to balance flavors; salt enhances sweetness here, so add carefully and taste as you go.
Step-by-Step Instructions
- Preheat and prep — Preheat the oven to 400°F (200°C). Line or lightly oil an oven-proof dish for the chicken and a separate sheet pan for the vegetables. Having everything ready means you won’t overcook the chicken while you’re still chopping.
- Make the cornstarch slurry — Whisk a tablespoon of cornstarch into an equal amount of cold water until smooth. This small step prevents lumps and gives you the glossy, thick glaze instead of a watery sauce.
- Combine the teriyaki sauce — In the baking dish whisk together the cornstarch slurry, low-sodium soy sauce, mirin, grated ginger, chopped garlic, and honey until incorporated. It will look runny at this point; the oven will concentrate and thicken it. If the mixture tastes too flat, a tiny pinch of salt or an extra splash of soy will brighten it — but remember soy is salty, so taste first.
- Add the chicken — Nestle the chicken breasts into the sauce, turning to coat. Place the dish in the preheated oven. Bake for about 25 minutes, or until the chicken reaches 155°F internally. Important: pull it at 155°F because it will climb to 165°F while resting — that rest makes the chicken juicier. If you don’t have a thermometer, cut a small slit: juices should run clear, and the texture will be firm but springy.
- Roast the vegetables — While the chicken starts, toss broccoli florets and sliced red bell pepper with a drizzle of avocado oil and a pinch of sea salt and pepper. Spread on the sheet pan and put them in the oven beside the chicken for 15–20 minutes depending on how crunchy or soft you like them. I like the broccoli slightly charred at the tips — it adds a smoky snap to the bowls.
- Cook the rice — While the oven does its work, cook one cup of jasmine or basmati rice with the appropriate amount of water on the stovetop or in an electric pot. Fluff with a fork when done. Rice will hold for the week if cooled slightly before sealing into containers.
- Rest the chicken — Remove the chicken and veggies from the oven. Let the chicken rest for about 10 minutes — this keeps it juicy and lets the internal temperature stabilize. Resting is non-negotiable if you want tender meat.
- Cube and glaze — Transfer the chicken to a cutting board, slice into bite-sized cubes, and return the pieces to the thickened, jelly-like teriyaki sauce in the baking dish. Stir gently so every piece gets coated. If the sauce seems too thick after resting, stir in a tablespoon of hot water to loosen it slightly so it coats the chicken more evenly.
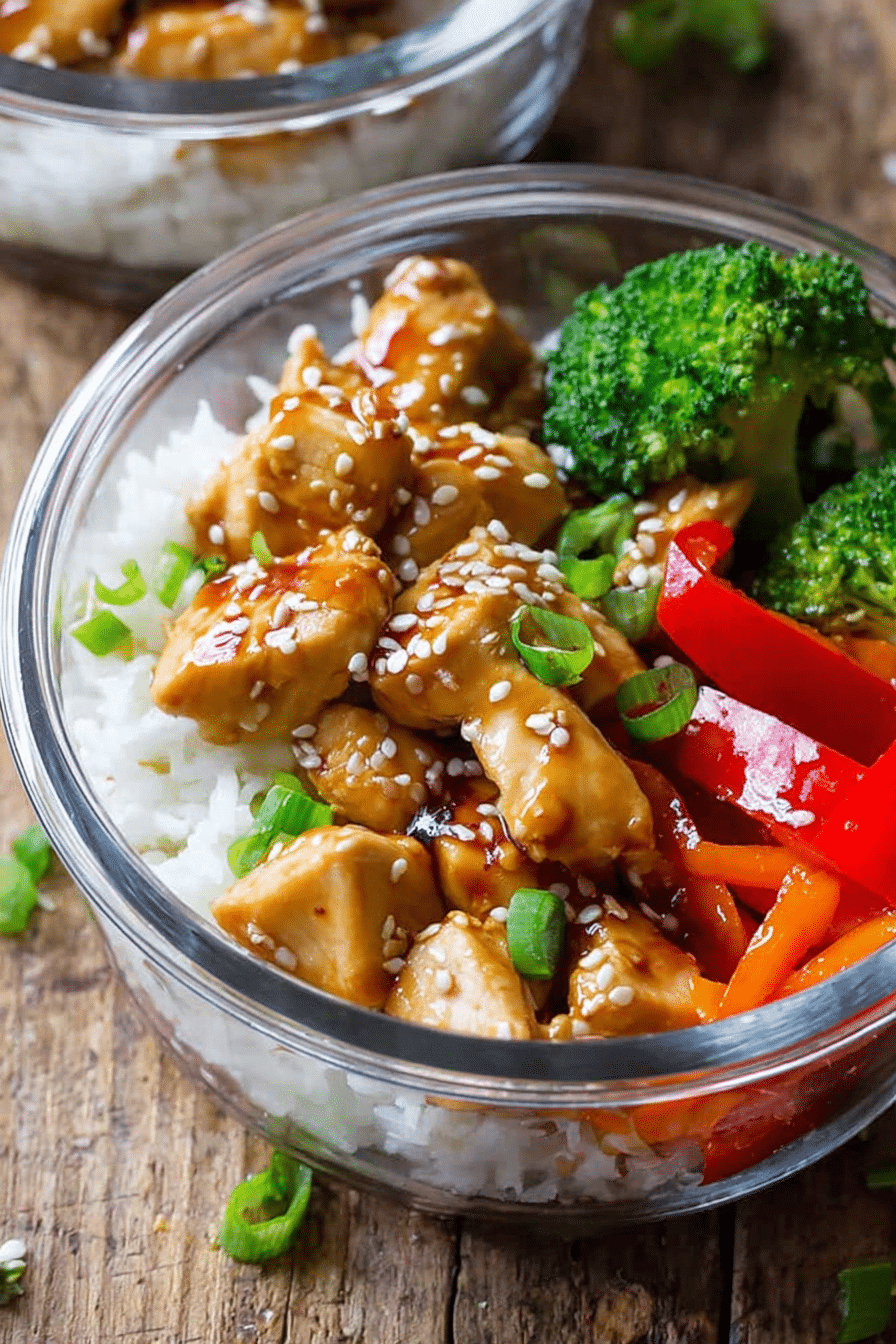
- Assemble the bowls — Divide rice, glazed chicken, and roasted vegetables evenly into four meal-prep containers. Finish each bowl with a sprinkle of sesame seeds and sliced spring onions. Let containers cool to room temperature before sealing and refrigerating.
- Pro tips & troubleshooting — If the sauce ends up too thin: simmer it briefly on the stovetop and whisk in a touch more cornstarch slurry until glossy. If the chicken dries: it was likely overcooked; for future batches either reduce oven time, use thighs, or pull at a lower temperature and rely on resting time to finish cooking. For more in-depth technique on keeping chicken moist, follow our tips for keeping chicken moist.
Nutritional Benefits of Teriyaki Chicken
These bowls are a sensible weekday meal: one bowl from this recipe clocks in at about 427 kcal with roughly 24 g of protein, 69 g of carbohydrates, and 6 g of fat. That protein content helps with muscle repair and satiety, while the rice supplies steady energy through complex carbohydrates (especially if you use brown rice). The broccoli and red bell pepper add fiber, vitamin C, vitamin A, and antioxidants — small nutrition wins that make these bowls feel balanced.
Beyond straight numbers, meal prepping like this helps portion control — you decide how much rice and sauce go into each container. If you want to lower calories or carbs, swap in cauliflower rice or reduce the rice portion and add extra vegetables. If you want more healthy fats, a few slices of avocado or a drizzle of toasted sesame oil at serving time does the trick.
Customizing Your Meal Prep Bowls
I consider this recipe a template — once you’ve mastered the oven-baked teriyaki method, you can change the rest based on what’s in your fridge.
- Grain choices – switch jasmine or basmati to brown rice, quinoa, or cauliflower rice for lighter bowls. Swap in fluffy cilantro-lime rice for a brighter base.
- Vegetable options – broccoli and red peppers are my go-tos, but snap peas, shredded carrots, roasted sweet potatoes, or sautéed bok choy all work. Choose a mix of colors for better nutrition and plate appeal.
- Protein swaps – tofu and shrimp are excellent. For tofu: press extra-firm blocks, cube, toss with a little oil and cornstarch, then bake or pan-fry until browned before tossing in the teriyaki. For shrimp: cook until opaque, about 6–8 minutes total depending on size, then toss in sauce just before assembling to avoid overcooking.
- Gluten-free options – use tamari or coconut aminos instead of soy sauce and choose gluten-free mirin or a rice vinegar and sugar combo. For thicker gluten-free glazes, cornstarch still works fine.
- Flavor swaps – make a spicy teriyaki by adding gochujang or sriracha to the glaze, or try a honey-garlic twist with extra garlic and less mirin. Sesame oil added at the end adds a toasty, aromatic finish.
Tips for Storing and Reheating
One of the reasons I love these bowls is reliability in the fridge. Here’s how I store and reheat for best texture and flavor:
- Storage – Divide into four airtight containers once slightly cooled. Store in the fridge for up to 4 days. If you want to freeze, freeze portions of chicken and rice for 2–3 months; roasted vegetables may become softer after freezing, so I prefer to freeze only the chicken and rice if I plan to reheat from frozen.
- Thawing – Thaw frozen portions overnight in the fridge for best results, or use a defrost setting in the microwave if you’re short on time.
- Reheating chicken & rice – Reheat covered in the microwave with a splash of water (10–20 seconds at a time) to create steam and avoid dryness. Alternatively, reheat in a 350°F oven for 10–12 minutes until warmed through. If reheating from frozen, let sit in the fridge overnight first.
- Keeping vegetables crisp – Reheat vegetables separately for a short time in a hot skillet or under the broiler to revive a little crunch. Microwaving everything together tends to make veggies limp — I learned this the hard way after a sad, soggy lunch one winter.
- Maintaining sauce texture – The teriyaki thickens as it cools. If it firms too much in the fridge, warm the sauced chicken gently and stir in a teaspoon of hot water to loosen the glaze before serving.
Flavor Variations and Alternatives
If you want to play with the profile, small swaps dramatically change the bowl without extra work:
- Spicy teriyaki – add a spoonful of gochujang or sriracha to the sauce for heat. Balance with a little extra honey if it gets too fiery.
- Peanut-ginger bowl – swap half the teriyaki sauce for a creamy peanut sauce, add a splash of lime, and top with chopped peanuts and cilantro for a Thai-inspired variation.
- Korean-style twist – use a Korean BBQ paste or gochujang combined with mirin for a more savory, fermented note. Finish with a fried egg on top for richness.
- Seafood alternative – For a seafood twist on this meal-prep concept, try our teriyaki salmon bowls as an easy alternative to chicken.
- Different glaze – If you want a bolder glaze option, our sticky chicken bowls show a similar approach with a different sauce profile.
- Leftover reinvention – Turn leftovers into lettuce wraps, a stir-fry with fresh greens, or a hearty fried rice by sautéing the rice with eggs and green peas and folding in the glazed chicken at the end.
Conclusion and Serving Suggestions
These teriyaki chicken meal prep bowls are reliable, flavorful, and easy to scale. The thick, glossy sauce makes meal-prep lunches feel less like leftovers and more like a prepared meal, while the roast-and-assemble method keeps cleanup minimal. Expect slightly softer vegetables if you store everything together; if you prefer crispness, keep veggies separate and reheat them briefly.
For serving, I like adding a few finishing touches: a squeeze of lime for brightness, a scattering of sesame seeds, and a drizzle of toasted sesame oil for aroma. Pair with a side of edamame for extra protein, a simple miso or clear soup for a more substantial lunch, or a fruit salad to round out the meal. Try these bowls a few times, tweak the grain and veg mix, and you’ll find one combo that becomes your go-to weekly lunch.
Give this recipe a try this week — make one batch on Sunday and you’ll be grateful come Wednesday afternoon. If you experiment with variations, I’d love to hear what you changed and how it turned out.
FAQ
- How long can I store these teriyaki chicken meal prep bowls in the fridge or freezer?
Store in airtight containers in the fridge for up to 4 days. You can freeze portions (chicken and rice freeze best) for 2–3 months—vegetables may become softer after freezing. Thaw overnight in the fridge before reheating. - Can I substitute the chicken with tofu or shrimp?
Yes. Use firm or extra-firm tofu (press, cube, and bake or pan-fry until browned) or shrimp (cook 6–8 minutes until opaque). Toss the cooked protein in the teriyaki sauce just before assembling the bowls. - How do I keep the chicken juicy and avoid drying it out?
Avoid overcooking: bake until the chicken reaches about 155°F (it will rise to 165°F while resting). Let the chicken rest ~10 minutes, cut into cubes, then stir it back into the thick teriyaki sauce to keep it moist. - How can I thicken the teriyaki sauce or make it gluten-free?
To thicken, use a cornstarch slurry (1 Tbsp cornstarch + 1 Tbsp cold water) and simmer until glossy—the recipe already uses this. For gluten-free, swap low-sodium soy sauce for tamari or coconut aminos; replace mirin with a little rice vinegar + a pinch of sugar or use gluten-free mirin. - What’s the best way to reheat meal prep bowls without losing veggie crunch?
Reheat chicken and rice in the microwave covered with a splash of water or briefly in a 350°F oven. Reheat veggies separately for a short time (oven or a hot skillet) to help restore crunch. Microwaving everything together can make vegetables soggy.
Teriyaki Chicken Meal Prep Bowls
Ingredients
Method
- Preheat oven to 400F (200C).
- Add cornstarch and cold water to a small bowl and whisk until no lumps are left.
- Add cornstarch slurry to an oven-proof baking dish, soy sauce, real mirin, ginger, garlic, honey and whisk until well combined.
- Add chicken breasts to teriyaki sauce and place in the hot oven for approximately 25 minutes or until the chicken has an internal temperature of 155F. (Internal temperature will rise to 165F during resting time).
- In the meantime, add broccoli florets and bell pepper slices to a large baking sheet, drizzle with avocado oil, season with sea salt and pepper and then place next to the chicken in the oven for 15-20 minutes depending on how crunchy or soft you like your veggies.
- While everything is in the oven, cook your rice in either the Instant Pot or on the stovetop.
- Remove chicken and veggies from the oven and let the chicken rest for approximately 10 minutes.
- Then remove the chicken from the sauce and place on a cutting board, cut chicken into bite-sized cubes and return to the thick jelly-like teriyaki sauce and stir to combine.
- Divide chicken, teriyaki sauce, veggies and rice into 4 meal prep containers, garnish with sesame seeds and sliced spring onion and store in the fridge for up to 4 days.