I grew up with the perfume of citrus in the kitchen: the faint, floral bite of key lime zest filling the air while the oven hummed in the next room. In my kitchen, key lime pie is more than a dessert — it’s the small ceremonial thing that signals summer is here. I still remember pressing crumbs into a pie plate for the first time and learning how that simple ritual makes the whole pie feel like home.
I keep a jar of grated key lime zest in my fridge during peak season; it’s the difference between a lime that reminds you of a grocery run and one that brings you back to a barefoot afternoon on the beach. Over the years I’ve learned to read the pie as it bakes — the telltale gloss on the surface, the way the center holds a gentle wobble — and those little signals are how I know it’s done.
I’ve baked this pie for block parties, for quiet weeknight desserts, and for guests who ask for a second slice. Each time I make it I come back to the same truth: a great key lime pie needs good limes, patience while it cools, and a crust that sings contrast with the filling. Below I walk through the history, the why behind ingredients, the method I use, and several practical variations so you can make this pie your own.
Why this Traditional Key Lime Pie Feels Like Florida in a Slice
This pie is a piece of place: born out of Florida’s citrus groves and coastal kitchens, it has always been associated with salt air, bright sun, and the kind of simple hospitality that welcomes neighbors with a dessert. The traditional version relies on a few pantry-stable staples and the bright, nostalgic flavor of the lime to carry the memory.
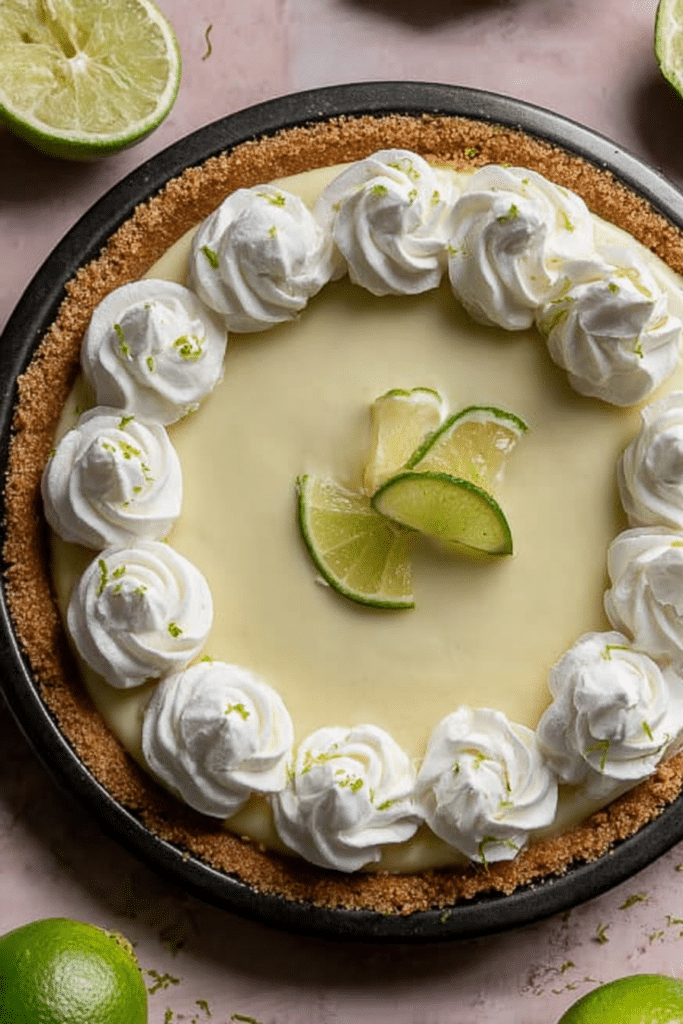
When you bite into a classic slice, you’re meeting a contrast — a buttery, golden crust giving way to a glossy, tangy filling that finishes sweet. That interplay of textures and the citrus aroma are what make this dessert feel like a shoreline afternoon in edible form.
Sensory note: imagine fragrance first — the clean, floral top-note of zest — followed by the tactile pleasure of a fork cutting through a silky custard into a crisp crumb. That progression is exactly why this pie has anchored itself as a summertime favorite.
Everything You Need for Traditional Key Lime Pie
Use the best, simplest ingredients you can find. The authenticity comes from quality rather than complexity.
- Graham cracker crumbs – The backbone of a classic crust; you can swap for gluten-free graham-style crumbs if needed.
- Unsalted butter – Binds the crust and adds richness; use a neutral, high-quality butter for the cleanest flavor.
- Light brown sugar – Adds depth and a touch of molasses to the crust; white sugar can work but the crust will be less nuanced.
- Egg yolks – The building block for a silky, set filling; they add body and color without relying on heavy thickeners.
- Sweetened condensed milk – Provides sweetness and a dense, creamy texture; using a high-quality brand keeps the filling from tasting canned.
- Key lime juice – The star ingredient; use fresh juice for bright acidity and aroma.
- Key lime zest – Intensifies the lime character; zest is where much of the fragrance lives.
- Heavy cream – For the topping; you can substitute coconut cream for a dairy-free option.
- Powdered sugar & vanilla – For stabilizing and flavoring whipped cream; powdered sugar blends more smoothly than granulated.
The Secret to the Perfect Silky Texture
The filling reaches its signature silkiness through three simple things: egg yolks for structure, the chemical set from the acid in the lime interacting with the condensed milk, and careful timing in the oven. If any of those elements are rushed, the texture can go from silken to curdled or rubbery.
- Whisk the yolks and zest first to aerate slightly — this helps the mixture feel smoother once the milk and juice are added.
- After adding lime juice to the condensed milk mixture, let it sit at room temperature for a few minutes so it begins to thicken before baking; this subtle rest helps the custard set more evenly.
- Bake just until the center holds a gentle jiggle. Overbaking is the most common error that yields a dry, grainy filling.
Troubleshooting (from my kitchen):
- I noticed a split or curdled surface — that usually means the oven was too hot or the pie sat too long at high heat; lower the temperature slightly and shorten the bake time the next time.
- If the filling seems too loose after chilling, it probably needed a few more minutes in the oven — but be cautious: even a small additional bake can change the texture. I prefer to err on the side of slightly underdone before chilling.
- If cracks form on the surface, it’s often from rapid temperature change. Let the pie cool slowly on a rack to room temperature before refrigerating.
Why Key Limes Matter (How they Differ from Regular Limes and Where to Find Them)
Key limes are smaller, thinner-skinned, and far more aromatic than the common Persian lime. Their juice is sharper and carries floral notes that the larger, greener limes don’t have. That concentrated aromatics-to-juice ratio is what gives the pie its distinct identity.
Seasonal sourcing is important: key limes are at their best in late summer to fall in many regions, and you can often find them at farmers’ markets, specialty grocers, or farm stands. If fresh key limes aren’t available, you can use bottled juice in a pinch, but the zest of a fresh key lime is what makes the difference in aroma.
Sensory tip: hold a wedge of key lime up to your nose and breathe in — you’ll notice a perfume unlike the sharper, more vegetal scent of a Persian lime.
For another citrus dessert, check out our lime bars which highlight the fresh flavors of limes.
How to Make Traditional Key Lime Pie (Step-by-Step)
- Preheat your oven and prepare the crust by combining graham crumbs, brown sugar, and salt, then tossing with melted butter until evenly moistened. Press the mixture firmly into the bottom and up the sides of a 9-inch pie plate.
- Bake the crust briefly until it smells toasty and holds together; cool on a wire rack to room temperature before filling.
- Make the filling by whisking the lime zest into the egg yolks until pale and slightly thickened. Add the sweetened condensed milk, then stir in the fresh key lime juice until homogeneous. Let the mixture rest briefly at room temperature to thicken.
- Pour the filling into the cooled crust and return to the oven. Bake until the edges are set and the center has a gentle, saucy jiggle — this keeps the interior creamy.
- Cool the pie to room temperature on a wire rack, then refrigerate for at least a few hours, preferably overnight, until well chilled and fully set.
- Before serving, whip chilled cream to soft peaks, add powdered sugar and vanilla, and finish to stiff peaks. Pipe or spread over the pie and garnish with thin lime slices or extra zest.
Pro Tip for traditional key lime pie recipe: Balance tartness without overbaking
- Taste the filling before baking to judge tartness — the raw mix should be brighter than you expect, since chilling softens the perceived acidity.
- Watch for the center jiggle rather than relying on a strict time; ovens vary, and visual cues are the best guide.
- Let the pie cool gradually to room temperature before chilling; rapid cooling can cause cracking and compromise texture.
- If your lime juice is especially bright or bitter, add a touch more sweetened condensed milk to the mix, a little at a time, until the balance sits right to your palate.
Variations to Try: Dairy-Free, Gluten-Free & Topping Ideas
- Dairy-free filling and topping — use canned full-fat coconut milk for richness and chill the solid cream to whip into a coconut whipped cream. Sweetened condensed milk can be substituted with a reduced coconut milk spiked with a touch of sweetener and thickened slightly by simmering.
- Gluten-free crust — replace graham crumbs with finely ground nuts or a gluten-free cookie crumb blend for a nut-forward, crunchy base.
- Toasted coconut topping — sprinkle toasted coconut over whipped cream for tropical texture contrast.
- Meringue finish — for a retro flair, top with a lightly torched meringue instead of whipped cream for a different flavor profile.
- Fruit-forward garnish — sliced passionfruit, mango salsa, or candied lime wheels brighten the plate and add color.
If you love the flavor of key lime, try our key lime white chocolate macadamia nut cookies for a delicious treat.
Explore the flavors of summer with our delicious lemon blueberry tart, another delightful dessert.
How to Store, Make-Ahead, and Serve Leftovers
- Refrigeration: Store the pie covered with plastic wrap or in an airtight container to prevent it from picking up fridge odors. Properly stored, it keeps well for a few days.
- Make-ahead: You can bake the pie a day ahead and add whipped topping just before serving; chilling overnight improves flavor melding.
- Serving from cold: Remove the pie from the fridge 10–15 minutes before serving to take the chill off and allow the flavors to bloom.
- Reviving texture: If the whipped topping looks deflated after time in the fridge, briefly re-whip a small amount of fresh cream and dollop it atop slices.
Learn the best practices for freshness with our guide on how to store leftovers to enjoy your key lime pie for days.
Serving suggestion: slice thin, serve cold with a dusting of extra zest or a tiny wedge of lime — the brightness of the citrus pairs beautifully with a light tea or a cold coffee on a warm afternoon.
Frequently Asked Questions
What type of limes should I use for this key lime pie recipe?
You should use key limes, as they have a unique tartness and flavor that sets them apart from regular limes. They are smaller and more aromatic, making your pie truly special!
Can I make this key lime pie gluten-free?
Absolutely! You can substitute the graham cracker crust with a gluten-free graham cracker alternative or a different gluten-free crust, such as a nut crust.
How long should I let the pie chill before serving?
It’s best to refrigerate the pie for at least 3 hours or overnight if you can. This allows the filling to set properly and enhances the flavors.
Is there a dairy-free option for the whipped cream topping?
Yes! You can use coconut cream whipped up with powdered sugar and vanilla extract as a delicious dairy-free alternative for the topping.
How can I tell when the pie is done baking?
The pie is done when the center is set but still has a slight jiggle when you gently shake it. Avoid overbaking to keep the filling creamy and smooth.

Traditional Key Lime Pie Recipe
Ingredients
Method
- Preheat oven to 350 degrees F.
- Make the Filling: Whisk the lime zest and egg yolks in a medium bowl for 2 minutes. Whisk in the sweetened condensed milk, then the lime juice. Set aside at room temperature to thicken while you prepare the crust.
- Make the Crust: In a medium bowl, stir together the graham cracker crumbs, brown sugar, and salt. Drizzle the melted butter over the mixture and press evenly into a 9-inch pie plate. Bake for 10 minutes; cool to room temperature.
- Once cooled, pour the lime filling into the crust. Bake until the center is set yet still jiggles slightly, 15 to 17 minutes. Cool to room temperature, then refrigerate for at least 3 hours.
- Make the Whipped Cream: Whip the cream on medium speed until soft peaks form. Gradually add powdered sugar and vanilla until stiff peaks form. Pipe or spread on top of the pie, garnish with lime slices, if desired.