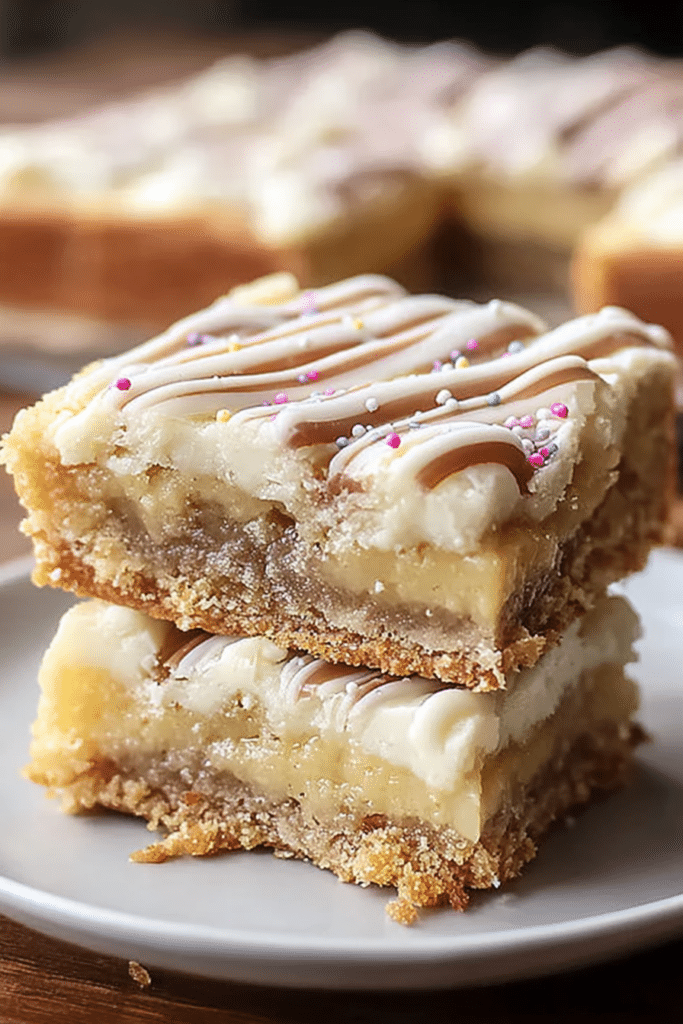
These vanilla bars are the recipe I reach for when I need something quick, simple, and reliably good. I make them on weeknights when there’s a sudden need for dessert, and I bring them to potlucks when I want a no-fuss crowd-pleaser. The prep truly takes minutes, and the warm vanilla aroma that fills the kitchen makes the short baking time feel like a treat in itself.
I like that these bars are practical—ingredients are pantry-friendly, and the method is forgiving. I’ve made them in different pans, subbed in mix-ins, and adjusted timing for different ovens. When they come out golden at the edges and slightly springy in the center, I know they’ll slice neatly once cooled.
What keeps me coming back to this recipe is how it balances ease and texture. With the right butter temperature and just enough creaming, you get a soft, silky crumb instead of a dense slab. I’ll walk you through what to watch for and share the quick fixes I’ve learned when things go sideways.
Everything You Need for Vanilla Bars
Set up a simple mise en place and you’ll be baking in no time. These notes focus on the role of each ingredient and sensible substitutions so you can make these bars with what you already have.
- All-purpose flour – Provides structure and a tender crumb; you can use a gluten-free 1:1 blend if you want a gluten-free version, but expect a slightly different texture.
- Granulated sugar – Sweetness and helps with browning; you can swap part of it for brown sugar for a deeper flavor.
- Unsalted butter – Adds richness and helps the batter emulsify; use unsalted margarine if needed, but flavor and texture will change slightly.
- Eggs – Bind the batter and add lift; for an egg-free version, try commercial egg replacers or a flax-based swap and expect a softer, slightly denser bar.
- Pure vanilla extract – The main flavor; you can experiment with almond extract or a touch of citrus zest for variation.
- Baking powder – Gives gentle rise and lightness; make sure it’s fresh for best results.
- Salt – Balances sweetness and enhances flavor; if using salted butter, reduce added salt.
- Powdered sugar – For a simple finish; optional, but it makes the bars look party-ready.
- Optional mix-ins – Chocolate chips, chopped nuts, or dried fruit for texture and seasonal flair.
- Essential tools – Mixing bowls, a sturdy whisk or electric mixer, a spatula, and a baking pan that matches the recipe’s bake time expectations.
The Secret to Soft, Silky Texture
The silky texture comes down to three things: butter temperature, creaming time, and gentle handling of the flour. Here’s what I watch for and why it matters.
- Butter should be at room temperature so it creams smoothly with sugar; when properly creamed the mixture looks lighter and holds air that helps the bars stay tender.
- Creaming long enough is important—too short and the batter will be dense; too long and you can warm the butter. Aim for a fluffy but not greasy-look.
- Add dry ingredients gradually and fold just until combined to prevent developing excess gluten, which would make the bars tough.
Imagine slicing into a bar with a fine, moist crumb that melts on the tongue—that’s the result of these small, intentional steps.
Why Butter Temperature and Mixing Time Matter
There’s a bit of kitchen science behind the feel of the batter and the final crumb. Understanding it helps you control the outcome.
- Creaming traps small air bubbles in the butter-sugar matrix; during baking those bubbles expand and give lift. Room-temperature butter creams more predictably than cold or melted butter.
- When you add eggs, mix promptly so the batter re-emulsifies; if the butter is too cool or the eggs too cold, the batter can look separated — gentle, continuous mixing brings it back together.
- Mixing develops gluten; you want minimal gluten formation here. Once the flour disappears into the batter, stop mixing to keep the bars tender.
Pay attention to how the batter looks and feels — creamy, smooth, and a little satiny — and you’ll be on track for the texture you want.
How to Make Vanilla Bars (Step-by-Step)
- Preheat your oven and prepare your pan so it’s ready when the batter is mixed.
- Cream softened butter and granulated sugar until the mixture is lighter in color and slightly fluffy — this traps air for lift.
- Add the eggs one at a time, mixing briefly after each so the batter stays smooth; stir in vanilla extract for flavor.
- Whisk together the dry ingredients in a separate bowl, then add them to the wet mixture gradually, folding until just combined so you don’t overwork the batter.
- Pour the batter into the prepared pan and smooth the top with a spatula for even baking.
- Bake until the edges are golden and a toothpick inserted in the center comes out clean or with a few moist crumbs; remove from oven and cool before slicing so the bars set.
For a sweet treat that pairs well with your vanilla bars, try our Perfect Sugar Donuts recipe!
Pro Tip for Vanilla Bars: Avoid Dry or Soggy Centers
Here are the practical tips I rely on to get an even bake every time — short, actionable items to check before and during baking.
- Use an oven thermometer to confirm your oven runs true; many home ovens can be off by 25°F or more, and that changes bake time and final texture.
- Adjust baking time for pan size and material: a darker pan shortens bake time and a larger pan thins the batter, so reduce time or use a slightly higher batter depth for the same timing.
- Test doneness by color and a toothpick; a clean toothpick or one with a few moist crumbs means the bars are done — overly wet batter means more time, but check often.
- If your centers are consistently underbaked, lower the oven temperature slightly and bake longer so the center cooks without over-browning the edges.
If you’re looking for other dessert ideas that are easy and delicious, check out our No-Bake Turtle Mini Cheesecakes.
How to Store, Freeze, and Reheat Vanilla Bars
Keep these simple storage rules in mind so your bars stay soft and inviting for days or longer.
Store cooled bars in an airtight container at room temperature to keep the crumb tender; they’ll stay good for several days without refrigeration. For longer storage, individually wrap bars in plastic wrap and place them in a freezer-safe bag, removing as much air as possible before freezing.
To reheat, let frozen bars thaw at room temperature or warm gently in a low oven for a few minutes to refresh the edges. A quick zap in the microwave (10–15 seconds) also softens them if you’re serving one immediately.
For a great way to use up ripe bananas, our Banana Oatmeal Bars are a delicious option.
Easy Variations: Chocolate Chips, Nuts, and Seasonal Twists
Try these simple swaps and additions to keep the base recipe interesting — these are short, scannable ideas you can try at home.
- Stir in chocolate chips or chunks for melty pockets of chocolate throughout.
- Add chopped nuts like pecans or almonds for crunch; toast them first for extra flavor.
- Swap a portion of the vanilla for almond extract or fold in citrus zest for a bright note.
- Seasonal twist: fold in pumpkin spice and a bit of pumpkin puree in fall, or mix in fresh berries in summer (watch moisture and adjust bake time).
- For gluten-free versions, use a reliable gluten-free 1:1 flour blend and handle the batter gently to preserve structure.
- Vegan option: use a plant-based butter alternative and an egg replacer; expect a slightly different texture and adjust baking time.
- No-bake alternative: combine a simple cookie or graham base with a vanilla custard-style filling chilled until set for a no-bake bar that keeps the same flavor profile.
For another delicious take on easy bars, check out our Pumpkin Bars with Cream Cheese Frosting recipe.
Troubleshooting Common Baking Issues with Vanilla Bars
I’ve run into the usual home-baker problems and learned a few concrete fixes — here are the problems I see most often and how I solve them.
- Dry, crumbly bars – Usually from overbaking or using too-hot an oven. I check the oven thermometer and shorten the bake time by a few minutes next time; adding a tablespoon of sour cream or plain yogurt to the batter can also boost moisture.
- Soggy or underbaked center – Caused by a pan that’s too large or the oven temperature being too low; use the recommended pan size or increase bake time and confirm oven temp with a thermometer.
- Dense bars – Overmixing after adding flour or using butter that’s too cold can compress the batter. Mix until just combined and make sure butter is softened but not melted.
- Sunken center – Often from opening the oven door too early or too much leavening; avoid peeking in the first two-thirds of the bake and measure your baking powder carefully.
- Uneven browning – Rotate the pan halfway through baking and consider using an oven rack positioned for even airflow.
Frequently Asked Questions
Can I substitute margarine for butter in the Vanilla Bars recipe?
Yes, you can substitute margarine for butter, but it may slightly alter the flavor and texture. For the best results, use unsalted margarine.
How should I store leftover Vanilla Bars?
Store the Vanilla Bars in an airtight container at room temperature for up to five days. You can also freeze them for up to three months.
What can I add to the Vanilla Bars for extra flavor?
You can mix in chocolate chips or nuts for added flavor and texture. Feel free to get creative with seasonal ingredients too!
How do I know when the Vanilla Bars are done baking?
The bars are done when they are golden brown and a toothpick inserted in the center comes out clean, typically around 25–30 minutes.
Can I use different types of flour for this recipe?
You can experiment with different types of flour, but note that it may affect the texture. All-purpose flour is recommended for the best results.

Vanilla Bars
Ingredients
Method
- Preheat your oven to 350°F (175°C) and grease a baking pan.
- In a bowl, cream together softened butter and granulated sugar until light and fluffy (3–5 minutes).
- Add eggs one at a time along with vanilla extract; mix until well combined.
- In another bowl, whisk together flour, baking powder, and salt. Gradually add to the wet mixture, stirring until just combined.
- Pour batter into the prepared pan and spread evenly.
- Bake for 25–30 minutes until golden brown and a toothpick comes out clean.
- Allow to cool before cutting into squares and dust with powdered sugar.