I keep a small bowl on my counter for overripe bananas because these bars are my go-to when time is short and kids need an after-school snack. In my kitchen they come together in under an hour, and the house fills with the warm aroma of banana and chocolate that gets everyone to the table. I love that they feel a little like blondies but with the gentle sweetness and moisture only bananas can give.
I usually enlist my kids to drop the chocolate chips and stir because there are simple little jobs for every age. That makes them part of the process and keeps the recipe approachable for busy families. I’ll share the small tricks I’ve learned so your bars stay chewy, not dry—because overbaked banana bars are the one avoidable mistake I see most often.
These bars are flexible: serve them as a quick breakfast with yogurt, a school lunch treat, or a dessert with a scoop of ice cream. I’ll walk you through the why of each ingredient, how ripe bananas change the texture, easy swaps for gluten-free or lower-sugar needs, and ways to store and reheat so nothing goes to waste.
Why These Banana Chocolate Chip Bars Are Perfect for Busy Families
Make them in about 45 minutes from start to finish, and most of that is hands-off baking time. They’re sturdy enough to pack in lunchboxes, soft enough for little ones, and sweet without feeling over the top. You’ll appreciate how simple ingredients from the pantry come together into a treat everyone asks for—my family asks for these on repeat.
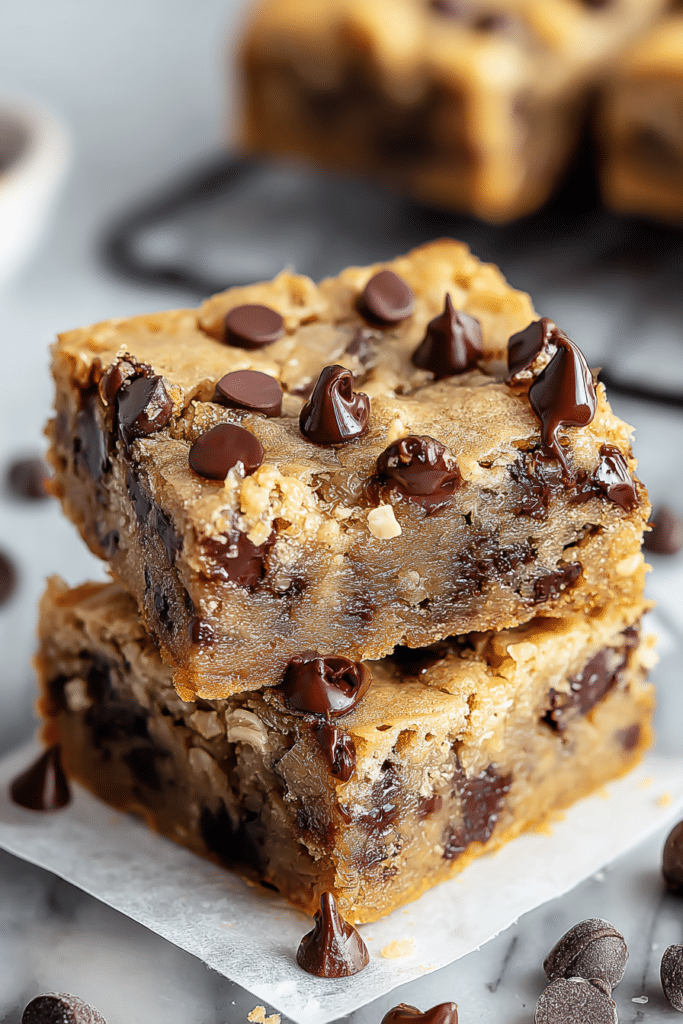
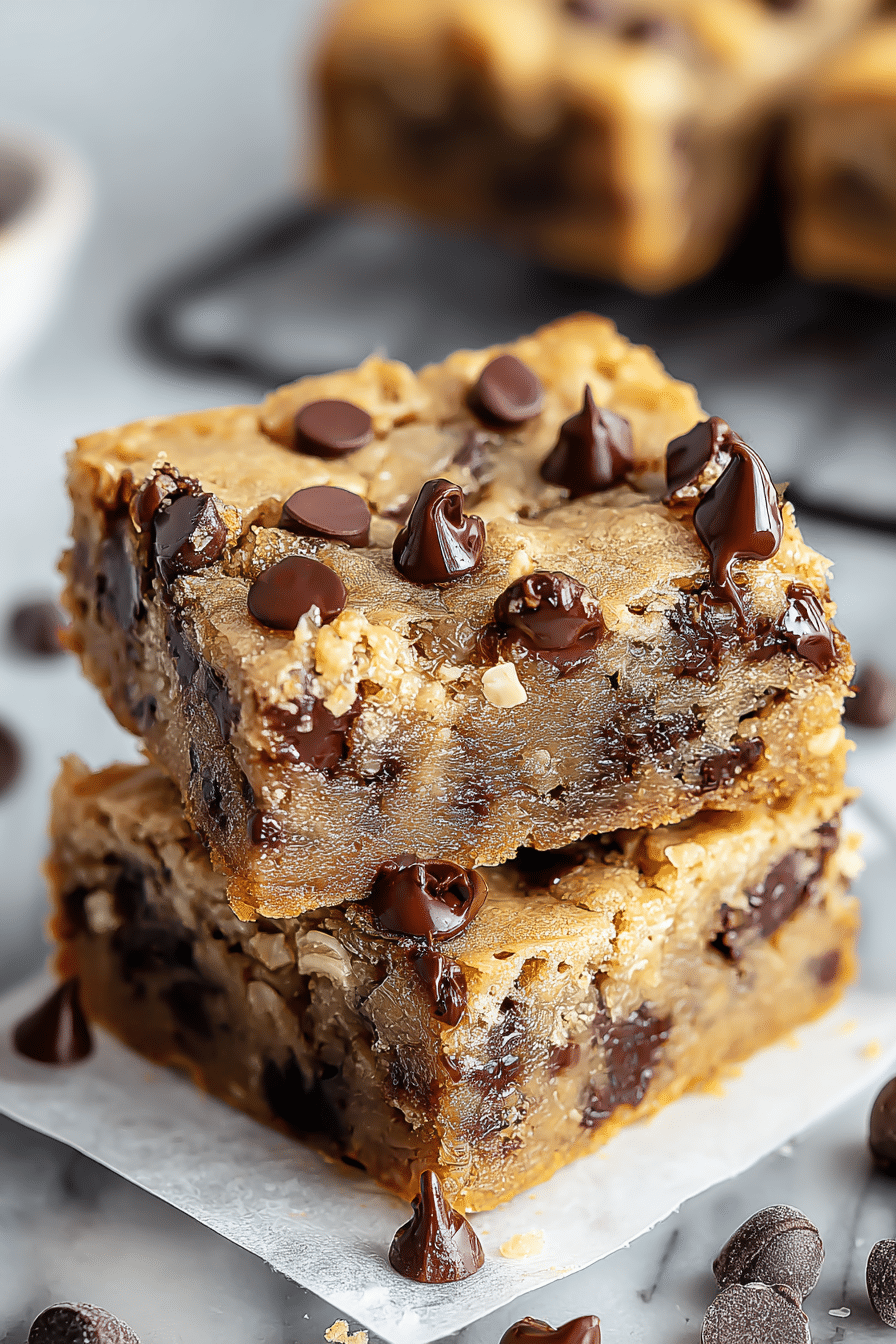
Sensory note: expect a gentle banana perfume from the oven, warm pockets of melted chocolate, and a lightly golden edge that gives way to a tender, chewy center. Let kids help with tasks like mashing bananas or sprinkling chocolate chips so they feel ownership over the final plate.
Everything You Need for Banana Chocolate Chip Bars
- * Unsalted butter – Adds richness and helps create a tender crumb; you can swap for dairy-free spread if needed.
- * Brown sugar – Gives moisture and chewiness from its molasses; use light or dark depending on how caramel-forward you want the flavor.
- * Egg – Binds the batter and gives structure so the bars hold together when sliced.
- * Vanilla – Enhances the banana and chocolate without being obtrusive.
- * Salt – Balances sweetness and makes the banana flavor pop.
- * All-purpose flour – The base for structure; see gluten-free swaps below.
- * Overripe bananas – Provide sweetness, moisture, and banana flavor—ripe with brown spots is best.
- * Chocolate chips or chopped chocolate – For melty pockets and chocolate flavor; choose your family’s favorite chocolate type.
The Secret to Chewy, Never-Dry Banana Bars
Chewiness comes from two simple ideas: moisture and gentle mixing. Brown sugar holds more moisture than white sugar, which keeps the bars soft. The bananas themselves add liquid and sugar, so resist drying the batter out by adding extra flour or baking too long.
- Use ripe bananas for both sweetness and moisture; under-ripe fruit won’t give the same texture.
- Mix just until the flour disappears; overmixing develops gluten and makes bars tough.
- Watch the oven closely in the final minutes—edges should be golden and the center set but still slightly soft to the touch. A toothpick should come out with a few moist crumbs.
Why Ripe Bananas Matter (and How Much to Use)
As bananas ripen, starches convert to simple sugars, which boosts sweetness and deepens flavor. Overripe bananas also release more moisture, so they act like a natural, flavorful liquid that keeps these bars chewy.
If you’re short on time, you can use frozen bananas—just thaw and mash them before adding to the batter. I often keep frozen bananas in my freezer for baking emergencies: they save the day and work just as well once thawed and drained slightly if they’re too watery.
How to Make Banana Chocolate Chip Bars (Step-by-Step)
- Preheat your oven and line a square baking pan so removal is quick and fuss-free.
- Cream the butter and brown sugar together until light and slightly fluffy so the bars have tenderness.
- Beat in the egg, vanilla, and salt until evenly combined.
- Fold in the flour just until it disappears—don’t overmix or the texture will tighten.
- Gently fold in the mashed bananas, then stir in most of the chocolate, reserving a handful to sprinkle on top.
- Spread the batter in the prepared pan and scatter the remaining chocolate over the top for melty visual appeal.
- Bake until the edges are golden and the center is set; remove and cool completely before slicing into squares so they hold their shape.
- Troubleshooting I’ve learned: if your batter looks very thin, you may have over-mashed watery bananas—drain them briefly on a paper towel next time. If bars are dry, reduce bake time by a few minutes and check earlier.
Pro Tip for banana chocolate chip bars: Easy gluten-free & low-sugar swaps
- Gluten-free option: use a cup-for-cup gluten-free flour blend that contains xanthan gum, or try almond flour for a denser, nuttier bar—expect a slightly different texture and shorter bake time.
- Lower-sugar swaps: reduce the added sugar and lean on very ripe bananas for sweetness, or replace part of the brown sugar with a sugar substitute designed for baking—watch texture and baking time.
- Dairy-free option: swap the butter for a solid plant-based margarine or coconut oil; coconut will add a mild tropical note.
- Baking time adjustments: gluten-free or nut flours often brown faster—check the bars a few minutes earlier and use the toothpick test to avoid overbaking.
Add-Ins Kids Love: Nuts, Seeds & Chocolate Swaps
- Walnuts or pecans for crunch—toast them lightly to bring out the flavor.
- Sunflower or pumpkin seeds for a nut-free crunch option that adds texture and a bit of protein.
- White, milk, or dark chocolate chips to change the sweetness profile; mini chips distribute more evenly for little mouths.
- A handful of dried fruit like cherries or cranberries for a tart contrast to the sweet banana.
How to Store, Freeze, and Reheat Banana Chocolate Chip Bars
- Store at room temperature in an airtight container for a few days, or refrigerate to extend life up to about a week.
- To freeze, slice the cooled bars, layer between parchment, and store in a sealed freezer bag or container for up to a few months; thaw at room temperature or in the fridge overnight.
- Reheat gently in a warm oven or microwave for a few seconds to restore that just-baked softness—expect melted chocolate pockets and a warmed banana aroma.
Variations for Breakfast, Dessert, and Holidays
- Breakfast: top a warm bar with plain yogurt and fresh berries for a balanced morning plate.
- Dessert: serve a warmed square with a scoop of vanilla ice cream and a drizzle of chocolate sauce.
- Fall/holiday twist: stir in ground cinnamon and a pinch of nutmeg; swap in chopped pecans and a few maple syrup dashes.
- Holiday peppermint: fold in chopped dark chocolate and top with crushed peppermint just after baking for a seasonal treat.
Frequently Asked Questions
Can I use frozen bananas for this recipe? Yes, you can use frozen bananas! Just make sure to thaw and mash them before adding them to the batter.
How should I store the banana chocolate chip bars? Store the bars in an airtight container at room temperature for up to 3 days, or in the refrigerator for up to a week.
Can I make these bars gluten-free? Absolutely! You can substitute the all-purpose flour with your favorite gluten-free flour blend.
What can I add to the bars for extra flavor? Feel free to add nuts, seeds, or even different types of chocolate chips to customize the flavor to your liking!
How do I know when the bars are done baking? The bars are done when the edges are golden and the center is set. A toothpick inserted in the center should come out with a few moist crumbs.
Banana Chocolate Chip Bars
Ingredients
Method
- Preheat oven to 350°F. Line an 8x8 baking pan with parchment, grease with nonstick spray.
- Cream butter and brown sugar until light and fluffy, about 2 minutes.
- Mix in egg, vanilla, and salt until combined.
- Gently mix in flour just until incorporated, don’t overmix.
- Fold in mashed bananas, then fold in 3/4 of the chocolate chips.
- Pour into prepared pan, top with remaining chocolate chips.
- Bake for 33-37 minutes until edges are golden and center is set.
- Cool completely before slicing into 16 squares.