- Prep
- 5 min
- Cook
- 5 min
- Total
- 135 min
- Serves
- 225
- Calories
- 15 kcal
On this page14 quick jumps
TOC
14 quick jumps
Introduction
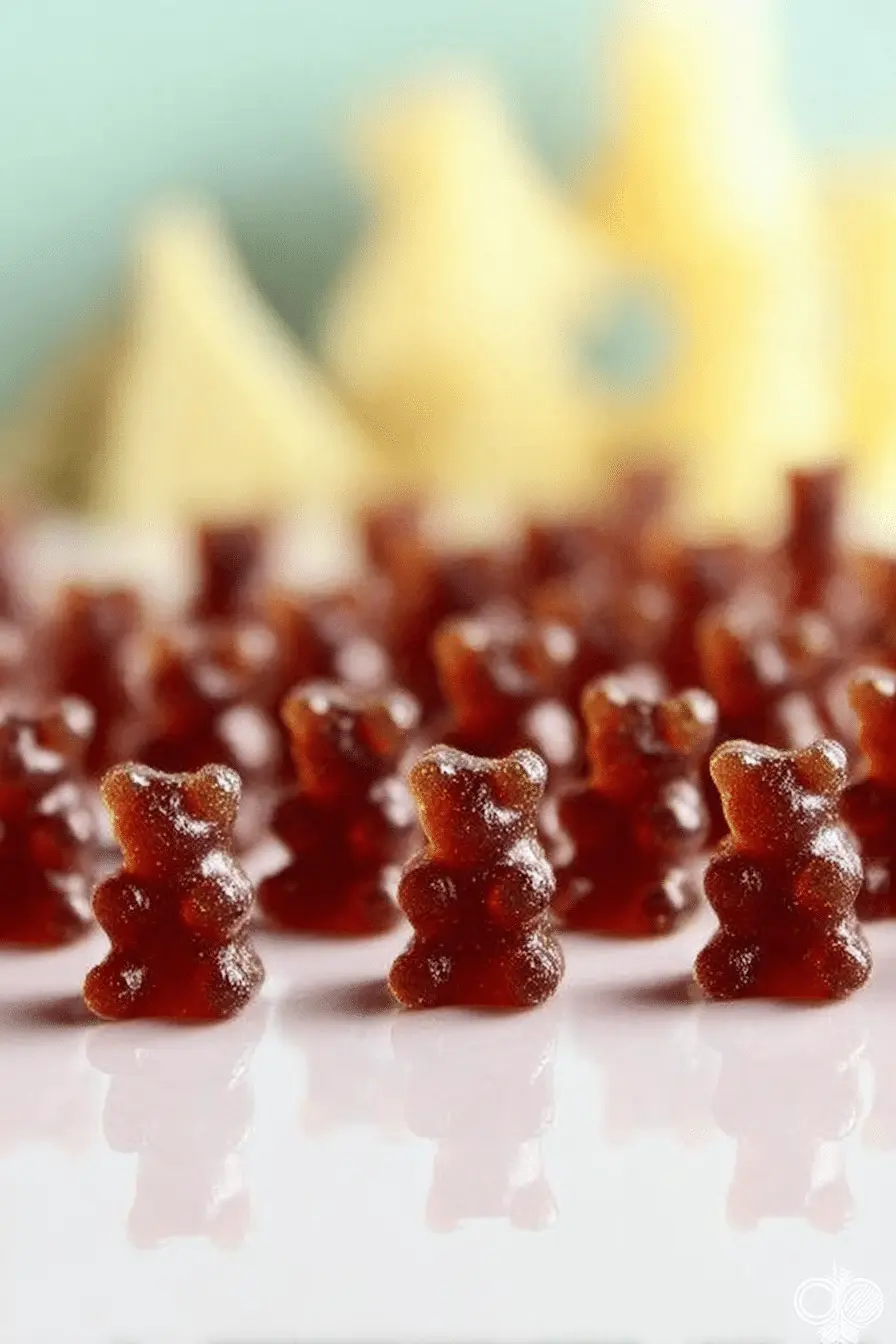
I make elderberry gummies every autumn in my kitchen. Over the years I’ve learned which small adjustments keep the color bright, the texture pleasantly chewy, and the nutrients intact. The first time I tried to speed things along by boiling the syrup I lost the bright purple hue and ended up with a gummy that tasted cooked rather than fresh — lesson learned.
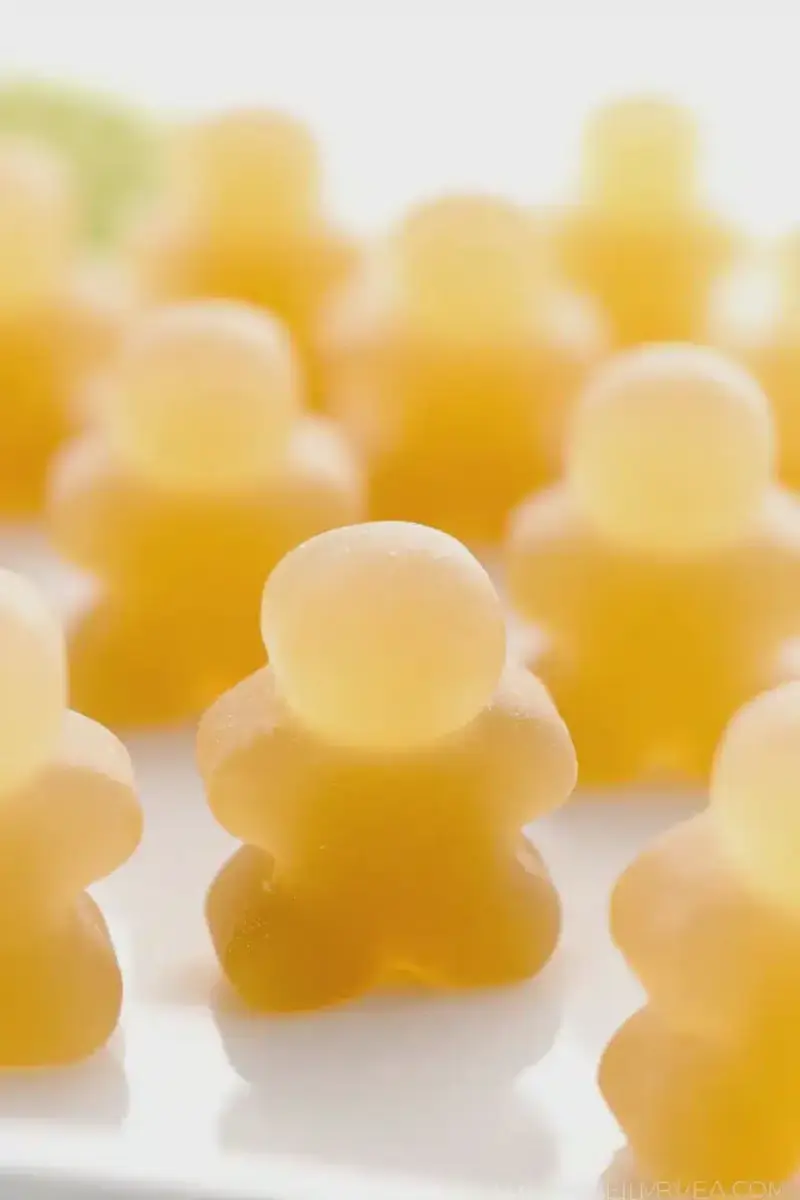
These gummies have become my go-to because they’re easy to grab on the way out the door and they actually get used (unlike a jar of pills that collects dust). The aroma of black elderberry is unmistakable: a sweet, slightly tart berry note with a warm, earthy undertone. When the mixture cools in the molds, the glossy little bears take on a jewel-like purple that’s impossible to resist.
I’ll walk you through why I favor certain ingredients, how to keep heat from degrading delicate compounds, and the quick troubleshooting tricks I use when a batch starts to thicken too fast. If you want a reliable, family-friendly immune support gummy that stores well in the fridge, this is the method I reach for every sniffle season.
Everything You Need for Black Elderberry Gummies
Below I cover the essentials you’ll want on hand and why each one matters. I recommend reading this section before you begin so you don’t have to pause mid-batch hunting for a tool or swap an ingredient unexpectedly.
- Homemade elderberry syrup – Provides concentrated anthocyanins and the classic elderberry flavor; homemade syrup is usually more potent than many store-bought concentrates.
- Water or light liquid – Used to thin the syrup so the gelatin can bloom; you can also use herbal tea for a flavor twist.
- Grass-fed gelatin (unflavored) – Gives gummies their chewy, glossy texture and supplies bioavailable protein; preferred for mouthfeel and nutrient density.
- Vitamin C powder – Added after cooling to preserve potency and give an immune boost; soluble powders work best.
- Probiotic powder (optional) – Adds gut-supporting microbes if you want an extra layer of wellness; timing matters since heat can kill cultures.
- Silicone molds + dropper – Molds produce clean edges and easy release; droppers or small funnels make filling tidy and fast.
Nutrition Snapshot: What’s in Each Gummy
Elderberry gummies combine the plant compounds from elderberries with the structural protein from gelatin, plus optional boosts like vitamin C and probiotics. Here’s what you’re getting in each bite:
- Anthocyanins and antioxidants from elderberry – linked in studies to antiviral and immune-supportive activity during seasonal illness.
- Collagen-building amino acids from gelatin – support gut lining and connective tissue; gelatin also contributes to the gummy’s satisfying chew.
- Vitamin C (if added) – helps support immune response and works synergistically with anthocyanins.
- Probiotics (if added) – can support gut health and immunity when live cultures are handled properly.
Suggested serving is modest—often one to two gummies daily depending on concentration—so you get a gentle, regular dose of plant and protein-derived nutrients without overdoing it. Compared to many store-bought gummy supplements, homemade versions let you control sugar, potency, and added nutrients.
Sourcing Elderberries: Quality Matters for Potency
If you want the most potent gummies, where your elderberries come from matters as much as how you prepare them. I’ve tested syrups made from different sources and saw noticeable differences in color intensity, aroma, and flavor depth.
- Wild-harvested vs. farm-grown – Wild berries can have robust, varied phytochemical profiles, while well-managed farm-grown berries often offer consistent potency and lower contamination risk.
- Organic and reputable suppliers – Look for sellers who provide clear sourcing information and testing when possible; pesticides and poor handling will reduce potency.
- Fresh vs. dried – Fresh (or properly rehydrated dried) elderberries yield a brighter color and fuller flavor; if you buy dried, choose whole-berry packs with minimal stems and a deep, dark hue.
- Smell check – high-quality elderberries (fresh or reconstituted) will have an earthy, fruity aroma that signals active aromatics and nutrients.
If you’re curious about where to get good berries, many health food stores and online herbal retailers carry quality dried elderberries. If you make your own syrup, it’s a great way to ensure potency and control ingredients.
Gelatin vs. Vegan Alternatives: Texture and Efficacy
Gelatin and plant-based gelling agents behave differently, and the choice affects texture and, in some cases, the nutritional profile. I prefer gelatin for texture and bioavailability, but I’ll outline the trade-offs so you can choose what fits your values and dietary needs.
- Texture differences – Gelatin yields a bouncy, slightly chewy gummy with a glossy finish. Vegan alternatives like agar-agar or pectin tend to set firmer or more brittle and often lack that classic chew.
- Nutritional considerations – Gelatin supplies amino acids (including glycine and proline) that can support connective tissue and gut health. Plant gelling agents do not provide the same amino acid profile.
- Usage tips for vegan substitutes – Agar-agar needs a full boil to activate then sets as it cools; pectin often requires a specific sugar/acid balance. Expect to adapt technique and texture if you go vegan.
- Effectiveness of added nutrients – Vitamin C and many powdered probiotics can be added with either gelling system, but temperature and timing are critical to preserve potency.
How to Make Black Elderberry Gummies (Step-by-Step)
This is the method I use in my kitchen to keep the color bright and the texture consistent. Read through the whole process once, then work steadily — the mixture can thicken quickly as it cools.
- Mix elderberry syrup with your thinning liquid until uniformly combined.
- Reserve a small portion of the liquid in a bowl to bloom the gelatin; keep the larger portion in a small saucepan on the stove over low heat.
- When the stovetop liquid is warm and steaming but not boiling, remove from heat—boiling can dull the color and weaken delicate compounds.
- Add a spoonful of gelatin to the reserved bowl of liquid and stir until fully hydrated; repeat until all gelatin has bloomed (this prevents clumping when it hits the warm pan).
- Stir the bloomed gelatin into the warm saucepan, whisking until the mixture is silky and lump-free; if it starts to thicken too quickly while you’re filling molds, gently rewarm over low heat to loosen.
- Allow the mixture to cool to the recommended temperature range before adding heat-sensitive powders (see the Pro Tip section below), then fill molds using a dropper or small spoon.
- Chill the molds until set—depending on gummy size this usually takes one to two hours—then pop out and store in an airtight container in the fridge.
Pro Tip for Black Elderberry Gummies: When to Add Vitamin C & Probiotics
- Add vitamin C powder only after the mixture has cooled to about 105–110°F; higher heat degrades ascorbic acid.
- If using probiotics, wait until the mixture is in the same temperature range (cooler rather than hot) to preserve live cultures; some strains are heat-sensitive and will be killed by higher temperatures.
- If you’re unsure of the temperature, err on the side of cooler—powders dissolve best in a slightly warm but not hot base.
- Stir powders in gently and thoroughly to avoid clumps; the mixture’s color may lighten slightly when powders are added but will regain depth as it chills.
Troubleshooting
- If your gummies are grainy or have lumps: I’ve found that blooming gelatin thoroughly in a small bowl prevents this; always whisk the bloomed gelatin into the warm liquid quickly.
- If they’re too soft: I let the batch sit back on very low heat, gently stirring until fluid again, then remix more gelatin if needed.
- If the color looks dull: avoid boiling the syrup. I once lost vibrancy by letting the pan boil; gentle warming preserves the anthocyanins.
- If the gummies won’t release cleanly from the mold: pop the mold briefly in the freezer for 5–7 minutes, then invert and press gently from the base.
How to Store, Dose, and Customize Your Elderberry Gummies
Storage, dosing, and small customizations let you tailor the gummies to your family’s needs. I keep a jar in the fridge and a small travel tin for short outings.
- Storage: Keep gummies in an airtight container in the fridge to preserve texture and potency; see the FAQ for expected shelf life.
- Dosing: A general guideline is one to two gummies per day, but adjust based on the syrup concentration and your health goals.
- Flavor customizations: Add a splash of citrus juice to brighten the flavor, or use a mild herbal tea in place of water for subtle complexity.
- Sugar control: Reduce sweetness by choosing a less sweet elderberry syrup or by diluting slightly with unsweetened liquid.
Variations
- Berry blend: Mix elderberry syrup with a small amount of blackcurrant or cherry juice for deeper color and layered flavor.
- Herbal boost: Steep immune-supportive herbs in your thinning liquid and strain before combining with syrup.
- Vegan version: Substitute agar-agar or pectin but expect a firmer texture; follow manufacturer activation instructions closely.
Potential Side Effects and Interactions
Elderberry is generally well tolerated, but it’s important to be informed about safety, especially when you’re making concentrated preparations at home.
- Common side effects: Some people experience mild stomach upset or diarrhea when first introducing elderberry; start with a small serving to assess tolerance.
- Raw or unripe berries: Undercooked raw elderberries, leaves, or stems contain compounds that can cause nausea—always use properly prepared syrup or fully cooked berries.
- Interactions: If you take immune-modulating medications or have an autoimmune condition, check with your healthcare provider before using concentrated elderberry products.
- Children and pregnancy: Elderberry gummies can be given to kids, but consult your pediatrician if you have concerns. Pregnant or nursing people should consult their provider before adding concentrated herbal supplements.
Frequently Asked Questions
How long will these black elderberry gummies last? When stored in an airtight container in the fridge, these gummies can last up to 2 weeks. Just be sure to keep them cool!
Can I substitute the gelatin with a vegan alternative? Yes! You can use agar-agar or pectin as a plant-based alternative to gelatin. Keep in mind that the texture may differ slightly.
Is it safe to give elderberry gummies to kids? Absolutely! These gummies are a great way to support kids' immune systems during sniffle season, but always check with your pediatrician if you have concerns.
How many gummies can I take per day? A general guideline is to take 1-2 gummies a day, but it's best to adjust based on your needs and dietary recommendations.
Where can I find quality elderberries for the recipe? Look for high-quality elderberries at health food stores, online herbal retailers, or make your own elderberry syrup using fresh or dried elderberries!
Ingredients
- ⅔ cuphomemade elderberry syrup
- ⅓ cupwater
- 4 tbspgrass-fed gelatin (unflavored)
- 1 tspvitamin C powder
- ½ - 1 tspprobiotic powder
Instructions
- 1
Mix together the elderberry syrup and water.
- 2
Pour 1/2 cup of the liquid into a small bowl. Place the remaining liquid in a small saucepan or pot. Turn the burner to low heat.
- 3
While the liquid is warming up you're going to prepare the gelatin.
- 4
When the liquid is hot but not boiling, remove the saucepan/pot from heat.
The best recipes reward patience — don't rush the sear.
- 5
Add 1 tablespoon of the gelatin to the liquid in the bowl and stir it in with a fork. Repeat until all gelatin has been mixed in.
- 6
Stir in the gelatin mixture to the saucepan/pot when the stovetop liquid is hot. Whisk thoroughly.
- 7
Allow the mixture to cool to 105F - 110F before stirring in vitamin C and probiotics if using.
- 8
Pour the gelatin mixture into your silicone mold. Use a dropper to make the process easier if needed.
- 9
Pop molds into the fridge for 1 - 2 hours to firm up.
- 10
When ready, pop them out of the mold and store in an airtight container in the fridge.
Recipe Card
How I Make Black Elderberry Gummies for Daily Immune Support
Keep it handy for later, send it to someone cooking with you, or open the clean print view.
- Prep
- 5 min
- Total
- 135 min
- Serves
- 225
You might also like
How I Make Quick Blueberry Lemon Jam — Canning in 1 Hour
May 21, 2026
The 5-Ingredient Japanese Jelly Dessert I Make All Summer
May 21, 2026
The Homemade Peachy Gummies My Kids Love — Fun, Simple Treat
May 21, 2026
How I Make Green Tea Lemon Ginger Gummies for Daily Immune Support
May 21, 2026
Reviews
Be the first to review this.