I make these cheesy garlic butter rollups whenever friends drop by with short notice — they come out of the oven warm, fragrant, and impossibly easy to eat. In my kitchen they’ve become the appetizer I reach for when I want something that looks polished but doesn’t steal the afternoon. The scent of butter and garlic baking into a golden crescent is the kind of thing that starts conversations before anyone sits down.
I like to keep the method straightforward: tender dough, a generous blanket of melting cheese, and a garlic-butter finish that browns nicely. Over the years I learned a few small habits — chilling the assembled rollups briefly before baking, and brushing every one with butter so each edge crisps evenly — that turn good rollups into reliably great ones.
What makes these perfect for gatherings is how customizable they are. I’ll sketch variations through the post, from swaps for different cheeses and herbs to gluten-free and lighter options. I also include practical tips for prepping ahead so you can spend more time with guests and less time shuttling between oven and table.
Why These Cheesy Garlic Butter Rollups Are Ideal for Entertaining
These rollups combine two things guests always reach for: golden, buttery pastry and molten cheese. They’re quick to assemble and fast to bake, so you can serve something warm even with last-minute plans. They also scale easily — make a double batch and you’ll still be done before appetizers at most dinner parties.
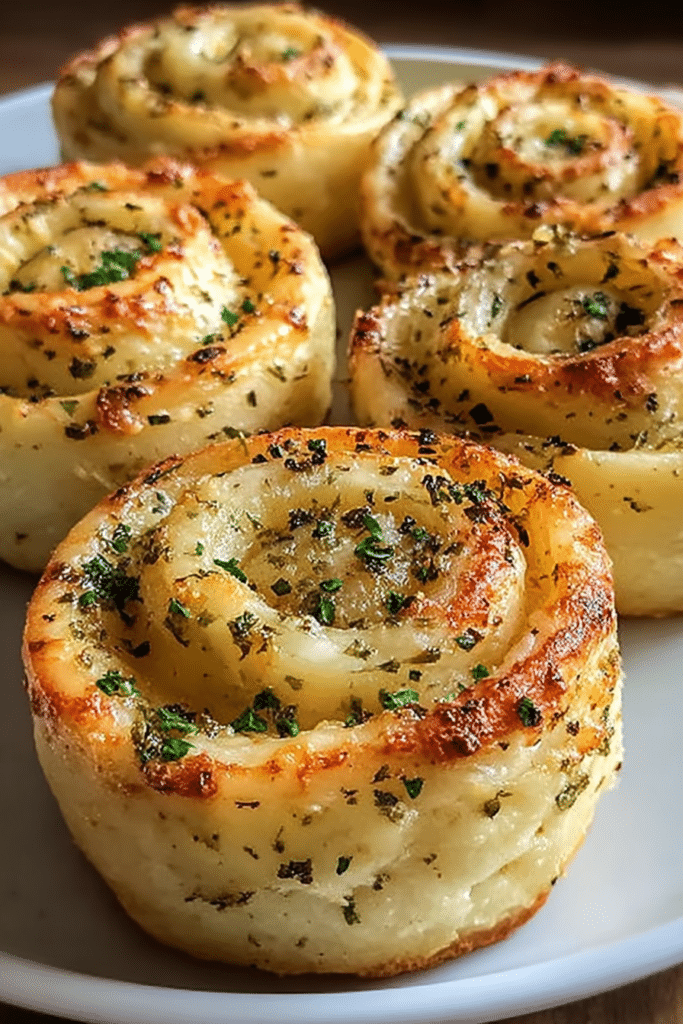
Visually, they pull guests in: glossy, browned tops with little pockets where cheese peeks through, and the smell of roasted garlic and butter drifting across the room. Because they’re handheld and forgiving, they suit casual get-togethers and slightly more formal receptions alike.
Practical reasons matter too. These rollups are forgiving — small imperfections in rolling or spacing won’t ruin the batch — and they adapt to themes: swap herbs and cheese profiles for Mediterranean, Italian, or smoky variations. I’ve also found they travel well to potlucks if you keep them warm in a covered pan.
Everything You Need for Cheesy Garlic Butter Rollups
Below I break down the ingredients and tools so you’re ready before you begin. Focus on quality where it counts: the cheeses and the butter will carry most of the flavor. For more garlic-forward ideas, you can also try this Cheesy Garlic Chicken Wraps as another delicious option.
- Crescent roll dough – The ready-made dough gives you flaky layers without laminating at home; you can substitute a similar sheeted dough.
- Mozzarella (shredded) – Melts into that iconic pull-apart texture; choose a good melting variety for smooth stretch.
- Parmesan (grated) – Adds a nutty, salty counterpoint and helps create golden browning.
- Unsalted butter – Brushed over the dough to encourage flakiness and golden color; salted butter can be used if you reduce added salt elsewhere.
- Garlic (minced) – Fresh garlic gives bright, aromatic notes; roasted garlic can be used for a sweeter, mellower flavor.
- Fresh parsley – Brightens the finish; other fresh herbs work well for variation.
- Salt & black pepper – Simple seasoning to lift the cheeses and butter.
- Baking sheet and parchment – Ensure even baking and easy cleanup.
- Pastry brush – For an even butter coating that promotes crisp, golden tops.
The Secret to Perfectly Flaky, Melty Rollups
Getting the texture right comes down to a few small technical choices. I’ll walk you through the ones that matter most so your rollups are flaky on the outside and beautifully molten inside.
- Keep dough slightly cool so it layers well; warm, sticky dough will compress and lose flakiness.
- Roll from the wide end toward the tip with consistent tension — this tightness helps the roll hold together and bake evenly.
- Brush butter over the tops so edges brown uniformly; butter on the surface encourages that pleasant crunch.
- Monitor baking time closely; pull the tray when tops are golden and cheese is bubbling through small vents.
- Let the rollups rest a few minutes after baking to let melted cheeses settle so they’re floppy rather than runny when served.
Cheese & Herb Swaps to Customize Every Batch
Want to vary the flavor profile? Try these swaps and small adjustments to suit different tastes and occasions. For a complementary side, consider making our Ultimate Cheesy Garlic Bread Delight to serve alongside these rollups.
- Cheddar or sharp cheddar – Adds tang and depth; great with smoked paprika for a bold bite.
- Gouda (young or smoked) – Melts smoothly; smoked gouda lends a cozy, barbecue-friendly note.
- Fontina or provolone – Creamy, mild melting cheeses that complement stronger grated cheeses like Parmesan.
- Herbs: thyme, rosemary, or oregano – Thyme pairs nicely with garlic, rosemary adds pine-like perfume (use sparingly), oregano leans Italian.
- Heat additions – Crushed red pepper flakes or finely chopped pickled jalapeño add a lively kick without overwhelming the butter-and-cheese base.
- Lower-calorie cheese swaps – Try a part-skim melting cheese blended with a touch of full-fat cheese for mouthfeel while cutting calories.
Gluten-Free and Lower-Calorie Options That Still Taste Rich
If you’re serving guests with dietary needs, you don’t need to sacrifice flavor. Here are practical swaps and techniques that preserve texture and taste.
- Gluten-free dough alternative – Use a store-bought gluten-free sheeted dough or a shortcrust-style GF pastry; handle gently to avoid cracking and consider brushing extra butter to improve browning.
- Lower-calorie cheese options – Blend a lighter melting cheese with a small proportion of stronger, full-fat cheese to retain flavor without full calories.
- Flavor-enhancing techniques – Add roasted garlic or concentrated herb pastes to compensate for milder cheese; fresh herbs and a finishing sprinkle of grated hard cheese lift perceived richness.
- Presentation for GF guests – Serve GF rollups on a separate platter and label them so guests can choose with confidence.
How to Make Cheesy Garlic Butter Rollups (Step-by-Step)
Follow these steps for consistent results. I write these in the second person so you can follow along in your kitchen.
- Preheat your oven to a moderate hot temperature so rolling and baking windows are predictable.
- Unroll the dough and separate into triangles; keep the dough chilled if it feels warm to the touch.
- Mix melted butter with minced garlic, chopped parsley, salt, and pepper; this is your finishing brush-on.
- Sprinkle shredded mozzarella and grated Parmesan across the wide end of each triangle so the cheese is distributed but not spilling over.
- Roll each triangle tightly from the wide end to the tip and place seam-side down on a parchment-lined baking sheet.
- Brush the assembled rollups with the garlic-butter mixture, making sure the tops and edges receive an even coat.
- Bake until the rollups are golden brown and the cheese has started to bubble through small vents—timing varies slightly by oven.
- Let the rollups cool for a few minutes so the cheese sets a bit, then transfer to a serving board and garnish with a little extra parsley if you like.
Pro Tip for cheesy garlic butter rollups: Keep them flaky and extra-melty
- Chill assembled rollups for 10–15 minutes before baking to help preserve layers and prevent spreading.
- If your oven has a convection setting, use it for more even browning; reduce the recommended temperature slightly and watch closely.
- Brush a second time with garlic butter halfway through baking for a glossed top and extra flavor.
- Allow a short resting time after baking so the melted cheese firms a touch and the rollups hold together when picked up.
Troubleshooting
I’ve run into these common issues in my kitchen; here’s how I fix them when a batch doesn’t behave.
- Dough feels too sticky — Chill it briefly and dust your work surface lightly to prevent tearing.
- Rollups spread too much — Roll tighter and chill assembled pieces before baking to help them hold shape.
- Cheese leaks out and burns — Use less cheese near the tip and tuck edges to contain fillings.
- Tops brown too fast before cheese melts — Lower oven rack one position and reduce temperature slightly.
How to Store, Reheat, and Make-Ahead Cheesy Garlic Butter Rollups
For party planning, you’ll want reliable storage and reheating methods so rollups stay as close to fresh as possible. If you’re building a richer spread, consider adding our Creamy Garlic Parmesan Mushrooms to the table.
- Refrigerate leftovers in an airtight container for up to three days; reheat in a hot oven to restore crispness rather than the microwave if you want flaky edges.
- To freeze: flash-freeze assembled (unbaked) rolls on a tray, then transfer to a sealed bag; bake from frozen, adding a few extra minutes to the time.
- Make-ahead strategy: assemble and keep covered in the fridge for a few hours before baking; this short hold helps when hosting so you can bake just before guests arrive.
- Transport tip: keep warm in a shallow pan covered with foil; avoid stacking to prevent sogginess from trapped steam.
Serving Suggestions and Dip Pairings for Every Occasion
Presentation matters: serve on a wooden board or shallow platter with contrasting colors to make these pop. For a complementary appetizer pairing, try our Garlic Butter Shrimp to create an impressive duo.
- Marinara sauce – Classic, bright acidity cuts through richness.
- Garlic aioli or herbed yogurt dip – Creamy, cooling contrast that keeps the garlic theme consistent.
- Ranch dressing – Crowd-pleasing and works well if you added a spicy element to the rolls.
- Garnishes: chopped parsley, flaky sea salt, or a light dusting of grated hard cheese for visual contrast.
Frequently Asked Questions
Can I use a different type of cheese?
Absolutely! Feel free to mix and match cheeses like cheddar, gouda, or even a blend for a unique flavor.
How do I make these rollups gluten-free?
You can substitute the crescent roll dough with gluten-free dough options available at most grocery stores to enjoy these rollups gluten-free.
Can I prepare these rollups in advance?
Yes! You can assemble the rollups, keep them covered in the fridge, and bake them just before serving for a fresh-out-of-the-oven treat.
What dips pair well with cheesy garlic butter rollups?
These rollups go great with marinara sauce, ranch dressing, or a garlic aioli for an extra zesty kick!
How should I store leftovers?
Store any leftover rollups in an airtight container in the fridge for up to 3 days. You can reheat them in the oven for a few minutes to restore their crispiness!

Cheesy Garlic Butter Rollups
Ingredients
Method
- Preheat the oven to 375°F (190°C).
- Unroll the crescent roll dough and separate the triangles.
- Mix melted butter, garlic, parsley, salt, and pepper in a bowl.
- Sprinkle mozzarella and Parmesan cheese on each triangle.
- Roll each triangle tightly starting from the wide end and place seam-side down on a baking sheet.
- Brush the garlic butter mixture over the top of each rollup.
- Bake for 12-15 minutes until golden brown and bubbly.
- Let cool slightly, then serve warm.