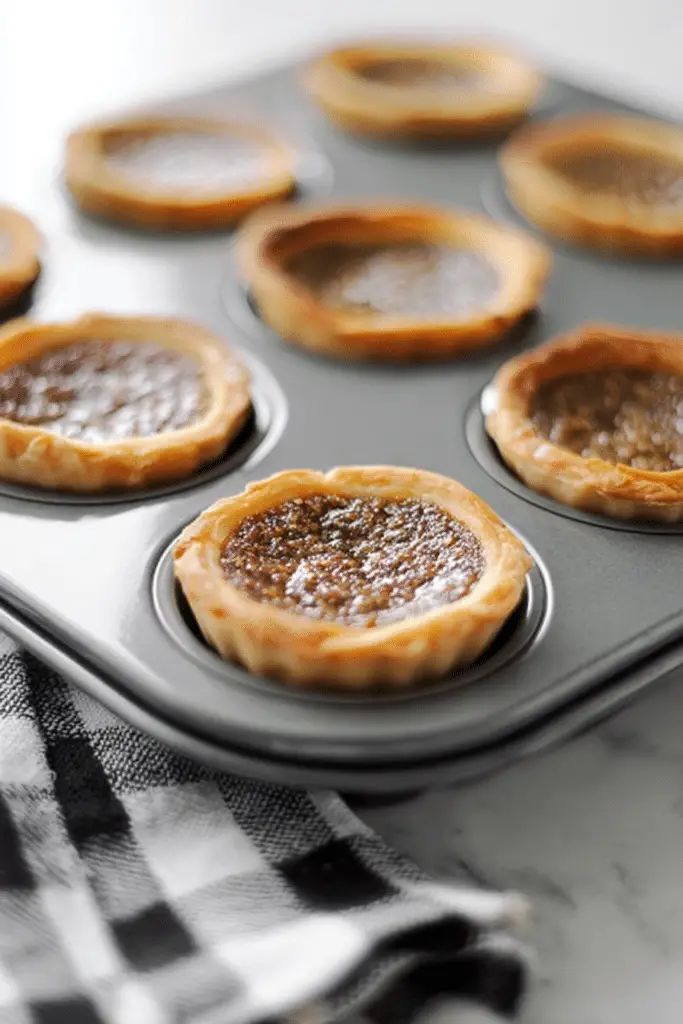
I still remember the first time I bit into a warm butter tart at a small kitchen table in Ontario — the crust cracked just a little under my fork, and that glossy, syrupy filling warmed the roof of my mouth. Butter tarts are the kind of thing you don’t just eat; you experience. They smell of brown sugar and melted butter as they bake, and the caramel scent fills the house in a way that makes you stop whatever you’re doing. Over the years I’ve made dozens of batches — for potlucks, quiet afternoons, and holiday trays — and this easy classic version is the one I reach for when I want the real, familiar thing without fuss.
Butter tarts are a beloved Canadian treat, much like our Sweet Almond Pastry, which showcases the richness of Canadian desserts.
Origin-wise, butter tarts have deep roots in Canadian kitchens — their exact origin is debated, but they are a staple in bakeries and home kitchens across the country. They evolved from British and North American pie and tart traditions into a distinctly Canadian small tart with a thin, flaky crust and a luxuriously sweet, slightly runny center. Their cultural importance is huge: they show up at church bake sales, school lunches, and family gatherings. Over time home cooks have adapted them with pecans, chocolate, maple, and dried fruits; every family seems to have a ‘secret’ twist. In this post I’ll share the straightforward, reliable version I make most often, plus the tweaks and troubleshooting I’ve learned from years of testing.
Ingredients for Easy Classic Butter Tarts
- Pre-made tart shells – the convenience factor: use good quality, flaky shells for consistent results (or make your own if you prefer).
- Unsalted butter – gives richness and that true butter-tart flavor; use fresh butter and melt it gently so you don’t scorch it.
- Brown sugar – provides the caramel color and depth; light or dark both work but dark will be a touch more molasses-forward.
- Golden corn syrup – keeps the filling glossy and tacky; maple syrup can be used to change the flavor profile.
- Egg – binds the filling and gives it structure; room temperature helps it mix smoothly without seizing.
- Salt – a pinch balances the sweetness and brings out the buttery notes.
- Pure vanilla extract – adds aroma and rounds the sweetness.
- Lemon juice – a small acidic note brightens the filling so it doesn’t taste one-dimensional.
- Chopped pecans – optional crunch; toasting them first deepens the nutty flavor.
- Dried fruit (raisins, cranberries) – traditional add-ins for texture and chew.
- Chocolate chips – for a modern twist that melts into pockets of chocolatey goodness.
Note: The ingredient descriptions above are conversational — later in the method I give the exact amounts and timing so you can follow the recipe precisely.
Step-by-Step Instructions for Baking Butter Tarts
These instructions are the exact steps I use in my kitchen. The full recipe yields 12 tarts and takes about 25 minutes from start to finish (10 minutes prep plus 15 minutes baking). I use 375°F as my baking temperature because it gives a good balance: the crust browns without the filling scorching.
- Prepare your shells: Place 12 pre-made tart shells on a baking sheet. If your tart shells come frozen, thaw them according to the package directions first. I like to pop them into the muffin tin briefly to make sure they keep their shape — sometimes store-bought shells can sag, and a quick check saves disappointment later.
- Make the filling: In a bowl, melt about a third of a cup of unsalted butter and let it cool for a minute. Add one cup of brown sugar and about a third of a cup of golden corn syrup, then whisk in one room-temperature egg until smooth. Stir in a quarter teaspoon of salt, a teaspoon of pure vanilla extract, and a teaspoon of lemon juice. This mixture should be glossy and pourable but not watery. If it looks grainy, whisk a bit longer — the warm melted butter helps the sugar dissolve.
- Add your mix-ins (optional): If you’re using add-ins like chopped pecans or dried fruit, fold them into the filling now. I usually add a small handful per tart — this gives texture and prevents the filling from being uniformly gooey. Chocolate chips are best sprinkled on top so they create melty pockets.
- Fill the shells: Spoon the filling into the prepared tart shells, filling each about three-quarters full. The filling puffs slightly as it bakes and you don’t want it to overflow. A small spoon or a 1-tablespoon scoop makes this neat and quick.
- Bake: Bake in a preheated oven at 375°F for 16–17 minutes. Keep an eye on the edges — the pastry should turn golden brown and the filling should caramelize and appear set at the edges while still slightly jiggles in the center. If the tops brown too fast, tent with foil for the last few minutes.
- Cool: Remove from the oven and let cool on a wire rack. The filling will continue to set as it cools; if you cut into them too soon you’ll get a runnier center than intended. I usually wait at least 20 minutes before serving warm, and an hour if I want them fully set.
Timing notes: prep is quick — about 10 minutes — because we’re using pre-made shells and a one-bowl filling. Baking time varies a little by oven and shell thickness; check at 15 minutes and again at 17. These tarts make 12 servings.
Customization Ideas: Add-ins and Variations
I’ve made these in countless permutations. Little changes can transform the experience — a spoonful of maple syrup, a handful of toasted pecans, or stirring citrus zest into the filling. Here are my go-to variations and how they affect texture and bake time:
- Pecan butter tarts – fold toasted chopped pecans into the filling for crunch; no bake time change.
- Raisin or cranberry – soak dried fruit briefly in warm water or liquor for plumper bits that won’t steal moisture from the filling.
- Chocolate chip – sprinkle chips on top just before baking so they become soft pockets; if you add too many, the filling may take a minute longer to set.
- Maple butter tarts – swap part of the corn syrup for real maple syrup for that unmistakable Canadian note; the filling may darken slightly.
- Citrus twist – add a little orange or lemon zest to brighten the sweet filling; this doesn’t change bake time but makes the tart taste fresher.
If you’re looking for another classic dish to serve alongside dessert, try our Classic Veal Parmesan for a delightful meal experience.
Tips for Perfecting Your Pastry Shell
The shell is what makes or breaks a butter tart in my opinion. A soggy bottom or a shrunken shell turns a great filling into disappointment. Here’s what I do and what I’ve learned:
- Chill everything: If you make pastry from scratch, keep your butter and water cold and chill the dough before rolling. Cold butter creates steam pockets and the flakiest pastry.
- Handle dough minimally: Overworking warms the butter and develops gluten, which gives tougher pastry. Press and fold gently.
- Blind baking (optional): For ultra-crisp bottoms, blind bake shells for 6–8 minutes at 375°F, then cool before adding filling. This is especially helpful if you’re using a wet filling or homemade pastry.
- Prevent shrinking: When you roll out pastry, don’t stretch it into the tin — that causes shrinkage. Let it naturally drape and trim the excess.
- Soggy bottom fix: Brush the inside of the shell with a thin egg wash and return to the oven for a minute to set it, or sprinkle a little ground nuts or breadcrumbs in the base before filling to absorb excess moisture.
Storing and Reheating Butter Tarts
These tarts are very forgiving after baking. I often make a double batch and freeze half for later. Here’s how to keep them tasting their best:
- Room temperature: Store in an airtight container at room temperature for up to 3 days — they’re often tastiest the day after, when the filling has mellowed.
- Refrigeration: Refrigerate for up to a week in an airtight container. Cold tarts are firmer and make a satisfying contrast to a warm cup of coffee.
- Freezing: Freeze cooled tarts on a tray until solid, then transfer to a freezer bag for up to 3 months. Thaw at room temperature or gently warm in a low oven.
- Reheating: Warm in a 300°F oven for 8–10 minutes to revive the crust and soften the filling without melting it completely.
For a sweet treat that complements your butter tarts, consider making our Easy Vegan Chocolate Brownie Sundae.
Common Baking Issues & Troubleshooting
Even experienced bakers hit snags. Here are the trouble cases I see most often and how I fix them.
- Edges burn before filling sets: Your oven may run hot or your shells may be thin. Tent with foil and drop the temperature by 15–25°F if this keeps happening.
- Runny filling: If the filling is too loose after the full bake time, it may need slightly more time (in small increments) or your egg may have been too cold when mixed, preventing it from incorporating well. Also ensure you filled shells only 3/4 full.
- Soggy bottom: Blind-bake shells briefly or add a light barrier like a dusting of ground nuts or breadcrumbs. Don’t overfill with wet add-ins.
- Cracked pastry: That usually means the dough was too dry or cold and then snapped. A quick patch with a bit of leftover dough and a gentle press before baking will help; pressing edges together with a brush of egg wash can seal cracks.
- Too sweet: Try reducing the sugar slightly or introduce a salty note with a sprinkle of flaky salt on top right after baking; a teaspoon of lemon juice in the filling also helps balance sweetness.
Frequently Asked Questions
What can I use instead of tart shells?
If you prefer, you can make your own pastry shells from scratch using flour, butter, and water. Alternatively, you can use pre-made phyllo dough or mini pie crusts for a different texture.
Can I make these butter tarts vegan?
Yes! You can substitute the butter with vegan butter and use a flax egg or applesauce instead of the regular egg. Be sure to check that your tart shells are also vegan-friendly.
How do I know when my butter tarts are done baking?
The tarts are ready when the filling is set but still slightly jiggly in the center, and the edges of the pastry are golden brown. You can also do the toothpick test by inserting one in the center; it should come out clean with a little filling sticking to it.
What are some popular add-ins for butter tarts?
Common additions include chopped pecans, walnuts, chocolate chips, or dried fruits like raisins or cranberries. Feel free to experiment and find your favorite combination!
How should I store leftover butter tarts?
Store your butter tarts in an airtight container at room temperature for up to 3 days, or refrigerate for up to a week. You can also freeze them for longer storage. Just make sure to wrap them well!
Conclusion & Serving Suggestions
These easy classic butter tarts are the sort of recipe I keep in my back pocket: quick to assemble, reliably delicious, and endlessly adaptable. Expect a flaky shell, a caramel-sweet filling that’s glossy and slightly gooey, and the comfort of a recipe that’s been passed around Canadian kitchens for generations. Serve them warm for a gooey center, or chilled if you prefer a firmer bite. They pair beautifully with strong coffee, a scoop of vanilla ice cream, or a dollop of whipped cream and a few toasted pecans.
For a refreshing pairing with butter tarts, serve a slice of Lemon Blueberry Tart as an excellent dessert option.
I hope you give these a try. When I make a tray, neighbors appear at the door — it’s that kind of dessert. If you tinker with add-ins, note what you tried and the bake time; the small changes are what turn a good batch into your family’s favorite.
Recipe at-a-glance: Makes 12 tarts. Prep time: ~10 minutes. Bake at 375°F for 16–17 minutes. Let cool before serving.
Happy baking — and if you make a batch, I’d love to hear what twist you tried (maple? chocolate? classic pecan?).

Easy Classic Butter Tarts
Ingredients
Method
- Prepare tart shells according to product packaging.
- Melt butter and let cool slightly. Then add brown sugar, golden corn syrup, egg, salt, vanilla and lemon juice; stir until well combined. If choosing to use add-ins, stir them in here.
- Pour the filling (about 3/4 full) into prepared tart shells and bake for 16-17 minutes at 375°F or until the tart shells start to turn golden brown, and sugar caramelize. Let cool before serving and enjoy!