Introduction to Italian Nut Roll Cookies
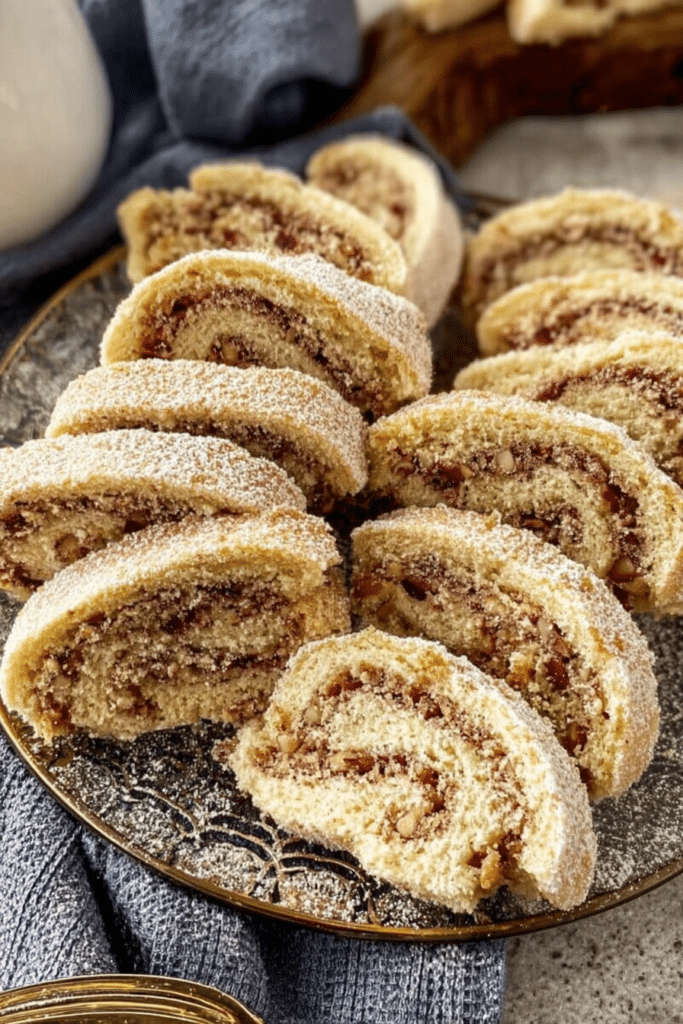
Italian nut roll cookies are the kind of cookies I make when I want something nostalgic, a little fussy in a comforting way, and perfect with coffee. Think of a tender, buttery shortbread-like dough wrapped around a warmly spiced nut and jam filling, baked until golden and sliced into little spirals. They’re slightly crisp at the edges, soft and tender in the center, with the filling giving a textural pop from finely chopped nuts and a sweet-tangy lift from jam.
I first made these on a gray December afternoon with holiday music on and a pot of coffee warming on the stove. The dough felt cold and slightly crumbly as I worked it, which is right — that cold butter is what gives the cookies that tender lift. The filling smelled of cinnamon and toasted nuts as I chopped them, and when the jam met the warm pastry it turned glossy and fragrant. These are the sort of cookies that disappear from the plate because everyone wants that little spiral of jam and nut in every bite.
Ingredients You’ll Need
- All-purpose flour – the base for the dough; gives structure without being heavy.
- Granulated sugar – sweetens the dough and the filling; helps caramelize the nuts slightly.
- Baking powder – a small lift so the dough isn’t dense.
- Salt – rounds and brightens flavors; don’t skip it.
- Unsalted butter – cold and cubed for a tender, flaky texture in the cookie dough.
- Eggs – bind the dough and add richness; room temperature works best for even mixing.
- Vanilla extract – a warm, familiar base note that complements jam and nuts.
- Lemon zest – optional, but a little brightness that cuts through the richness.
- Walnuts or hazelnuts – finely chopped for texture and a toasty, earthy flavor; walnuts are traditional.
- Fruit jam or preserves – apricot, raspberry, or your favorite; provides acidity and sweetness to balance the nuts.
- Ground cinnamon – warms the nut filling; a little goes a long way.
- Powdered sugar – optional finishing dusting for a classic look and touch of sweetness.
Full ingredient list with measurements (use these exact amounts when you bake):
- 2 cups all-purpose flour
- ½ cup granulated sugar
- 1 teaspoon baking powder
- ¼ teaspoon salt
- ½ cup unsalted butter (cold and cut into small pieces)
- 2 large eggs
- 1 teaspoon pure vanilla extract
- Zest of one lemon (optional)
- 1 cup walnuts (or hazelnuts, finely chopped)
- ½ cup fruit jam or preserves (apricot, raspberry, or your choice)
- ¼ cup granulated sugar (for the filling)
- 1 teaspoon ground cinnamon
Step-by-Step Instructions
Below is the tested method I use every time I make these — I’ve written down the cues I look for so you can replicate the same result. The timing and temperature are important; don’t rush the chilling step.
- Combine the dry ingredients: In a large mixing bowl whisk together the all-purpose flour, granulated sugar, baking powder, salt, and the lemon zest if you’re using it. The lemon zest should smell bright and citrusy — that little burst of aroma is your cue it’s fresh.
- Cut in the butter: Add the cold butter pieces to the dry ingredients. Use a pastry cutter or your fingertips to work the butter into the flour until the mixture looks like coarse crumbs. You want lots of small, pea-sized bits of butter still visible — that’s what creates a tender bite after baking. If the butter melts and the mixture turns greasy, you’ve warmed it too much; pop the bowl in the fridge for 10–15 minutes to firm up.
- Mix the eggs and vanilla: Beat the eggs and vanilla in a small bowl, then add them to the flour-butter mixture. Stir until the dough comes together. It will be a little shaggy and soft. If it seems too dry and won’t hold when you press a handful together, add a teaspoon of cold water at a time until it just binds. Too much water will make the dough sticky and harder to roll, so be conservative.
- Chill the dough: Shape the dough into a disk, wrap it tightly in plastic, and refrigerate for at least 1 hour. This step is non-negotiable — chilling firms the butter and helps the dough roll out cleanly. I usually make the dough in the morning and bake in the afternoon; it’s more manageable that way.
- Prepare the nut filling: In a medium bowl combine the finely chopped nuts, ¼ cup granulated sugar, and 1 teaspoon ground cinnamon. Taste a tiny bit (it’s okay to nibble raw nuts) and add more sugar if you want it sweeter — but remember the jam will add sweetness too. The nuts should be chopped finely so the log rolls evenly and slices cleanly.
- Preheat and prep: Preheat your oven to 350°F (175°C). Line a baking sheet with parchment paper or a silicone mat so the logs have a nonstick surface and slide easily onto the rack.
- Roll out the dough: Divide the chilled dough into two equal pieces. On a lightly floured surface roll one portion into a rectangle about ¼ inch (6 mm) thick. The dough should be pliable but cool; if it warms and gets sticky, slip it back in the fridge for 10 minutes. Aim for an even thickness so the cookies bake uniformly.
- Assemble: Spread a thin layer of fruit jam across the dough, leaving a small ¼–½ inch border. The jam layer should be thin — thick globs will make the log slip or squirt out when rolled. Sprinkle half the nut mixture evenly on top of the jam. Press gently with the rolling pin to help the filling adhere if needed.
- Roll into logs: Starting at one long edge, roll the dough into a tight log (jelly-roll style). You should be able to see a neat spiral through the dough as you roll; that visual is a helpful cue. Pinch the seam to seal and tuck the ends under slightly. Repeat with the second portion so you have two logs. Place seam-side down on the prepared baking sheet — that keeps them from unrolling in the oven.
- Bake: Bake the logs for 30–35 minutes, until they’re golden brown and give slightly when pressed. The exact time depends on your oven; if the top browns quickly but the center still feels soft, lower the oven by 10–15°F and continue baking for a few more minutes. The aroma will be warm and nutty; the edges will start to deepen in color first.
- Cool and slice: Remove the baking sheet from the oven and let the logs cool for about 10 minutes — warm, but cool enough to handle. Use a sharp serrated knife to slice the logs diagonally into ½-inch (1.3 cm) thick cookies. A gentle sawing motion keeps the jam from tearing the dough. Place slices on a wire rack to cool completely.
- Finish: Once completely cool, dust with powdered sugar if desired. Store in an airtight container at room temperature for up to a week.
Tips for Perfecting Your Dough
I make these two or three times each holiday season, and a few consistent practices save me from a ruined batch:
- Keep ingredients cold: Cold butter and a chilled dough make rolling possible. If your kitchen is warm, chill the dough frequently.
- Don’t overwork the dough: Mix just until it comes together. Over-kneading develops gluten and produces tough cookies.
- Watch the butter size: Aim for pea-sized butter pieces when cutting them into the flour. If you make the butter too small (dust-like), you’ll lose flakiness; too big and the dough won’t hold together well.
- Measure flour correctly: Spoon flour into your measuring cup and level it off; packing flour can make the dough dry. If the dough is crumbly, add cold water, one teaspoon at a time.
- Roll evenly: An even ¼-inch thickness ensures consistent baking. If one side of the log is thicker, you’ll get uneven browning and inconsistent slices.
- Slicing tip: Cool the logs slightly before slicing. If they’re too hot the jam will smear and the slices will fall apart; if too cold they can crack. Aim for the warm-but-handlable window after 8–12 minutes out of the oven.
- Fixing a sticky dough: Dust your rolling surface and pin lightly, but avoid adding too much flour. If the dough keeps sticking, chill it for 15–20 minutes then continue.
Exploring Variations
These cookies are forgiving and welcome creativity — here are a few tested variations I rely on when I want to switch things up.
If you enjoy nut flavors, you might also love making homemade chocolate turtles for a festive treat.
- Gluten-free: Swap all-purpose flour for a 1:1 gluten-free blend and add 1–2 teaspoons of xanthan gum if your blend doesn’t contain it. Almond flour can be used, but expect a denser, more crumbly dough; compensate with an extra egg white or a tablespoon of cold water.
- Nut-free: Use toasted sunflower seeds or pumpkin seeds finely ground to mimic the texture of chopped nuts. Keep the sugar and spice amounts the same.
- Chocolate twist: Add 2 tablespoons of cocoa powder to the dough and swap apricot jam for chocolate-hazelnut spread for a richer variation. Be mindful — chocolate spreads can be slicker, so use a thinner layer.
- Spice variations: Try a pinch of cardamom with the cinnamon, or orange zest instead of lemon for a different aromatic profile.
- Fruit swaps: Apricot gives a classic, slightly tangy contrast to nuts; raspberry is brighter. Use less-runny jams for cleaner rolls.
The Cultural Significance of Nut Rolls
Nut rolls have deep roots in many Italian households, often appearing around the holidays and family gatherings. They’re a make-ahead, shareable treat — the kind of cookie that gets packed into tins and exchanged between neighbors. In my experience, every family has a version: some add citrus zest, others favor a heavier nut-to-jam ratio. That patchwork of small differences is what makes the recipes feel like heirlooms.
Discover more about the holiday traditions by reading our article on Italian Christmas cookies.
When I bake these with my sister, we swap small tips — she insists on hazelnuts for their sweet, almost chocolatey notes, while I prefer walnuts for their rustic crumb and earthiness. We eat them at coffee breaks, after dinners, and pack them with care when visiting family. The ritual of rolling and slicing becomes part of the season.
Pairing Nut Rolls with Beverages
These cookies pair beautifully with warm, comforting drinks and a few special dessert pairings. The goal is to match the nutty richness and jammy brightness with a beverage that either complements or refreshes the palate.
For a delightful dessert pairing, consider serving these cookies with a slice of classic tiramisu.
- Strong coffee or espresso: The bitterness and aroma cut through the butter and sugar, making each bite taste fresher. I almost always reach for a small espresso cup.
- Black tea: A robust tea like Assam or an Earl Grey with its bergamot notes pairs nicely, especially when the filling is apricot or orange-scented.
- Sweet dessert wine: A small glass of Vin Santo or Moscato complements the nutty and jammy flavors for a special-occasion pairing.
- Milk: For a cozy, nostalgic feel, a cold glass of milk is simple and satisfying — especially for kids.
Storage and Serving Suggestions
These cookies keep beautifully, which is why they’re popular at holidays — you can bake in advance and still serve top-quality results.
Pair your Italian nut roll cookies with savory dishes like garlic parmesan chicken skewers for a well-rounded meal.
- Room temperature: Store in an airtight container layered with parchment paper to prevent sticking. They stay fresh for up to 1 week.
- Freezing: To freeze, place slices in a single layer on a baking sheet until firm, then transfer to a freezer-safe container with sheets of parchment between layers. They freeze well for up to 3 months. Thaw at room temperature.
- Make-ahead: Make the dough up to 2 days in advance and keep wrapped in the fridge. You can also assemble the logs and refrigerate them for a few hours before baking if you want to spread the work across two days.
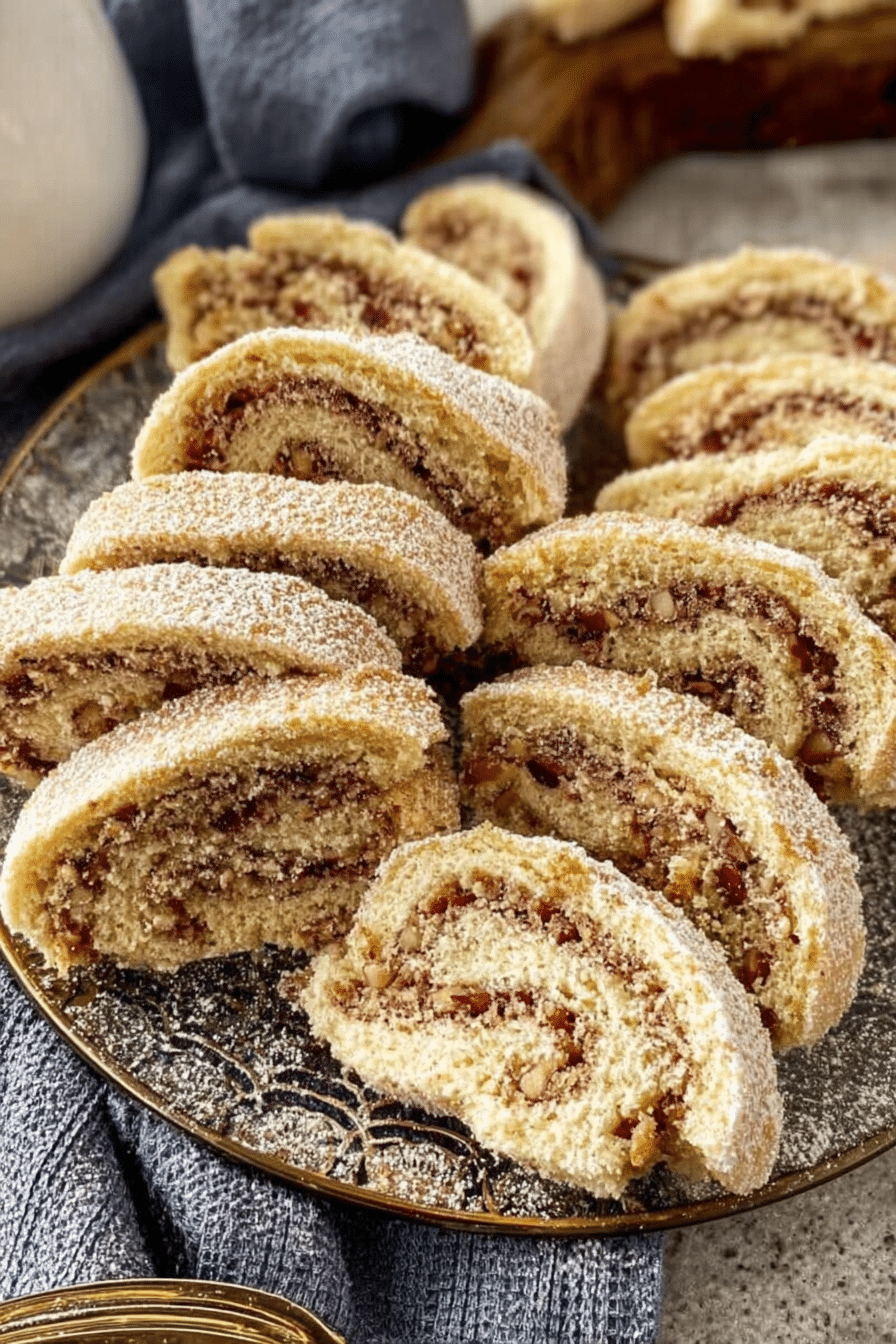
- Serving: Arrange on a platter dusted with powdered sugar and garnish with whole nuts or a small spoonful of jam for color. Slice diagonally for attractive spirals.
FAQ
- Can I use a different type of nut in the Italian nut roll cookies?
Absolutely! While walnuts are traditional, you can use hazelnuts or even almonds if you prefer. Just make sure they are finely chopped for the best texture. - What kinds of jam can I use for the filling?
You can use any fruit jam or preserves that you like! Apricot and raspberry are popular choices, but feel free to experiment with your favorites. - How should I store the Italian nut roll cookies?
Store the cookies in an airtight container at room temperature for up to a week. They can also be frozen for longer storage—just make sure to layer them with parchment paper to prevent sticking! - Can I make the dough in advance?
Yes, you can prepare the dough ahead of time! Wrap it tightly in plastic wrap and refrigerate for up to 2 days before rolling and baking. - Are there any gluten-free alternatives for this recipe?
Yes! You can substitute all-purpose flour with a gluten-free blend, almond flour, or coconut flour. Just keep in mind that the texture may vary slightly.
Conclusion: Share the Love with These Cookies
These Italian nut roll cookies are one of those recipes that reward patience — the chilling, the careful rolling, the clean slices. The payoff is a cookie with a buttery, tender crumb, a warm spiced-nut center, and a ribbon of jam that brightens every bite. I make a double batch most years: one to keep in the cookie jar and one to gift. If you try them, take a photo, share the spiral you’re most proud of, and tell someone who’ll appreciate a homemade treat. Baking these is a small, comforting ritual — and that’s the real joy.
Italian Nut Roll Cookies
Ingredients
Method
- In a large mixing bowl, whisk together the all-purpose flour, granulated sugar, baking powder, salt, and lemon zest (if using). Add the cold butter pieces to the dry ingredients.
- Using a pastry cutter or your fingertips, cut the butter into the flour mixture until it resembles coarse crumbs.
- In a small bowl, beat the eggs and vanilla extract together. Add the egg mixture to the flour mixture. Mix until the dough comes together. If it's too dry, add a teaspoon of cold water at a time until it holds together.
- Shape the dough into a disk, wrap it in plastic wrap, and refrigerate for at least 1 hour.
- In a medium bowl, combine the finely chopped nuts, granulated sugar, and ground cinnamon. Set aside.
- Preheat your oven to 350°F (175°C). Line a baking sheet with parchment paper or a silicone baking mat.
- Divide the chilled dough into two equal portions. On a lightly floured surface, roll out one portion into a rectangle approximately ¼ inch (6 mm) thick.
- Spread a thin layer of fruit jam evenly over the dough, leaving a small border around the edges. Sprinkle half of the nut mixture evenly over the jam layer.
- Starting from one of the long edges, carefully roll the dough into a tight log, similar to a jelly roll. Pinch the seams and ends to seal. Repeat with the second portion of dough and remaining filling. Place the logs seam-side down on the prepared baking sheet.
- Bake in the preheated oven for 30-35 minutes, or until the rolls are golden brown.
- Remove from the oven and allow the rolls to cool on the baking sheet for about 10 minutes.
- While the rolls are still warm but cool enough to handle, use a sharp serrated knife to slice them diagonally into ½-inch (1.3 cm) thick cookies. Place the sliced cookies on a wire rack to cool completely.
- Once cooled, dust the cookies with powdered sugar if desired.
- Store any leftovers in an airtight container at room temperature for up to 1 week.