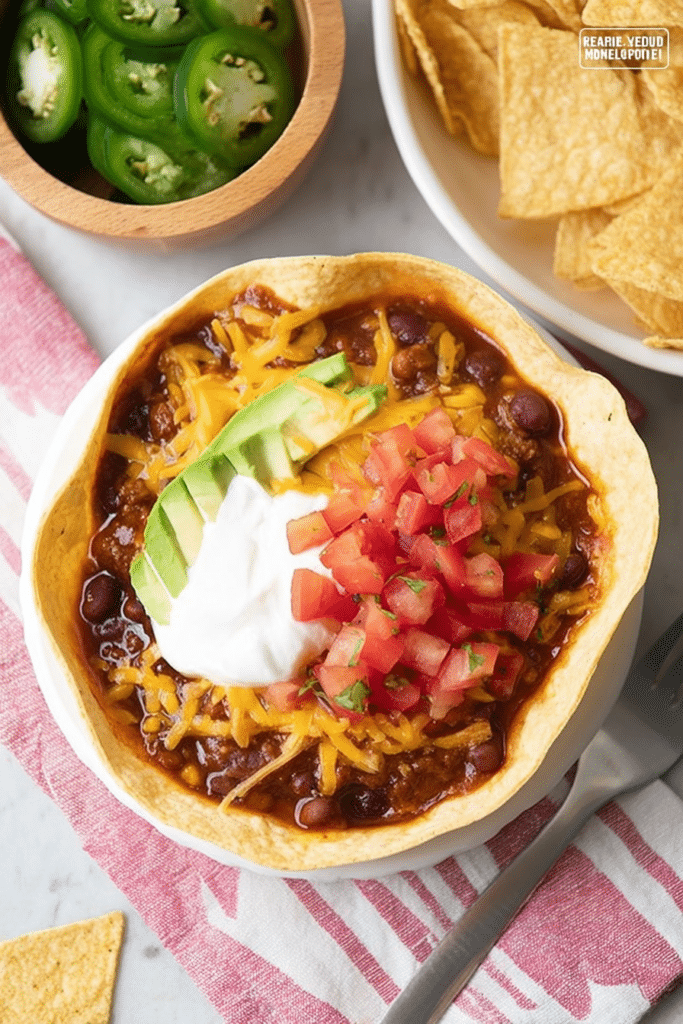
I make this Mexican chili all the time when the week gets busy and I want something that feels like a hug in a bowl. The aroma that fills the kitchen — warm tomato, toasted spices, and that faintly sweet scent from the onion — is what first sold me on this recipe. It’s a one-pot comfort dish that’s forgiving, fast, and endlessly adaptable.
Mexican chili has roots in home kitchens across Mexico and the American Southwest. It’s not a single fixed recipe so much as a family of dishes built around beans, chiles, tomatoes, and comforting spices. In my family, this version evolved from a pantry-friendly, one-pot method I learned when I wanted something filling with minimal cleanup. Over time I swapped canned items and seasonings to hit a balance between speed and layered flavor.
Regional variations are everywhere — northern styles tend to be lighter in color (white chili), coastal areas lean on smoky chiles and seafood at times, and huevitos or chiles verdes turn things bright and tangy. This post focuses on a home-kitchen, approachable Mexican chili that’s hearty, relies on canned beans and tomatoes for convenience, and still tastes like you cooked it from scratch.
Ingredients You’ll Need
If you’re looking for a quick option, check out our easy no bean chili that requires just a few simple ingredients.
- • Kidney beans – add creaminess and body to the chili; they hold their shape nicely.
- • Black beans – bring a dense, meaty texture and earthy flavor.
- • Refried beans – used to thicken the pot and create a spoonable, satisfying mouthfeel.
- • Mexican-style chili beans – a seasoned bean that layers in authentic chile flavor.
- • Corn – for pops of sweetness and texture contrast.
- • Diced tomatoes – the acidic base that brightens the chili and balances richness.
- • Tomato sauce – makes the chili glossy and helps the spices cling to everything.
- • Chopped canned chilies – add gentle heat and a characteristic flavor without fresh chiles.
- • Water – to loosen the pot to the right consistency; simmering reduces it back down.
- • Taco seasoning mix – a convenience shortcut that contributes cumin-forward, garlicky notes.
- • Ranch dry mix – yes, it sounds odd, but it brings a tangy, savory background that lifts the whole dish.
- • Lean ground beef – provides protein and rich, caramelized meaty bits when browned.
- • Onion – finely chopped to melt into the chili and add sweet-savory depth.
- • Tostada bowls – fun for serving; they add crunch and a bowl you can eat.
As tested (yields about 6 servings): 1 lb lean ground beef, several 15-oz cans — kidney, black, refried, and Mexican-style chili beans — plus a can each of corn, diced tomatoes, tomato sauce, a small can of chopped chilies, one cup of water, a packet of taco seasoning, and a packet of Hidden Valley Ranch dry mix, with half a cup of finely chopped onion and six tostada bowls. Those canned amounts are the original version I tested and write about here.
Step-by-Step Instructions
For an easy preparation method, you may find our crockpot chili recipe very helpful.
- Brown meat and onion: Heat a large pot over medium-high and add a small drizzle of oil. Add the lean ground beef and the finely chopped onion. I like to let the beef sit undisturbed for 2–3 minutes to develop a browned crust, then break it up so you get little caramelized bits. That’s where a lot of flavor lives. Sauté until the beef is cooked through and the onion is soft and translucent.
- Add the canned ingredients: Without draining anything, add the kidney beans, black beans, refried beans, Mexican-style chili beans, corn, diced tomatoes, tomato sauce, and chopped chilies directly into the pot. Pour in the cup of water. Not draining the cans keeps the starchy, flavorful liquid that helps thicken the final chili. I know it looks like a lot of liquid at first — that’s normal.
- Season the pot: Sprinkle in the taco seasoning packet and the Hidden Valley Ranch dry mix. Stir everything to combine well. At this stage taste a spoonful (carefully — it’s hot). If it tastes flat, it usually needs salt; a pinch at a time is all you need. Remember that canned products can carry salt already, so adjust after a few minutes of simmering.
- Bring to a boil, then simmer: Turn heat up just until the pot comes to a rolling boil, then immediately lower to a gentle simmer. Simmer on low for 20–30 minutes, uncovered or partially covered, stirring occasionally so the bottom doesn’t stick and the refried beans emulsify into the broth. The chili will thicken noticeably as the starches hydrate; it should move slowly on the spoon and look glossy when done.
- Finish and serve: Taste again for seasoning — if it needs brightness, a squeeze of lime or a pinch of sugar can help. Serve hot in tostada bowls with your favorite garnishes.
Cook time notes: Prep time is about 10 minutes; active simmer time is 20–30 minutes, total roughly 35 minutes. If you find the chili is too thin near the end, simmer uncovered for another 5–10 minutes to reduce. If it’s too thick, stir in a splash of water until it loosens up.
Health Benefits of Ingredients
This chili isn’t just comforting — it brings real nutritional value to the bowl. The combination of multiple beans makes the dish high in fiber and plant-based protein, which keeps you full and supports digestion. Even with lean ground beef, the beans stretch the protein so you’re getting more food per ounce of meat.
Tomatoes and tomato sauce add vitamin C and lycopene, an antioxidant that’s more available after cooking. Peppers and the canned chilies contribute vitamin A and capsaicin, which can support metabolism and have anti-inflammatory properties. Onions and the spice mix add not only flavor but sulfur compounds and antioxidant benefits.
For vegetarians: Swap the ground beef for extra beans, cooked lentils, or textured vegetable protein for a filling, higher-fiber bowl. The refried beans help with mouthfeel, so the vegetarian version still feels rich and satisfying. One of the things I appreciate is that this pot can be adapted without losing its comforting texture.
Variations of Mexican Chili
For a delicious twist, try our healthy ground beef chili which offers a lighter take on the classic recipe.
Here are a few directions you can take this basic pot depending on what you have on hand or the regional vibe you want:
- Classic red chili – keep the tomato base and taco seasoning but add a tablespoon of smoked paprika or a small chipotle in adobo for smokiness. Brown the meat a touch more for caramelized flavor.
- White chili (northern style) – swap the red tomato sauce for a chicken or vegetable broth base, use white beans, and add green chiles and cumin. Finish with a handful of shredded Monterey Jack or a dollop of sour cream. The texture is smoother and the flavor brighter.
- Chili verde – use roasted tomatillos, green chiles, and cilantro to create a tangy, herbal pot. It’s an excellent contrast to the red version and shines with white beans or shredded pork.
- Vegetarian bean medley – double down on beans and add lentils or quinoa for extra protein. Sauté bell peppers and zucchini at the beginning for additional texture.
If you want to make the chili spicier or milder for different eaters at your table, read on to the spice customization section for specific strategies.
Pairing Suggestions
To complement your chili, don’t miss our Mexican street corn dip for a flavorful side.
Good pairings bring texture and temperature contrast. Here are some reliable combos:
- Cornbread – sweet, buttery cornbread tames the heat and soaks up the sauce beautifully. I like to toast the top a little in a skillet so it gets a faint crust before serving.
- Rice – plain or cilantro-lime rice provides a neutral bed so the chili becomes a saucy topping.
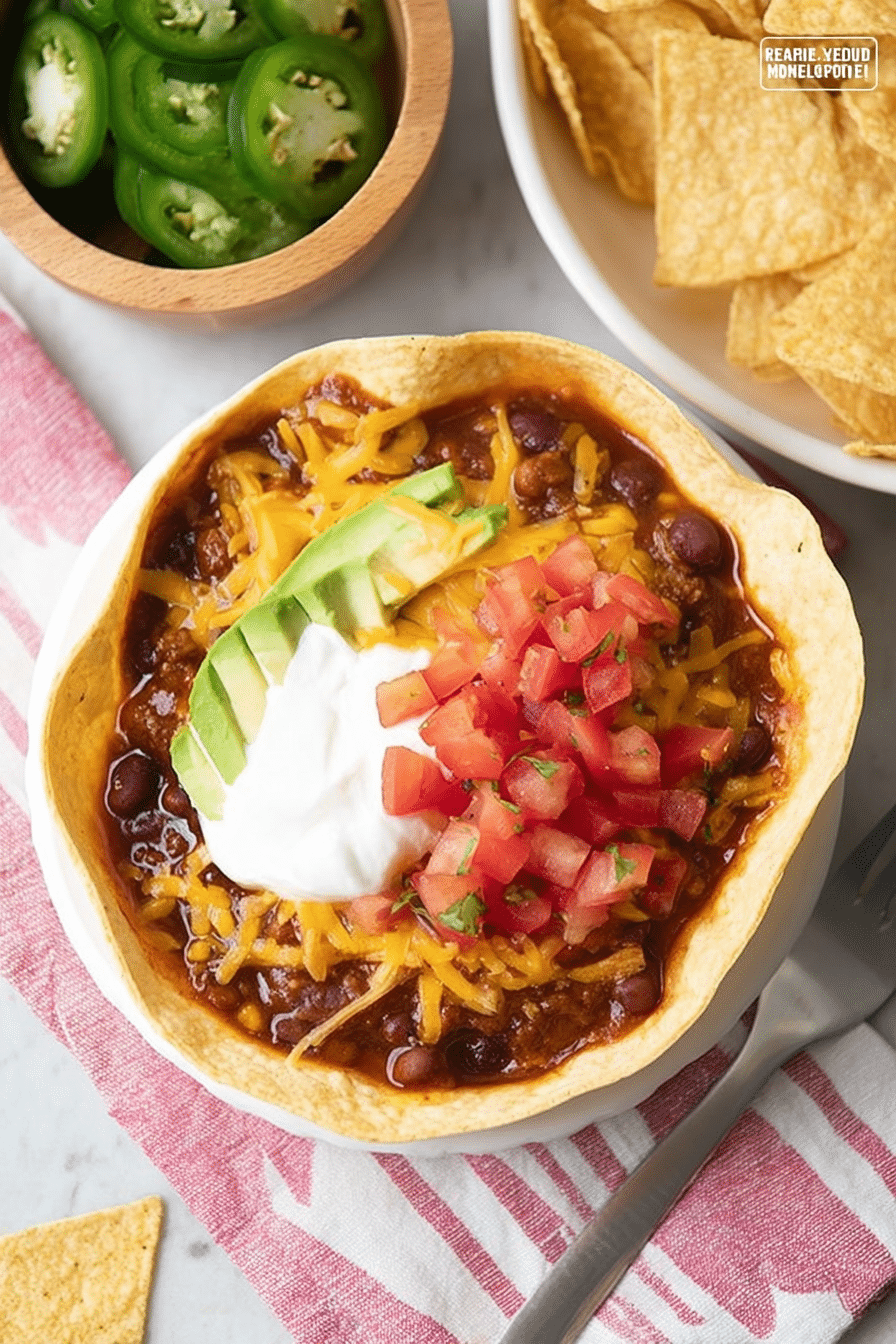
- Tortillas or tostada bowls – soft tortillas for wrapping or crunchy tostada bowls for contrast. The tostada bowl is my go-to when serving a crowd because it looks festive and makes the meal feel special.
- Simple salad or slaw – a sharp cabbage slaw or a quick salad with lime vinaigrette brightens the palate between rich bites.
- Beverages – a crisp Mexican beer, a citrus-forward agua fresca, or even a tart margarita are classic matches. Nonalcoholic pick: salted lime agua fresca offers great balance to the chili’s richness.
Tips for Customizing Spice Levels
One of the best things about chili is how easy it is to control heat. I always cook the pot mild and let people add heat at the table — saves arguments and accommodates kids.
- Reduce heat – use mild canned chilies and a milder taco seasoning. Add a splash of dairy (a spoonful of sour cream or a sprinkle of shredded cheese) to soften heat in finished bowls.
- Increase heat – add jalapeños, serranos, or a diced chipotle in adobo while the pot simmers. For a slow-building heat, add crushed red pepper flakes or cayenne to taste.
- Control with garnish – keep hot sauces, sliced fresh chiles, and pickled jalapeños on the side so each person can adjust their bowl.
- Fixing a too-spicy pot – a spoonful of sugar, a bit more tomato sauce, or dairy (yogurt, sour cream) can calm down an overly fiery batch. Beans and starchy additions also help absorb heat.
Frequently Asked Questions
Can I make Mexican chili vegetarian?
Absolutely! You can easily substitute the ground beef with a mix of beans, lentils, or textured vegetable protein for a hearty vegetarian chili.
What can I use instead of taco seasoning?
If you don’t have taco seasoning, you can create your own mix using a blend of chili powder, cumin, garlic powder, and paprika for a similar flavor.
How should I store leftover Mexican chili?
Store any leftover chili in an airtight container in the refrigerator for up to 5 days, or freeze it for up to 3 months.
Can I add other vegetables to the chili?
Definitely! Feel free to add bell peppers, zucchini, or corn to enhance the flavor and texture of your chili.
How can I adjust the spice level of the chili?
You can control the spice level by using milder chilies or reducing the amount of chili powder. For extra heat, add jalapeños or chipotle peppers!
Storage, Leftovers and Make-Ahead Notes
I often make a double batch and refrigerate half for busy weeknights — it’s one of those recipes that tastes better the next day because the flavors meld. Refrigerated, it keeps well for up to 5 days. For longer storage freeze in portioned containers for up to 3 months. When reheating, thaw overnight if frozen, then gently simmer on low, stirring occasionally. Add a splash of water if it seems too thick; it will thicken as it cools, so reheat to slightly looser than you want to serve.
Make-ahead tip: Prepare the meat and onion, cool, and store in the fridge for a day; when ready, combine with the canned ingredients and simmer. It shaves off active time when you’re juggling other things.
Final Thoughts from the Kitchen
I always keep a few cans of beans and tomatoes in my pantry because this chili comes together from what’s on hand. When I first tested it, I under-seasoned the pot and learned the hard way that canned goods need salt to pop — so tasting and adjusting toward the end of the simmer is crucial. I also learned that browning the meat well and not draining the cans gives the chili a rounded, homemade flavor even though it’s made from mostly pantry staples.
If you try this on a weeknight you’ll appreciate how little hands-on time it needs and how many meals it can stretch into. Garnish with cilantro, shredded cheese, diced avocado, or a squeeze of lime and you’ve got a bowl that’s bright, comforting, and reliably satisfying.
Mexican Chili
Ingredients
Method
- Brown meat and onion in a large cooking pot over medium high heat.
- Add all remaining ingredients (do not drain any of the cans before adding) and bring to a boil, then reduce heat.
- Simmer on low heat for 20-30 min stirring occasionally.
- Serve in tostada bowls.