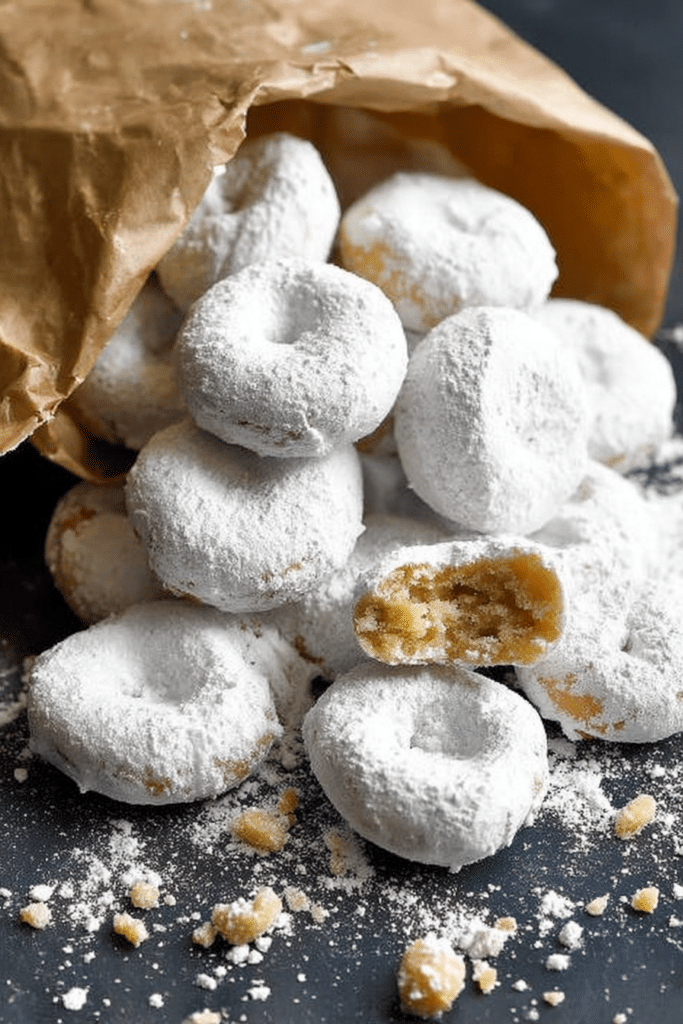
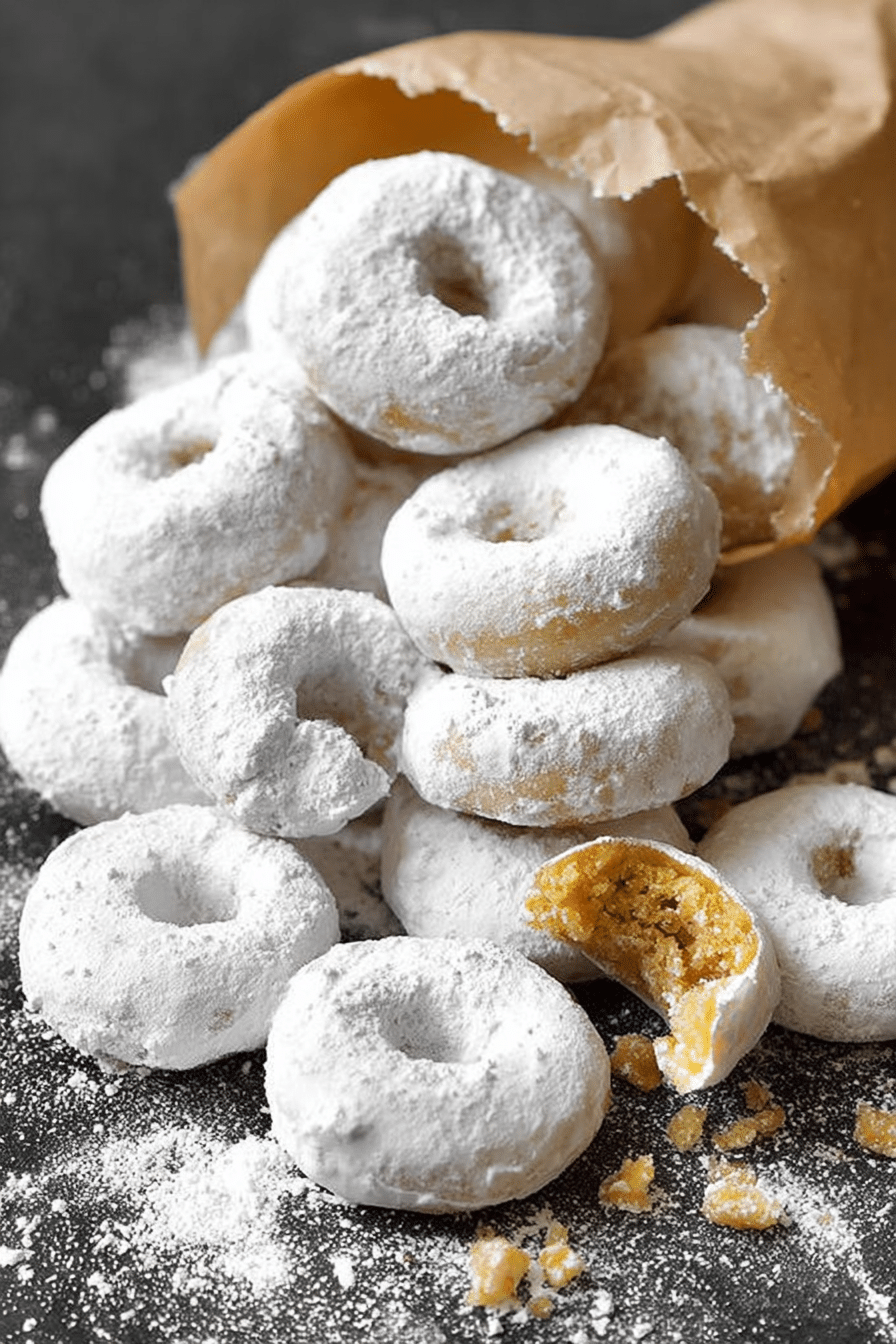
There’s something impossibly nostalgic about a stack of tiny, powdered sugar–dusted doughnuts. I made this batch on a Sunday morning when the house still smelled like coffee and the kids were asking for something special. These mini powdered sugar doughnuts are soft and tender in the center with a very fine, snowy coating of sugar that melts the moment it hits your tongue. They’re the kind of doughnuts you can pop two or three of before you remember to take a picture.
I’ve tested these in mini doughnut pans, an electric maker, and a quick shallow fry on the stovetop. No matter the method, the batter behaves very predictably — it’s a loose cake batter that puffs quickly and sets in under ten minutes. Expect a soft crumb, a slight spring when you press the top, and a whisper of vanilla. These are perfect for breakfast, a party platter, or packing into lunchboxes as a small weekday treat.
Ingredients You Need
- All-purpose flour – provides structure; you can swap a 1:1 gluten-free blend if needed.
- Baking powder – the leavening agent that makes each mini doughnut light and cakey.
- Salt – balances sweetness and brings out the vanilla.
- Egg – binds and adds richness for tender doughnuts.
- Granulated sugar – sweetens and helps with browning in frying.
- Milk – adds moisture; whole milk gives the richest crumb but lower-fat milk works.
- Vegetable oil – keeps the batter tender; can be replaced with a neutral oil or melted butter for flavor.
- Vanilla extract – flavor backbone; a little goes a long way.
- Powdered sugar – for coating; superfine powdered sugar gives the best, even dusting.
- Almond or coconut flour – alternative flours for gluten-free versions (expect texture differences).
- Applesauce or Greek yogurt – healthier swaps to reduce oil or add protein, though they slightly change texture.
Step-by-Step Instructions
Below I lay out the step-by-step method I used to get a tray of about 28 mini doughnuts from start to finish. If you want more background technique (especially for scaling), I often refer back to a reliable base recipe because it’s forgiving and easy to adapt.
Yield: about 28 mini doughnuts. Prep time: about 10 minutes. Cook time: 7–9 minutes for baked, under 2 minutes for quick fry each side for frying batches. Total time: roughly 18–30 minutes depending on method and batches.
For extra technique tips and a reliable base you can scale down, see our tried-and-true doughnut recipe that’s great for adapting to mini sizes.
- Preheat and prepare: If you’re using an electric doughnut maker, preheat it per the manufacturer’s directions. If you’re baking, preheat the oven to 350°F (175°C) and grease your mini doughnut pans thoroughly so the little donuts release cleanly. If frying, heat a shallow pot of neutral oil (about 2–3 inches deep) to 350°F and keep a thermometer handy — oil temperature is everything.
- Dry mix: In a small bowl, sift together the flour, baking powder, and salt. Sifting helps avoid lumps and gives a lighter crumb. Set this aside so it’s ready to fold in.
- Wet mix: In a medium bowl, whisk the egg and granulated sugar until they’re homogenous and slightly pale. Add the milk, the vegetable oil (or melted butter if you prefer), and the vanilla extract. Whisk until the mixture looks smooth; it will smell faintly sweet and vanilla-forward.
- Combine: Gently fold the dry mix into the wet mixture. Stir just until there are no dry streaks — the batter will be thick but pourable into a piping bag or a zip-top bag with a corner snipped. Overmixing develops gluten and makes the doughnuts denser.
- Fill: Add powdered sugar to a brown paper bag or a plastic bag and set aside. If using mini doughnut pans or an electric maker, fill each indentation about 3/4 full. For frying, spoon small rounds (about 1 to 1.5 tablespoons each) into the oil so they form little doughnut rounds; I find using a small cookie scoop keeps them uniform.
- Bake or cook: For baked mini doughnuts, bake at 350°F for 7 to 9 minutes, or until a toothpick inserted into the doughnut comes out clean and the edges are just beginning to color. For an electric maker, follow the maker’s cook time (most are in the 2–4 minute range per batch) and check with a toothpick. For frying, keep the oil at a steady 350°F and fry each mini doughnut until golden, which usually takes less than 2 minutes total per doughnut — flip once so both sides brown evenly. Drain fried doughnuts briefly on paper towels.
- Coat in powdered sugar: Transfer warm (not piping hot) doughnuts to your bag of powdered sugar and give them a quick shake 1–3 times to coat. The warmth helps the sugar adhere, but if they’re too hot the powdered sugar will melt into a glaze; that’s okay if you like a slightly wet coating, but for the classic powdered look, let them cool just a minute first.
- Serve: These are best served the day they’re made. I like them with coffee or a glass of milk. If leftover, store in an airtight container at room temperature for a day or two; they soften slightly but are still delicious warmed for a few seconds in the microwave.
Baking vs. Frying Donuts
This recipe is forgiving whether you bake or fry. I’ve made both often and can tell you exactly what to expect so you can pick the method that fits your time and taste.
- Frying – Pros: The exterior gets that classic slightly crisp, golden shell and you get the deep-fried aroma everyone associates with doughnuts. The interior stays tender. Cons: requires more hands-on attention, a thermometer, and a bit more oil and cleanup. Calorie note: fried mini doughnuts will usually have more calories than baked because of oil absorption; expect them to be roughly 25–40% higher in calories compared to baked versions.
- Baking – Pros: Faster cleanup, less oil, and more predictable, especially when you’re feeding kids or making many batches. Cons: you’ll miss the fried crispiness; baked doughnuts are cakier and lighter. They’re still very satisfying when coated well in powdered sugar and are the better option if you’re watching fat or cooking in small kitchens.
If you love the classic fried texture, try our homemade Krispy Kreme–style donuts for a traditional, melt-in-your-mouth result.
Healthier Alternatives and Substitutions
I often tweak this batter when I want a slightly healthier treat without losing the feel of a doughnut. These swaps change texture a bit, but they’re reliable and taste good.
- Reduce oil – use plain Greek yogurt or unsweetened applesauce in place of part of the oil; the doughnuts stay moist but will be less tender than the oil version.
- Lower sugar – replace half the granulated sugar with honey or maple syrup. If you do, reduce the milk by a tablespoon or two because liquid sweeteners add moisture.
- Whole wheat or oat flour – swap up to half of the all-purpose flour for whole wheat pastry flour or finely ground oats for a nuttier flavor and extra fiber. Expect a denser crumb.
- Gluten-free – use a 1:1 gluten-free all-purpose flour blend that contains a binder (like xanthan gum). Almond or coconut flour work but require recipe adjustments; they absorb more liquid and produce a different, often denser texture.
If you want a lower-oil option, our baked apple fritters are a great example of how baking can still deliver crisp, indulgent flavors.
Customization Options for Toppings
Once the basic doughnuts are done, the topping possibilities are endless. I keep a small station with powdered sugar, cinnamon sugar, and a quick chocolate glaze for different moods. Texture and temperature matter: warm doughnuts accept glazes and let them set into a thin shell; slightly cooled doughnuts hold sprinkles and toppings without them sliding off.
- Powdered sugar – classic, snowy, and simple. Great when you want that old-school bakery look.
- Cinnamon sugar – mix granulated sugar with ground cinnamon and toss warm doughnuts for a cozy, spiced coating.
- Chocolate glaze – melt chocolate with a little butter or cream and dunk the tops; add sprinkles while wet.
- Maple glaze or berry glazes – seasonal favorites: pumpkin spice in autumn or a quick warmed berry reduction in summer make these feel special.
- Nuts and toasted coconut – press into wet glaze for crunch and contrast.
For a seasonal variation, try spicing your batter like our pumpkin donut holes and finishing with cinnamon sugar or a maple glaze.
Tips for Making Donuts with Kids
These mini doughnuts are a fantastic kid project because much of the fun is hands-on and visual. Safety first: keep children away from hot oil; simply assign frying to adults and let kids do the measuring, mixing, and decorating.
- Measuring and mixing: let kids whisk the wet ingredients and add the dry ones while you guide. They love the change in texture from runny to thicker batter.
- Filling pans: using a small spoon or piping bag is a safe, less messy job for little hands.
- Decorating: set out powdered sugar, sprinkles, and small bowls of glaze. Kids can shake the bag for powdered sugar (under supervision) or dip doughnuts in glaze and add sprinkles.
- Teaching moments: show them how to check doneness with a toothpick and explain why we don’t overmix batter — simple science in the kitchen.
Nutrition Information
Below is a practical breakdown for the standard mini powdered sugar doughnut (baked version) based on the recipe yield of about 28 doughnuts.
- Calories – ~85 kcal per mini baked doughnut.
- Fat – ~2 g per mini baked doughnut.
- Carbohydrates – ~16 g per mini baked doughnut.
- Protein – ~1 g per mini baked doughnut.
- Fried comparison – fried mini doughnuts can be roughly 25–40% higher in calories due to oil absorption (estimate: ~110–120 kcal each, depending on oil used and draining).
Portion guidance: 1–2 mini doughnuts is a reasonable single serving as a sweet treat. If you’re sharing a platter, plan 3–4 per person for larger appetites or a dessert spread with other items.
FAQ
- How do I get powdered sugar to stick to the donuts? Shake warm (not piping hot) donuts in powdered sugar inside a bag 1–3 times. If the sugar won’t stick, very lightly brush with melted butter or a quick spritz of neutral oil before coating.
- Can I make these mini doughnuts gluten-free? Yes. Use a 1:1 gluten-free all-purpose flour blend (with xanthan gum if it’s not included). You can also try almond or coconut flour, but expect a different texture and you may need to adjust liquid amounts and binding agents.
- Can I fry these instead of baking? Yes — frying gives a more traditional doughnut texture. Heat oil to about 350°F (175°C) and fry the mini doughnuts until golden (usually under 2 minutes total), drain on paper towels, then toss in powdered sugar.
- How should I store and reheat leftover mini powdered sugar doughnuts? Store in an airtight container at room temperature for 1–2 days. Reheat briefly in the microwave (6–8 seconds) or in a 300°F oven for 5–7 minutes. If the powdered sugar melts, dust a little extra on after warming.
Conclusion and Serving Suggestions
These mini powdered sugar doughnuts are a simple, rewarding bake (or fry) that delivers nostalgia on a small scale. From the first warm bite — where powdered sugar meets slightly tender crumb and a whisper of vanilla — you’ll understand why I keep this recipe in regular rotation. Expect soft centers, a delicate sweetness, and plenty of flexibility to adapt the batter to your dietary preferences.
Serve them warm with a strong cup of coffee, a pot of tea, or let them sit on a dessert platter with brownies and fruit for variety. For parties, line a tray with mini doughnuts, cinnamon sugar, and a couple of glaze bowls for dipping — it makes a lively, interactive dessert station.
Finally, this recipe is forgiving. If your first batch comes out a touch dense, check that you didn’t overmix or that your baking powder is fresh. If frying, keep the oil temperature steady to avoid greasy doughnuts. These tiny rings of joy are worth the small learning curve — make a batch, take notes, tweak a little, and before long this will be one of those recipes you make without thinking, just like I do on slow Sunday mornings.
Mini Powdered Sugar Doughnuts
Ingredients
Equipment
Method
- If using an electric doughnut maker, preheat according to manufacture’s instructions. If using mini doughnut pans, preheat oven to 350°F and grease pans.
- In a small bowl, sift together flour, baking powder, and salt. Set aside.
- In a medium bowl, whisk together egg and sugar. Then add milk, oil and vanilla extract, mixing until thoroughly combined. Gently stir in the flour mixture, stirring until there are no lumps.
- Add powdered sugar to a brown paper bag or a plastic bag. Set aside.
- If using mini doughnut pans, carefully fill each indention 3/4 full. Bake for 7 to 9 minutes or until a toothpick inserted into a doughnut comes out clean.
- If using an electric mini-doughnut maker, carefully fill each indention 3/4 full. Bake according to manufacturer’s instructions or until a toothpick inserted into a doughnut comes out clean.
- Transfer donuts to bag with powdered sugar and shake to coat in powdered sugar.
- Serve immediately!