I still remember the first time I made these no-bake cake batter truffles: it started as late-night nostalgia for licking the bowl after baking a cake, and ended with a tray of bouncy, sprinkle-studded bites that disappeared faster than I could cool the coating. These truffles are indulgent, quick, and purely no-bake—no oven, no fuss. They capture that unmistakable cake-batter sweetness but in a firm, bite-sized form that’s great for parties, gifting, or sneaking straight from the fridge.
These are the kind of dessert I make when I want something nostalgic without an oven or when I’m prepping for a party and need something that can be made ahead. They’re forgiving, they travel well (if kept cool), and they’re the quickest way I know to get that childhood joy of cake-batter straight to your mouth in neat little rounds.
Ingredients Needed for Truffles
- All-purpose flour – provides the bulk and structure for the dough; if you need gluten-free, substitute almond flour combined with a bit of oat flour.
- Yellow cake mix – carries the classic cake-batter flavor and sweetness; you can swap in vanilla or funfetti cake mix for a different profile.
- Unsalted butter – adds richness and helps the dough bind; for a dairy-free option, use coconut oil or vegan butter.
- White sugar – gives that instant cake-like sweetness and grainy bite that we love in cake batter.
- Vanilla extract – amplifies the cake flavor; good quality vanilla makes a noticeable difference.
- Salt – a pinch balances the sweetness and brings out the flavor.
- Milk – a few splashes (just enough to bring the mixture together) for pliable dough; plant-based milks work fine.
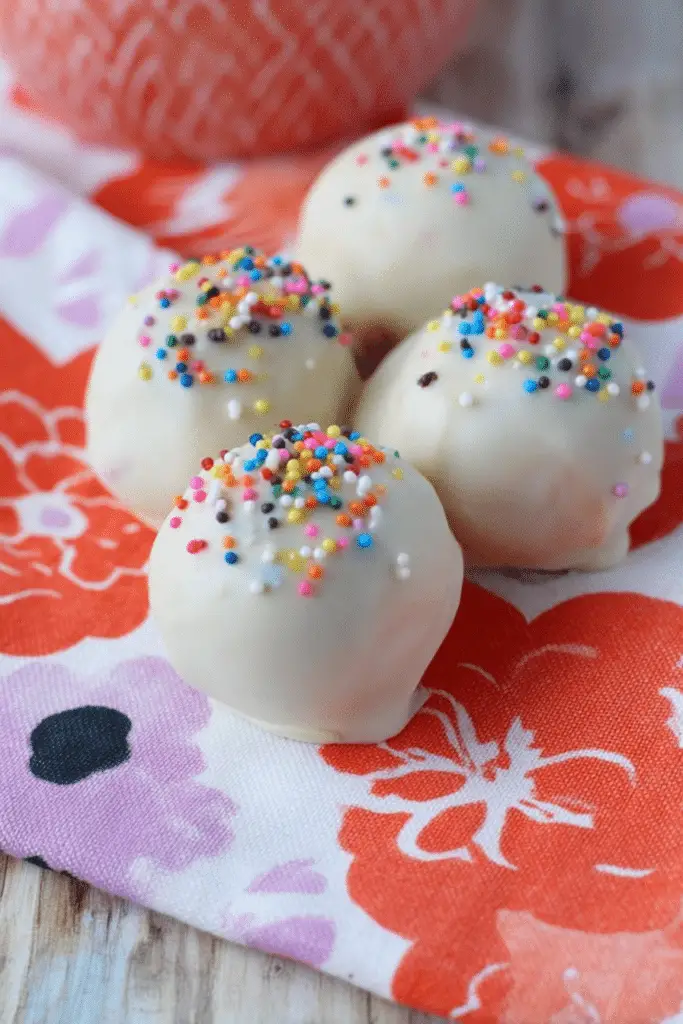
- Sprinkles – for color, texture, and nostalgia; use seasonal or themed sprinkles for holidays.
- Almond bark or vanilla-flavored coating – melts easily for dipping and sets glossy; real chocolate can be used as an alternative.
- Pop sticks or small skewers – optional but handy for dipping and getting a clean coating.
Step-by-Step Instructions
Below I walk through the exact steps I use every time I make these truffles. I’ve included the precise amounts and timing I tested so you can replicate what I did. Tools that made the process faster for me: a stand mixer (or hand mixer), a small cookie scoop, parchment-lined baking sheets, and a microwave-safe bowl.
- Beat together butter and sugar using an electric mixer until combined. I usually cream them for about 1–2 minutes until the mixture is slightly pale and feels smooth—this helps dissolve the sugar and gives a softer mouthfeel to the centers.
- Add the cake mix, flour, salt, and vanilla and mix thoroughly. I add these dry ingredients in two batches so the mixer doesn’t dust my kitchen. The batter will look crumbly at first; keep scraping the bowl and mix until you see it start to come together.
- Add 3–4 tablespoons of milk (I used 3). You want a dough consistency—not sticky, not dry. I often start with 3 tablespoons and add the fourth only if it still feels too stiff. If it seems too wet, a tablespoon of extra cake mix or flour fixes it.
- Mix in sprinkles by hand. I fold these in last so the colors don’t bleed; they add small crunchy flecks that are part of the charm.
- Roll dough into one-inch balls (a small cookie scoop makes this effortless) and place on parchment or wax paper on a cookie sheet. I find a uniform size helps them look pretty on a platter and sets evenly when coated.
- Chill balls in the refrigerator for 15 minutes to firm up. This is important: if the centers are warm, the coating will slide off or become blotchy. Fifteen minutes is the minimum in my kitchen; in a warmer house I leave them closer to 20.
- While dough balls are chilling, melt almond bark in the microwave in 30-second intervals until melted, stirring between each interval. Almond bark melts quickly—overheating will thicken it or cause it to grain. A few drops of coconut oil can make real chocolate smoother for dipping, too.
- Using a pop stick, dip truffles into melted almond bark and gently twirl around to remove excess coating. I find twirling and a quick tap on the edge of the bowl removes the big drips. Place each truffle back on the cookie sheet and top with sprinkles immediately—once the coating starts setting, the sprinkles won’t stick well.
- Chill truffles in the refrigerator until ready to serve. Ten to fifteen minutes firms the coating; for firmer centers, chill 30 minutes. These are best when cold but not rock-hard.
Customization Ideas for Flavors and Sprinkles
One of my favorite things about this recipe is how easy it is to make it your own. I’ve tested several variations and kept notes on what worked and what didn’t so you don’t have to learn by trial and error.
- Chocolate lover’s version – Swap some of the flour or part of the cake mix for cocoa powder, and use dark chocolate coating for a richer bite. Tip: add a teaspoon of espresso powder to intensify the chocolate.
- Funfetti / birthday cake – Use funfetti cake mix and plenty of rainbow sprinkles in the centers. It’s an instant party in your mouth—great for kids’ events.
- Nutty add-ins – Fold in finely chopped toasted pecans or pistachios for texture. Keep nuts small so they don’t make rolling difficult.
- Fruity accents – Stir in tiny pieces of dried cranberries or chopped freeze-dried strawberries for a tart counterpoint to the sweet centers.
- Seasonal sprinkles – Use red-and-green sprinkles for Christmas, pastel-colored sprinkles for Easter, or heart-shaped ones for Valentine’s Day to match your theme.
- Peanut butter twist – Add a swirl of peanut butter to the dough or incorporate powdered peanut butter for a leaner profile.
If you’re exploring truffle variations, try our indulgent Reese’s Oreo truffles for a peanut butter–chocolate take on bite-sized no-bake treats.
Want a seasonal twist? Swap flavors like we do in our no-bake pumpkin cheesecake balls for an autumnal version of cake batter truffles.
Storage Tips and Shelf Life
These truffles keep well, but there are some practical details to follow so they stay fresh and retain their texture.
- Refrigeration – Store truffles in an airtight container in the refrigerator for up to 1 week. I layer them between sheets of parchment to prevent sticking and keep the presentation neat.
- Freezing – Freeze on a baking sheet until solid, then transfer to a freezer-safe container or bag. They keep up to 2 months. Thaw in the refrigerator before serving; avoid microwaving as the coating can seize or separate.
- Room temperature – Coated truffles should not be left at room temperature for long, especially in warm weather. If serving outdoors or at a party, keep them on chilled trays or swap smaller batches out from the fridge as needed.
- Labeling – If you store multiple flavors, label containers or separate with parchment. Flavors like peanut butter can transfer scent to neutral truffles if stored together for long periods.
Nutritional Information and Healthier Alternatives
Below are approximate nutrition figures per truffle based on the full recipe yield of 24 pieces. I’m providing estimates so you can plan—these are not lab-verified, but reflect the ingredients and proportions used.
- Estimated per truffle (approx) – Calories: ~200 kcal; Fat: ~10 g; Carbohydrates: ~22 g; Sugars: ~12 g; Protein: ~2 g.
If you’re seeking lighter or lower-sugar options, here are tested swaps and what to expect:
- Almond flour / oat flour swap – Replacing all-purpose flour with almond or a blend of almond + oat flour reduces gluten and increases protein and healthy fats. Texture will be more tender and slightly denser.
- Natural sweeteners – You can trim refined sugar by using maple syrup or honey for part of the sugar, but the dough will be wetter—add a bit more dry mix (cake mix or flour) to compensate.
- Lower-carb options – Use almond flour and a sugar substitute designed for baking, and coat with 90% dark chocolate thinly. Expect a drier, nuttier mouthfeel and a less glossy exterior.
- Dairy-free / vegan – Swap butter for coconut oil or vegan butter and use a dairy-free coating. Texture tends to firm differently; chill a little longer before dipping.
Looking for a lower-sugar, high-protein alternative? Try our no-bake protein balls as a healthier snack option similar to truffles.
Serving Suggestions for Different Occasions
These truffles are wildly versatile. Here are ways I serve them depending on the occasion—and a few presentation tips that always get compliments.
- Party platter – Arrange on a tiered tray with a few flavors mixed together. I put small labels so guests know if a truffle contains nuts.
- Gift boxes – Pack in small bakery boxes layered with parchment. For gifting, keep them chilled and include a cold pack if they’ll travel.
- Movie night – Serve in a bowl with napkins—easy to pop one or two without guilt (but we both know you’ll grab a few).
- Pairings – Milk is the obvious match, but these also pair nicely with coffee, hot cocoa, or a lightly sweet sparkling wine.
For more bite-sized no-bake ideas perfect for parties, check out our no-bake turtle mini cheesecakes.
Frequently Asked Questions (FAQs)
- Can I make these truffles gluten-free or vegan?Yes. For gluten-free, use a gluten-free cake mix or substitute with almond flour + a little oat flour. For vegan, swap butter for coconut oil or vegan butter, use a dairy-free coating, and ensure the cake mix is eggless or labeled vegan. Texture may vary, so chill a bit longer if needed.
- What should I do if the dough is too dry or too sticky?If too dry, add milk 1 teaspoon at a time until the dough holds together. If too sticky, chill the dough for 10–20 minutes or stir in a tablespoon of extra flour/cake mix and try again. Lightly greasing your hands helps with rolling sticky dough.
- How should I store the truffles and how long do they last?Store in an airtight container in the refrigerator for up to 1 week. You can freeze them (on a tray first, then transfer to a container) for up to 2 months. Thaw in the fridge before serving and avoid leaving coated truffles at room temperature for extended periods.
- Can I use real chocolate instead of almond bark for coating?Yes. Melt good-quality chocolate with a small amount of coconut oil or vegetable shortening to thin it for dipping. Melt in short bursts and stir between intervals. Avoid getting water in the chocolate to prevent seizing.
- Can I make these ahead for a party or to gift?Absolutely. You can prepare the centers a day or two ahead and chill them. After coating, store in the fridge until serving. For gifting, pack in layers separated by parchment in a sturdy, cool container and keep them refrigerated or include cold packs if shipping.
Conclusion and Final Thoughts
These no-bake cake batter truffles are one of those recipes I make repeatedly because they’re quick, flexible, and reliably crowd-pleasing. Expect a soft, sweet center flecked with sprinkles and a glossy outer shell when coated correctly. The recipe is forgiving—if something goes a little off, a short chill or a tweak to the moisture balance usually fixes it. They’re perfect for making with kids, for party trays, or as a last-minute homemade gift.
Try the basic version once, and then experiment: add nuts, swap cake mixes, or use flavored coatings. If you make them, I’d love to hear which combo became your favorite—these truffles always spark good conversation and more than a few smiles.

No-Bake Cake Batter Truffles
Ingredients
Method
- Beat together butter and sugar using an electric mixer until combined. Add cake mix, flour, salt, and vanilla and mix thoroughly. Add 3-4 tbsp. of milk (I used 3) if needed to make a dough consistency. Mix in sprinkles by hand.
- Roll dough into one-inch balls and place on parchment or wax paper on a cookie sheet. Chill balls in the refrigerator for 15 minutes to firm up.
- While dough balls are chilling, melt almond bark in the microwave in 30-second intervals until melted. Stir between intervals.
- Using a pop stick, dip truffles into melted almond bark and gently twirl around to remove excess coating. Place truffle back on a cookie sheet and top with sprinkles. Repeat with the remaining balls until finished.
- Chill truffles in the refrigerator until ready to serve.