
I make these Peanut Butter Banana Bars on repeat because my kids actually eat them without negotiation. They’re the kind of snack I feel good packing in lunchboxes: warm banana and peanut butter flavor, a tender chew from oats, and just enough sweetness to satisfy little palates. I keep the process simple so we can have fresh bars on busy mornings.
In my kitchen the aroma of baked bananas and toasted oats is a tiny comfort that makes the whole house feel cozier. These bars are forgiving — I’ve learned they tolerate quick mash-ups and last-minute swaps, which is a lifesaver on homework nights when I’m juggling snack duty with carpool.
I like to keep things reassuring for other parents: the recipe uses pantry-friendly ingredients, takes minimal hands-on time, and the results are soft, chewy bars kids love to hold and eat. I’ll walk you through what to gather, how to get the texture just right, allergy-friendly swaps, and quick storage tips so you always have snacks ready to go.
Why Parents Love These Peanut Butter Banana Bars
These bars pair familiar kid-friendly flavors — sweet banana and creamy peanut butter — in a way that feels homemade and wholesome. Oats add a gentle chew and a bit of fiber, while the banana provides natural sweetness so you don’t have to overdo added sugar. The result is a snack that feels special without being complicated.
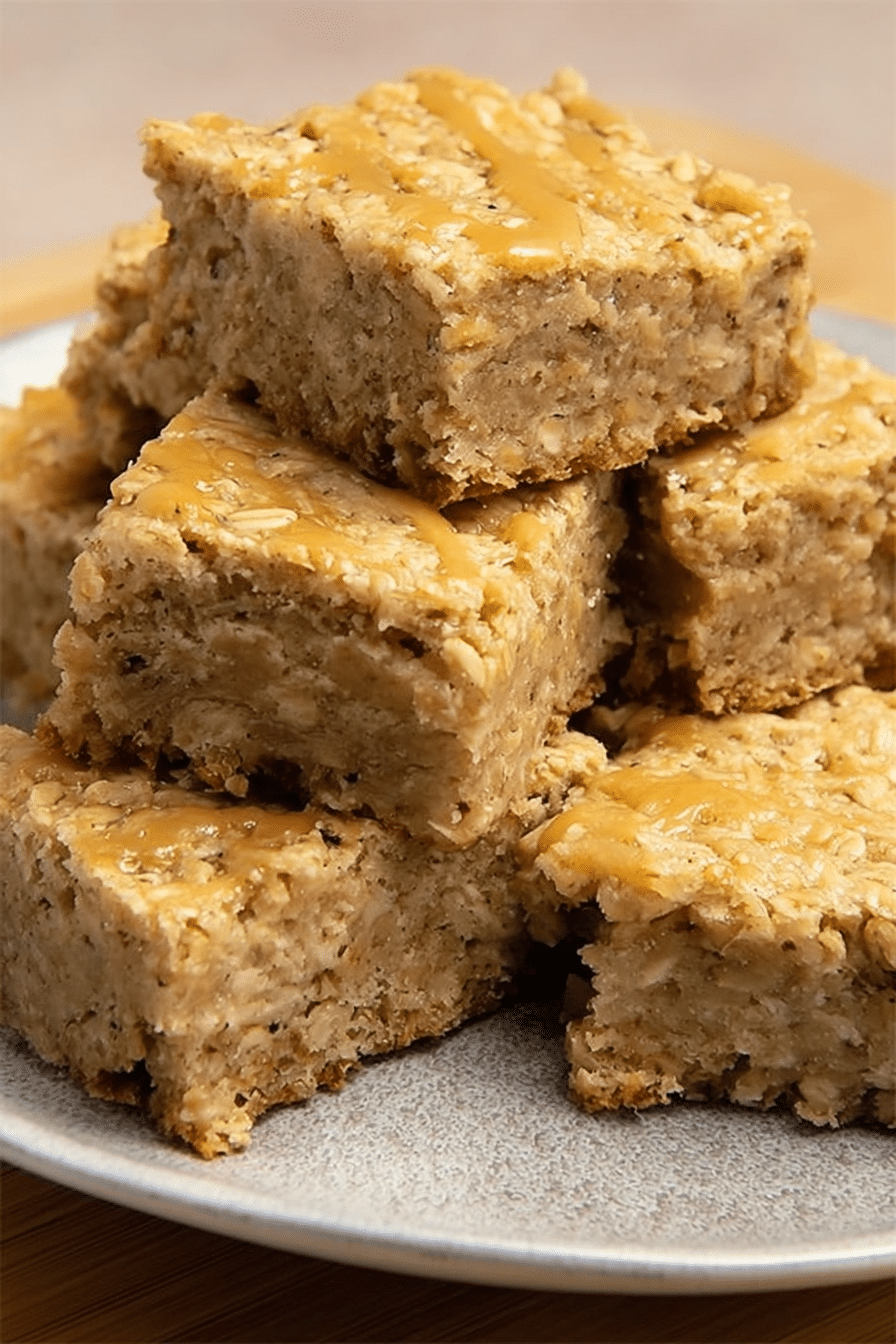
Picture golden-brown edges, a soft center, and the smell of warm bananas while the bars cool on the counter. They’re easy to portion for lunchboxes, travel well, and are sturdy enough for little hands. Most importantly, kids tend to love the flavor combination, which makes them a go-to for picky eaters.
Everything You Need for Peanut Butter Banana Bars
Gather a few basic pantry items and a couple of simple tools. The ingredients each play a clear role, and a few easy swaps keep the recipe flexible for family needs. If you like banana-forward snacks, you might also enjoy a similar kid-friendly option like banana oatmeal bars to switch things up.
- All-purpose flour – Gives the bars structure; swap for a gluten-free blend if you need gluten-free bars.
- Old-fashioned rolled oats – Add chew and a little texture; use certified gluten-free oats for a GF version.
- Baking powder – Provides a gentle lift so the bars aren’t too dense.
- Salt – Balances sweetness and enhances the peanut butter flavor.
- Unsalted butter – Adds richness and tenderness; room temperature butter creams easily. For dairy-free, use coconut oil or a dairy-free butter alternative.
- Granulated and brown sugars – Work together for sweetness and moisture; brown sugar contributes chew and a hint of caramel.
- Egg – Binds the batter; for vegan swaps see the allergy-friendly section.
- Vanilla extract – Brightens flavor and rounds out the banana and peanut butter.
- Overripe bananas – Provide natural sweetness and moisture; they’re the secret to keeping bars tender.
- Peanut butter – The star flavor that gives the bars a nutty creaminess; see nut-free alternatives below if needed.
If you want more banana ideas, try our banana oatmeal bars for another kid-friendly snack option.
The Secret to Soft, Chewy Peanut Butter Banana Bars
The texture comes down to a few deliberate choices: minimal over-mixing, the right bake time, and allowing the bars to cool so they set without drying out. A few careful techniques will give you that tender chew with a light oat texture.
- Mix just until combined: Overworking the flour develops gluten and leads to a tougher bar. Stir until you no longer see streaks of flour.
- Don’t overbake: Pull the bars when the edges are lightly browned and a toothpick comes out clean—there should still be some spring in the center. They will continue to set as they cool.
- Let them fully cool in the pan: Cooling helps the bars firm up so you can cut neat squares without them crumbling apart.
- Oats for texture: Rolled oats give a pleasant chew; if you prefer a softer bar, pulse the oats lightly in a food processor before mixing.
Why Overripe Bananas Make a Big Difference
Overripe bananas are sweeter and more aromatic because their starches have converted to simple sugars. That extra natural sugar enhances flavor without adding more granulated sugar, and it brings a honeyed banana perfume to the batter.
They also add moisture — which keeps the bars soft and less crumbly — and their deeper banana flavor pairs beautifully with peanut butter. When your bananas are spotted and soft, you’ll notice a richer banana scent while you mash them, and that translates into a tastier bar out of the oven.
Nut-Free and Vegan Swaps (Allergy-Friendly Options)
These bars adapt well to allergy-friendly swaps so you can keep snack time inclusive. Simple substitutions preserve the texture and flavor so kids still get a satisfying treat.
- Sunflower seed butter or soy nut butter – A great nut-free stand-in that keeps the creamy texture and rich mouthfeel.
- Flax egg (ground flaxseed mixed with water) or applesauce – Use in place of the egg for a vegan version; flax gives a slightly firmer crumb while applesauce increases moisture.
- Coconut oil or dairy-free butter – Swap for the butter to make the bars dairy-free.
- Adjust sugars – Reduce granulated sugar slightly if you want less sweetness; the banana’s natural sugars will carry more flavor.
For a nut-free dessert option, check out our peanut butter rice krispie treats that everyone can enjoy!
How to Make Peanut Butter Banana Bars (Step-by-Step)
- Preheat your oven so it’s up to temperature before the batter goes in; this helps the bars bake evenly.
- Grease an 8-inch square pan or line it with parchment for easy removal later.
- Whisk together the dry ingredients (flour, oats, baking powder, salt) and set them aside so they’re ready to fold in.
- Cream the room-temperature butter with both sugars until the mixture is light and slightly fluffy; this traps air that yields a tender crumb.
- Add the egg and vanilla, beating until incorporated, then mix in mashed overripe bananas and peanut butter until uniform.
- Reduce the mixer speed and add the dry ingredients gradually, stirring just until no dry streaks remain.
- Spread the batter into the prepared pan and smooth the top. Bake until the edges are golden and a toothpick comes out clean or with just a few moist crumbs.
- Cool the bars completely in the pan so they set, then lift them out using the parchment and cut into squares.
Troubleshooting:
- If your batter feels too loose, I’ve found a brief chill in the fridge (10–15 minutes) helps it firm up for even spreading.
- If the top browns too quickly, tent the pan loosely with foil and continue baking until the center is set.
- If bars seem dry after cooling, make sure you didn’t overbake; slight underbaking yields a moister result that firms as it cools.
Pro Tip for Peanut Butter Banana Bars: Nut-Free Swap That Keeps the Chew
- Sunflower seed butter is my go-to nut-free swap because its oil content and texture closely mimic peanut butter; it keeps the bars tender and chewy.
- When using seed butters, taste for sweetness — some are saltier or milder, so you may want to adjust the sugar slightly to keep the flavor balanced.
- Be aware seed butter can darken a bit during baking; this is normal and won’t affect texture or taste.
How to Store, Freeze, and Pack These Bars for Busy Days
These bars are excellent for meal prep. Store them the right way and they’ll stay fresh for snacks, lunches, and carpool munching.
- Room temperature: Keep bars in an airtight container for up to three days.
- Refrigerator: Store in an airtight container for up to one week to extend freshness.
- Freezing: Wrap individual bars or stack them separated by parchment, then freeze in a sealed container for up to two months. Thaw at room temperature or warm briefly in the microwave for a soft, fresh-baked feel.
- Portioning: Cut into single-serve squares and pack in reusable snack bags or small containers for easy grab-and-go mornings.
For packing ideas, consider making banana spinach muffins as a nutritious option that can be stored easily!
Unique Flavor Variations (Add-Ins like Nuts, Spices, or Seeds)
Once you’ve got the base down, these bars are a great blank canvas for little experiments that kids often love.
- Cinnamon or pumpkin pie spice – Adds warmth and pairs beautifully with banana.
- Mini chocolate chips – Stir in for a sweeter treat; they’ll melt a bit but keep their shape.
- Chopped nuts or seeds – Add crunch; fold them in gently so the texture stays balanced.
- Shredded coconut or dried fruit – Mix for chew and new flavor notes; remember dried fruit can draw moisture so watch texture.
- Swap some oats for quick-cooking oats or pulse oats for a finer texture; this can make the bars slightly softer.
Elevate your dessert game with our chocolate peanut butter banana cups for a delicious flavor twist!
Frequently Asked Questions
Can I make these peanut butter banana bars gluten-free?
Yes! You can substitute the all-purpose flour with a gluten-free flour blend. Just ensure that your oats are labeled gluten-free as well.
How do I store leftover peanut butter banana bars?
Store the bars in an airtight container at room temperature for up to 3 days, or in the refrigerator for up to a week. They can also be frozen for up to 2 months.
Can I add chocolate chips to the recipe?
Absolutely! Chocolate chips would make a delicious addition. Just fold them into the batter before transferring it to the baking pan.
What can I use instead of butter for a dairy-free option?
You can use coconut oil or a dairy-free butter substitute in place of the unsalted butter to make the recipe dairy-free.
How do I know when the bars are done baking?
The bars are done when the edges are browned and a toothpick inserted into the center comes out clean. Keep an eye on them towards the end of the baking time!
Peanut Butter Banana Bars
Ingredients
Method
- Preheat oven to 350°F (175°C). Grease an 8-inch square baking pan.
- Whisk together the flour, oats, baking powder, and salt. Set aside.
- Using an electric mixer on medium speed, beat the butter, sugar, and brown sugar until light and fluffy.
- Add the egg and vanilla, and mix well. Mix in the bananas and peanut butter, mixing just until combined.
- Reduce mixer speed to low. Gradually add the flour mixture, mixing just until combined.
- Transfer the batter to the prepared pan and spread evenly. Bake 40-45 minutes, or until edges are browned and a pick inserted into the center comes out clean. Cool in the pan before cutting into bars.