I bake this cake when I want a dessert that looks like it belongs on a celebration table and tastes like a private indulgence. In my kitchen the moment the caramel starts to shimmer and the chocolate crumb releases that warm, nostalgic aroma I know I have something guests will remember. The contrast between glossy salted caramel and deep chocolate is one of those pairings that feels luxurious without being fussy.
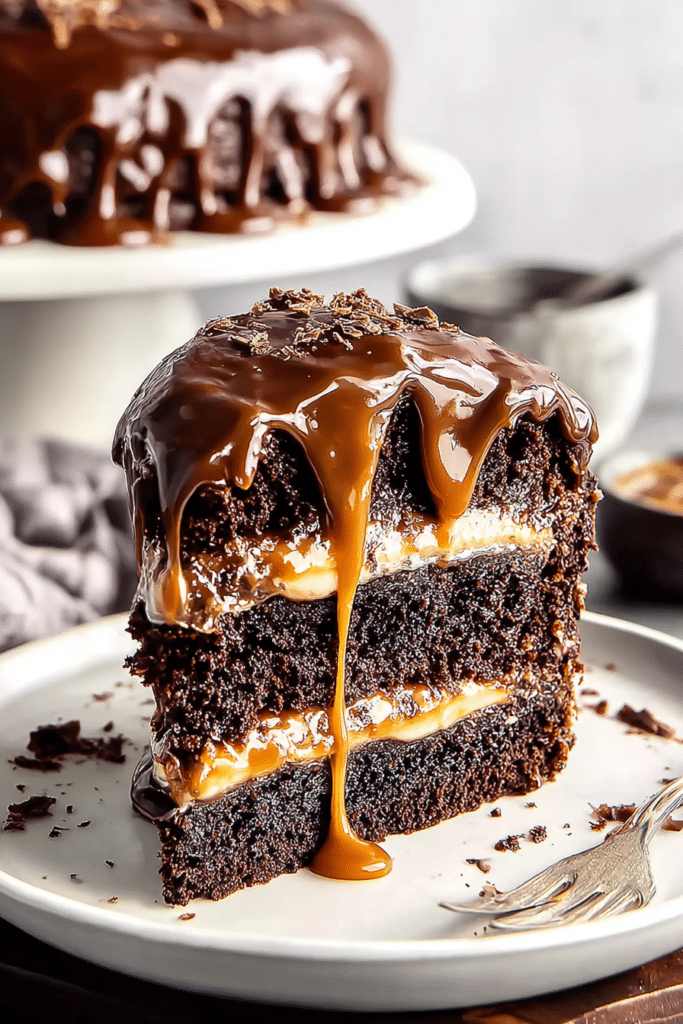
I like to build height with three even layers so each slice displays those ribboned bands of chocolate and caramel. I’ll admit I’ve learned the hard way that timing and patience make the difference between an elegant cut and a messy one — so I always cool my layers thoroughly and chill the filled cake briefly before glazing. The result is a cake that slices cleanly, for picture-perfect presentation and praise that feels genuinely earned.
When I serve this at parties I see guests pause: they notice the glossy drizzle, the tiny glint of sea salt flakes, the steam from a warm cup of coffee beside the plate. That visual and aromatic invitation is what makes this cake ideal for entertaining — it looks impressive and the flavor balance keeps every guest reaching for another slice.
Why This Salted Caramel & Chocolate Cake Is Perfect for Party Hosts
This cake offers luscious layers and a striking silhouette that make it a centerpiece as much as a dessert. The glossy caramel drizzle catches the light; the deep chocolate layers create a seductive contrast. For hosts, it delivers both drama and dependability: it holds well on a buffet and travels nicely when you need to bring a show-stopping dessert to a friend.
The marriage of salted caramel with chocolate is balanced — the caramel’s buttery sweetness and a pinch of salt sharpen the chocolate rather than overwhelm it. That contrast keeps each bite interesting, so guests compliment both the flavor and your hosting instincts. When people praise the dessert, I always feel the satisfaction of having given them something memorable.
Use this cake for a variety of themes: a candlelit birthday, a seasonal holiday spread, or an elegant dinner party. It adapts easily to garnish swaps — fresh berries for brightness, candied nuts for textural contrast — so you can tailor it to the mood of your event.
Everything You Need for Salted Caramel & Chocolate Cake
Gather reliable tools and quality ingredients so your finished cake reflects the care you put into it. Accurate measuring and the right equipment keep textures consistent, while higher-quality chocolate deepens the flavor without needing extra fuss.
- All-purpose flour – Provides structure; swap a cup-for-cup gluten-free blend for a gluten-free version.
- Unsweetened cocoa powder – Intensifies chocolate flavor; Dutch-processed creates a rounder, darker crumb.
- Sugar – Balances bitterness from cocoa; you can experiment with unrefined sugar for a slightly different depth.
- Baking powder – Leavening for lift; check freshness to ensure reliable rise.
- Salted butter – Adds richness and helps the batter aerate; use a high-quality block butter for best results. For vegan options, use a plant-based butter substitute designed for baking.
- Eggs – Improve structure and emulsion; bring to room temperature so they blend smoothly. For vegan alternatives, try a commercial egg replacer suited for cakes or a flax-based swap, noting texture differences.
- Heavy cream – Enriches batter and smooths the caramel; coconut cream can work for dairy-free versions but will alter flavor.
- Semi-sweet dark chocolate – The backbone of the chocolate layers; choose a chocolate with the percentage you prefer for bittersweet or mellow notes. Using milk or white chocolate will create a sweeter profile.
- Sea salt flakes – For finishing; they add an elegant crunch and visual contrast.
- Equipment – Two or three round cake pans, a stand or handheld mixer (optional), an offset spatula for smoothing, and a bench scraper for neat sides.
For more decadent treats, try our salted caramel butter bars to excite your guests.
Why Temperature and Timing Matter for Moist Chocolate Layers
Temperature governs texture: room-temperature butter traps air when creamed, yielding a lighter crumb; cold ingredients will slow mixing and can produce a dense cake. The oven temperature determines how the cake rises and sets — too hot and the exterior firms before the center cooks, too cool and the cake may underbake and sink. Cooling is its own step of patience: releasing tension in the crumb by cooling on a rack prevents moisture loss and helps you slice cleanly.
- Pro-Tip: Bring cold ingredients to room temperature ahead so they incorporate evenly.
- Pro-Tip: Use an oven thermometer to verify true oven temperature rather than relying on the dial.
- Pro-Tip: If layers dome, level them lightly when slightly warm — they cut more cleanly than when completely cooled.
- Pro-Tip: Cool cakes in their pans briefly to set, then move to a wire rack to finish cooling for even moisture retention.
How to Make the Silkiest Homemade Salted Caramel Sauce
Caramel is alchemy: sugar must melt and color without burning, then be tempered with butter and cream for silkiness. Keep the heat moderate and steady so the sugar melts evenly. Watch the color closely — a deep amber signals rich flavor, but beyond that the sugar will scorch. When you add butter and cream, remove the pan from direct heat and stir gently to combine; finishing off-heat prevents graininess and preserves that glossy sheen.
- Heat control is essential — keep the flame or burner set so sugar melts gradually into an even liquid before any color forms.
- Look for a deep golden amber color to hit caramel’s optimal flavor; if it goes too dark, the sauce will taste bitter.
- Finish the sauce off the heat and stir gently as you add butter and cream to prevent crystallization.
- If the caramel seizes or becomes grainy, a gentle splash of warm water and patient stirring can sometimes coax it back to smoothness.
- For a pourable glaze that sets slightly on the cake, adjust the final cream quantity to reach the thickness you prefer.
Check out our guide on how to make homemade caramel sauce for the perfect addition to your cake.
Plating & Presentation: Make a Show-Stopping Layered Cake
Presentation is part craft and part theatre. Build height by trimming layers level and stacking them with a generous ribbon of salted caramel between each. Smooth the sides with an offset spatula or a bench scraper, then finish with a flood of warm caramel that drips just a little down the edges. Add a scattering of sea salt flakes and a few fresh berries or toasted nuts for color and texture.
- Use fresh, bright garnishes like halved strawberries or candied citrus to contrast the cake’s deep tones.
- Create height variation by stacking three layers rather than two for a more dramatic silhouette.
- Slice with a hot, clean knife between cuts for the neatest edges — wipe the blade between slices.
- Consider step-by-step photos or a short video of your assembly to guide guests or recreate the look later.
How to Make Salted Caramel & Chocolate Cake (Step-by-Step)
- Preheat the oven and prepare your pans so they’re ready when the batter is mixed.
- Sift or whisk your dry ingredients together so cocoa and flour are evenly distributed.
- Cream the softened butter with sugar until light and slightly aerated, then add eggs one at a time so each is incorporated thoroughly.
- Alternate adding the dry ingredients and cream to the butter mixture, mixing until just combined to avoid overworking the batter.
- Divide batter evenly between pans and bake until a tester comes out with a few moist crumbs attached; avoid overbaking to keep layers tender.
- Cool cakes in pans briefly, then transfer to wire racks to finish cooling completely before leveling and assembling.
- Make the salted caramel sauce with attentive heat control; finish it off the heat and stir in butter and cream for a glossy texture.
- Layer the cakes with caramel between each tier, chill briefly to set the filling, then pour a final warm caramel glaze and finish with sea salt flakes.
Pro Tip for salted caramel & chocolate cake: Finish caramel off-heat to avoid graininess
- I always remove the pan from heat before adding butter and cream — this small step prevents the sauce from seizing and becoming grainy.
- If your caramel begins to crystallize, sprinkle in a small amount of warm water while stirring gently; patience here can often rescue the batch.
- To reheat caramel, warm gently over very low heat or in short bursts in a microwave, stirring between intervals until smooth.
- If the caramel becomes too thin after reheating, let it cool slightly to thicken; if too thick, stir in a splash of warm cream to reach the desired pourability.
- During assembly, keep the caramel slightly warm so it flows but cool it enough that it won’t soak into the cake layers.
How to Store, Make-Ahead, and Easy Variations
Planning ahead makes hosting effortless. You can bake the layers a day or two in advance, wrap them tightly, and store them chilled until assembly. The caramel keeps well refrigerated; bring it gently back to pourable consistency before using. For longer storage, freeze layers well wrapped and thaw overnight in the refrigerator.
- Storage: Store assembled cake in an airtight container at room temperature for short-term serving or refrigerate if your kitchen is warm. Leftovers keep best in an airtight container for a few days.
- Make-Ahead: Bake layers up to two days ahead and prepare caramel the day before; assemble on service day for freshest presentation.
- Variations: Swap semi-sweet chocolate for milk chocolate for a sweeter cake, or use white chocolate with a touch more salt for contrast.
- Gluten-Free: Replace the flour with a cup-for-cup gluten-free baking blend and check for added xanthan gum if your blend lacks it.
- Vegan: Use plant-based butter, a vegan egg replacer, and coconut cream — expect a slightly different crumb and flavor but still luxurious.
Pairing Suggestions with Beverages
Choose beverages that either mirror the cake’s depth or cut through its richness. Coffee with chocolatey notes complements the cake’s cocoa, while a dessert wine or a rich stout contrasts with the sweet caramel. For a lighter counterpoint, herbal tea can offer a refreshing balance, and sparkling wine always adds celebratory sparkle.
Pair your cake with delicious chocolate-covered desserts for a sweet treat.
A rich Baileys chocolate mousse would complement the flavors of your cake beautifully.
Frequently Asked Questions
Can I use a different type of chocolate for this cake?
Absolutely! You can customize the recipe by using milk chocolate or even white chocolate if you prefer a sweeter flavor.
How should I store leftover cake?
Store any leftovers in an airtight container at room temperature for up to three days to keep it fresh.
What if my caramel sauce turns grainy?
If your caramel sauce gets grainy, make sure to finish it off the heat, as this can help smooth it out. Stir gently while it’s cooling to keep it silky.
Can I make this cake ahead of time?
Yes, you can make the cake layers ahead of time. Just wrap them tightly and store in the fridge. Assemble the cake on the day you plan to serve it.
What beverages pair well with this cake?
This cake pairs wonderfully with a cup of coffee, a glass of dessert wine, or even a rich stout beer for a delightful balance of flavors.

Salted Caramel & Chocolate Cake
Ingredients
Method
- Preheat your oven to 350°F (175°C) and grease two round cake pans.
- In a bowl, whisk together flour, cocoa powder, baking powder, and salt.
- In another bowl, cream together softened butter and sugar until light and fluffy. Add eggs one at a time.
- Gradually mix in the dry ingredients along with heavy cream until just combined.
- Divide batter between prepared pans and bake for 25-30 minutes or until a toothpick comes out clean.
- Cool cakes in pans for 10 minutes, then transfer to wire racks.
- For the salted caramel sauce: melt sugar over medium heat until golden brown. Stir in butter and heavy cream with a pinch of sea salt.
- Assemble the cake by layering with salted caramel sauce between layers and on top.