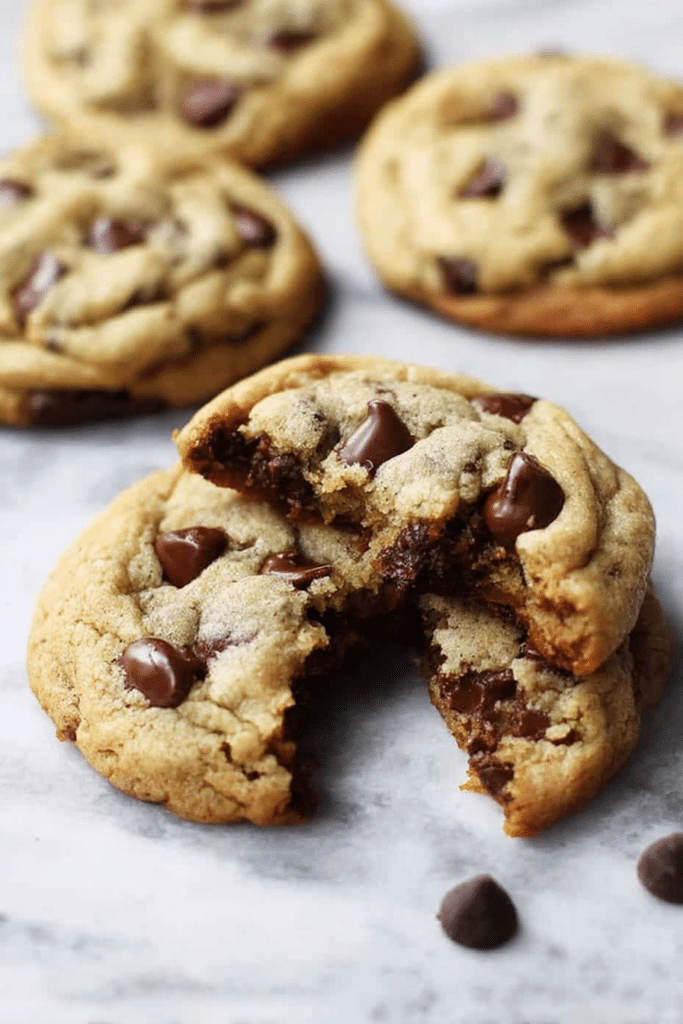
I still remember the first time I baked chocolate chip cookies that actually looked like the photos — the edges thin and golden, the centers soft and glossy with molten chocolate. I was making them for a cold Saturday afternoon; the kitchen smelled like warm butter and vanilla, and my cat spent the whole time on the counter hoping for a fallen chip. Over the years I’ve tweaked the formula, tested different flours, and learned how tiny shifts (a chilled dough, a different sugar ratio, or a second of extra mixing) totally change the result. This post is the version I keep coming back to: reliable, forgiving, and familiar, the kind of cookie that becomes a go-to when you want comfort in a tray.
Chocolate chip cookies have a simple, almost mythic origin: a chance addition of chocolate to a butter cookie that forever changed American baking. They became an icon because they’re flexible — you can make them soft or crisp, studded with nuts or studiously plain, and each household has slightly different memories tied to them. For me, they’re the weekend ritual: a warm tray, a glass of milk, and the tiny, satisfied hush when a cookie is still warm and just-set. In this article I’ll walk you through why each ingredient matters, how to make the classic recipe step-by-step, and how to fix things when they go sideways. I cooked these cookies multiple times while drafting this post so the tips below are from real, hands-on testing.
Key Ingredients for the Best Cookies
- Butter – the backbone of flavor. Butter gives the cookie richness and helps with spreading; cold, cubed butter behaves differently than softened — colder butter slows spread and gives a slightly thicker edge.
- Brown sugar – adds chew and moisture thanks to its molasses; it deepens flavor and gives that slightly caramel note.
- White sugar – gives lift and crispness; a balance of white and brown sugar controls chew vs. crunch.
- Eggs – binder and structure; eggs add moisture and help the cookie set, especially the yolks which add richness.
- Vanilla extract – a small amount amplifies chocolate and caramel notes; pure vanilla is worth it here.
- Flour – provides structure; all-purpose flour is standard, but a cup of cake flour blended with all-purpose lightens the crumb if you want a softer interior.
- Cornstarch – optional but effective for tender cookies; a little cornstarch keeps the center soft and slightly puffy.
- Baking soda – gives lift and helps with browning and spread; don’t substitute baking powder without adjusting other ingredients.
- Salt – essential for balance; a flake finish (a pinch of flaky sea salt after baking) makes the chocolate pop.
- Chocolate chips – semi-sweet is classic, but mixing milk and semi-sweet or using chopped chocolate gives pockets of molten chocolate and a better texture contrast.
For a delightful twist on classic flavors, check out our bakery style chocolate chip cookies recipe that highlights top-notch ingredients.
Step-by-Step Cookie Making Instructions
Below is the reliable recipe I used while testing. I include the exact temperatures, times, and the little cues I watched for in the oven — those cues are what will save you from overbaked, dry cookies.
- Preheat: Preheat oven to 400 degrees (if not chilling the dough). I always check my oven with a thermometer first — mine runs a touch hot, so I sometimes use 385 degrees instead. If your oven has hot spots, rotate the baking sheet halfway through baking.
- Cream butter and sugars: In a large mixing bowl, cream 1 cup cold butter (cut into cubes), 1 cup brown sugar, and 3/4 cup sugar for about 4 minutes until light and fluffy. Note: I use cold cubed butter here — it seems counterintuitive, but creaming cold butter into sugars gives a slightly different, more structured cookie and prevents excess spread. At first the mixture looks grainy; after 3–4 minutes it becomes lighter in color and airier — that’s what you want.
- Add eggs and vanilla: Add 2 large eggs and 2 teaspoons vanilla. Mix for 1 minute longer until everything is cohesive. If the mixture looks curdled, that’s usually because the butter was too cold compared to room-temperature eggs — mix a bit longer until smooth.
- Dry ingredients: Stir in 2 3/4 cups flour (or use 1 cup cake flour + 1 3/4 cups all-purpose for a softer crumb), 1 teaspoon cornstarch, 3/4 teaspoon baking soda, and 3/4 teaspoon salt. Mix just until combined — overmixing develops gluten and gives a tougher cookie. The dough should look slightly shaggy and a little sticky.
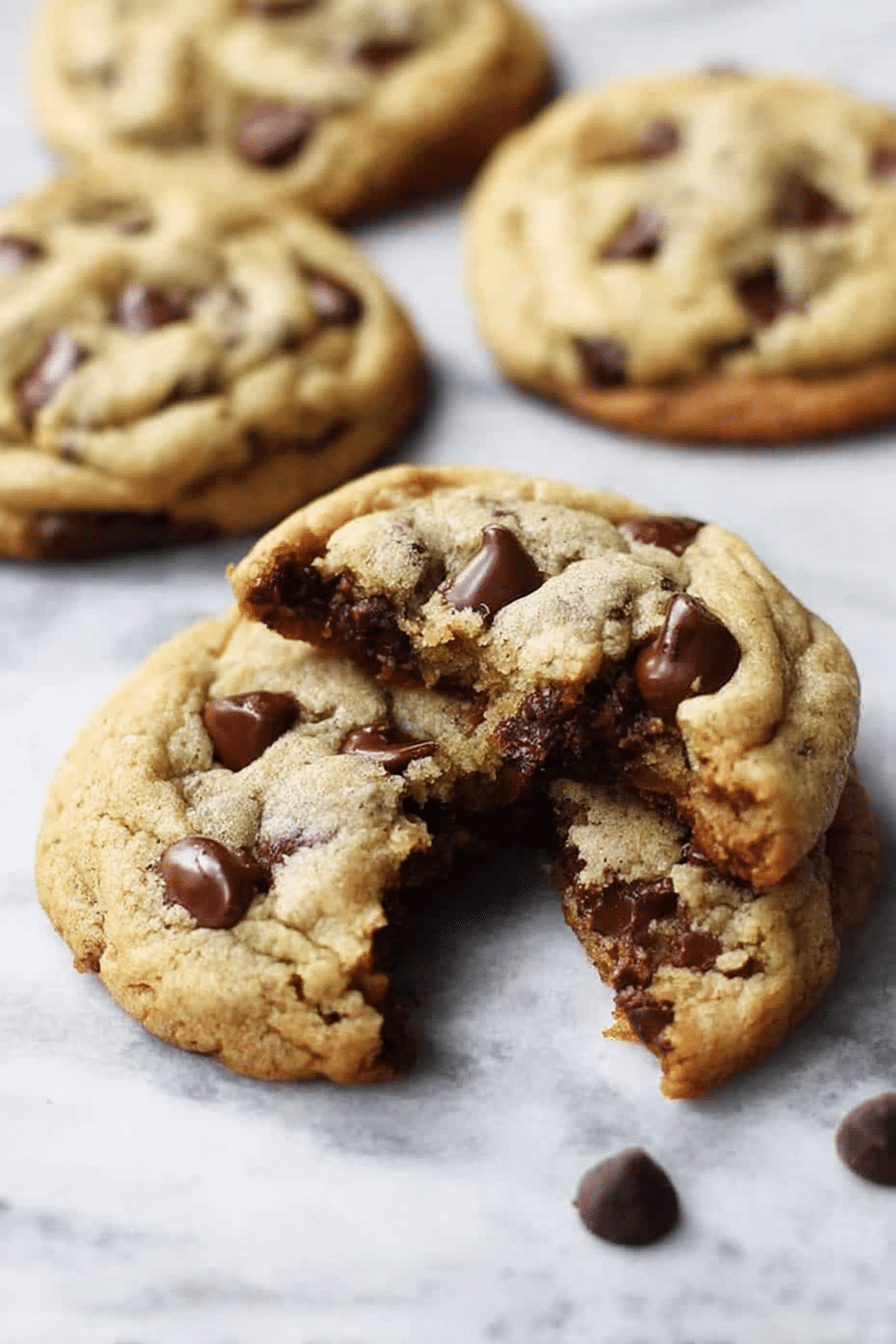
- Chocolate: Fold in 2 to 2 1/2 cups chocolate chips (semi-sweet or a mix of milk and semi-sweet). I like a mix of chopped chocolate and chips for melty pockets and bigger chocolate “islands.”
- Chill (optional but recommended): If time permits, wrap the dough tightly and chill for 24 hours. Chilling firms the fat, deepens flavor, and prevents runaway spreading. I’ve baked both same-day and after 24 hours — the chilled dough produces a thicker cookie with more complex flavor, while same-day is softer and slightly more spread.
- Portion: If not chilling, scoop dough onto baking sheets lined with parchment or a Silpat. Use light-colored cookie sheets; dark sheets brown bottoms too fast. I use a 2-tablespoon scoop for uniform size. If chilled, let dough sit on the counter 10–15 minutes so it’s scoopable.
- Bake: Bake for 8–11 minutes or until the edges just begin to turn a light golden color. The center will still look soft — resist the urge to overbake. The cookies continue to set on the hot sheet after you remove them. I usually pull mine at 9 minutes for a chewy center and 11 for a firmer, slightly crisper center.
- Rest: Remove from oven and let the cookies set for 5 minutes on the baking sheet before transferring to a rack. This settling time is important — moving them too soon makes them fall apart, waiting too long can dry them out.
Yield: about 18 cookies, depending on scoop size. Total time can be as little as 25 minutes if you skip chilling, but for the best flavor and texture I usually plan ahead and chill the dough overnight.
Baking Tips for Chewy vs. Crispy Cookies
Texture comes down to chemistry and timing. I test-baked the same dough with small tweaks and noted the differences so you can choose intentionally.
- Sugar ratio: More brown sugar = chew. More white sugar = crisp. Brown sugar contains molasses and holds moisture, which keeps cookies soft.
- Butter temperature: Cold butter (worked in) or chilled dough = less spread and a thicker, chewier cookie. Softer butter creates more spread and thinner, crisper edges.
- Baking time: Shorter time (pull when centers still look a little wet) = chewy. Longer time = crisp. That 1–2 minute window in an 8–11 minute bake is where the personality of your cookie is decided.
- Flour choice: A portion of cake flour or extra cornstarch yields a tender, cakier middle. All-purpose alone gives a balanced, slightly firmer chew.
- Dough chill: Chilling dough solidifies fat and allows flour to hydrate. It reduces spread and deepens flavor. If cookies are spreading too much, chill the dough at least 30 minutes before baking.
- Baking sheet color: Dark sheets = faster browning below. Use light-colored sheets for more even bake and less risk of burnt bottoms.
Common mistakes to avoid: overmixing (tough cookies), baking at too high a temperature (browned edges but raw middle), and scooping uneven dough (uneven bake). If your cookies are flat and oily, your butter was probably too soft or your dough was overworked — chill and try again.
Flavor Variations and Add-Ins
Once you have a base dough you like, the add-ins are the fun part. I’ve made batches with toasted pecans, espresso powder, and orange zest — each twist shifts the cookie’s personality.
- Nuts (walnuts, pecans) – add crunch and a toasty note; toast them briefly in a pan first for more depth.
- Spices (cinnamon, espresso) – a pinch of cinnamon warms the dough, while a teaspoon of espresso powder intensifies the chocolate without tasting like coffee.
- Alternate chips – swap some chips for caramel or peanut butter chips for a different flavor profile.
- Chopped chocolate – gives irregular, molten pockets compared to uniform chips.
- Zest or extract – orange zest pairs beautifully with dark chocolate; almond extract is potent, so use sparingly.
If you’re looking for a delicious twist, try our chocolate chip cheesecake bars for a creative dessert option.
Dietary Adjustments: Gluten-Free & Vegan Options
I’ve adapted this dough successfully for special diets, though you’ll need to accept small changes in texture.
- Gluten-free: Use a 1:1 gluten-free flour blend that contains xanthan gum. These blends mimic all-purpose flour in structure. If your blend is particularly absorbent, add a tablespoon or two of milk (or dairy-free milk) to keep the dough from feeling dry. Watch baking time closely — gluten-free cookies sometimes brown faster.
- Vegan: Replace butter with a solid, block-style vegan butter and use flax or chia egg (1 tablespoon ground flax + 3 tablespoons water per egg, let sit 5 minutes). Note that flavor will be slightly different — vegan butters vary — and cookies may be a touch denser. Adjust sugar ratio if needed for less sweetness.
- Egg-free swaps: Commercial egg replacers work in many cookie recipes. They can change spread and chew, so do a small test batch first.
When substituting, expect a slight change in color, spread, or chew — that’s normal. If you go vegan or gluten-free, bake a test cookie to check timing and adjust as needed.
Perfect Pairings: Cookies and Beverages
There’s a reason milk is the classic pairing: it cuts richness and heightens the chocolate’s creaminess. But different cookies call for different partners.
- Cold milk – the classic; balances sweetness and cools the mouth between bites.
- Black coffee – great with darker chocolate cookies; the bitterness offsets sweet and sharpens chocolate notes.
- Tea – a light, floral tea complements buttery cookies and nut add-ins.
- Dessert wine or liqueur – small pours can pair nicely with indulgent, fudgy cookies for an adult dessert experience.
Pair your cookies with our no-bake turtle mini cheesecakes for an ultimate dessert experience!
Nostalgic Stories About Chocolate Chip Cookies
Cookies are memory machines. For me, the sound of a cookie tin opening at Christmas is as evocative as any scent. When I was a kid, my grandmother would underbake the cookies on purpose so they’d be gooey in the center. As an adult I do the same — we all have a version that represents home.
Families have rituals: a kid who gets the slightly misshapen cookie, a neighbor who trades a jar of jam for a dozen, a college student who bakes to study by calories instead of asleep. Those stories are why the recipe matters less than the hands that make it. For a nostalgic treat, consider our chocolate mint poke cake, which captures the comforting flavors of childhood favorites.
Conclusion and Final Thoughts
These chocolate chip cookies are the result of repeated testing and small, intentional choices. Use cold butter and chilled dough for thicker, chewier cookies; adjust sugar for more crunch; and keep an eye on bake time to nail your preferred texture. Expect slight differences between ovens and batches — that’s normal and part of the craft. If you keep the tips above in mind, you’ll get consistent results and a cookie that feels homemade, comforting, and a little bit indulgent.
FAQ
- What makes these chocolate chip cookies the best? These cookies are considered the best because of their perfect balance of chewy and crispy textures, thanks to the combination of cold butter and well-measured ingredients. The recipe also allows for chilling the dough, which enhances the flavors.
- Can I substitute ingredients in this recipe? Absolutely! You can use different types of chocolate chips (like dark or milk chocolate) and even swap out all-purpose flour for gluten-free flour blends. Be sure to adjust baking times if you’re going vegan or gluten-free.
- How do I achieve chewy versus crispy cookies? To achieve chewy cookies, bake them for a shorter time and consider using brown sugar. For crispy cookies, bake a little longer and use a mix of white and brown sugar. Chilling the dough also helps achieve a chewy texture!
- What should I do if my cookies spread too much while baking? If your cookies are spreading too much, try chilling the dough for at least 30 minutes before baking. Also, make sure your butter is cold and not too soft when you start mixing.
- How long can I store the cookies, and how should I do it? These cookies can be stored in an airtight container at room temperature for up to a week. You can also freeze them for longer storage; just make sure to layer them between parchment paper.
If you try the recipe, chill the dough overnight the first time — you’ll notice a more concentrated, deeper flavor. And if something goes wrong, don’t be discouraged: donuts get glazed, cakes get frosted, cookies get remade. Bake another batch and tweak one variable at a time — that’s the experimental, domestic science I love about baking.
The BEST Chocolate Chip Cookies
Ingredients
Method
- Preheat oven to 400 degrees (if not chilling the dough). Check your oven temperature using an oven thermometer since some ovens run hot. If you suspect your oven runs hot, preheat oven to 385 degrees. In a large mixing bowl, cream butter, brown sugar, and sugar for 4 minutes until light and fluffy.
- Add eggs and vanilla. Mix for 1 minute longer.
- Stir in flour, cornstarch, baking soda, and salt. Mix just until combined. Fold in chocolate chips.
- If time permits, wrap the dough tightly in plastic wrap and chill for 24 hours. If not, scoop cookie dough onto baking sheets. I suggest using parchment paper or Silpat silicone baking sheets on light-colored baking sheets. If using dark colored baking sheets, the bottoms of the cookies may brown quickly and can burn. I suggest using light-colored cookie sheets.
- Bake for 8-11 minutes or until the edges just begin to turn a light golden color. Remove from oven and let set for 5 minutes before removing from the cookie sheet.