
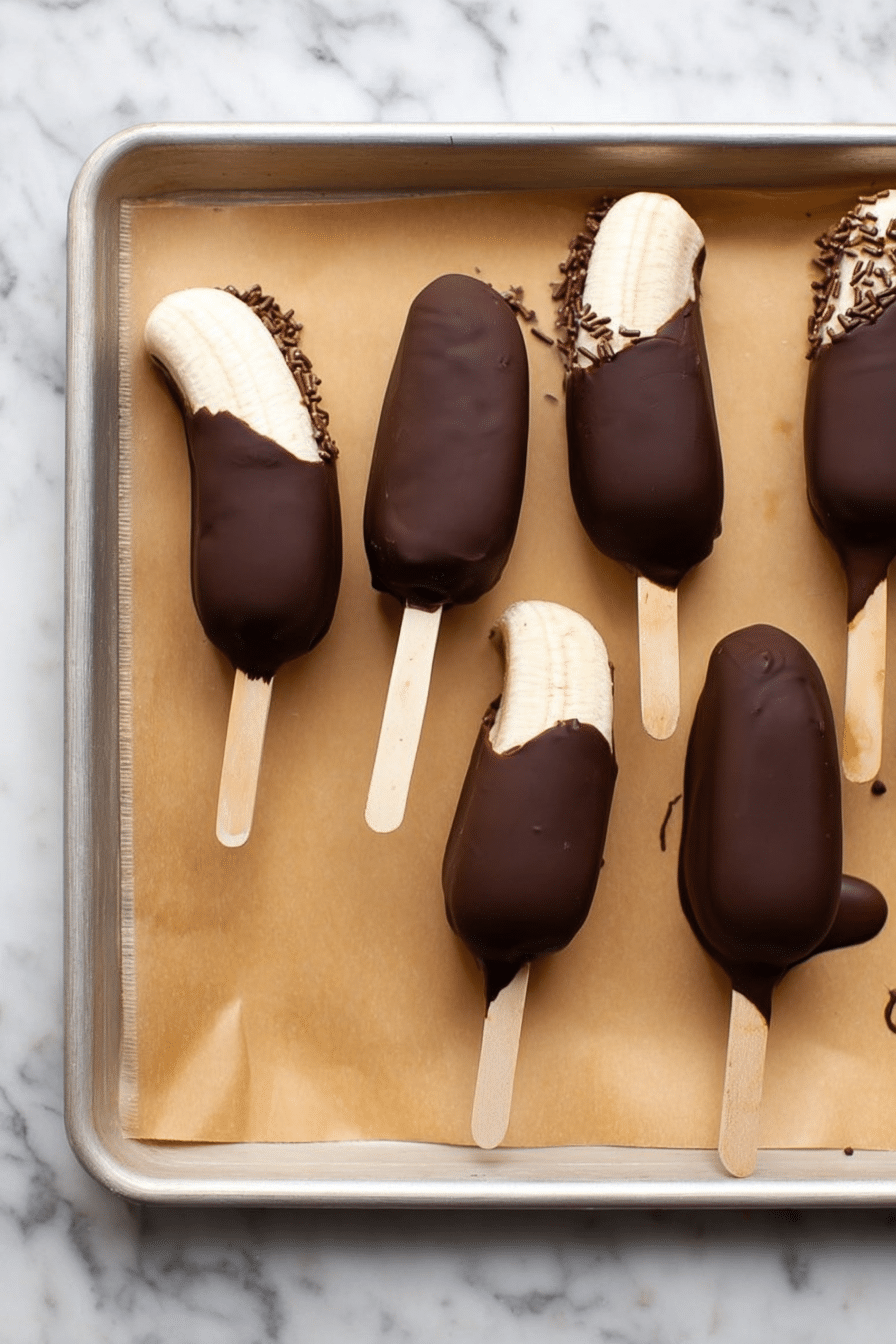
I make chocolate covered banana pops every summer — they’re one of those lazy-weekend, kitchen-with-bare-feet recipes that somehow feel celebratory and practical at the same time. The first time I made them, the chocolate snapped pleasingly when I bit into one and the banana was still soft and cool inside; that contrast is the whole point. They’re a quick, three-ingredient dessert that kids love to help with and adults love to eat seconds of. They show up at pool parties, after soccer games, and on afternoons when the sun makes the porch furniture warm and you want something frozen but not fussy.
When you make these, you’ll notice a few things right away: the way the chocolate glosses and flows when it’s just-warm, the faint coconut scent if you use coconut oil, and the soft sigh of the frozen banana as you press it into your mouth. I’ll walk you through the exact steps I use (I usually make a dozen at once), troubleshoot the sticky spots, and share toppings and storage tips so these actually work in a busy kitchen.
Ingredients for the Perfect Banana Pops
- Bananas – choose ripe bananas with some brown speckling but still firm, so they’re sweet yet hold their shape when frozen.
- Chocolate – use good-quality chocolate (dark, milk, white, or dairy-free) to get a smooth, glossy coating that snaps.
- Coconut oil – a little melted coconut oil thins the chocolate and creates a shiny finish; refined coconut oil won’t add coconut flavor.
- Popsicle sticks – simple wooden sticks or reusable pop sticks give a stable handle for dipping and eating.
- Toppings – chopped nuts, shredded coconut, granola, cacao nibs, flaky salt, or sprinkles to add texture and visual pop.
Step-by-Step Instructions
Below is the step-by-step process I follow; I’ve tested this several ways and this method is the most failproof in my kitchen. The recipe yields about 12 pops and takes roughly 15 minutes of hands-on work plus freezing time.
- Line a baking sheet with parchment paper so the pops don’t stick. Peel the bananas and cut each one in half — I do this because a half-banana is the perfect size for kids and fits nicely on a tray. Insert a popsicle stick or wooden skewer into the cut side of each half. Laying them out with space between them, transfer to the freezer and freeze for at least 4 hours, or up to 2 days. I’ve left them longer and after two days they start to get a little icy and don’t look as fresh once coated.
- When you’re ready to coat, melt the chocolate. You can use a double boiler or the microwave — both work. For the double boiler, fill a saucepan with an inch or two of water, bring to a simmer, then reduce to medium-low. Place chopped chocolate and a little coconut oil in a heatproof bowl set over the pan. Stir frequently with a clean dry spatula. Stop when the chocolate is about 80% melted and remove from the heat; residual warmth melts the rest to a silky finish. If you use the microwave, heat in short bursts (20–30 seconds), stirring between bursts so you don’t scorch the chocolate. Adding coconut oil helps keep the chocolate thin enough to coat smoothly; without it the chocolate can set too quickly on the cold banana and become clumpy.
- Remove the bananas from the freezer once the chocolate has fully melted. I prefer to pour the chocolate over the frozen banana rather than dunking. Hold each banana over the bowl and spoon or ladle the chocolate evenly across each side. Hold it upside down for a few seconds so excess chocolate drips off, then immediately sprinkle or press on toppings before the chocolate firms up. Pouring (instead of dunking) keeps the unused chocolate warmer longer — dunking a frozen banana cools the chocolate in the bowl quickly and makes it thicken and clump as you work.
- Work relatively quickly. The chocolate will harden as it cools, especially on the very cold banana surface. If the chocolate stiffens in the bowl, warm it gently again over the double boiler or for a few seconds in the microwave — don’t overheat. If the chocolate becomes grainy, it may have seized from moisture or heat; you can save it by stirring in a small splash of warm coconut oil or a teaspoon of neutral oil to smooth it out.
- Return coated bananas to the parchment-lined tray and freeze until the chocolate is completely set — this happens fast, usually within 10–20 minutes depending on how cold your freezer is. Once set, transfer the banana pops to a freezer-safe bag or container. These keep well for up to two weeks when wrapped properly.
Creative Topping Ideas
I always keep a few bowls of toppings out and let everyone customize. It’s fun, and the toppings hide any imperfections in the chocolate coating.
-
- Crushed peanuts or almonds — adds crunch and a salty contrast to the sweet banana.
- Shredded coconut — gives a chewy texture and tropical flair.
- Granola — for a breakfast-y crunch, try a honey granola (works great if you’re not keeping them vegan).
- Cacao nibs or chopped dark chocolate — for an extra bitter crunch if you like contrast.
- Sprinkles — kids (and adults who are kids-at-heart) love color and whimsy.
- Flaky sea salt — sprinkle lightly on dark chocolate for that irresistible sweet-salty finish.
For a richer chocolate experience, consider topping with our chocolate peanut butter protein balls.
If you’re a fan of chocolate, you might love adding some nuts inspired by our homemade chocolate turtles as a topping.
Health Benefits of Bananas
Bananas are a quietly powerful snack — they bring potassium, dietary fiber, vitamin B6, and vitamin C to the party. Potassium supports heart health and helps with muscle function, which is handy after running around outside. The fiber helps with digestion and, paired with the natural sugars in bananas, gives enough energy for a quick pick-me-up without the sugar spike that candy can cause.
Making chocolate covered banana pops is a way to get fruit into an indulgent format: you’re still eating a real piece of fruit, which makes it a healthier dessert choice compared to many traditional options. They fit nicely into a balanced diet as an occasional treat — the banana contributes nutrients and the chocolate satisfies cravings.
For another delightful dessert option, try our banana pudding which also highlights the delicious flavor of bananas.
Fun Family Engagement Activities
These pops are a perfect kid-friendly kitchen project. I set up an assembly line: one person lays out bananas and sticks, another pours chocolate, a kid sprinkles toppings, and someone else pops finished treats onto the tray. It keeps kids engaged and teaches simple cooking skills like measuring and timing.
- Make it a contest for the most creative topping — set a timer for 5 minutes and see who designs the best-looking pop.
- Let kids choose their chocolate type and toppings; it teaches decision-making and ownership of the dish.
- Decorating station: small bowls of toppings and a few spoons makes the process tactile and fun.
For another fun family dessert project, check out our no-bake banana pudding dessert.
Storage Tips for Your Pops
Proper storage keeps your pops tasting fresh and avoids freezer burn. Here’s what I do after testing many batches:
- Freeze the pops until the chocolate is set, then transfer to a single layer in a freezer-safe bag, removing as much air as possible. If you stack them, separate layers with parchment or wax paper.
- Label the bag with the date. These stay best for up to two weeks; after that the texture of the banana changes and ice crystals make them icy rather than creamy.
- If you find your pops have a little frost, let them sit at room temperature for 2–3 minutes before serving so they soften slightly. Don’t let them thaw too long or the chocolate can sweat and lose its snap.
Variations: Different Chocolate Flavors
Changing the chocolate opens up new flavor profiles. Here are some ideas I’ve tested and liked:
- Dark chocolate — bold and less sweet; pairs well with flaky sea salt or chopped nuts.
- Milk chocolate — sweeter and creamier; great with sprinkles and crushed cookies.
- White chocolate — very sweet and beautiful; try crushed peppermint around the holidays for a candy-cane pop.
- Yogurt-coated — melt yogurt chips carefully and use them like chocolate for a tangy twist; these aren’t as glossy but taste bright.
- Flavored infusions — a few drops of mint extract, orange extract, or a touch of espresso powder stirred into the melted chocolate can transform the taste; start with a tiny amount and taste so you don’t overpower the banana.
One technical note: if you want the chocolate to remain glossy and stable at room temperature (for parties), tempering chocolate is the pro method. For home use, adding a little coconut oil gives a shiny finish and helps set the chocolate more reliably on the cold banana.
Conclusion: Enjoying Your Treats!
Chocolate covered banana pops are simple enough to make on a weekday but special enough for a party. They’re refreshingly cool on hot days, and they give you that chocolate fix without feeling heavy. Make a big tray, let everyone invent their own toppings, and don’t worry if some look imperfect — the taste is what counts. I make these when friends come over and keep a stash in the freezer for easy after-school snacks. Try them, play with the toppings, and keep the routine: freeze, melt, pour, top, and enjoy.
FAQ
How long do I need to freeze the bananas before dipping them in chocolate?
You should freeze the bananas for at least 4 hours, or up to 2 days. This will help them hold their shape while you dip them in chocolate!
Can I use regular chocolate instead of vegan chocolate?
Yes, you can use regular chocolate if you prefer! Just be aware that it won’t be a vegan option.
What are some good topping options for chocolate covered banana pops?
Great topping ideas include chopped nuts, shredded coconut, granola, cacao nibs, or even sprinkles! Feel free to get creative!
How long can I store the chocolate covered banana pops in the freezer?
You can store the banana pops in a freezer-safe bag for up to two weeks. Just make sure to wrap them well to avoid freezer burn!
Can I make these banana pops in advance for a party?
Absolutely! These chocolate covered banana pops are perfect for making in advance, and they’ll be a refreshing treat at your summer party!
Chocolate Covered Banana Pops
Ingredients
Method
- Line a baking sheet with parchment paper. Peel the bananas, cut them in half, and insert a popsicle stick or wooden skewer into the cut side of each half. Place the bananas on the baking sheet with space in between them, and freeze for at least 4 hours, or up to 2 days in advance.
- Use either a double boiler or the microwave to melt the chocolate.
- For Double-Boiler: Fill a saucepan with 1-2” of water, then place a glass bowl over the top. Bring the water to a simmer over high heat, then reduce to medium-low. While the water warms, add the chocolate and coconut oil to the glass bowl. Stir frequently until the chocolate is around 80% melted, then remove the bowl from the pot and stir until completely melted.
- Remove bananas from the freezer. Hold each banana over the melted chocolate and pour the chocolate over each side using a large spoon. Hold the banana upside down to let excess chocolate drip off, then return to the parchment paper and repeat with remaining bananas.
- Serve immediately, or store in the freezer until ready. Once the chocolate has hardened, store in a freezer-safe bag for up to two weeks.