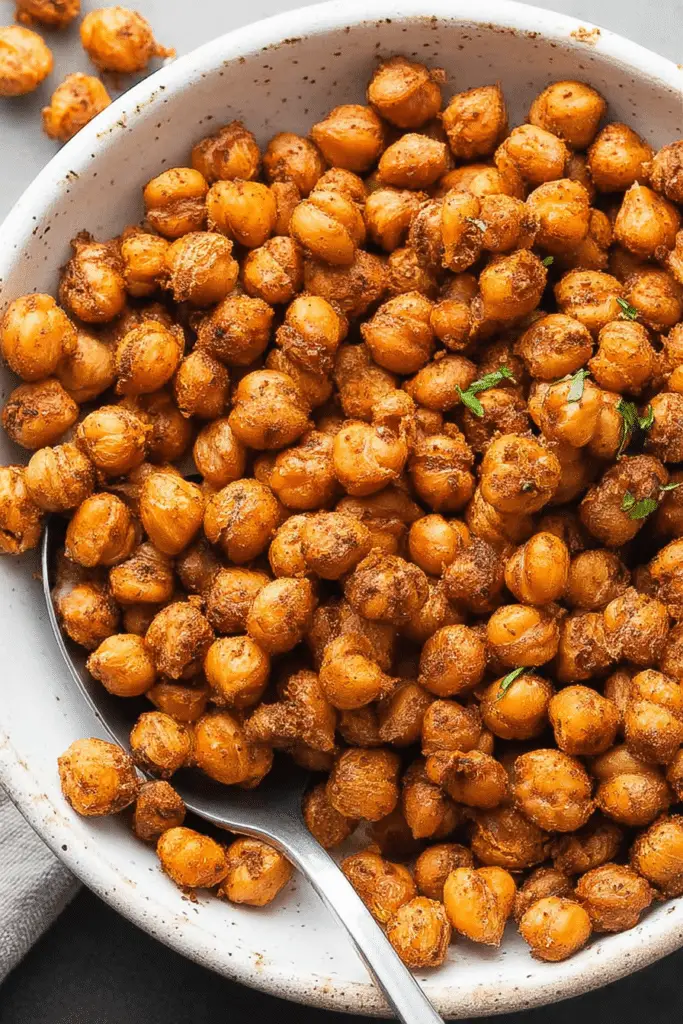
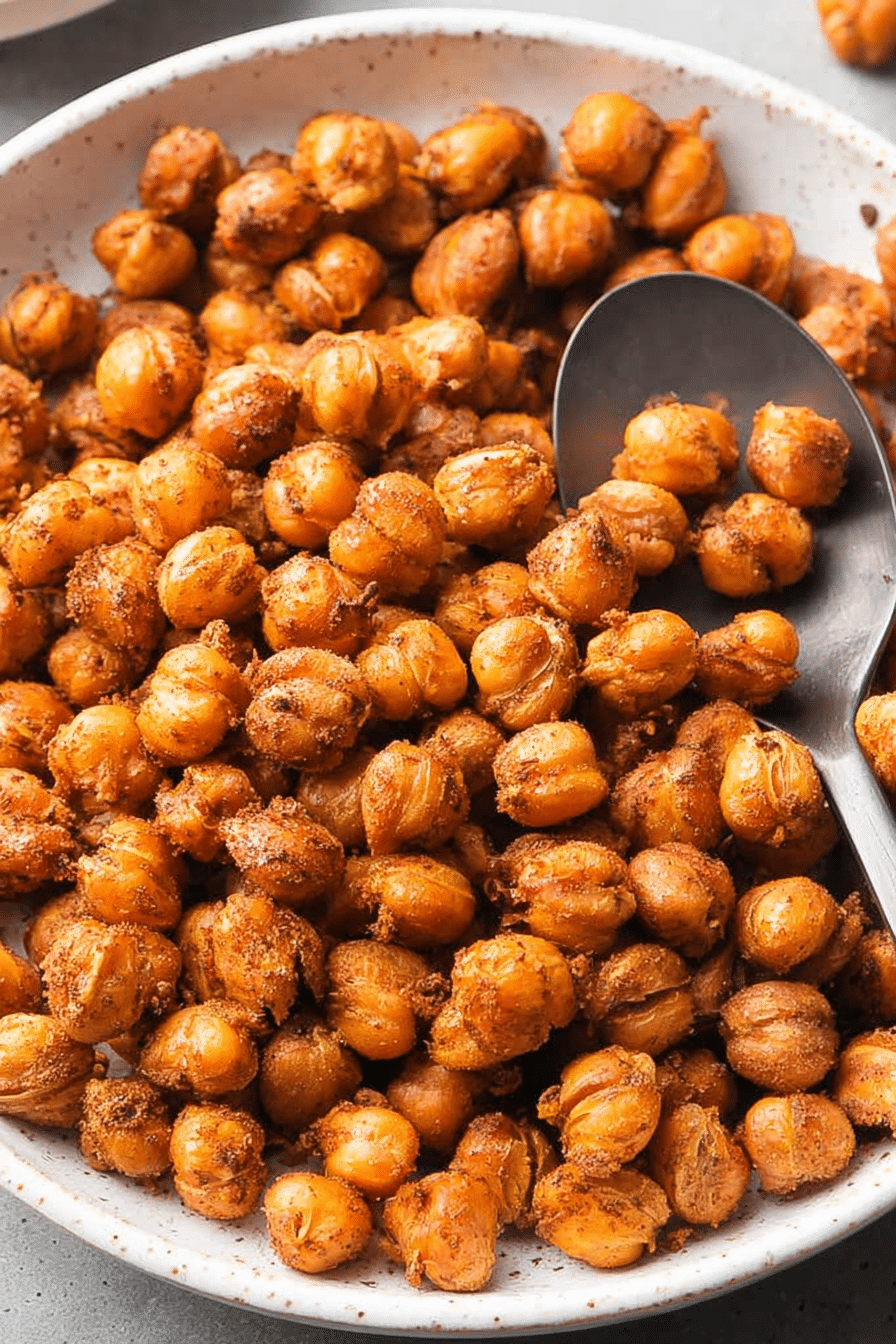
I started roasting chickpeas the same way I learned to roast vegetables — with patience and a little curiosity. The first time I made these, I thought I was just turning a can of beans into something crunchy, but the apartment filled with a toasty, nutty smell that made me open the oven and poke at the pan every few minutes. The outside crackled under the spoon and the inside stayed slightly tender — that contrast is what keeps me coming back.
Roasted chickpeas are one of those recipes that feel fancy but are unbelievably simple: chickpeas, a drizzle of olive oil, a handful of spices, and heat. The goal is a dry, glassy exterior that crackles when you bite into it. I use this recipe when I want a snack that’s portable, low-effort, and versatile — it works as a snack, a salad topper, or a crunchy bowl accent. Below I’ll walk you through the method I use in my kitchen, the things that went wrong the first few times I tried it, and how to fix them.
Nutritional Benefits of Chickpeas
Chickpeas are quietly powerful. They bring plant-based protein and fiber to the table and a lineup of vitamins and minerals that support everyday health. In this recipe, a serving is light in calories (around 50 kcal) but contributes a bit of protein and very modest fat — exactly the kind of snack that fills the gap between meals without making you sluggish.
Here’s what to expect nutritionally: the recipe’s nutrition details note roughly 53 calories per serving, about 2 grams of protein, and low fat. Beyond those numbers, chickpeas are known to be a good source of dietary fiber, which helps digestion and keeps you feeling satisfied longer. The combination of fiber and protein makes them useful for supporting weight management by stabilizing blood sugar and lowering cravings.
There’s also heart-health upside: legumes like chickpeas are associated with better cardiovascular markers in large observational studies, likely because they’re low in saturated fat and contain soluble fiber and minerals such as magnesium and potassium. If you’re counting macro or micronutrients, roasted chickpeas are a small but meaningful way to add plant protein and fiber to snacks and meals.
Ingredients Needed for the Recipe
- Chickpeas – drained and rinsed; the base of the dish, they crisp up beautifully when dried well.
- Olive oil – a light drizzle helps spices stick and promotes browning without making the chickpeas greasy.
- Smoked paprika – adds warmth and a faint smokiness that plays nicely with cumin.
- Ground cumin – gives nutty, earthy depth; a small amount goes a long way.
- Garlic powder – concentrated savory flavor; more reliable than fresh garlic for even seasoning.
- Onion powder – rounds out the aromatics and adds subtle sweetness.
- Ground coriander – floral-citrus hints that lift the spice mix.
- Sea salt – essential for flavor; start modest and adjust after roasting.
- Freshly ground black pepper – a finishing note of heat and aroma.
Step-by-Step Instructions
I always follow a two-stage roast: naked roasting first to dry the chickpeas, then oil and season to finish. This two-step method is what reliably gets me the glassy, crunchy shell without burning them.
- Preheat oven to 400 degrees F. Use a rack in the center so heat circulates evenly.
- Lightly spray a baking sheet with oil or use a thin layer of oil. I prefer a flat rimmed baking sheet so the chickpeas don’t roll into the oven’s corners.
- Drain and rinse the chickpeas. Pour them into a colander and run cool water through until the liquid runs clear — you’ll notice the water gets less cloudy than when you first dump the can, which is a good sign.
- Pat dry. Lay the chickpeas on a paper towel–lined plate and press gently. If your paper towel becomes saturated, switch to a fresh one. I once tried to skip this step and ended up with a pan of mushy, half-crispy chickpeas. Lesson learned: moisture is the enemy of crispiness.
- Mix spices. In a small bowl, combine ground cumin, smoked paprika, garlic powder, onion powder, ground coriander, sea salt, and black pepper. Set the mixture aside so it’s ready after the first roast.
- Spread the dried chickpeas in a single layer on the prepared baking sheet. Crowding is the other common mistake — if they’re piled up, steam will build and they’ll soften instead of crisping.
- Bake “naked” for 15 minutes at 400°F — that’s without oil or spices. This step dries out the surface and firms the interior. You’ll notice they start to rattle against the pan; that sound is your cue that moisture is leaving.
- Remove the pan from the oven and drizzle about ½ tablespoon olive oil over the chickpeas. Toss so each chickpea has a light coating; too much oil makes them soggy. If they seem dry and the spices aren’t sticking, add oil in very small increments (up to 1 tablespoon total) until they’re just glossy.
- Sprinkle the spice mix and stir to coat. Everything should look lightly dusted rather than swimming in oil.
- Return the pan to the oven and bake for another 10 minutes at 400°F. Pull the pan and stir them once — this helps all sides brown evenly.
- Put them back in for an additional 5–10 minutes, watching closely in the last few minutes. The total bake time will be 30–35 minutes. Look for even deepening of color; some chickpeas will brown quicker, but try to avoid blackened spots which mean they’ve burned.
- Turn off the oven and prop the door ajar. Let the chickpeas cool inside with the slightly open door — they firm up significantly as they cool, and that cooling step is the secret to super crisp bites.
- Serve warm or at room temperature. These are great right away, but they also keep for snacking later.
If you prefer quicker crisping, try adapting the recipe using an air fryer method for crunchy results in less time.
Flavor Customization Tips
I tinker with seasonings depending on what I’ll pair the chickpeas with. The base spice blend above is my everyday favorite, but once you master the dryness and the two-stage roast, the world opens up.
- Spicy – cayenne or extra smoked paprika for heat. Start light; heat intensifies after roasting.
- Sweet – cinnamon and a touch of maple or brown sugar. Toss the chickpeas after roasting so the sugar caramelizes but doesn’t burn during the high-heat roast.
- Global blends – curry powder or za’atar for Mediterranean and South Asian notes. These blends hold up well and coat the chickpea surface for bold flavor.
- Herbaceous – toss with finely chopped rosemary, thyme, or parsley after roasting for a fresh pop.
- Cheesy – garlic-parmesan: grate a little parmesan and toss while warm so it clings to the chickpeas.
Pro tip on ratios: think of your spice mix as a dusting rather than a sauce. For a 15 oz can of chickpeas, a half-teaspoon to a teaspoon of a dominant spice (like smoked paprika) and smaller amounts of the supporting aromatics is usually plenty. Taste after roasting and add salt if needed — salt is the most common thing people under-add.
For a bold, North African twist, check out our harissa-spiced chickpeas to inspire spicy seasoning blends for your roasted chickpeas.
Need fresh seasoning inspiration? Our popcorn seasoning ideas translate perfectly to roasted chickpeas for endless flavor variations.
Creative Serving Suggestions
These chickpeas are like crunchy confetti for savory dishes. Here are a few favorite ways I use them:
- Salad topper – sprinkle a handful over a leafy salad to add texture and protein.
- Bowl accent – add to grain bowls or Buddha bowls for contrast to creamy dressings.
- Snack bowl – serve alongside other nibbles for parties; they travel well in a container.
- Sandwich/crunch – add to wraps for a crunchy surprise that keeps everything from being soggy.
Try sprinkling a handful of these crispy roasted chickpeas over our chickpea, feta and avocado salad for extra crunch and protein.
Sustainability of Chickpeas as a Snack
Choosing chickpeas is a sensible move for both health and the planet. As a legume, chickpeas fix nitrogen in the soil, which can reduce the need for synthetic fertilizers in crop rotations. Compared with many animal-based snacks, legumes typically require less land and fewer resources per gram of protein. For someone trying to eat more sustainably without sacrificing convenience, roasted chickpeas are a reliable choice.
In my cooking, I prefer buying cans that list minimal added ingredients or dry chickpeas in bulk when I’m planning ahead — dry chickpeas store very well and produce less packaging waste. If you soak and cook dried chickpeas in larger batches, you can roast small portions fresh whenever you want a snack, which cuts down on single-use cans and gives you more control over the texture.
Conclusion and Final Thoughts
To recap: crispy roasted chickpeas are easy to make, versatile, and small but meaningful for nutrition. The two-stage roasting method — dry them first, then oil and spice — is the reliable routine that gives consistent crispness. Expect a crunchy exterior and a slightly pillowy center. They store well at room temperature in an airtight container for several days, though they’re at their crispiest the first day. If they soften, a quick 5–10 minute reheat in a hot oven restores the texture.
I’ve tested variations, tweaked oil amounts, and learned the hard way that a wet paper towel or too much oil ruins the texture. If you’re new to roasting chickpeas, follow the timing and the dry-first approach and you’ll almost certainly succeed. Once you’re comfortable, experiment with global spice mixes — some of my favorite batches were accidental, tossed with extra cumin and leftover za’atar.
If you make these, I’d love to hear which spice blend you landed on — share your favorite combo in the comments or tell me whether you used canned or dried chickpeas. Happy roasting!
Frequently Asked Questions
What’s the secret to super crispy roasted chickpeas?
Dry the chickpeas thoroughly, roast them ‘naked’ first (15 minutes at 400°F), then drizzle a small amount of oil, add spices, and roast another 15–20 minutes total (stirring once). Let them cool in the slightly open oven — that cool-down step makes them extra crispy.
Why didn’t my chickpeas get crunchy in the oven?
Usually because they were too wet, too oily, or crowded on the pan. Pat them very dry, use only ½–1 tablespoon oil for a 15 oz can, spread in a single layer, and keep the oven at 400°F. Bake longer if needed and cool in the open oven to firm up.
Can I use dried chickpeas instead of canned?
Yes. Soak dried chickpeas overnight and cook until tender before drying them thoroughly and following the same roasting method. Canned chickpeas work fine too — just drain, rinse, and dry well.
How should I store roasted chickpeas and how long do they last?
Cool completely, then store in an airtight container at room temperature. They stay best for up to one week (if they last that long!). If they soften, re-crisp them in a 350–400°F oven for 5–10 minutes.
Can I make flavor variations like sweet or spicy?
Absolutely. For spicy, toss with cayenne or extra smoked paprika. For sweet, use cinnamon and a touch of maple syrup or sugar (toss after roasting so it caramelizes). Try curry powder, za’atar, garlic-parmesan, or chili-lime — start light and adjust to taste.
Crispy Roasted Chickpeas Recipe
Ingredients
Method
- Preheat oven to 400 degrees F.
- Lightly spray a baking sheet with cooking oil or cooking spray. Set aside.
- Drain and rinse the chickpeas.
- Pat dry the chickpeas on paper towels until they are no longer wet.
- In a small bowl, mix together cumin, paprika, garlic powder, sea salt, onion powder and pepper.
- Transfer the dried chickpeas to the prepared baking sheet.
- Bake in the preheated oven for 15 minutes without oil or spices.
- Remove the chickpeas from the oven, drizzle olive oil and stir until evenly coated.
- Add the spice mixture and stir until evenly distributed.
- Bake for an additional 10 minutes, stir, then bake for another 5-10 minutes.
- Turn off the oven and let the chickpeas cool inside to achieve maximum crispiness.
- Serve with your favorite recipes.