- Prep
- 5 min
- Cook
- 5 min
- Serves
- 8
On this page30 quick jumps
TOC
30 quick jumps
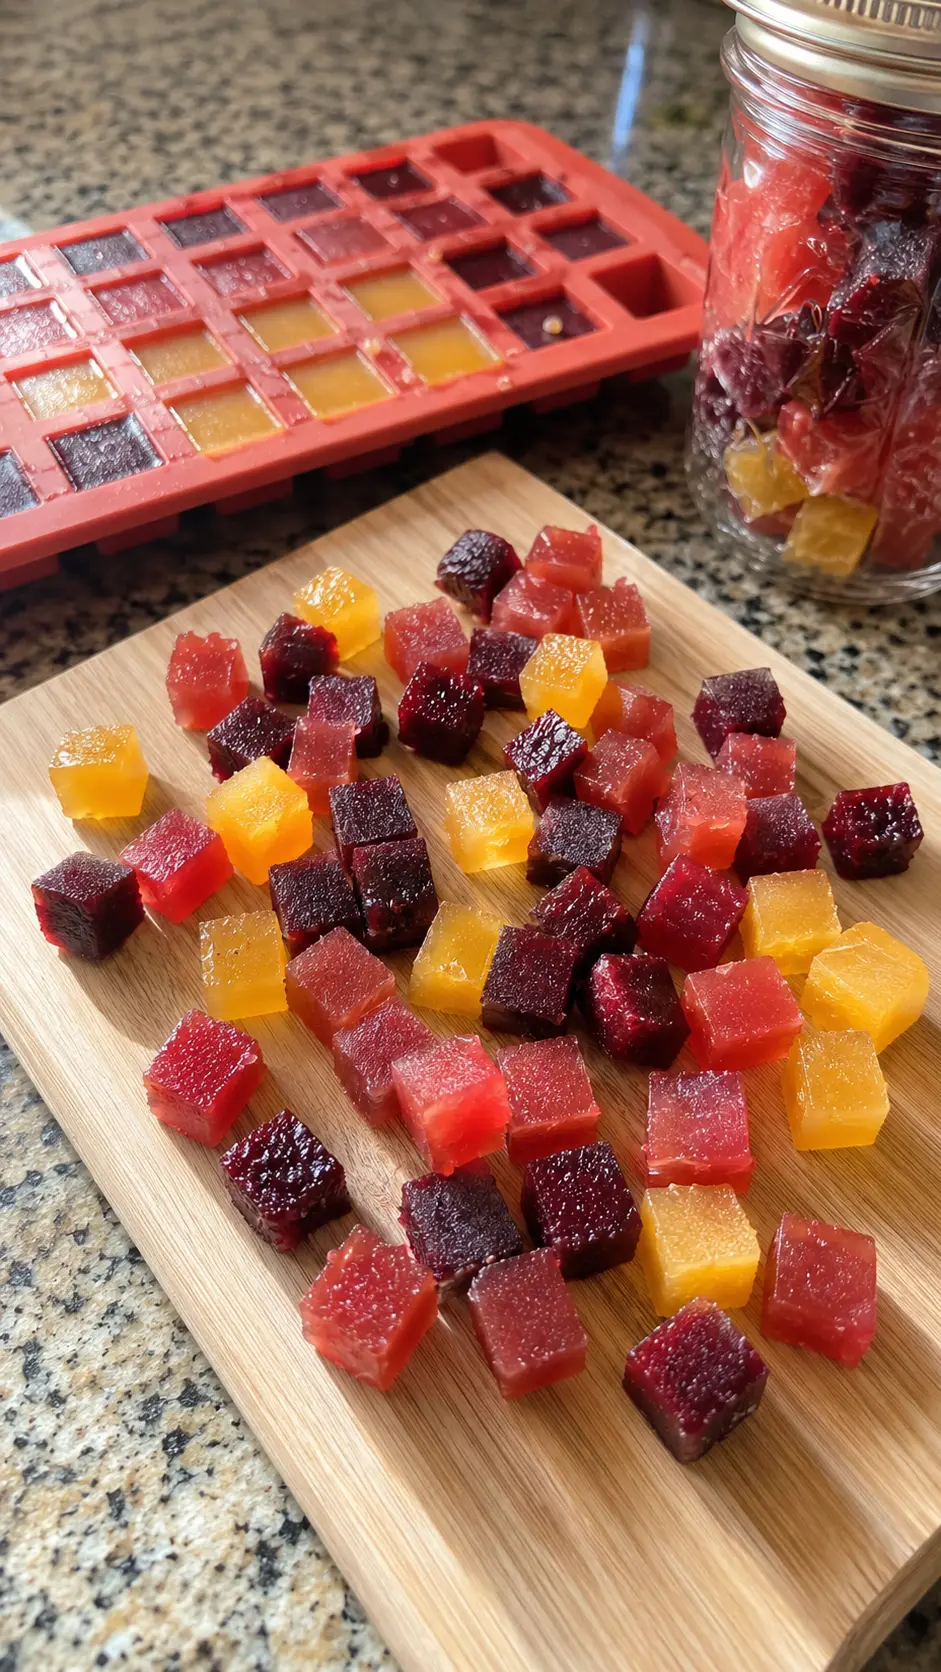
These homemade fruit snacks are sweet, fruity, chewy little treats made with real fruit and just a handful of simple ingredients.
Instead of starting with artificial fruit flavor, the recipe begins with actual fresh or frozen fruit. The fruit is blended with a neutral juice, sweetened, combined with powdered gelatin, and chilled until firm enough to cut into bite-sized pieces.
The result falls somewhere between a gummy candy and a firm fruit jelly.
They're soft enough to chew easily but sturdy enough to pick up with your fingers, pack into a snack container, or pour into fun silicone molds.
Another reason this recipe is worth keeping around is how easily the flavor can change.
Make a batch with strawberries one week, try peach the next, or combine several berries for a deeper fruit flavor. You can even make multiple colors and serve them together for a homemade fruit snack mix.
The actual hands-on preparation takes only about 10 minutes. Most of the time is simply waiting for the gelatin to set in the refrigerator.
The technique is easy, but a few details—especially how you add the gelatin and how hot the mixture becomes—make a big difference in the final texture.
Welcome to the Fruit Snack Lab
What Gives Homemade Fruit Snacks Their Texture?
Picking Fruit for the Best Flavor
Fresh vs. Frozen Fruit
Why Juice Is Added
Getting the Sweetness Right
Gelatin Without the Lumps
Why You Shouldn't Boil the Mixture
Straining: When It's Worth Doing
Pan Method vs. Silicone Molds
Fruit Flavor Combinations to Try
How to Make Several Flavors at Once
Texture Troubleshooting
Storage and Packing
Homemade vs. Store-Bought Fruit Snacks
Frequently Asked Questions
What Gives Homemade Fruit Snacks Their Texture?
The ingredient doing most of the structural work is gelatin.
Fruit purée on its own remains soft and spoonable.
Once gelatin is dissolved into the warm fruit mixture and then chilled, it creates a network that traps the liquid and transforms the purée into something you can slice, hold, and chew.
The amount of gelatin matters.
Use too little and you may end up with something closer to fruit-flavored gelatin dessert.
Use too much and the texture can become unnecessarily rubbery.
This recipe is designed to create a firm fruit snack that can be removed from the pan and cut into small pieces.
Temperature also plays an important role.
The gelatin needs enough warmth to dissolve completely, but the fruit mixture does not need to boil.
Picking Fruit for the Best Flavor
Because fruit is the main flavor in the recipe, start with fruit that actually tastes good.
A bland strawberry won't suddenly become intensely strawberry-flavored just because it becomes a fruit snack.
Ripe fruit generally gives you the strongest result.
Good options include:
Strawberries
Raspberries
Blueberries
Blackberries
Cherries
Peaches
Mixed berries
You can use a single fruit or combine several.
Strawberries produce a familiar sweet berry flavor.
Raspberries and blackberries bring more tartness.
Peaches create a milder, softer fruit flavor.
Cherries produce a deeper color and a naturally strong taste.
Mixed berries are useful when you want something more complex.
Fresh vs. Frozen Fruit
Both fresh and frozen fruit can work.
Fresh Fruit
Fresh fruit is an excellent choice when something is in season and full of flavor.
Wash it thoroughly and remove stems, pits, or other inedible parts before blending.
Frozen Fruit
Frozen fruit makes this recipe possible year-round.
Thaw the fruit before measuring and blending it.
Frozen berries are especially convenient because they're usually picked ripe and require almost no preparation.
If a large amount of liquid collects as the fruit thaws, you don't necessarily need to discard it. That liquid contains fruit flavor.
Just remember that additional liquid can slightly affect the concentration and texture of the finished mixture.
Fruits to Avoid With This Gelatin Method
Not every fresh fruit behaves well with gelatin.
The original recipe specifically recommends avoiding fruits such as fresh pineapple, kiwi, mango, papaya, figs, guava, and ginger root because they can interfere with gelatin setting.
If you're experimenting beyond the tested fruit suggestions, make a small batch first rather than preparing several trays at once.
Fruit chemistry can affect the final set more than you might expect.
Why Juice Is Added
The recipe uses white grape juice or apple juice.
Both are relatively neutral compared with strongly flavored juices.
That matters because you want the fruit you selected to remain the main flavor.
Strawberries paired with a strongly flavored orange or cranberry juice, for example, would taste very different.
Neutral juice also adds extra sweetness and helps the fruit blend smoothly.
If you want a less sweet version, the original recipe notes that water can be used instead.
The flavor will be a little less concentrated, but the fruit itself can still provide plenty of character.
Why Lemon Juice Helps
Fresh lemon juice is a small ingredient with an important job.
Fruit snacks are naturally sweet.
A little acidity keeps that sweetness from tasting flat.
Lemon also makes fruit flavors seem brighter and more noticeable.
You shouldn't necessarily taste "lemon fruit snacks" unless you're using a lot.
Think of it more like seasoning.
Just as salt can make savory ingredients taste more flavorful, a little acidity can make fruit taste more vibrant.
Getting the Sweetness Right
These are treats, so sweetness is part of the experience.
The original recipe uses granulated sugar because it creates a clean sweetness without introducing another strong flavor.
The sweetness of your fruit still matters.
A batch made from very ripe strawberries may naturally taste sweeter than a batch made from tart raspberries.
If you're experimenting with different fruits, taste the purée before the gelatin goes in.
Remember that chilled foods can taste slightly less sweet than warm mixtures, so the final fruit snack may seem a little less intense once refrigerated.
Can I Replace the Sugar?
Honey or maple syrup can sweeten fruit snacks, but they also bring their own distinct flavors.
That may be delicious—it just produces a different result.
Maple syrup with berries, for example, will taste different from the straightforward fruit-and-sugar version.
If your goal is a flavor closer to traditional fruit snacks, granulated sugar keeps the fruit flavor more neutral.
If you're experimenting with liquid sweeteners, remember that adding extra liquid can also influence texture.
For that reason, make modest changes rather than drastically altering several ingredients at once.
Gelatin Without the Lumps
This is probably the most important technique in the recipe.
Add the powdered gelatin gradually while whisking.
Dumping all of it into the warm fruit mixture in one pile can create gelatin clumps.
Those little clumps can be difficult to dissolve and may leave uneven pieces in the finished fruit snacks.
Instead:
Keep the fruit mixture warm.
Whisk continuously.
Sprinkle in some gelatin.
Whisk until incorporated.
Continue gradually until all of it has been added.
The goal is a completely smooth mixture before you remove the saucepan from the heat.
If you can still see obvious gelatin granules or lumps, keep whisking gently until they're dissolved.
Why You Shouldn't Boil the Mixture
The mixture only needs enough heat to dissolve the sugar and gelatin.
It does not need a rolling boil.
Heat the fruit purée over medium heat, then whisk in the sugar and gelatin as directed.
Once everything is completely dissolved and smooth, remove it from the heat.
The original recipe specifically instructs not to let the mixture boil.
This also means the cooking stage moves quickly.
Have the pan or molds prepared before you start heating the fruit.
Gelatin begins setting as the mixture cools, so this isn't the ideal recipe for searching through cupboards for a mold after the saucepan is already finished.
Mise en Place Matters Here
"Mise en place" simply means having your ingredients and equipment ready before cooking.
For these fruit snacks, it makes the process much easier.
Before you heat anything, have ready:
Blended fruit
Sugar
Gelatin
Whisk
Prepared pan or silicone molds
Spatula
Measuring tools
If using individual candy molds, place them on a flat baking sheet before filling.
That makes it much easier to transfer the molds to the refrigerator without bending the silicone and spilling liquid everywhere.
Straining: When It's Worth Doing
Straining is optional, but it can noticeably change the texture.
Strawberry or Peach
These fruits can usually be blended very smooth without much trouble.
You may decide that straining isn't worth the extra step.
Raspberry or Blackberry
These contain many tiny seeds.
If you want very smooth fruit snacks, pass the purée through a fine-mesh strainer before heating.
Push the fruit through with a spoon or silicone spatula.
You'll lose a small amount of fruit volume, but the final snacks will have a cleaner texture.
Mixed Berry
Whether you strain depends on which berries dominate the mixture.
If the blend contains lots of raspberry or blackberry, straining may be worthwhile.
Pan Method: The Easiest Option
You don't need special gummy bear molds.
The simplest method is to pour the finished fruit mixture into a lined 9x5-inch loaf pan.
Refrigerate it until completely firm.
Once set, lift or peel the slab away from the lining and transfer it to a cutting board.
Use a sharp knife to cut:
Small squares
Rectangles
Diamonds
Thin strips
This method is quick and creates the homemade cube-style fruit snacks you see in many kitchens.
They don't need to look identical.
Slight differences in size actually make them feel more homemade.
Silicone Molds: The Fun Option
Silicone candy molds are useful when you want shapes.
You can make:
Bears
Hearts
Stars
Dinosaurs
Fruit shapes
Small cubes
Lightly grease the molds when needed, then remove as much excess grease as possible.
A candy dropper, squeeze bottle, or small measuring cup with a spout can make filling tiny cavities much easier.
Work quickly because the gelatin mixture starts thickening as it cools.
If it becomes noticeably thicker while you're filling molds, don't panic. Keep moving and finish the batch.
How Full Should You Fill the Molds?
Fill small candy cavities close to the top.
If some pieces are dramatically thinner than others, they'll have a different texture.
Thinner fruit snacks feel softer and more delicate.
Thicker ones have more chew.
Consistent filling gives you consistent results.
When using a dropper, fill a row at a time rather than jumping around the mold.
That usually keeps the process cleaner.
Fruit Flavor Combinations to Try
Once you know the basic method, flavor combinations are where the recipe becomes especially fun.
Strawberry
Simple, sweet, and familiar.
This is one of the easiest starting points.
Strawberry-Cherry
Combine sweet strawberries with deeper cherry flavor.
The color becomes especially vibrant.
Raspberry-Strawberry
Raspberry adds tartness while strawberry keeps the mixture sweet and familiar.
Straining is useful because of the raspberry seeds.
Blueberry-Cherry
A darker fruit combination with rich berry flavor.
Peach-Berry
Peach softens the intensity of stronger berries.
Try peach-strawberry or peach-raspberry.
Mixed Berry
Combine strawberries, blueberries, raspberries, and blackberries.
Each batch can taste slightly different depending on the fruit ratio.
Make a Rainbow-Style Batch
One fun approach is making several smaller batches rather than one huge batch.
For example:
Red: strawberry or cherry-strawberry
Pink: raspberry-strawberry
Purple: blueberry-blackberry
Orange/Gold: peach
Once all of the flavors are chilled and cut, combine them in a large container.
You get a homemade mixed fruit snack assortment without adding artificial colors simply for appearance.
How to Make Several Flavors Efficiently
If you're preparing multiple batches, organize the work.
Start with the lightest-colored fruit and move toward the darkest.
For example:
Peach
Strawberry
Raspberry
Blueberry or blackberry
That means you don't have to scrub every tiny stain from the blender between every flavor.
Rinse the equipment between batches and keep each prepared mixture in its own pan or mold.
Label the trays if similar colors contain different flavors.
Once everything has set, cut or unmold all of the batches together.
Getting Clean Cuts
Use a sharp knife.
A dull knife can drag through the fruit snack slab and create ragged edges.
If the mixture sticks slightly, wipe the knife between cuts.
For uniform squares:
Cut the slab into long strips.
Rotate the cutting board.
Cut across the strips at equal intervals.
You don't need perfect precision unless presentation matters.
For everyday snacks, irregular little cubes taste exactly the same.
Texture Troubleshooting
Homemade fruit snacks are simple, but gelatin recipes are sensitive to technique.
My Fruit Snacks Didn't Set
Possible causes include:
Gelatin wasn't fully dissolved.
The fruit interfered with gelatin setting.
Ingredient proportions were changed significantly.
The snacks didn't chill long enough.
First, give them additional refrigerator time.
If they're still liquid or extremely soft after several hours, review the fruit and gelatin measurements.
They're More Like Jell-O Than Fruit Snacks
A very soft texture usually means the gelatin structure isn't strong enough for the amount of liquid.
Make sure you measured the powdered gelatin accurately.
Also avoid adding large amounts of extra fruit juice or liquid sweetener without accounting for the texture change.
The Gelatin Is Clumpy
It was probably added too quickly.
Next time, sprinkle it in gradually while whisking constantly.
The Snacks Are Too Firm
Accurate measurement matters with gelatin.
Too much gelatin can create a firmer, more rubbery texture than intended.
The Fruit Flavor Seems Weak
Several things can help:
Use riper fruit.
Use juice rather than water.
Add the lemon juice.
Try naturally stronger fruit such as raspberry or cherry.
Combine a mild fruit with a stronger berry.
They're Too Sweet
Try using naturally tart fruit in the next batch.
Raspberries and some berry blends naturally balance sweetness better than very ripe peaches.
They're Too Tart
Use sweeter fruit or a slightly sweeter neutral juice.
Why Homemade Fruit Snacks Don't Feel Exactly Like Packaged Gummies
Commercial gummy candies and packaged fruit snacks are formulated for long shelf life, consistent chew, and manufacturing stability.
A simple homemade recipe made from fruit purée and gelatin naturally behaves differently.
Expect something fresher, softer, and more fruit-forward.
That's part of the appeal.
Rather than trying to perfectly recreate a factory-produced gummy, focus on the qualities homemade fruit snacks do especially well:
Real fruit flavor
Customizable sweetness
Fresh texture
Easy flavor variations
Fun homemade shapes
Packing Fruit Snacks
Because homemade fruit snacks are softer and fresher than many commercial versions, pack them thoughtfully.
Use a small airtight container rather than tossing them loosely into a bag with heavy foods.
For lunch boxes, keep them cool when possible.
If you're making several flavors, mix a few of each into individual containers.
This makes an easy grab-and-go snack.
Storage
The original recipe recommends storing homemade fruit snacks in an airtight container for 1 to 2 days at room temperature or up to 5 days in the refrigerator.
Refrigeration is the best option when you're preparing a batch for several days.
Keep the container sealed so the pieces don't dry out or absorb refrigerator odors.
If stacking several layers, you can separate them with parchment when necessary.
Can Homemade Fruit Snacks Be Made Ahead?
Yes.
They actually need refrigerator time to set, so they're naturally suited to advance preparation.
Make them in the evening and let them chill while you're doing something else.
Once firm, cut or unmold the snacks and transfer them to an airtight container.
If you're preparing them for a party, school activity, or weekend snack, making them the day before is convenient.
A Fun Kitchen Project
These homemade fruit snacks are also a good recipe when you want something more interactive than simply opening a package.
Kids can help choose fruit combinations, arrange molds, pick shapes, or sort the finished snacks by color.
Because the hot fruit mixture needs careful handling, an adult should take care of the saucepan and pouring when children are involved.
Once the snacks have chilled, unmolding is the fun part.
Silicone shapes usually peel away easily and make the transformation from fruit purée to gummy snack feel especially satisfying.
Make the Recipe Your Own
Once you understand the technique, homemade fruit snacks become less of a single recipe and more of a template.
Start with flavorful fruit.
Blend it until smooth.
Use neutral juice to support rather than overpower the fruit.
Add enough sweetness to make the snacks taste like a treat.
Use fresh lemon juice to brighten the flavor.
Then add the gelatin slowly and whisk until completely dissolved without boiling the mixture.
From there, you get to decide what the finished snack looks and tastes like.
Pour the mixture into a loaf pan and cut rustic little cubes.
Use silicone molds to make bears or stars.
Make strawberry, peach, and mixed-berry batches and combine them into your own fruit snack assortment.
The recipe only needs a few ingredients and a few minutes at the stove, but changing the fruit gives you an almost endless number of variations.
And unlike a recipe that requires hours of baking or complicated decoration, most of the work here is simply waiting for the refrigerator to do its job.
Once the fruit mixture is firm, cut it into bite-sized pieces, store it in a covered container, and enjoy a colorful homemade snack with real fruit flavor.
Ingredients
- 1 1/2 cupsfruit
- 1/2 cupwhite grape juice or apple juice
- 1 tablespoonfresh lemon juice
- 1/3 cupgranulated sugar
- 3 tablespoonspowdered gelatin
Instructions
- 1
Combine fresh fruit, white grape juice, and lemon juice in blender. Blend on high until smooth. If desired, pass through a mesh strainer to remove seeds.
- 2
Pour puréed fruit into a saucepan and set over medium heat. Add sugar and stir until dissolved.
- 3
Add gelatin slowly while whisking. If added too quickly, gelatin will clump.
- 4
Continue to whisk until mixture is smooth and gelatin has dissolved. Do not let mixture boil.
- 5
Remove from heat. Line a 9x5-inch bread pan with parchment or wax paper and pour mixture in.
- 6
Chill in the fridge for one hour until firm. Remove from the pan and cut with a sharp knife.
- 7
Store fruit snacks at room temperature for up to 2 days or in the fridge for up to 5 days.
FAQs
How long do homemade fruit snacks take to make?
How many fruit snacks does the recipe make?
Can I use frozen strawberries?
Do I have to strain the fruit?
Can I make these without candy molds?
Can I use silicone ice cube molds?
Why did my gelatin clump?
Can I boil the fruit mixture?
Can I make vegan fruit snacks with this recipe?
Can I use honey instead of granulated sugar?
What juice is best?
Can I use water instead?
Do homemade fruit snacks need refrigeration?
Can I double the recipe?
Can I make multiple colors?
Why are my homemade fruit snacks sticky?
Can I coat them in sugar?
Recipe Card
Quick and Easy Homemade Fruit Snacks
Keep it handy for later, send it to someone cooking with you, or open the clean print view.
- Prep
- 5 min
- Serves
- 8
You might also like
Apple Walnut Salad with Balsamic Vinaigrette
A fast and easy Apple Walnut Salad packed with flavor and crunch, perfect for a quick lunch or dinner side.
Sep 1, 2026
Easy Sun-Dried Tomato, Spinach and Quinoa Salad
Make this easy Sun-Dried Tomato, Spinach and Quinoa Salad in under 30 minutes for a quick, healthy meal.
Aug 30, 2026
Quick Roasted Vegetable Medley
Enjoy this quick roasted vegetable medley, perfect for busy weeknights in just 30 minutes!
Aug 29, 2026
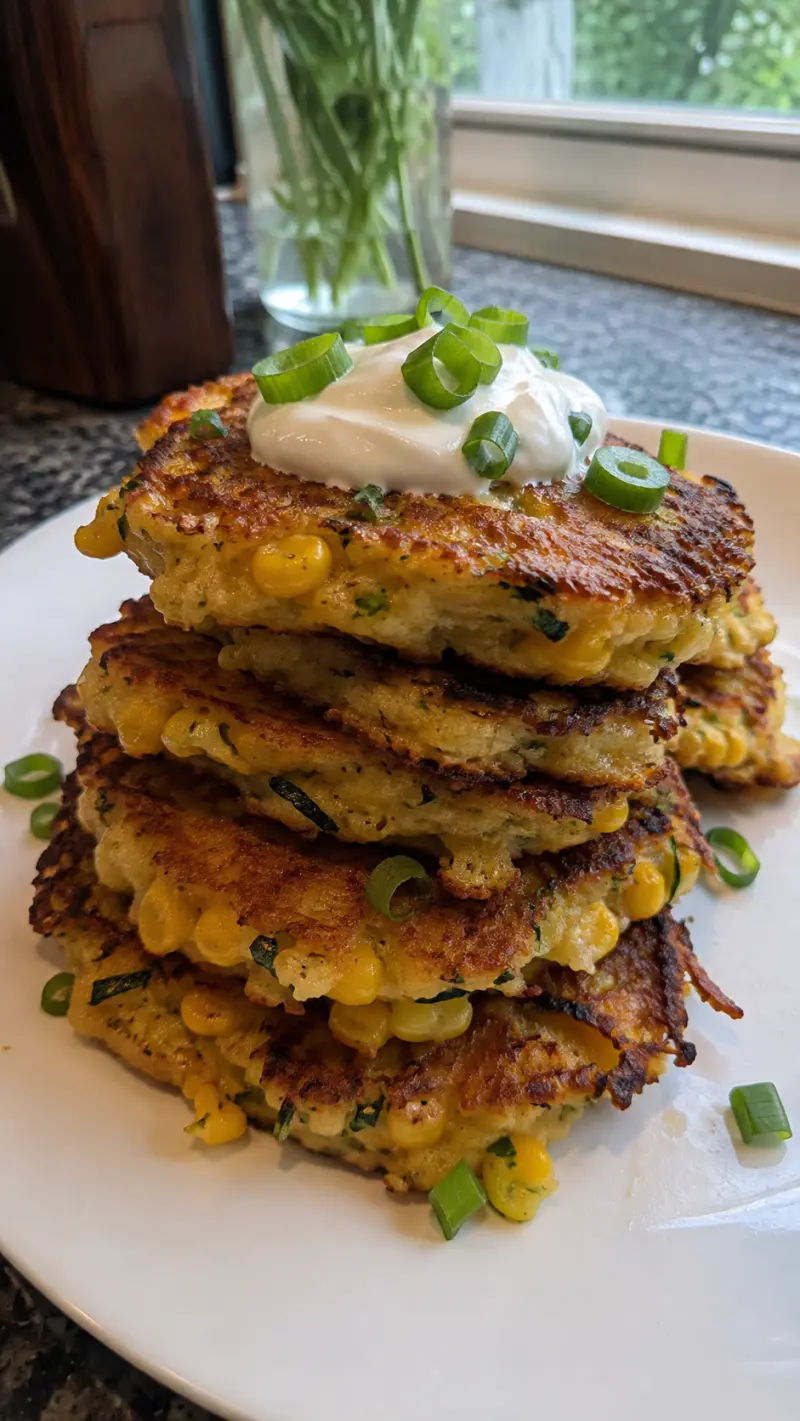
Quick and Easy Zucchini and Corn Fritters
Crispy zucchini and corn fritters that come together in 30 minutes, perfect for a quick meal any night of the week.
Aug 26, 2026
Reviews
Be the first to review this.