I fell for coffee jelly the first time I spooned a chilled cube of glossy coffee against my tongue on a sweltering afternoon. In my kitchen it quickly became the solution for hot-day cravings: bright coffee flavor, a playful wobble, and a sweet cream that cools you down faster than ice water. I love that it looks fancy but takes almost no time and no fuss.
Over the years I’ve tested different gels and coffees and learned the small things that turn ordinary coffee jelly into the version I serve when guests come by. In my experience, the right coffee, a clean boil to activate the gelling agent, and a simple sweet cream make all the difference. The result is a glistening dessert that invites you to dive in with a spoon.
What I enjoy most is how flexible it is: you can keep it classic and simple or riff on it with citrus, spices, or plant-based creams. If you’re after a quick, refreshing dessert that feels thoughtful without demanding oven time, this is the one I reach for every summer.
Below I walk you through everything you need, how I make it reliably clear and wobbly, and the small tricks I use to keep the texture perfect every time.
Why Coffee Jelly Is the Fast, Refreshing Dessert You Need This Summer
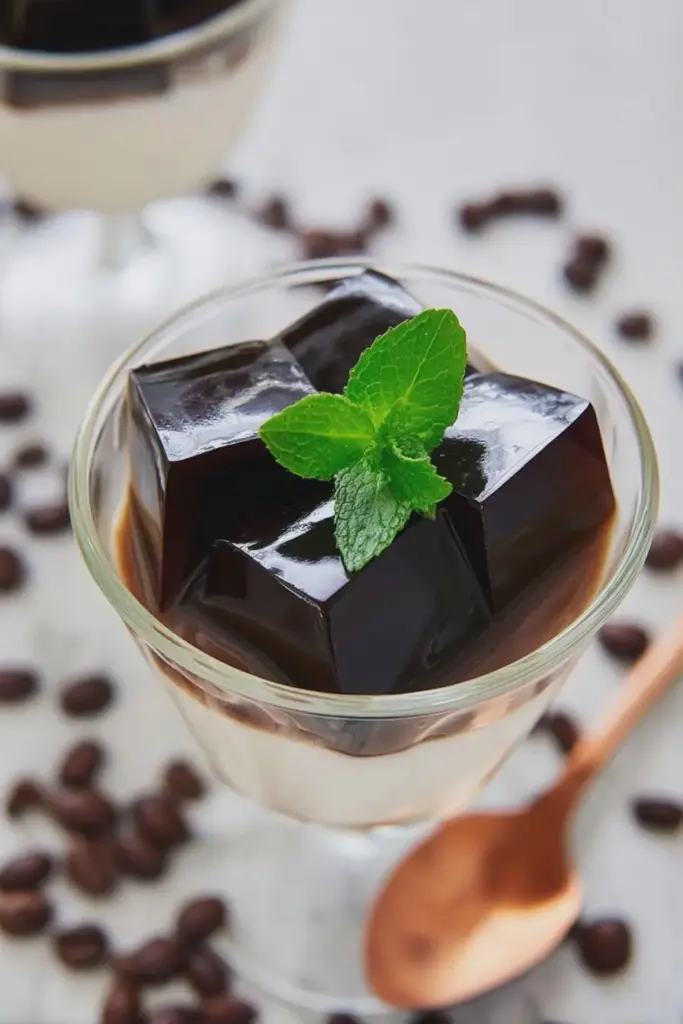
Coffee jelly is the kind of dessert that looks like you spent an afternoon plating but really takes minutes to prepare. The texture is light and springy—a satisfying wobble that glints in the sun when served in a glass. It’s refreshing because it’s chilled, low-effort, and carries that clean, aromatic coffee scent that wakes up the palate on hot days.
It’s also a crowd-pleaser: you can set a tray of cubes and let people spoon in sweet cream or layer it in cups with fruit or biscuits. Because it’s not overly sweet on its own, it pairs well with bright flavors like citrus or berries, and with richer finishes like chocolate shavings or toasted nuts.
Think of coffee jelly as versatile staging for flavor: the coffee delivers aroma and bitterness, the jelly gives you playful texture, and the topping brings the sweetness and creaminess.
Everything You Need for Coffee Jelly
Below I list the essential components and what each one does. I’ll note substitutions where they make the dessert friendlier for different diets, but I don’t include exact quantities here so you can adapt easily.
- Coffee – The backbone of the jelly; use a coffee with a flavor profile you enjoy. Stronger roasts give more roastiness, while medium roasts show brighter notes.
- Agar-agar powder – The setting agent I prefer for a clean, firm jiggle that keeps well when chilled. Works as a vegetarian alternative to gelatin.
- Sugar (or evaporated cane sugar) – Balances the coffee’s bitterness and helps shine the flavor. Swap for a granulated sweetener of your choice for different sweetness profiles.
- Heavy cream – Makes the classic drizzle that contrasts the coffee’s bite. For a non-dairy option, use chilled coconut cream or a thick plant-based cream.
- Sweetened condensed milk – Adds sweetness and a silky mouthfeel to the cream sauce. You can substitute with a vegan condensed milk or a simple syrup mixed into your plant cream.
- Equipment – A small pot for heating, a fine mesh strainer to keep the jelly clear, and a shallow mold or dish to set the jelly.
The Secret to the Perfect Wobble
The wobble comes from gentle technique more than fancy ingredients. Agar needs a full boil to dissolve properly, and then a short, careful cool-down to set into that glossy, springy texture. If you rush cooling or stir too aggressively after boiling, the jelly can trap bubbles or become cloudy.
- Bring the coffee and agar mixture to a steady rolling boil so the agar fully activates; you’ll see it thicken slightly.
- Once boiled, avoid vigorous stirring; gentle swirls are fine. That keeps the jelly clear and minimizes foam.
- Pour through a fine mesh strainer into your mold to catch any undissolved bits or foam for a glass-clear finish.
- Troubleshooting (what I do when the jelly misbehaves) – If the jelly is too soft, I simmer the next batch a bit longer with slightly more agar. If it’s cloudy, I skim foam at the boil and always strain before pouring. If it’s too firm, I reduce the agar a touch and increase the liquid in the next attempt.
Which Coffee Works Best (and Flavor Variations)
Not all coffees are created equal for jelly. I tend to choose coffee that has clear, pleasant aromatics rather than something overly smoky or oily. Espresso or a concentrated brew gives deep flavor in a small volume, while a strong pour-over or French press offers clarity of flavor.
For twists, I like to infuse the coffee with subtle flavors as it heats—vanilla bean, a strip of orange peel, or a pinch of cinnamon—then remove the solids before pouring. You can also layer in flavored syrups after the jelly is set, or fold cubes into milk-based drinks for a playful dessert-beverage hybrid.
Quick Tips for a Smooth, Clear Jelly
- Strain the coffee before and after boiling to remove grounds and any foam.
- Use a shallow mold so the jelly cools evenly and sets reliably.
- Skim off bubbles at the surface during the boil; they’re the main cause of cloudiness.
- Cool to room temperature before refrigerating to prevent condensation forming on the jelly surface.
- Chill the cream sauce separately so it stays thick and pourable when you serve.
How to Make Coffee Jelly (Step-by-Step)
- Combine your brewed coffee with sugar and agar-agar in a small pot, stirring gently to distribute the powder.
- Heat the mixture over medium and bring it to a full rolling boil, stirring occasionally to ensure the agar dissolves completely.
- Remove the pot from the heat, strain the liquid through a fine mesh into a shallow mold, and let it cool to room temperature.
- Cover and refrigerate until fully set; it should have a glossy, firm wobble when ready.
- Whisk your cream and sweetened condensed milk together until smooth and chilled; keep this in the fridge until serving.
- To serve, unmold the jelly (a quick run of a toothpick around the edge helps), cut into cubes, and spoon into glasses. Drizzle with the chilled cream sauce just before eating.
Pro Tip for coffee jelly: Use the Right Agar Temperature and Timing
- I always bring the mixture to a full rolling boil—agar needs that heat to bloom properly. A simmer won’t do the job.
- If you’re using a different brand of agar, test a small batch first: some brands set firmer, so you may need to tweak the amount slightly.
- Don’t rush chilling: let the jelly reach room temperature before refrigerating to avoid condensation, which can dull the surface.
- When reheating a leftover batch to adjust texture, warm it gently and add a small pinch of agar dissolved in hot liquid rather than boiling again for best clarity.
Serving Ideas and Toppings to Brighten the Cup
Pairings and toppings transform simple cubes into a pretty plated dessert. I like to play with contrast—textural, temperature, and flavor—to keep each spoonful interesting.
- Drizzle the sweet cream over cubes right before serving so it sits in ribbons across the jelly.
- Garnish with chocolate shavings, citrus zest, or a sprig of fresh mint for color and aroma.
- Layer coffee jelly with fresh berries or a crumble of shortbread for a parfait-style presentation.
- For a richer take, fold cubes into chilled milk or a coffee cocktail for a playful adult dessert drink.
How to Store, Make-Ahead, and Easy Variations (Vegan, Lower Sugar)
Here’s how I keep coffee jelly tasting fresh and the simple swaps I use for dietary needs.
- Storage – Store set jelly in an airtight container in the refrigerator; it keeps well for up to a week. Keep the cream sauce separate and add it just before serving.
- Make-ahead – You can make the jelly a day ahead and keep it refrigerated. Prepare the cream topping the morning you plan to serve so it stays bright and fresh.
- Variations – For a vegan version, substitute coconut cream for the heavy cream and use a plant-based condensed milk or a sweet syrup mixed into the cream. For lower sugar, reduce the sweetener in the jelly and increase bitter notes by using a bolder coffee or add a splash of unsweetened cocoa for depth.
- Flavor swaps – Infuse the coffee with vanilla, a strip of citrus peel, or a warm spice to give the jelly an aromatic twist.
Frequently Asked Questions
How long does it take to prepare coffee jelly?
Making coffee jelly is quick and easy! It takes about 8 minutes total, including 3 minutes of preparation and 5 minutes of cooking.
Can I use decaf coffee for this recipe?
Yes, you can absolutely use decaffeinated coffee if you prefer to limit your caffeine intake while still enjoying the flavors of coffee jelly!
What’s the best way to serve coffee jelly?
Coffee jelly is delightful when served in glass cups or bowls, topped with a drizzle of sweetened cream or even with fruit for added flavor.
How should I store leftover coffee jelly?
You can store any leftover coffee jelly in an airtight container in the refrigerator, where it will keep well for up to a week.
Are there any vegan adaptations for this recipe?
Yes! You can replace the heavy cream and sweetened condensed milk with coconut cream and a vegan sweetener for a delicious vegan version.

Coffee Jelly
Ingredients
Method
- To make the jelly, put the 55 grams evaporated cane sugar and 4 grams agar-agar powder into a pot, then add the 4 cups coffee. Stir while bringing to a boil.
- When the mixture comes to a rolling boil, remove from heat and pour into an 8 x 8-inch mold. Let cool to room temperature, cover, and refrigerate to fully set.
- To make the sauce, add 1/2 cup heavy cream and 1/4 cup sweetened condensed milk to a bowl and stir until combined. Keep chilled until ready to serve.
- When the coffee jelly has set, unmold it by inverting onto a cutting board. Cut the jelly into bite-sized cubes and serve in glass cups or bowls, drizzled with the sweet cream.