I started making probiotic gummies in my kitchen because I wanted a quick way to add live cultures to my day without reaching for another capsule. I tested batches with different juices, yogurt bases, and gelling agents until the texture and probiotic viability felt right. These became my go-to snack for mornings when I needed something portable, cooling, and nourishing.
What I love about this method is how forgiving it is: you can change the fruit, use whatever yogurt you have on hand, and still end up with a bright, chewy treat that stores well in the fridge. I learned the hard way that temperature control during mixing and setting is the difference between lively probiotics and a batch that loses benefit.
Over the years I’ve refined the small details that matter — letting frozen fruit fully come to room temperature, blooming the gelatin properly, and choosing the right probiotic strains so they survive the short warming step. Make these once and you’ll see how easy it is to fold gut-supporting foods into a busy life without extra fuss.
Below I’ll walk you through what you need, why the ingredients work together, texture tips, vegan and low-sugar swaps, and practical storage notes so you can make your own reliably good probiotic gummies.
Why Probiotic Gummies Are Perfect for Busy Gut Health Routines
Probiotic gummies offer a simple, portable way to add live cultures into your daily routine without changing much else. They work well as a replacement for an on-the-go probiotic capsule when you want food-based cultures as part of a snack or breakfast. The chewy texture and bright fruit flavors make them a practical option to slip into a bag, lunchbox, or a small container for the car.
They’re especially useful when you want to pair probiotics with a little protein — the yogurt base provides that creamy mouthfeel and some satiety. For people focused on gut health, that combination helps deliver beneficial bacteria alongside nutrients that support the gut lining.
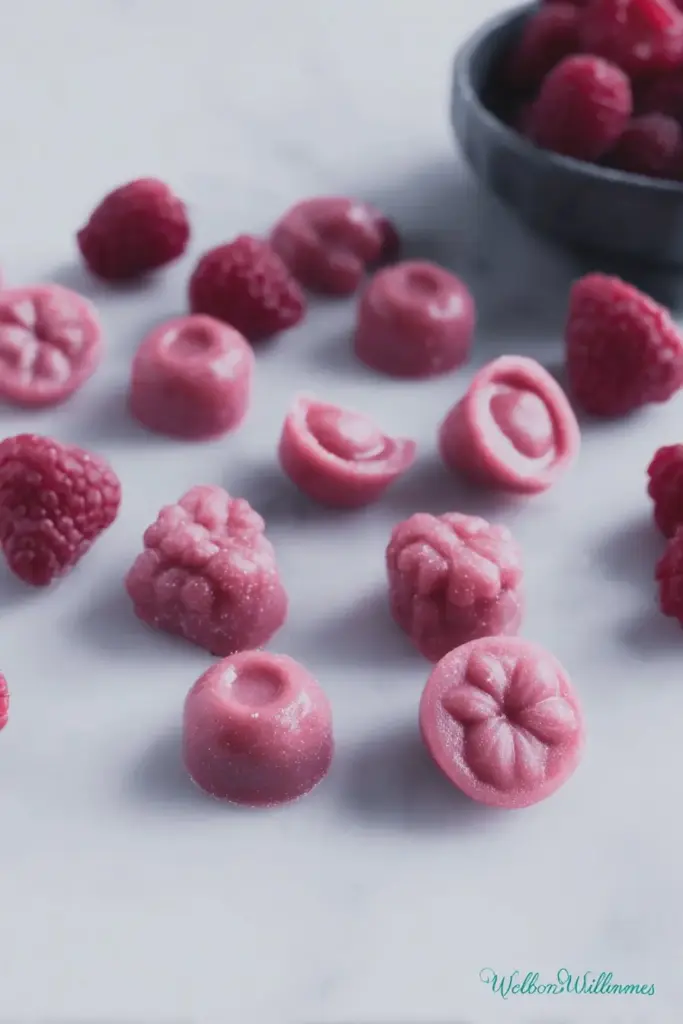
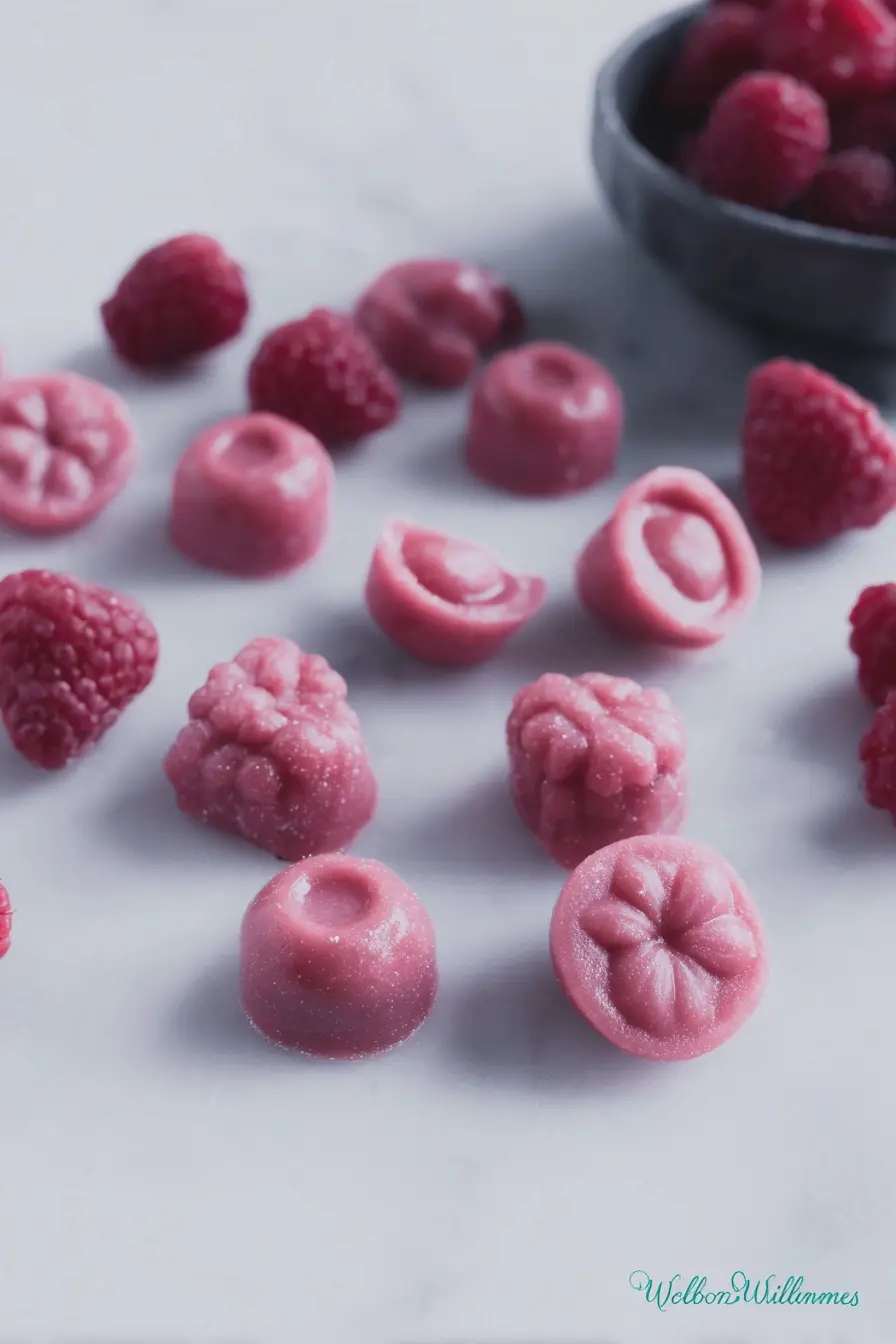
Visualize a tray of small, translucent gummies in jewel-toned reds or purples, a cool scent of berry and citrus when you open the container, and the firm-but-pliable bite that comes from a properly set gel — that’s what makes them so convenient and satisfying in a routine context.
Everything You Need for Probiotic Gummies
High-quality ingredients and a few simple tools make the process smooth. Choose organic produce and juices when possible for cleaner flavor and fewer additives. A handful of flexible tools will cut your time and frustration in half.
- * Fresh or thawed fruit – Adds flavor, color, and fiber; frozen fruit is fine if fully thawed and drained.
- * Plain yogurt or milk kefir – The probiotic carrier and creamy binder; choose full-fat or low-fat according to preference.
- * 100% fruit juice – Sweetness and liquid base; choose lower-sugar options for a lighter treat.
- * Gelatin – Gives chew and body; use high-quality gelatin for the best texture.
- * Natural sweetener (optional) – Honey or citrus juice can balance tartness if needed.
- * Tools – A blender, a small saucepan, a bowl for blooming gelatin, and silicone molds (or a greased dish) to set the gummies.
Why Yogurt + Gelatin Works: The Science Behind the Probiotics
Yogurt and kefir contain live cultures — strains of Lactobacillus and Bifidobacterium are common — that help support microbial diversity in the gut. Gelatin itself is a protein derived from collagen and can provide amino acids that may support the gut lining. When combined, the yogurt provides the live microorganisms and the gelatin creates a stable matrix that helps protect those microbes during short temperature changes and while refrigerated.
Gel-form probiotics are often more stable than some liquid formats because the gel limits oxygen exposure and concentrates the culture in a consistent texture. That said, viability depends on strain, timing, and heat exposure: gentle warming is fine, but prolonged high heat will reduce counts.
In sensory terms, gelatin gives you a firm, slightly springy mouthfeel while the yogurt adds creaminess and a subtle tang — together they balance into a pleasing, snackable gummy.
The Secret to the Perfect Gummy Texture
- Bloom the gelatin properly: sprinkle it over cool liquid and let it sit until it swells; this prevents lumps and creates an even chew.
- Balance liquid-to-gelatin ratio: too little gelatin yields a floppy candy; too much makes it rubbery. Test one small mold to dial in firmness before filling all molds.
- Control temperature: warm the juice just enough to dissolve the gelatin — it should be hot but not boiling. Excessive heat can harm yogurt cultures later when you combine ingredients.
- Mix gently once you add yogurt: high-speed blending after adding live cultures can introduce heat; blend briefly on low to combine textures without warming the mixture too much.
- Chill undisturbed: let the molds set in the refrigerator until fully firm; quick cooling in the freezer can change texture and make them icy rather than gummy.
Low-Sugar & Vegan Swaps That Still Keep the Probiotics Alive
There are sensible ways to reduce sugar or make this recipe plant-based while preserving the probiotic benefits. For lower sugar, use natural zero-calorie sweeteners carefully and choose juices with no added sugar. For vegan versions, agar-agar or pectin can replace gelatin, but they behave differently — agar sets more firmly and can be less pliable, so expect a slightly different bite.
If you’re looking for a treat that won’t derail your health goals, try our healthy carrot cake recipe!
- Low-sugar sweeteners: stevia or erythritol can reduce sugar load; taste and adjust because they vary in sweetness intensity.
- Vegan gelling agents: agar-agar and pectin are good options — note that they require bringing the liquid to a fuller boil to activate, so only add probiotic cultures after the mixture has cooled to avoid killing them.
- Dairy-free probiotic carriers: use plant-based cultured yogurts with live cultures or water-based kefir alternatives — check labels for live strains to ensure probiotic benefit.
How to Make Probiotic Gummies (Step-by-Step)
- Make sure your fruit is fully at room temperature and any thawed fruit is well drained so excess water doesn’t dilute the gel.
- Blend the fruit with your yogurt or kefir on low until smooth; you want a creamy, uniform base without overheating from long blending.
- Pour part of the juice into a bowl and sprinkle the gelatin evenly over the surface; allow it to sit and bloom for several minutes until plumped.
- Warm the remaining juice in a small saucepan until it simmers, then remove from heat and stir in your optional sweetener or citrus for balance.
- Combine the warmed juice with the bloomed gelatin and whisk until the gelatin is fully dissolved and the liquid is smooth and clear.
- Immediately add the warm gelatin mixture to the blender with the fruit-yogurt base and blend briefly on low to combine; avoid long blending to keep the mix cool.
- Pour into silicone molds or a greased glass dish and refrigerate until firm; allow adequate setting time so the texture is consistent.
- Pop gummies from molds or cut from the dish, then store in the fridge in an airtight container.
Pro Tip for Probiotic Gummies: Keep Probiotics Alive — Choose Stable Strains and Avoid High Heat
- I recommend choosing yogurts or kefir with well-documented, stable strains that tolerate mild warmth — look for Lactobacillus rhamnosus or Bifidobacterium lactis on labels, which are commonly used and reasonably heat-tolerant for brief warming steps.
- Aim to combine live cultures into the mixture when it has cooled somewhat: the gelatin solution should be warm, not piping hot, before it meets yogurt or kefir.
- Common mistakes I made early on: adding probiotics to a hot mixture, over-blending to the point the mix warms, or using a gelling method that required boiling after cultures were introduced. Avoid those to preserve viability.
- Store the gummies cold and eat them within a reasonable window so the cultures remain active — refrigeration helps slow decline in live counts.
How to Store, Freeze, and Make-Ahead Probiotic Gummies
Proper storage preserves both texture and probiotic benefit. Refrigerate gummies in an airtight container and use them within about a week for best texture and culture activity. You can freeze portions for longer storage, but freezing changes texture slightly; thaw in the fridge to maintain a better mouthfeel.
For longer prep sessions, portion gummies into single-serving containers so you can grab them easily for meals or snacks. Labeling with the date helps you track freshness.
Learn the best techniques for storing your fruits with our guide on how to freeze peaches, ensuring you have fresh ingredients on hand.
- Refrigeration: use airtight containers and keep them cold — they typically last about a week.
- Freezing: freeze in a flat layer or individual portions; expect a small texture change after thawing.
- Make-ahead tips: set gummies in silicone trays, then pop them out and layer between parchment in a container for quick access.
Variations and Troubleshooting: Common Problems Encountered
Below are practical swaps and quick fixes I use when a batch isn’t cooperating. Generate the “Pro-Tips,” “Troubleshooting,” and “Variations” sections as bulleted lists for high scannability.
For a deliciously convenient snack option, consider making our blueberry cheesecake protein balls.
- Too soft / won’t set: Increase gelatin slightly or reduce excess liquid from very watery fruit; ensure gelatin was allowed to bloom.
- Too rubbery: Use a touch less gelatin and avoid overcooking the gelling liquid.
- Probiotics seem inactive: Check strain stability on the yogurt label and avoid introducing cultures to hot liquid.
- Vegan texture issues: Agar-agar sets differently — dissolve it in fully boiling liquid and allow the mixture to cool before adding cultures; expect a firmer bite.
- Flavor tweaks: Add a squeeze of citrus or a touch of natural sweetener to brighten a dull batch.
Conclusion: These probiotic gummies have become a practical way I support gut health during hectic weeks. With a few quality ingredients, attention to temperature, and the right probiotic source, you can make a tasty, travel-ready snack that supports digestive balance.
Frequently Asked Questions
Can I use frozen berries instead of fresh ones for the probiotic gummies? Absolutely! Frozen berries work great. Just make sure they are completely thawed, drained, and at room temperature before blending.
What if I want to make these gummies vegan? You can easily swap gelatin with agar-agar or pectin to keep the recipe vegan while still enjoying the probiotic benefits!
How should I store the probiotic gummies? Store them in an airtight container in the refrigerator. They should last for about a week. You can also freeze them for longer storage!
Can I use any type of fruit juice in this recipe? Yes! Feel free to use your favorite fruit juice. Just ensure it’s 100% juice for the best flavor and health benefits.
Do I have to add honey for sweetness? No, the honey is optional! You can skip it or replace it with lime juice for a different flavor profile.
Probiotic Gummies
Ingredients
Method
- Make sure the berries are completely thawed and drained. This recipe works best if the berries and yogurt are room temperature.
- Place the berries and yogurt or kefir in a blender and blend until smooth.
- Pour half of the juice into a medium-sized stainless steel bowl or glass baking dish.
- Sprinkle the gelatin over the surface of the juice and allow it to bloom for 5-10 minutes.
- While the gelatin is blooming, pour the other half of the juice into a small saucepan and bring it to a simmer.
- When the juice in the saucepan is heated, remove it from the heat and stir in the honey or lime juice, if using.
- Add the warmed juice to the cool juice with the gelatin and whisk until smooth.
- Immediately pour the juice and gelatin mixture into the blender with the fruit and yogurt.
- Blend on LOW speed until just combined.
- Pour into silicone molds or into a greased glass baking dish and place in the refrigerator until the gelatin has set.
- Serve when cool.