
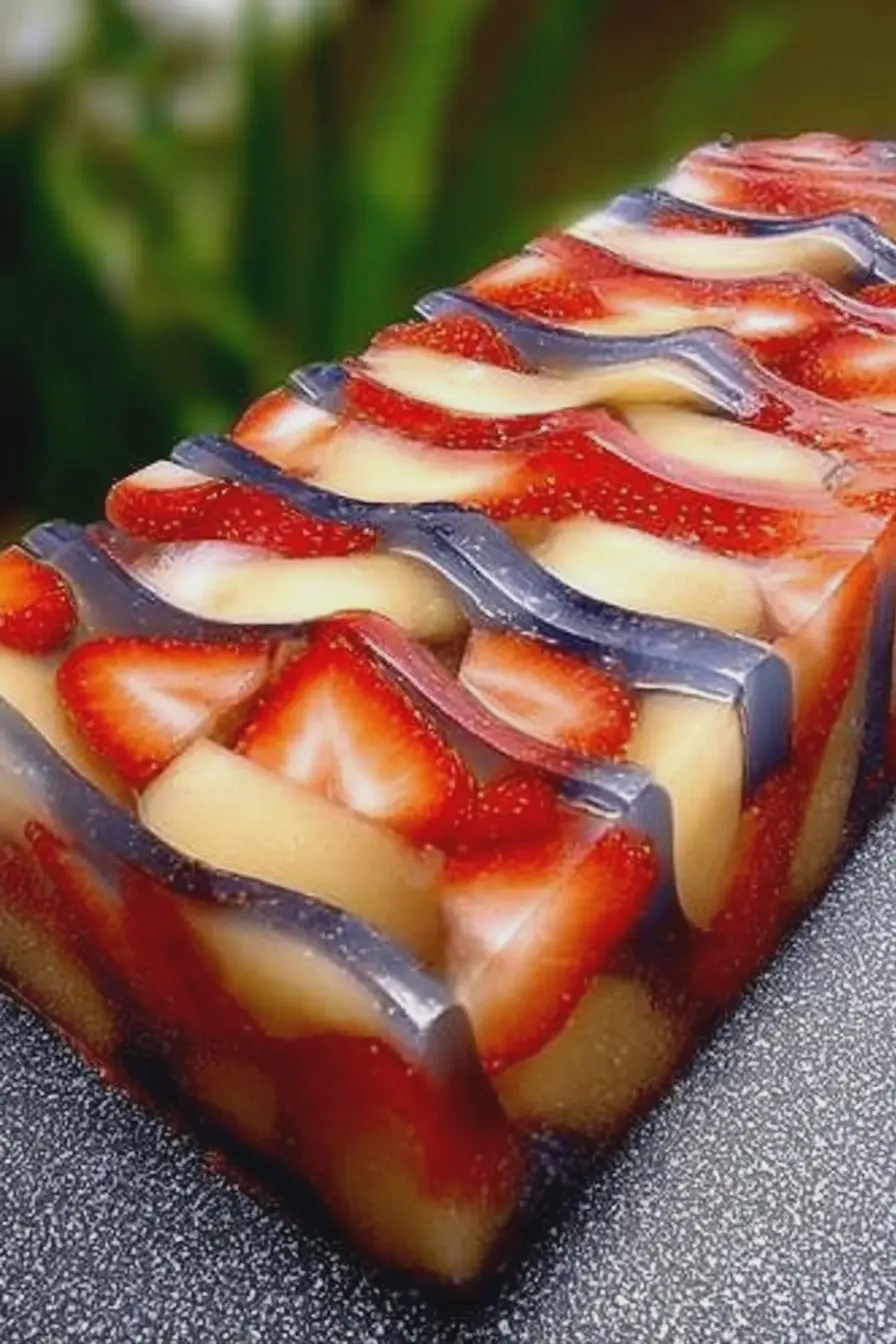
I make this fruit terrine every summer when the berries are at their brightest. In my kitchen it became the centerpiece for backyard parties: a cool, jewel-like slab of fruit that looks special without demanding last-minute fuss. I love how the layers hold their shape and how the flavors stay fresh and light on a hot day.
Over the years I learned a few small tricks that turn a pretty idea into a flawless presentation: the right thickener for a crystal-clear set, how to avoid air bubbles, and the best way to arrange fruit so each slice looks like a little flag. Those are the kind of tweaks that save you time when guests arrive and let you enjoy the party.
What I appreciate most is how forgiving the terrine is. You can prepare it ahead, change the fruit to suit the season or guest dietary needs, and it still looks like you spent hours on it. It stays cool and refreshing — exactly what guests want on a hot summer afternoon.
Below I walk you through everything I use, the technique for a glossy set, arrangement ideas, plant-based thickener choices, troubleshooting, and creative variations to suit your table.
Why This Fruit Terrine Is the Perfect Patriotic, Chilled Centerpiece for Summer Entertaining
This terrine checks all the boxes for summer entertaining: it’s visually striking, makes a large, shareable portion, and is served chilled so it refreshes on a warm day. The red, white and blue palette is naturally festive for holiday tables, but the method works with any seasonal fruit.
Simplicity is its superpower — the active work happens once, and then the refrigerator does the rest. Because it’s made ahead, you free up oven and stovetop space and gain time to focus on finishing touches for your spread. The cool, jellied texture offers a clean contrast to heavier desserts and is especially welcome after savory summer meals.
Everything You Need for Fruit Terrine (Red, White & Blue)
- White grape or other light juice – Provides a clear, mild-flavored liquid so fruit colors pop; choose a juice that won’t overpower the fruit.
- Agar powder (or gelatin) – Thickening agent; agar gives a clear, firm set and is vegan-friendly, while gelatin yields a softer, more wobbly finish.
- Natural sweetener (optional) – Use only if your fruit or juice needs a little lift; a touch of honey, agave, or sugar brightens flavors.
- Strawberries – Bold red color and firm texture for the bottom or base layer.
- Bananas – Creamy, neutral-colored layer; use just-ripe bananas so they hold shape.
- Blueberries – Small, vibrant berries that maintain color and create the top blue layer.
- Tools – A loaf pan or terrine mold for crisp edges, a saucepan for dissolving the thickener, a ladle for gentle pouring, plastic wrap, and a sharp knife for unmolding.
The Secret to a Clear, Jellied Finish
A crystal-clear finish depends on three things: fully dissolving the agar, pouring while the liquid is warm but not boiling onto cold fruit, and minimizing trapped air. Agar sets more firmly and more clearly than gelatin when handled right.
- Sprinkle the agar over room-temperature juice and let it hydrate for a few minutes before heating; this prevents clumping.
- Heat gently and bring to a simmer, stirring constantly until the agar is completely dissolved; you should not see grains.
- Remove from heat and let the liquid cool slightly — warm but not scalding — before pouring over the fruit so you avoid cooking delicate pieces and creating cloudy pockets.
- Pour slowly in a thin stream, using a ladle to help control flow and reduce air bubbles; if bubbles form, skim them off quickly with the back of a spoon.
- Allow the terrine to chill fully in the refrigerator, untouched, until completely set for the glossiest surface.
Fruit Arrangement, Layering, and Color Contrast Techniques
Good arrangement makes every slice look intentional. Think in layers and contrast: bold colors next to pale ones, and varied shapes to create depth. Place the prettiest face of each berry against the mold so it becomes the focal point when inverted.
- Start with the largest fruit pieces pressed gently against the mold wall so they appear whole when sliced.
- Create an even middle layer for balance and a top layer that reads as a clean color block from the platter perspective.
- Use odd-numbered groupings (clusters of 3–5 berries) for a natural, pleasing look.
- Trim or slightly angle banana slices so they nestle together without gaps or air pockets directly under the gel.
For more delightful ideas, check out our tips for stunning fruit arrangement that can elevate your fruit terrine presentation.
Choosing Plant-Based Thickeners: Agar vs. Gelatin
Both thickeners set liquids, but they behave differently. Agar is derived from seaweed, sets firmly at room temperature, and produces a clearer, more brittle gel that holds fruit nicely. Gelatin gives a softer, silkier set and melts more readily in the mouth. Choose agar for a vegan option and long-lasting, stable slices.
- Agar sets more firmly and is ideal for vertical molds where you want clean edges and slices that hold their shape.
- Gelatin yields a softer texture that some prefer for a delicate mouthfeel, but it can be less transparent and less stable in warm rooms.
- When combining with acidic fruit or fresh pineapple/mango/kiwi (which contain enzymes that can prevent gelling), either cook the fruit briefly or use extra agar to compensate.
Learn more about choosing plant-based thickeners to ensure your terrine meets various dietary needs.
How to Make Fruit Terrine (Step-by-Step)
Follow these steps in order so your terrine sets perfectly and your fruit keeps its color and texture.
- Prepare your mold: line a loaf pan with plastic wrap, leaving extra overhang for easy lifting.
- Wash, hull, and slice fruits; place the prettiest sides against the mold wall and arrange layers as desired.
- Hydrate the agar in a small amount of juice, then heat and simmer until fully dissolved, stirring to avoid lumps.
- Stir the remaining juice and any optional sweetener into the dissolved agar, then remove from heat and let cool slightly while stirring occasionally.
- Pour the warm (not hot) agar-juice slowly over the fruit, using a ladle to minimize bubbles and ensure even coverage.
- Cover and refrigerate until completely firm; chill time varies but overnight gives the best, clean slices.
- To unmold, run a thin knife around the edge, warm the outside briefly under hot tap water for a few seconds, then invert onto a platter and peel away the plastic wrap.
Pro Tips for Fruit Terrine: Use Agar Agar for a Vegan, Crystal-Clear Set
- If the gel doesn’t set, you likely undercooked the agar; gently reheat the mixture to dissolve remaining grains and pour again.
- To avoid fruit floating or shifting, press fruit gently into the initial thin layer of gel and chill briefly before adding more liquid.
- Work with cold fruit and slightly cooled agar; pouring very hot liquid will soften delicate fruit and cause clouding.
- Prevent browning of bananas by tossing slices lightly with citrus juice or placing them away from direct exposure to the gel before setting.
- For added aroma, steep a strip of citrus peel or a few herb sprigs in the juice while heating, then remove before pouring.
Unique Flavor Combinations and Variations for Fruit Terrine
If you want to go beyond the classic red-white-blue, try pairing fruits and subtle aromatics for new profiles. These variations hold up well in the terrine format and keep the dessert refreshing.
- Mango + coconut water + lime zest for a tropical, bright slice.
- Kiwi + green grape juice + mint leaves for a fresh, slightly tangy set.
- Peach + chamomile-infused juice + a touch of honey for floral warmth.
- Mixed berry + pomegranate juice + a few basil leaves for a savory-herbal lift.
- If you’re curious about more creative pairings, explore these unique flavor combinations to elevate your fruit terrine.
How to Store, Make-Ahead, and Serve Your Fruit Terrine
This terrine is a true make-ahead star: prepare it the day before your event and keep it chilled until serving. Proper storage preserves texture and freshness.
- Store covered in the refrigerator; a tight seal prevents the gel from absorbing fridge odors and keeps the surface glossy.
- If making more than a day ahead, check fruit texture — very soft fruits can become mushy over multiple days, so reserve the softest fruit for the day of serving.
- To transport, keep the terrine on a flat surface in a cooler with ice packs; unmold at the venue if space or stability is a concern.
- For serving, invert onto a chilled platter, slice with a thin, sharp knife dipped in hot water between cuts for neat slices.
For the best results, read our article on how to store and serve your fruit terrine so you can enjoy it fresh and delicious.
Nutritional Information and Health Benefits
This terrine highlights fresh fruit, which contributes vitamins, fiber, and antioxidants. Using a light, clear juice keeps added sugar low if you skip extra sweeteners. Agar adds negligible calories and provides a plant-based setting agent that’s free of animal products.
Health-conscious swaps: choose a low-sugar or naturally light juice, omit optional sweeteners, and select higher-fiber fruits to improve satiety. Remember that very ripe fruit is sweeter and may reduce the need for added sweetener.
Frequently Asked Questions
What fruits can I use in my fruit terrine?
You can use a variety of fruits such as strawberries, bananas, blueberries, and even tropical fruits like mango or kiwi for a twist. Just make sure they are fresh and ripe!
Can I make this fruit terrine vegan?
Absolutely! Just replace the gelatin with agar powder, which is a fantastic plant-based thickener that will give you a crystal-clear set.
How long does the fruit terrine need to chill?
It should chill in the refrigerator for at least a few hours until it’s completely set. For best results, overnight chilling works wonders!
What’s the best way to serve the fruit terrine?
To serve, run a knife around the edges and invert it onto a platter. You can garnish it with additional fresh fruits or mint for added flair!
Can I store leftover fruit terrine?
Yes, you can store leftover fruit terrine in the refrigerator, covered with plastic wrap, for up to 3 days. Just make sure it stays sealed to maintain freshness!
Fruit Terrine (Red White & Blue!)
Ingredients
Method
- Put one cup of the juice in a saucepan, and sprinkle the agar over it; allow it to soften for a few minutes. Heat on medium-high, stirring, until the agar is completely dissolved and the juice begins to boil.
- Stir in the remaining juice and the agave (optional) and remove from heat. Allow the agar mixture to cool slightly while you prepare the fruit. Be sure to stir the juice every minute or so.
- Remove the stems from the strawberries and slice them lengthwise. Place them on the bottom of a loaf pan, prettiest sides down. Slice the bananas and place them on top of the strawberries. Put the blueberries in an even layer on top of the bananas.
- Gently pour the juice mixture evenly over the berries. Working quickly, distribute the mixture evenly in pan.
- Cover with plastic wrap and refrigerate until completely chilled and jelled.
- To serve: Carefully run a knife along the edge of the mold (you may want to lower the pan into a large bowl or sink full of hot tap water for a few seconds to free the mold) Invert over a platter.