
I started making fruit gummies because my kids wanted gummy snacks but I did not want the mystery ingredients that come in store-bought packs. Over the years I tested different fruits, tried more and less gelatin, and learned how small changes—like warming gently instead of boiling—make the texture just right. I’ll admit: my first batch turned out rubbery. That taught me to pay attention to temperature and timing.
Making these has become a small ritual in my kitchen. I let my kids choose the molds, and we talk through the colors and smells as the purée warms. The simple aroma of fresh fruit and a touch of citrus always gets them excited, and they love showing off the shapes in their lunchboxes.
I like that these gummies are easy to customize for picky eaters and dietary needs. You can tweak sweetness, swap the sweetener, or even try agar for a vegan version. Small changes in the method will change the firmness, and I’ll walk you through the adjustments that worked for me.
If you want a playful way to present these, they pair nicely with themed desserts for parties or kid-friendly treats. For a fun twist at a party, try incorporating these gummies into a kids dirt dessert with gummy worms for a giggle—here’s a playful example:
This Kids Dirt Dessert with Gummy Worms is a fun and creative way to get kids excited about healthy snacks.
Why These Homemade Fruit Gummies Are Perfect for Busy Parents and Picky Eaters
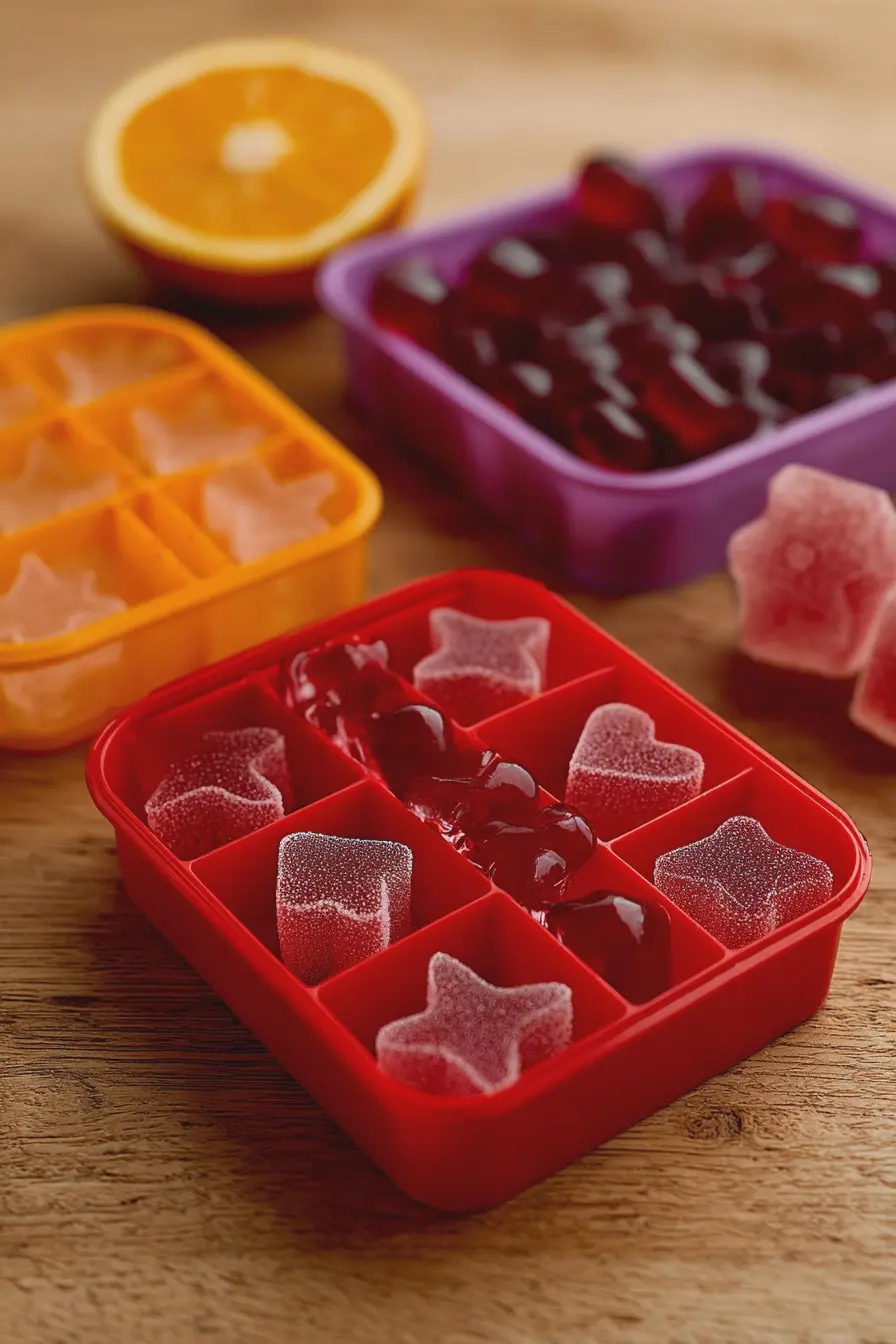
These gummies are designed with parents in mind: they’re fast, flexible, and familiar. You can match flavors to what your child already likes, which helps get picky eaters on board. Warm fruit purée smells sweet and fresh as you stir; bright colors from berries and mangoes make the trays look like a mini rainbow. Because you control the ingredients, you can reduce added sugar and highlight real fruit nutrition.
They’re also a practical snack—prep takes minutes and most of the time is hands-off chilling. I find making a small batch after dinner fits easily into a busy routine; the kids can help with pouring into molds and choosing shapes, which makes them more likely to eat the final product.
Use these gummies to introduce new flavors slowly: pair a familiar fruit with a new one so kids recognize at least part of the taste. Presentation matters—cutting shapes or using colorful molds makes the snack feel special without extra work.
Everything You Need for Homemade Fruit Gummies
Below are the ingredients and tools I reach for every time. The list focuses on purpose and substitutions so you can adapt based on what you have.
- Fruit purée – Provides flavor, color, and natural sweetness; you can blend fresh or use thawed frozen fruit.
- Natural sweetener (honey or maple) – Balances tart fruits; swap for a low-carb sweetener if you need keto-friendly gummies.
- Grass-fed gelatin – Gives gummies their bounce and chew; avoid using plain collagen if you want a true gummy texture.
- Lemon juice – Brightens flavor and helps preserve color; vitamin C powder can be used for extra preservation if desired.
- Pinch of salt – Enhances fruit flavor in small amounts.
- Silicone molds – Make removal simple and are kid-friendly; fun shapes increase appeal.
- Small saucepan and whisk – A wide, shallow pan helps heat gently and a whisk keeps the gelatin lump-free.
- Fine-mesh strainer (optional) – Use this if you prefer very smooth gummies without seeds or pulp.
How to Make Homemade Fruit Gummies (Step-by-Step)
- Warm the fruit purée and your chosen sweetener in a small saucepan over low heat. You want it to be warm and fragrant, not boiling.
- Sprinkle the gelatin evenly across the surface while whisking constantly so it hydrates without forming lumps.
- Keep whisking over low heat until the gelatin is fully dissolved and the mixture is smooth and glossy.
- Stir in lemon juice and any optional additions like a pinch of salt or vitamin C powder to help preserve color.
- Pour the mixture into silicone molds or a parchment-lined dish while it’s still fluid; working quickly helps prevent a skin from forming.
- Refrigerate until set—typically about an hour or two. When firm, pop the gummies from the molds and store in an airtight container in the fridge.
The Secret to the Perfect Texture: Getting gummies firm but tender
Texture comes down to gelatin amount and cooling. More gelatin means firmer gummies; less yields a softer chew. Cooling slowly in the fridge lets the gelatin network form evenly, producing a tender, bouncy bite rather than something brittle or rubbery.
- If gummies are too soft: I usually reheat the mixture gently, whisk in a little more dissolved gelatin, and re-pour into molds. That extra step saved several batches for me.
- If gummies are too stiff or rubbery: Try reducing the gelatin slightly next time and shorten the chilling time by checking at the earlier mark.
- If you see a sticky surface: Let them sit at room temperature for a few minutes, then dust lightly with a tiny amount of cornstarch or powdered sugar if needed for handling.
- If they won’t release from the mold: I put the molds in the freezer for 5–10 minutes; the slight chill firms the gummies and makes removal much easier.
Why Temperature Matters When Working with Gelatin
Gelatin is sensitive to heat: boiling can break down the proteins that give gummies structure, resulting in a weaker set. That’s why you heat gently—aim for warm enough to dissolve gelatin but not so hot that you see simmering. You can feel the difference: a warm, slightly steamy saucepan versus a bubbling one.
Room temperature ingredients help prevent shocks that cause clumping. After you combine everything, chilling in the refrigerator lets the gelatin form its network gradually. Rapid cooling (like placing molds in the freezer) can work to speed things up, but it may change texture slightly—so use it only when you need a quick set.
Which Fruits Give the Best Flavor and Nutrients for Kids
Different fruits bring different vitamins and textures. I recommend choosing a base fruit your child already likes and experimenting with small additions for variety. Here are good options and what they offer:
- Strawberries – Sweet, bright, and high in vitamin C; they make a vivid red color that kids find appealing.
- Blueberries – Mildly sweet with antioxidants; they make a pretty purple-blue hue and mix well with other berries.
- Mango – Tropical, naturally sweet, and rich in vitamin A and C; it yields a silky purée that sets into glossy gummies.
- Peaches – Gentle sweetness and a soft flavor that pairs well with vanilla or cinnamon for variety.
- Apples and pears – Subtler flavor profiles; they’re great for lower-sugar gummies and work well blended with bolder fruits.
- Banana – Creamy texture and potassium; best used mixed with another fruit to avoid a heavy texture.
If you want to make a playful dessert around fruit, try pairing these gummies with a larger themed treat. For example, fruity flavors like pineapple can be highlighted in a show-stopping dessert—here’s a related inspiration:
Learn more about how fruits like pineapple are not just tasty but also nutritious by checking out our Creamy Pineapple Pecan Cake.
Pro Tip for Homemade Fruit Gummies: Shelf Life, Safety & Packing for Lunchboxes
- Storage timeframe – Keep gummies in an airtight container in the fridge and use within about ten days for best flavor and texture.
- Allergy safety – Label batches with the fruit and any sweeteners used; avoid cross-contamination if you prepare nut-containing items in the same area.
- Lunchbox packing – Place gummies in a small silicone cup or reusable silicone bag to keep them separate from sandwiches and prevent squishing.
- Portion control – Use fun-shaped molds to give a satisfying visual portion without overdoing sugar or calories.
- Meal prep pairing – These gummies work well as a sweet finish to a lunchbox. For other homemade treat ideas to pair with, check out this recipe inspiration:
For more ideas on delicious homemade treats, check out our Homemade Cinnabon Cinnamon Rolls that pair perfectly with these fruit gummies.
How to Store Homemade Fruit Gummies and Easy Variations to Try
Proper storage keeps gummies fresh and maintains texture. I store small batches in a single layer separated with parchment or in a roomy airtight container so they don’t stick together. If you’ve added sugar coatings or powdered vitamin C, store them in a cool spot of the fridge away from strong-smelling foods.
- Refrigerator storage – Airtight container in the fridge for up to ten days; separate layers with parchment if stacking.
- Freezing – You can freeze gummies briefly, but thawing can change texture—freeze only if you need long-term storage and accept a slightly softer result.
- Keto variation – Use a low-carb sweetener and a tart fruit base like lemon or a small amount of raspberry to keep carbs down.
- Vegan option – Substitute gelatin with agar-agar and follow package instructions for setting; note the texture will be a little different (firmer and less chewy).
- Fruit combo ideas – Strawberry-mango, blueberry-lemon, peach-vanilla, or mixed berry with a splash of apple make bright, kid-friendly flavors.
- Creative add-ins – Tiny bits of freeze-dried fruit folded into the mixture after it cools slightly add fun flecks and concentrated flavor.
- Kitchen multipurpose tip – These gummies are as versatile as doughs you keep on hand; for example, consider how other homemade staples fit in your routine:
Just like our Easy Pizza Dough Recipe with Yeast, these gummies can be a versatile treat in your kitchen.
Making fruit gummies at home is one of those small projects that rewards patience with real, wholesome results. I hope the tips I’ve learned save you time and help you create a snack your kids will actually eat without fuss.
Frequently Asked Questions
Can I use fresh fruit instead of fruit purée?
Absolutely! You can blend fresh fruits to make your own purée. Just remember to strain it if you want a smoother texture.
How can I make my gummies vegan?
You can substitute gelatin with agar-agar, which is a plant-based thickener. Follow the package instructions for the correct ratios.
How long do homemade fruit gummies last?
These gummies can last up to 10 days when stored in an airtight container in the fridge. Enjoy them while they’re fresh!
What types of fruit work best for gummies?
Fruits like berries, mangoes, and peaches are great choices for flavor. Try to use a combination for a variety of taste and nutrients!
Can I reduce the sweetness in the recipe?
Definitely! You can adjust the amount of honey or maple syrup according to your taste preferences or omit it for a more tart flavor.
Homemade Fruit Gummies
Ingredients
Method
- In a small saucepan, heat the fruit purée and sweetener over low heat until just warm—not boiling.
- Sprinkle gelatin evenly over the surface while whisking constantly until fully dissolved and smooth.
- Stir in lemon juice and any optional additions.
- Pour into silicone molds or a parchment-lined baking dish. Refrigerate for 1–2 hours until set.
- Remove from molds and store in an airtight container in the fridge for up to 10 days.