I’ve been making these mini chocolate tarts for years — they’re the sort of small, indulgent dessert I pull out when I want something pretty on the table without fussing over a big cake. The first time I tested this recipe I pressed that flaky shortcrust into a muffin tin and laughed at how easily it worked; the pastry cradled the filling like a tiny chocolate boat. The smell of baked butter and chocolate wafting through the kitchen makes everyone slow down and notice. This post walks you through everything I learned making and re-making these, from the moment the dough feels crumbly in your fingers to the way the ganache settles glossy and thick into each shell.
In this guide you’ll get the full recipe — a tender shortcrust pastry filled with a simple chocolate ganache — plus troubleshooting tips, customization ideas, and storage advice so your tarts look and taste great when you serve them. Expect a yield of about 18 mini tarts and a hands-on time that’s mostly chilling and waiting (always my favorite kind of recipe).
Ingredients and Equipment Needed
Below I’ll talk through the main ingredients and why I choose them, then list the basic equipment that really helps get consistent results. The ingredient notes are conversational — later in the step-by-step you’ll find the precise measurements and timings.
- Unsalted butter – gives the shortcrust its rich, tender texture; using unsalted lets you control the saltiness.
- Powdered sugar – blends into the butter for a smooth, melt-in-your-mouth shell; it also helps the dough stay tender.
- Egg – binds the dough and adds a little richness; room temperature eggs incorporate more easily.
- All-purpose flour – the backbone of the pastry; you can substitute a gluten-free blend if needed (see variations).
- Salt – a pinch brightens the chocolate and balances the sweetness.
- Dark or semi-sweet chocolate – makes the ganache glossy and intense; different chocolates change the final flavor, so choose one you like to eat by the spoonful.
- Heavy cream – creates the silky ganache; higher fat gives a richer mouthfeel.
- Whipping cream + powdered sugar + vanilla – for a light whipped topping if you want contrast in texture.
- Fresh fruit – strawberries or berries add bright acidity and a fresh pop against the chocolate.
- Flaky salt – optional, but a tiny sprinkle on top wakes up the chocolate and adds a pleasant crunch.
Equipment that makes this simple and repeatable:
- Muffin pan (standard size) – I use mine as tartlet molds; it’s faster than individual tart pans.
- Rolling pin – for rolling the dough to an even thickness.
- Round scalloped cookie cutter – for neat rounds that fit the pan wells.
- Baking weights or uncooked rice – to blind-bake without puffing up the crust.
- Mixing bowls and an electric mixer – for creaming butter and for whipping cream.
- Heatproof bowl and whisk – to make the ganache.
- Piping bags – helpful for filling shells and piping whipped cream, though a spoon works fine in a pinch.
Step-by-Step Instructions for Making Mini Chocolate Tarts
I’m going to walk through the full recipe exactly as I make it. I always keep an eye on visual cues — color, gloss, how the dough behaves — because those tell you more than a clock sometimes.
- Prep the dry mix: In a medium bowl stir together the flour and salt, then set aside. The flour should look slightly chalky and evenly mixed — no pockets of salt.
- Cream the butter and sugar: In a large mixing bowl beat the softened butter until creamy, then add powdered sugar and start on low so it doesn’t puff sugar into the air. Increase to medium until the mixture looks light and fluffy — this takes a couple of minutes. You’ll notice a pale, satiny texture; that tells you the air is incorporated and your crust will be delicate.
- Add the egg: Beat the egg in until it’s fully combined. If the mix looks like it’s separating or curdling a little, a tablespoon of flour will bring it back — it just needs to be homogeneous before adding the rest.
- Bring in the flour: Add the flour mixture on low speed; the dough will come together into a soft, crumbly mass. It’s supposed to be a bit shaggy — if it looks wet or sticky you’ve added too much egg or your butter was too soft. Chill will fix that.
- Form and chill: Turn the dough onto plastic wrap, press into a flattened disc, wrap tightly, and chill for at least 2 hours or overnight. This step is non-negotiable: chilled dough rolls more cleanly, shrinks less in the oven, and keeps the crust tender.
- Roll and cut: On a lightly floured surface roll the dough to about 1/8-inch thick. Use a round scalloped cutter to punch out rounds. If the dough cracks at the edges, it’s too cold — let it sit 5 minutes; cracks patch easily with a bit of excess dough.
- Mold into the muffin pan: Place a dough round over each well and gently press with your knuckle until it slips down and lines the well. Patch tears with scraps; you don’t need perfection here. Chill the filled pan for about 30 minutes while the oven preheats to 350°F. The extra chill helps the shells keep their shape and prevents excessive shrinking.
- Blind-bake: Before baking, line each shell with a muffin liner and fill with baking weights or uncooked rice. Bake 18–20 minutes, or until the edges are golden brown and you can smell a toasty, buttery aroma. The color cue is important — underbaked shells taste pasty; overbaked ones get too crumbly.
- Cool the shells: Remove the liners and let the shells cool in the pan for 5 minutes, then transfer to a wire rack to cool completely. If you try to fill them warm, the ganache will run thin and not set evenly.
- Make the ganache: Put the chopped chocolate in a heatproof bowl. Heat the heavy cream until small bubbles form around the edge and it’s just barely simmering — don’t let it boil. Pour over the chocolate, let it sit 3 minutes, then stir until glossy and smooth. If you end up with streaks or the ganache looks split, gently warm the bowl over a pot of simmering water and whisk until smooth.
- Thicken and fill: Let the ganache cool slightly until thickened but still pourable. Transfer to a piping bag and fill each tart until about three-quarters full. A note: ganache continues to thicken as it cools — if it becomes too stiff, microwave in 5–8 second bursts and stir.
- Whip the cream: In a chilled bowl beat heavy cream with powdered sugar and vanilla to firm peaks. Pipe a dollop of whipped cream on some tarts; on others I skip the cream and top with fruit or flaky salt for variety.
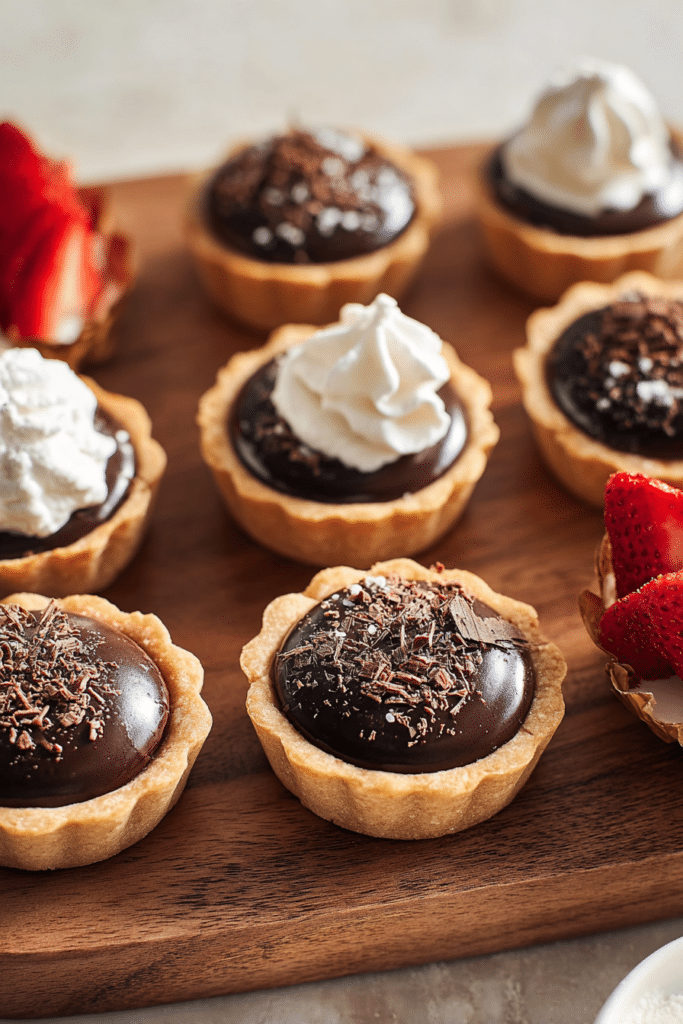
- Finish and serve: Top as desired — fresh strawberries on a few, a dusting of cocoa on others, and a tiny flake of salt for contrast. The contrast of glossy ganache, tender pastry, and bright fruit is what sells these every time.
What can go wrong and how to fix it: If the crust shrinks badly, the dough was too warm — next time chill longer and avoid overworking. If the ganache won’t set, either the chocolate-to-cream ratio is off or the filling was poured into warm shells; cool the shells and allow the ganache to firm in the fridge. If your ganache splits (looks grainy), warm gently and whisk to bring it back together — chilling while it’s split will lock in the texture, so warm it first.
Tips for Customizing and Decorating
One of my favorite things about these tarts is how little changes produce totally different moods — a hint of espresso makes them adult and sophisticated, while peppermint turns them festive. Below are ideas I actually test in my kitchen, and what to watch for when you try them.
Try adding a fun twist to your mini chocolate tarts by serving them alongside chocolate covered banana pops for a delightful treat.
- Espresso or coffee – dissolve a small spoonful of instant espresso in the hot cream before pouring it over the chocolate for a mocha depth. Be careful: too much coffee masks the chocolate.
- Peppermint – a drop or two of peppermint extract in the whipped cream is enough. Avoid overdoing extracts; they concentrate quickly.
- Citrus zest – orange or lemon zest stirred into the ganache brightens the richness. Zest finely to avoid bitter pith.
- Crunchy toppings – toasted hazelnuts, chopped pistachios, or a shard of praline add texture contrast. Toast nuts until fragrant and let them cool completely before adding to avoid softening the ganache.
- Caramel – a drizzle of salted caramel on top creates a lovely salty-sweet balance. Drizzle after the ganache has set a bit so the caramel sits prettily on top.
- Edible gold leaf or cocoa dust – for a party, a tiny brush of gold leaf or a dusting of fine cocoa powder makes each tart look bakery-chic.
- Holiday themes – top with crushed candy canes for winter, fresh edible flowers in spring, or a candied orange slice for autumn gatherings.
Healthy Variations of Mini Chocolate Tarts
If you want to lighten these up or adapt them for dietary needs, I’ve tested a few swaps that work well without turning the tarts into something unrecognizable.
If you’re interested in exploring other tart recipes, check out our mini lemon meringue tarts, which are both delicious and refreshing.
- Nut-based crust – replace part or all of the flour with finely ground almonds or hazelnuts for gluten-free and slightly lower-carb shells. The texture is more crumbly and nutty; press firmly into the wells.
- Avocado-chocolate ganache – blend ripe avocado with cocoa powder and a natural sweetener for a dairy-free, lower-sugar filling. The mouthfeel will be softer and less glossy than cream-based ganache, but it’s rich and satisfying.
- Dairy-free cream – full-fat coconut cream works well for ganache, though it adds a faint coconut note. Chill the canned coconut cream overnight and use just the thick part.
- Alternative sweeteners – swap powdered sugar in the whipped cream for a powdered erythritol blend, or use maple syrup in the ganache (reduce cream slightly). Expect subtle differences in set and sweetness perception.
- Lower-fat cream – half-and-half can replace heavy cream for a lighter ganache, but it won’t be as firm when set — chill the filled tarts longer before serving.
Serving Suggestions and Pairings
These mini tarts are small but convincing — they pair well with sharp, acidic flavors and rounded beverages that complement chocolate’s bitterness.
For a savory complement to your desserts, serve your mini chocolate tarts alongside caramelized onion and mushroom Gruyere pasta.
- Fruits – fresh raspberries, strawberries, or orange segments add acidity to cut the richness. I like placing a halved strawberry atop a piped swirl of cream; the color contrast is irresistible.
- Sauces – a raspberry coulis spooned onto the plate provides a bright, tart counterpoint and looks restaurant-ready.
- Drinks – pair with espresso, a fortified wine like tawny port, or a nutty Amaretto. For non-alcoholic pairings, strong brewed coffee or a chai latte pairs nicely with the spice of chocolate.
- Cheese – a slice of mild, creamy cheese like mascarpone served alongside provides a lovely textural contrast at dessert tables.
Storage Tips for Mini Tarts
Leftovers are common here — these tarts keep well but they do change texture if stored incorrectly. Here’s what I do so they stay as close to freshly made as possible.
- Fridge – store filled tarts in an airtight container in the refrigerator for up to 3 days. If topped with whipped cream, consume within 24–48 hours for best texture.
- Freezing – you can freeze the baked shells for up to a month. Wrap them well and store in an airtight container. Fill with ganache after thawing to avoid soggy shells. Filled and frozen tarts can be kept for about a month; thaw overnight in the fridge.
- Preventing sogginess – to prevent soggy bottoms, bake shells until golden and cool completely. For make-ahead party prep, bake shells and store them dry; fill the day of serving.
- Refreshing before serving – if the ganache dulls in the fridge, let tarts come to room temperature for 20–30 minutes to restore silkiness. A quick, gentle brush of warmed chocolate can add back shine if necessary.
Conclusion and Final Thoughts
These mini chocolate tarts are reliably impressive but not fussy. Once you get the hang of the dough and the ganache, you’ll find yourself customizing them for holidays, weeknight treats, or when friends drop by unexpectedly. They’re small, but the combination of a crisp, buttery shell and a thick, glossy filling makes each bite feel luxurious. I always keep extra tart shells in the freezer — they’re a tiny shortcut to a finished dessert that feels like effort.
Delight your guests with a combination of mini chocolate tarts and homemade chocolate turtles for a truly indulgent dessert experience.
FAQ
Can I use a different type of chocolate for the filling?
Absolutely! You can use dark, milk, or even white chocolate. Each will give your tarts a unique flavor, so feel free to experiment!
How do I store leftover mini chocolate tarts?
Store leftover tarts in an airtight container in the fridge for up to 3 days. If you want to keep them longer, you can freeze them for up to a month. Just make sure to cover them well to prevent freezer burn!
Can I make the tart crust ahead of time?
Yes, you can make the tart crust ahead of time! Prepare the dough, shape it into a disc, wrap it in plastic, and chill it in the fridge for up to 2 days or freeze it for later use.
What can I use instead of heavy cream for a lighter option?
You can use half-and-half or a light non-dairy creamer if you want a lower-fat alternative. Just keep in mind that the texture of the ganache may be slightly different.
Are there any gluten-free options for this recipe?
Yes, you can substitute the all-purpose flour with a gluten-free flour blend. Just make sure it’s suitable for baking!
If you try these, tell me what twist you made — did you add espresso, swap to a nut crust, or sprinkle flaky salt? I test each variation at least twice before I serve it to guests, and I’m happy to help troubleshoot if something in your batch didn’t behave as expected. Happy baking!
Recipe yield reference: this batch makes about 18 mini tarts. Estimated nutrition per tart: around 367 kcal with approximately 25 g fat, 31 g carbs, and 4 g protein (values are estimates and will vary by ingredients).

Mini Chocolate Tarts
Ingredients
Equipment
Method
- In a medium bowl, stir together flour and salt. Set aside.
- In a large mixing bowl, use an electric mixer to beat the softened butter on medium speed until creamy. Add the powdered sugar and beat until fluffy.
- Add the egg and beat until combined.
- Add the flour mixture and beat until it forms a soft, crumbly dough.
- Wrap the dough in plastic wrap and chill in the fridge for at least 2 hours or overnight.
- On a floured surface, roll out the dough to about 1/8 thick. Cut rounds out of the dough.
- Place dough rounds in muffin pan openings and fill them with liners and weights. Bake for 18-20 minutes.
- Remove liners and let cool before filling with ganache.
- Prepare ganache by heating heavy cream and mixing it with chopped chocolate.
- Pipe ganache into each tart shell until about 3/4 full.
- Top with whipped cream and fresh fruits or flaky salt.