I still remember the first time I baked a full rainbow in my oven: the kitchen smelled like warm vanilla and sugar, my kids squealed at every spoonful of neon batter, and the finished cake looked like a confetti parade sliced into squares. I made a lot of mistakes that day (too much swirling, a sad pale purple), but those flubs taught me the little moves that make this sheet cake reliably vibrant and tender.
Over the years I’ve pared the process down so busy parents can make it between soccer practice pickups and bath time. The technique I rely on gives a tight, velvety crumb that holds up to frosting and enthusiastic little hands. The result looks spectacular without needing piping skills or complicated layers.
I love that this cake is playful enough to thrill kids and straightforward enough for grown-ups to enjoy the process. You’ll get bursts of color with every slice, a mildly tangy cream cheese frosting that balances the sweetness, and plenty of room for creative decorations that match any party theme.
Below I break the whole thing down — what to gather, how to mix and swirl (without turning the batter into brown), and how to involve your kids safely so baking becomes part of the celebration instead of an extra chore.
Why this Rainbow Sheet Cake is Perfect for Busy Parents and Kids’ Parties
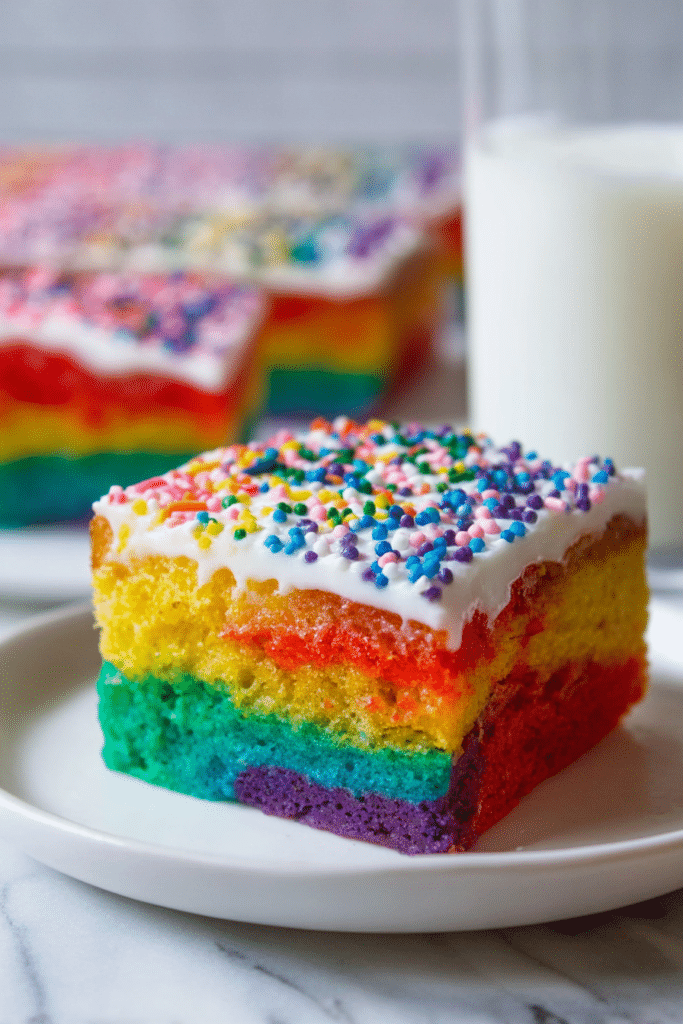
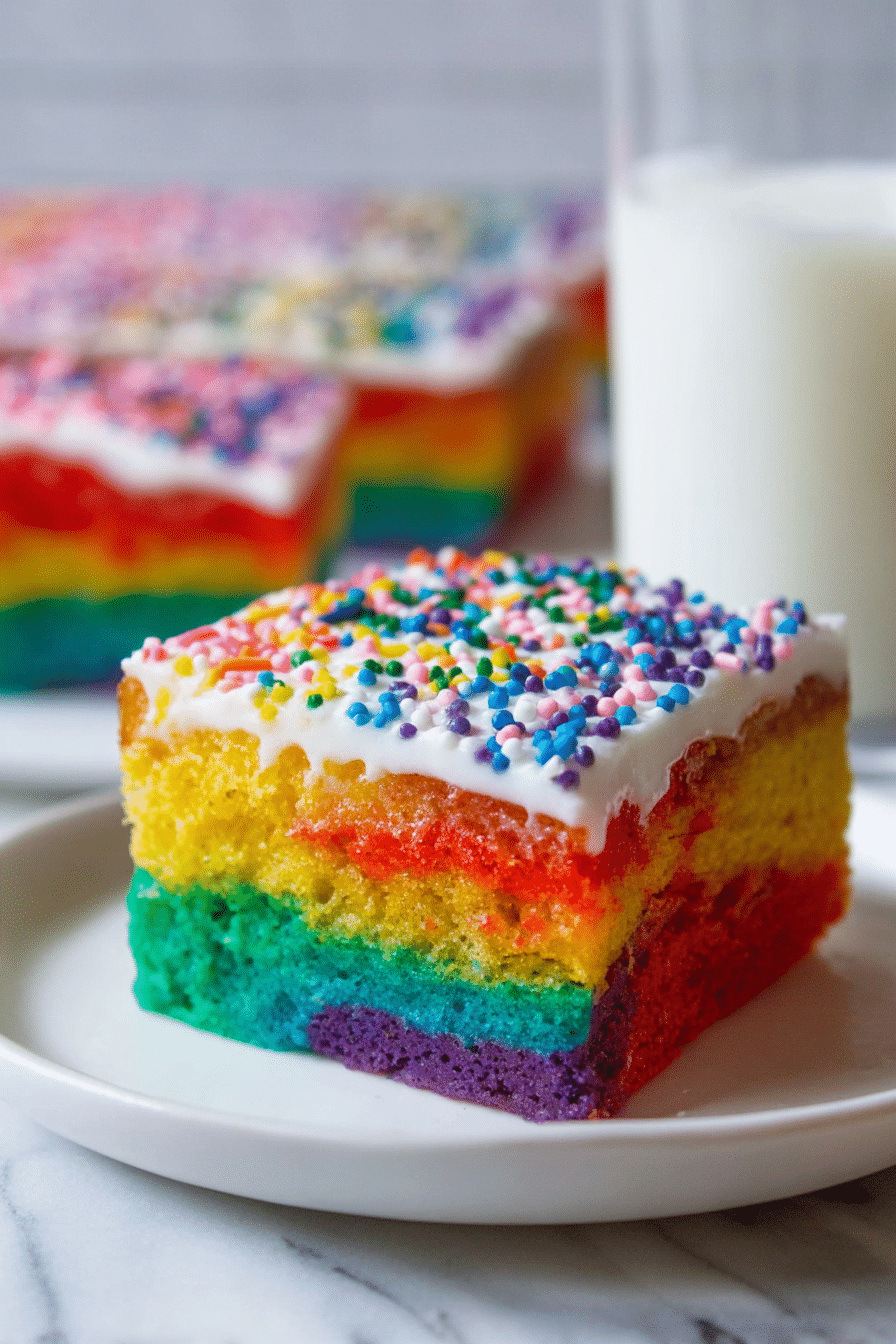
This cake hits the sweet spot between show-stopping visuals and genuine simplicity. The bright patchwork of colors captures kids’ attention at first glance, and the flavor is universally kid-friendly—mild vanilla with a tender crumb that isn’t overly sweet. Because you pour and swirl batters into a single pan, setup and cleanup are quicker than stacked layer cakes, and one sheet usually feeds a crowd.
Visually, imagine slices that reveal playful patches of yellow, red, blue, and green—like a tie-dye picnic. Texturally, the cake stays moist for several days when stored correctly, which is a lifesaver if you need to bake ahead for a weekend party.
Everything You Need for Rainbow Sheet Cake
Below is everything you’ll want on hand before you start. I list the tools and ingredients so you can move confidently through the recipe and avoid last-minute dashes to the store.
- All-purpose flour – Provides structure and a tender crumb; can be swapped for a gluten-free blend if needed (see Variations).
- Cornstarch – Keeps the crumb soft and fine.
- Sugar – Sweetens and helps with browning and texture.
- Baking powder & baking soda – Leavening agents that give lift and a light bite.
- Butter – Adds richness and flavor; room temperature butter is easier to work with during reverse creaming.
- Vanilla – Simple flavor anchor that makes the colors taste as good as they look.
- Buttermilk – Adds tenderness and a subtle tang that balances the frosting.
- Eggs – Bind and enrich the batter for stability.
- Food coloring – Gel colors give the brightest hues; liquid colors are okay but may require more to get vivid shades.
- Cream cheese & butter (for frosting) – The combo gives a silky, tangy topping that pairs perfectly with the sweet cake.
- Powdered sugar – Sweetens and thickens the frosting; always sift to avoid lumps.
- Kitchen tools – Have a stand mixer or hand mixer, mixing bowls for dividing batter, measuring tools, a 9×13 baking pan lined with parchment, a chopstick or butter knife for gentle swirling, and a spatula for frosting.
If you’re looking for more colorful cake options, try our Strawberry Layer Cake that kids will love!
How to Make Rainbow Sheet Cake (Step-by-Step)
Follow these steps to get bright patches of color and a tender crumb. I’ve written them so you can hand them to a helper (or your older kid) without worrying about missing key moments.
- Preheat your oven and prepare the pan: oil lightly and line with parchment so the cake lifts out cleanly.
- Combine the dry ingredients in the mixer bowl to create an even base—this is the start of the reverse creaming method.
- Add room-temperature butter to the dry mix and blend with the paddle until the mixture resembles damp sand; this coats the flour and limits gluten formation.
- Beat together your wet ingredients in a separate cup, then stream them into the mixer on low speed until just combined; stop and scrape the bowl once or twice.
- Divide the batter evenly into several bowls (one per color). Add your chosen colors and stir gently until uniform. Use gels for the brightest results.
- Spoon alternating dollops of each color into the prepared pan, distributing color across the surface rather than forming stripes in one area.
- Use a chopstick or butter knife to make a few small decorative swirls—think gentle arcs rather than vigorous mixing, which will muddy the colors.
- Tap the pan to release air bubbles, then bake until a toothpick inserted near the center comes out with a few moist crumbs. Let the cake cool completely before frosting.
For tips on getting cream cheese frosting smooth, be sure to check out our detailed guide.
The Secret to the Perfect Texture: Reverse Creaming Explained
Reverse creaming is less about drama and more about control. When you coat the dry ingredients with butter first, the flour proteins are less likely to hydrate aggressively once you add the liquid. The result is a finer, tighter crumb that slices cleanly and holds color patches without turning gummy.
- Think of the butter as tiny shields around the flour; they slow gluten development so the cake stays tender.
- Mix the wet ingredients in slowly and stop as soon as they’re incorporated—you don’t want to overwork the batter.
- If your batter feels too loose after adding eggs and buttermilk, a brief rest while you preheat the oven can help it settle; it should pour but still hold a bit of body.
Food Coloring & Swirling Tips for Bright, Patchwork Layers
Bright colors and playful swirls are the visual star of this cake. My goal was always to make colors pop without turning them into a muddy mess, so here are practical tips I use every time.
- Use gel or paste food coloring for the most vivid, concentrated hues—liquids dilute the batter and require more product to reach the same saturation.
- Add color gradually: a little goes a long way. Stir until fully mixed so you get an even shade.
- Spoon colors across the pan in a pattern that spreads each hue; alternating dollops helps create that patchwork tie-dye effect.
- Swirl gently: insert a chopstick and trace slow, shallow curves—avoid long, deep figure-eights that will blend the batters together.
- For natural color alternatives, try beet powder for pink/red, turmeric for warm yellow, spirulina for green, and blueberry purée for softer blues and purples; note that naturals can affect flavor and moisture.
How to Get the Cream Cheese Frosting Smooth Every Time
A flawless frosting starts with patience and small, clean actions. I’ve frosted hundreds of cakes and these steps keep the frosting silky and avoid the dreaded grainy texture.
- Make sure both the cream cheese and butter are at the same soft room temperature so they blend without lumps.
- Beat cream cheese and butter until fully homogenous before adding any sugar or flavoring.
- Sift powdered sugar before adding; add it in portions and scrape the bowl between additions to incorporate evenly.
- If the frosting is too loose, chill it briefly or add more sifted powdered sugar a tablespoon at a time until you reach a spreadable consistency.
- For a glossy finish, smooth the frosting with an offset spatula warmed briefly under hot water and wiped dry—this helps the surface glide without tearing the cake.
Pro Tip for Rainbow Sheet Cake: Involve Kids Safely and Save Time
Getting kids involved turns baking into a party warm-up and cuts your workload into kid-friendly jobs. I let my kids take small, supervised roles and it always adds to the fun.
- Give younger kids tasks like lining the pan with parchment, spooning colored batter into bowls, or sprinkling decorations while you handle the hot, sharp, or heavy tasks.
- Older kids can mix colors, help measure (with your supervision), or gently swirl the batter in the pan.
- Set up a clean ‘splash zone’ for color mixing and protective aprons—it keeps the mess contained and teaches cleanup habits.
- Use a timer and simple checklists so children know when it’s their turn; that structure helps keep the process moving.
Scaling Up: How to Double, Triple, or Turn This into Cupcakes
Planning a bigger party? This cake scales well if you keep ratios consistent and watch the bake times.
- Double or triple everything proportionally; if you use a scale, keep the same weight ratios—the easiest way to stay accurate.
- For larger batches, mix in two bowls to avoid overworking one large batch of batter.
- When converting to cupcakes, fill liners about two-thirds full and reduce baking time—check for doneness earlier since cupcakes bake faster than a sheet.
- Oven space matters: bake multiple pans on different racks one at a time or rotate them mid-bake to ensure even baking.
How to Store, Freeze, and Make-Ahead Rainbow Sheet Cake
Timing can save your party day. I often bake the cake a day ahead and keep frosting separate until the morning of the event for the freshest look.
- Store unfrosted cake layers wrapped tightly in plastic at room temperature for a day, or refrigerate for up to a week if already frosted.
- To freeze, wrap cooled unfrosted cake tightly in plastic and foil; freeze for up to three months. Thaw in the refrigerator overnight before frosting.
- Pre-make the frosting and keep it chilled; bring it to room temperature and re-whip briefly before spreading.
- Assemble and decorate on the party day for the brightest colors and freshest finish.
Decoration Ideas & Beverage Pairings for Birthday Themes
Decorating is where you get to match the cake to the party vibe—unicorns, dinosaurs, space, or a simple rainbow picnic. A few quick decorations can make the cake feel custom-made without much extra work.
- Classic sprinkles and oversized sugar confetti make the top pop and are instant kid favorites.
- Add fresh fruit accents like sliced strawberries or blueberries for a slightly sophisticated touch that pairs well with cream cheese frosting.
- Top with edible glitter or candy stars for themed parties like space or mermaids.
Pair this cake with kid-approved drinks like a simple lemonade, fruity iced tea, or a sparkling fruit punch. For grown-ups, a light-bodied sparkling wine or a citrusy iced cocktail balances the cake’s sweetness nicely.
Looking for more fun options? Explore our decoration ideas and beverage pairings to elevate your party experience!
Alternate Frostings and Dietary Variations
Not everyone can have dairy or gluten, and that’s fine—there are tasty swaps that keep the party going.
- Vegan cream cheese frosting – Use plant-based cream cheese and vegan butter; chill and whip to get the right texture.
- Chocolate frosting – A cocoa-based buttercream complements the vanilla cake for a different twist.
- Gluten-free option – Substitute with a trusted 1:1 gluten-free flour blend and add a little extra liquid if the batter seems stiff.
- Lower-sugar approach – Use less powdered sugar in the frosting and swap some sugar in the cake with alternatives designed for baking, keeping an eye on moisture balance.
If you need more tailored swaps, try our alternate options guide for step-by-step substitutions.
If those swaps spark more questions, check our dedicated alternatives page for ideas: alternate frosting options and dietary swaps.
Pro-Tips
- I always color batter in small batches to test shades—you can always darken a color but you can’t lighten it.
- Chill your frosting briefly if it’s too soft; that helps it set without adding more sugar.
- Use an offset spatula and a quick hot-water swipe for a glassy-finish top.
- Label bowls if you’ve got helpers so you don’t accidentally swap colors.
Troubleshooting
- If the colors blend into a muddy tone, you likely over-swirl—next time make fewer, shallower strokes.
- If the cake is dense, check your leavening and don’t overmix after adding wet ingredients.
- If frosting is lumpy, re-whip after sifting powdered sugar and ensure all dairy ingredients were at room temperature.
- If the cake is dry, try a slightly shorter bake time and ensure accurate oven temperature with an oven thermometer.
Variations
- Mini rainbow sheet cake: use a smaller pan and reduce baking time; colors stay the same.
- Unicorn theme: pastel colors, edible glitter, and piped buttercream manes.
- Rainbow cupcakes: pipe dollops of each color into liners for individual servings—great for school parties.
Make the cake your own, enjoy the messy, joyful process with your kids, and serve slices that get immediate squeals of delight.
Frequently Asked Questions
Can I use a cake mix for this rainbow sheet cake?
Absolutely! You can use a white or vanilla box cake mix. Just make sure it’s one that bakes up white or off-white for the best color results.
How can I make sure the cake layers are vibrant?
Be generous with the food coloring! Start with a few drops and add more until you achieve the desired brightness, mixing thoroughly but gently to avoid over-mixing.
What’s the best way to store leftover cake?
Store any leftovers in an airtight container at room temperature for up to 3 days or in the fridge for about a week. For longer storage, freeze it wrapped tightly in plastic wrap for up to 3 months.
How can I make cream cheese frosting that isn’t too runny?
Make sure both your cream cheese and butter are softened to room temperature before mixing. If your frosting is too loose, gradually add more sifted powdered sugar until you reach a spreadable consistency.
Can I involve my kids in making this cake?
Certainly! Kids can help with mixing the batter, adding the food coloring, and decorating the cake. Just supervise them closely when using any tools or mixing ingredients.
Rainbow Sheet Cake
Ingredients
Method
- Preheat an oven to 350°F. Lightly coat a 9 x 13 x 2-inches baking pan with cooking oil, then line it with parchment paper.
- Make the cake batter by whisking together flour, cornstarch, sugar, baking powder, and baking soda in a stand mixer.
- Mix in butter and vanilla extract until the mixture resembles damp sand.
- Whisk together buttermilk and eggs and then drizzle the mixture into the butter and dry ingredients.
- Divide the batter into 6 bowls and color each with food coloring.
- Alternate spoonfuls of colored batter into the prepared pan and lightly swirl.
- Bake for 30 to 35 minutes until a toothpick comes out clean. Cool completely.
- For the frosting, cream together softened cream cheese and butter, then incorporate vanilla and sifted powdered sugar.
- Frost the cake and sprinkle with rainbow sprinkles before serving.