I learned to love T‑bones the hard way: by overcooking a dozen good steaks and slowly figuring out which moments in the process make the biggest difference. In my kitchen I treat a T‑bone like a small project—measure twice, sear once—and that discipline pays off with the texture and aroma you notice the moment you lift the lid. There’s a particular satisfaction in the first hiss when a cold steak hits a screaming hot grate.
I’ll be candid: the best results came when I stopped treating searing like a race and started seeing it as a series of deliberate moves. Salt early, dry the steak, get the grill truly hot, and use an instant‑read thermometer instead of guessing. Those small adjustments changed the crust, the browning, and most importantly the juiciness when I finally sliced into the meat.
Grilling T‑bones is also social work: once you know the timing and the touch, you can cook confidently with friends around the grill. I’ve served these at backyard dinners where conversation pauses the moment the steaks hit the table—the smell, the sight of the sear stripes, and the pop of butter melting over the meat are the moments people remember.
Over the rest of this article I’ll walk you through what I use, how I set up the heat zones, the exact sequence I follow on the grill, and the finishing touches that make the steak sing. Expect practical tips you can use the next time you fire up the grill—no fuss, just repeatable technique.
Why This Grilled T-Bone Steak Belongs in Your Grill Rotation
T‑bones give you two textures and two flavor experiences in one steak: the robust strip side and the more tender filet on the other side of the bone. That contrast makes them uniquely satisfying to grill and to share. When cooked right they combine a deeply caramelized crust with a buttery, tender interior.
Grilling a T‑bone is also a communal pleasure: it’s a cookout centerpiece that invites conversation and a little showmanship at the grill. I’ve lit coals for neighborhood dinners where the sound of meat searing sets the tone—people gather, share stories, and wait for the rest period together.
Finally, mastering this cut teaches you skills that translate to other large steaks and chops: heat management, the rhythm of searing, and respecting carryover cooking. These are transferable techniques that upgrade your entire grill rotation without adding complexity.
Everything You Need for Grilled T-Bone Steak
Set up your station so everything is within reach: tongs, thermometer, oil, and a tray to rest the steaks. Clean grates and a properly hot surface are nonnegotiable.
- Instant‑read thermometer – The single most reliable way to hit the doneness you want; don’t rely on touch alone.
- Long‑handled tongs – They give control without piercing the meat; avoid forks that let juices escape.
- Sturdy spatula or scraper – For cleaning grates between cooks and keeping the searing surface clean.
- Heat‑proof gloves or mitts – For confident handling near high heat.
- Grill brush and high‑smoke‑point oil – Clean, lightly oiled grates prevent sticking and promote even browning.
- Plate or tray for resting – Tent with foil after grilling to hold heat while juices redistribute.
- High‑quality T‑bone steaks – Choose steaks at least an inch thick with even marbling and a clean bone; thickness affects cook time.
- Salt and freshly cracked pepper – Simple, time‑tested seasonings that enhance beef without masking it.
If you enjoy grilling beyond steak, check out our best hamburger patty recipe for your next cookout.
The Secret to Perfect Grill Marks
Grill marks are as much about timing, surface temperature, and confidence as they are about aesthetics. The marks come from the Maillard reaction where the meat meets the hot metal—so you need a hot, clean grate and a patient hand.
- Set up two heat zones: a direct high‑heat zone for searing and a cooler indirect zone for finishing. This gives you control and prevents overcooking.
- Preheat your grill until the grates are smoking hot. Oil the grates lightly right before the steak goes on to promote contact and prevent sticking.
- Sear without moving for the first short interval, then rotate the steak 90 degrees to create crosshatch lines; this requires confidence—lift only when the steak releases easily from the grate.
- Even spacing of the grates matters: tight, clean grates produce crisper lines. Worn or crooked grates make uneven marks.
Why Temperature and Carryover Matter for T-Bones
Temperature is the language a steak speaks. Over the grill it tells you when to stop and when to rest. Because T‑bones are thick and include a bone, they hold heat and continue to cook after the grill—this is carryover cooking.
- Aim to remove T‑bones from the grill slightly below your target final temperature to account for carryover.
- Common target pull temperatures (remove from heat): rare about 120–125°F, medium‑rare about 130–135°F (I pull around 135°F for consistent medium‑rare), medium about 140–145°F.
- Rest steaks 7–10 minutes tented with foil so juices redistribute; this keeps the interior glossy and moist instead of bleeding onto the plate.
- Use an instant‑read thermometer inserted into the thickest part (not touching bone) for accurate readings.
Best Seasonings, Marinades, and the Cowboy Butter Finish
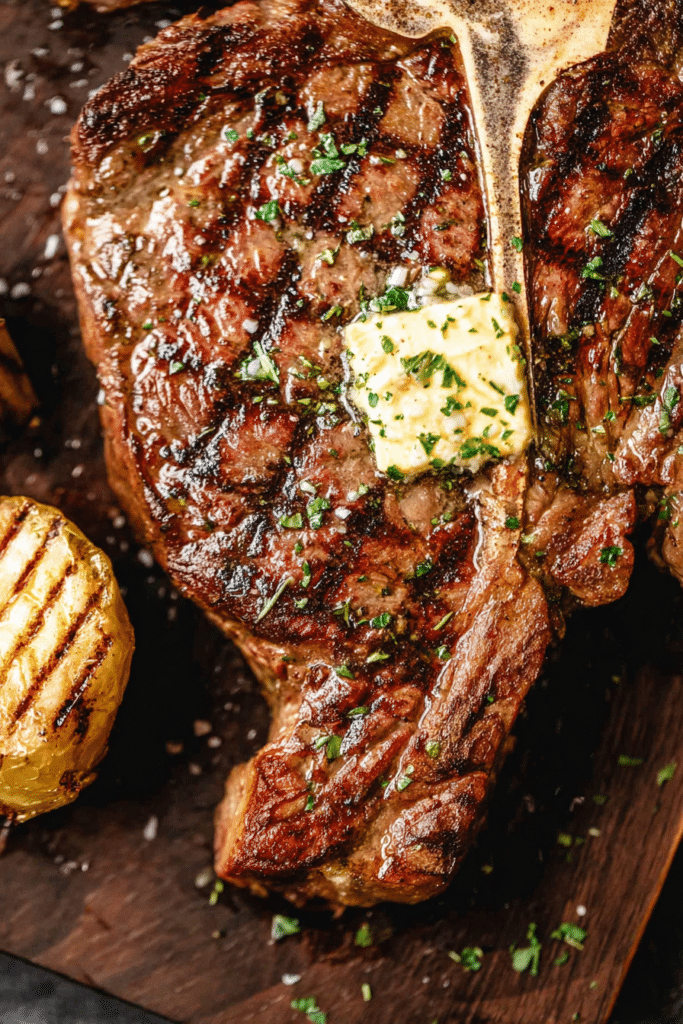
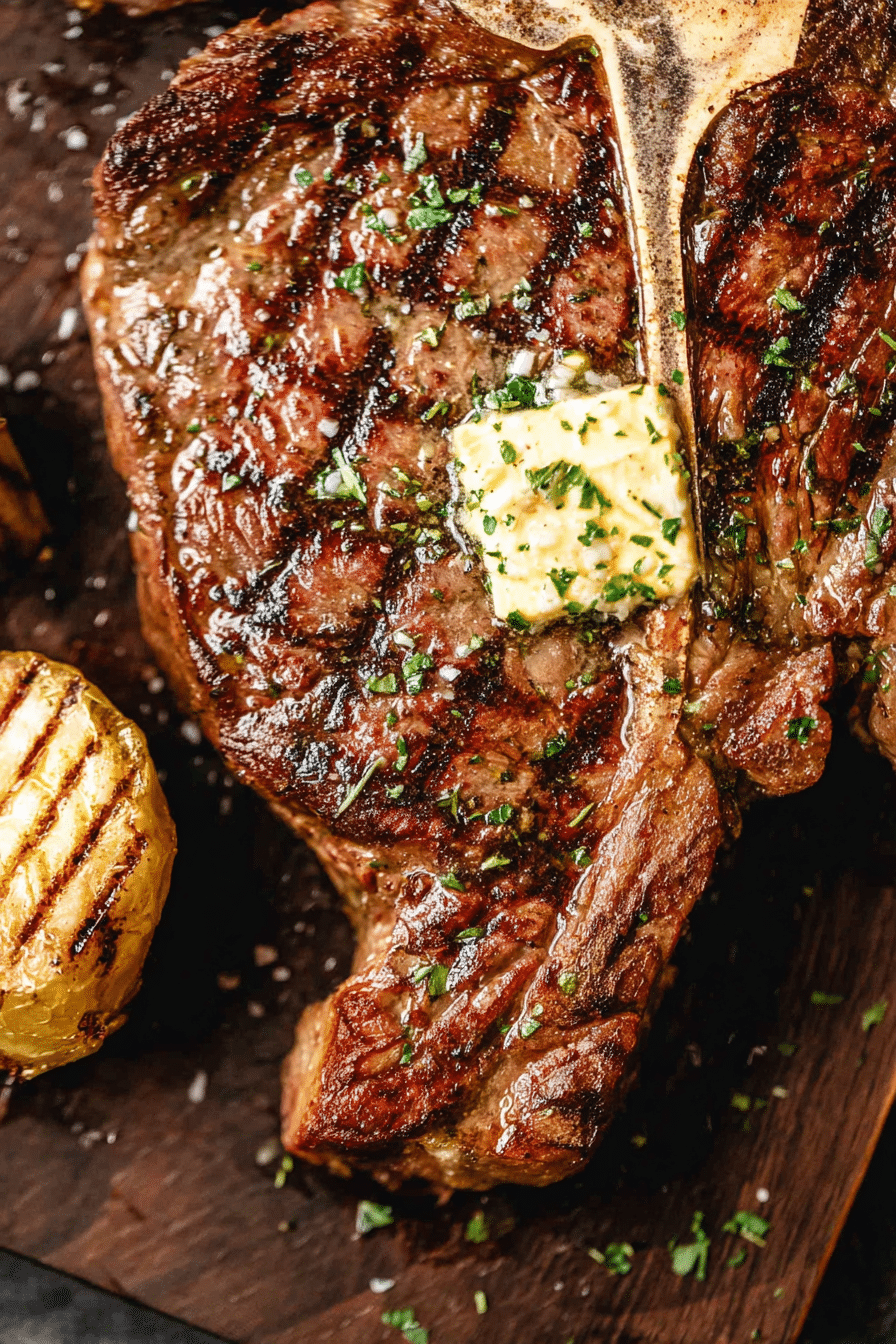
T‑bones don’t need heavy marinades; they reward minimal seasoning that highlights beef flavor. A finishing compound butter—Cowboy Butter—adds richness and herbaceous notes that make the steak irresistible. Topping your grilled T-bone with homemade cowboy butter can elevate its flavor to new heights.
- Smoked salt or coarse kosher salt – Brings out beefy flavor and helps form a crust; salt early so it seasons through the meat.
- Cracked black pepper – Freshly cracked for texture and heat; apply just before grilling to prevent burning.
- Simple garlic‑herb marinades – If you want more flavor, a brief marinade with garlic and herbs complements the steak without masking it.
- Smoked finishes – Adding a short smoke session before or after searing lends a woodsy note that pairs beautifully with the butter finish.
- Compound butters and sauces – A pat of Cowboy Butter melts into the steak; if you prefer something brighter, try a chimichurri. If you’re looking for a sauce to complement your T-bone, try our chimichurri steak recipe.
For an alternate pairing, consider serving alongside garlic butter steak bites—rich, cheesy accompaniments that echo the buttered finish and make the meal feel indulgent. Try these steak bites if you want an extra touch of flavor.
How to Make Grilled T-Bone Steak (Step-by-Step)
- Remove steaks from the fridge 30–60 minutes before grilling and pat them dry; this helps the surface brown. Season both sides with your salt and pepper.
- Clean and lightly oil the grates. Preheat the grill: get one area very hot for direct searing and leave another cooler area for indirect finishing.
- Place the steak over direct high heat and cover. Sear for a short initial interval until a crust forms, then lift and rotate the steak 90 degrees to create crosshatch marks. Sear the second interval on the same side.
- Flip the steak and repeat the brief sear and 90‑degree rotation on the other side, then move the steak to the indirect zone (filet side over indirect heat if one side is thicker).
- Finish cooking until the steak reaches your pull temperature (see temperature guidance above). Monitor with an instant‑read thermometer inserted into the thickest section without touching the bone.
- Plate the steaks, top each with a generous pat of Cowboy Butter, and tent loosely with foil. Rest for 7–10 minutes before slicing against the grain around the bone.
Pro Tip for Grilled T-Bone Steak: Pull at 135°F, Rest 7–10 Minutes
- Pulling at about 135°F yields a consistent medium‑rare after carryover; if you prefer rarer or more done, adjust the pull temperature by 5–10°F accordingly.
- Rest uncovered for a minute, then tent loosely with foil to avoid steaming the crust; resting lets the juices redistribute for a juicier slice.
- Measure temperature in the thickest part away from the bone; hitting bone will give a higher reading that can mislead you.
- Aim for a little confidence: when the steak feels springy with some give, it’s usually near medium‑rare—use the thermometer to confirm.
Troubleshooting
- If your steak sticks to the grate when you try to turn it, give it another 15–30 seconds; a properly formed crust releases naturally.
- If the outside is charred but the inside is underdone, you likely used too high heat for too long—lower the finishing zone and move steaks there sooner.
- If juices pool on the cutting board, you sliced too soon or didn’t rest long enough—add a few more minutes of rest next time.
- If temperatures climb too quickly, open vents (on a charcoal grill) or reduce burner heat (on a gas grill) to slow the rate and avoid overcooking.
How to Store, Reheat, and Vary Your Grilled T-Bone Steak
Leftovers can be excellent if stored and reheated with care. Keep refrigerated in an airtight container for a few days or freeze tightly wrapped for longer storage. Thaw thoroughly before reheating.
- Reheating gently – Reheat in a low oven or on a cooling grill over indirect heat to avoid drying; you can finish with a brief sear to refresh the crust.
- Slice and repurpose – Thin slices work well in salads, sandwiches, or alongside scrambled eggs for a hearty breakfast.
- Freeze properly – Wrap tightly and remove air to minimize freezer burn; thaw slowly in the fridge before reheating.
Variations
- Herb‑garlic marinade – Short marination with garlic, lemon, and fresh herbs before grilling adds brightness without overpowering the beef.
- Smoked then seared – Give the steak mild smoke for 10–15 minutes before a hot sear to layer in wood flavor.
- Spice rub – A dry rub with smoked paprika and ground coriander gives a warm, savory crust; apply just before grilling.
- Sauce pairings – Finish with Cowboy Butter for richness, or a vibrant chimichurri for acidity and herbiness.
Serving suggestions: slice the rested steak near the bone to showcase both the strip and the filet. Plate with a pat of melting butter, a sprinkle of flaky salt if needed, and simple sides that let the meat shine.
Frequently Asked Questions
What should I look for when choosing T-bone steaks?
When selecting T-bone steaks, look for steaks that are at least 1 to 1 1/4 inch thick with a nice amount of marbling. The meat should be a bright red color, and the bone should appear clean.
How do I know when my T-bone steak is done cooking?
Use a meat thermometer to check the internal temperature. For a medium-rare steak, remove it from the grill at around 135°F. Let it rest for 7-10 minutes before slicing to allow the juices to redistribute.
What is cowboy butter, and how do I make it?
Cowboy butter is a flavorful compound butter typically made with softened butter mixed with garlic, herbs, and spices. You can easily make it by combining softened butter with minced garlic, fresh herbs like parsley, and a pinch of salt.
Can I use different seasonings for my T-bone steak?
Absolutely! While this recipe uses smoked salt and cracked black pepper, you can experiment with different seasonings like garlic powder, onion powder, or your favorite steak rub to add unique flavors.
How should I store leftover grilled T-bone steak?
Store leftover grilled T-bone steak in an airtight container in the refrigerator for up to 3-4 days. You can also freeze it for longer storage, but be sure to wrap it well to prevent freezer burn.
Grilled T-Bone Steak
Ingredients
Method
- Remove the steak from the fridge 30 minutes to 1 hour before you’re ready to grill. Place on a plate, then sprinkle generously with salt and pepper on both sides. Rest at room temperature for at least 30 minutes, but no more than an hour.
- Clean and oil your grill grates. Preheat the grill to high heat (500+ degrees) with direct flame on all but one section.
- Place the steaks over direct heat and cover the grill. Sear for 1-1.5 minutes, turn 90 degrees for grill marks, then sear for another 1-1.5 minutes. Flip the steak and repeat, cooking until reaching desired temperature, about 3-5 additional minutes.
- Plate the steaks, top with Cowboy Butter, and tent with foil. Rest for 7-10 minutes before slicing.