I make these peachy gummies on evenings when the day ran long and the kids still want a snack before bed. I like that they come together fast and that the whole process gives my little helpers something safe and simple to do — pouring, pressing the puree through the food processor, and choosing the shapes is their favorite part. In my kitchen they’re a good way to get fruit into small hands without a lot of fuss.
Over the years I’ve learned the small things that keep the texture just right and the color bright: ripeness matters, gentle heat matters, and chilling time matters. Once I stopped overcooking the puree and whisking the gelatin in off-heat, the gummies set reliably every time. I also keep the sugar separate so the ones we store stay fresh.
These gummies are a practical treat for busy families — minimal ingredients, minimal cleanup, and a lot of smiles. If you want a savory snack to pair with them for a small picnic, I sometimes serve them alongside a warm pan of creamy garlic mushrooms; the contrast makes snack time feel a bit special for the kids.
Why These Homemade Peachy Gummies Are Perfect for Busy Parents
These packs are quick to prepare and easy to adapt around nap time or between activities. The bright peach color is an instant visual win for kids, and the soft, springy texture is fun to pick up. I’ll often have the puree done while dinner finishes cooking so the gummies are ready soon after.
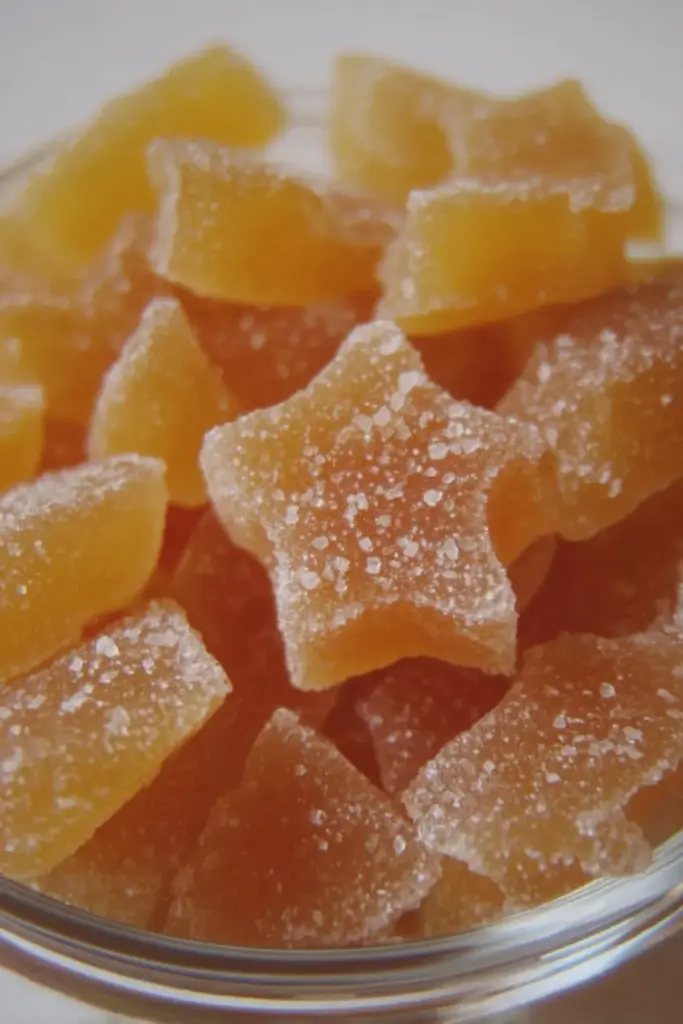
Sensory: notice the fresh peach aroma as the puree warms, the shiny surface of the finished cut pieces, and the gentle spring when you press one between thumb and forefinger.
Everything You Need for Homemade Peachy Gummies
Gather a few simple things and you’re set. I recommend keeping the tools and ingredients laid out where kids can help without getting underfoot. Don’t forget: little hands can measure and pour, but keep the stove work to an adult.
- Ripe peaches – The star of the show; they give natural sweetness and color. Fresh or fully thawed frozen peaches both work well.
- Unflavored gelatin – Provides the classic gummy texture and a clean flavor base; easier to control than flavored mixes.
- Sugar (optional) – For coating at serving time only; leave off for a naturally sweet snack.
- Food processor or blender – To puree the fruit until silky smooth.
- Small saucepan – For warming the puree and dissolving the gelatin gently.
- 8×8 pan or silicone mold – A shallow dish makes cutting easy; fun molds are a bonus for kids.
Also, if you’re looking for another simple snack to pair alongside these gummies, try a savory pan of creamy garlic mushrooms for a neat adult-friendly contrast while the kids enjoy their treats. Creamy Garlic Parmesan Mushrooms
The Secret to the Perfect Gummy Texture
Getting the texture right is mostly about technique and patience. When I first made these, lumps and a grainy finish were my two common mistakes — both solved by gentle whisking and avoiding overheating.
- Whisk gelatin into warm (not scalding) puree so it dissolves evenly and you avoid lumps.
- Bring the mixture just to a simmer, then keep it bubbling very gently for a short time to fully activate the gelatin. Overcooking makes the chew collapse.
- Chill fully until set; a cool, steady environment yields the firm-but-springy texture kids like.
Sensory: you want the mixed liquid to look glossy and feel perfectly smooth on the back of a spoon before you pour it into the pan.
Why Temperature Matters When Working with Gelatin
Gelatin is sensitive to both too-much heat and too-rapid cooling. In my experience, treating temperature like the main character keeps results consistent.
- Too hot: high heat can break down gelatin’s protein strands, weakening its ability to set and leaving a soft, syrupy result.
- Just right: warm enough to dissolve the gelatin (so no grains remain) but not boiling hard for long preserves its gelling power.
- Cooling: steady refrigeration lets the network of gelatin proteins form properly; rapid temperature swings can create a brittle or uneven set.
Sensory: watch the change from a glossy pourable liquid to a duller, firm slab in the fridge — and notice how the firmness gives when you press a set gummy.
How to Make Homemade Peachy Gummies (Step-by-Step)
Keep your helpers busy with kid-safe steps and let them watch the magic of the mix firm into gummies. Use these bulleted steps so the process is easy to follow.
- Puree the peaches until smooth in your food processor or blender.
- Pour the puree into a saucepan and warm gently over medium-low heat.
- Whisk in the unflavored gelatin off-heat or over very low heat until fully dissolved and the mixture looks glossy.
- Bring the mixture up to a gentle simmer and let it bubble very softly for about two minutes while stirring — don’t let it roar.
- Pour the warm mixture into an 8×8 pan or silicone molds; no greasing required.
- Refrigerate for at least 30 minutes until fully set.
- When firm, turn the slab out or pop gummies from molds and slice or cut into fun shapes.
- If using sugar, toss pieces in sugar just before serving so stored gummies stay dry.
Sensory: you’ll smell warm peaches during cooking, see a glossy peach color in the finished slab, and feel a bouncy give when you press a ready gummy.
Kid-Tested Tips to Make Gummy Cutting & Serving Fun
Let kids choose shapes and present the gummies as a little event — it makes snack time more engaging. For a playful twist, combine the gummies into a themed platter or use color-coordinated cups.
- Let kids press smaller molds or cookie cutters into the set slab to make stars, hearts, or animals.
- Create a mini ‘gummy bar’ where children pick a shape and decide whether to roll it in sugar at serving time.
- Make it a sensory activity: let kids feel the cool, smooth surface before cutting, and let them admire the bright peach color.
Your kids will love our Kids Dirt Dessert with Gummy Worms for a fun twist on serving gummies!
Pro Tip for homemade peachy gummies: Keep Sugar Separate Until Serving
Presenting the pro tips and troubleshooting as bulleted lists makes them easier to scan quickly.
- Store gummies plain in the fridge; add sugar at the moment you serve to avoid moisture issues.
- Offer sugar on the side in a small bowl so each child can choose their preference.
- For a healthier approach, skip the sugar and let the natural peach sweetness shine—kids often prefer the fresher fruit taste.
How to Store, Freeze, and Make-Ahead Your Gummies
Simple storage keeps these treats ready for busy days. I keep a shallow airtight container on a low shelf in the fridge so kids can help themselves safely.
- Refrigerate gummies in a single layer in an airtight container; they keep best when not stacked.
- If you coated some in sugar for immediate eating, consume those first because the sugar can draw moisture and go syrupy.
- To freeze: place gummies on a tray until firm, then transfer to a freezer-safe container separated by parchment so they don’t stick; thaw briefly at room temperature before serving.
For a sweeter gummy, consider freezing peaches before adding them to your mixture!
Easy Variations: Vegan, Sugar-Free, and Fruity Mix-Ins
Presented as a bulleted list for easy scanning — these swaps keep the recipe flexible for different diets and tastes.
- Vegan gelatin swap – Use a plant-based gelling agent like agar-agar, keeping in mind it sets differently (often firmer and less elastic).
- Sugar-free option – Rely on naturally sweet fruits, or sweeten lightly with a sugar substitute suitable for cooking if needed.
- Fruity mix-ins – Blend in other fruit purees (berries, mango) for color and flavor combos; taste first to balance sweetness.
- Layered flavors – Pour a thin set layer, chill, then add another flavor on top for two-tone gummies kids love.
If you enjoy unique flavors, try incorporating elements of our pumpkin flan as an inspiration for fruity mix-ins!
Creative Uses for Leftover Gummy Bases or Purees
Leftover puree is too good to waste. I often repurpose it into other snacks that still feel fun for kids.
- Stir leftover puree into yogurt or smoothies for a flavor boost.
- Spread thin layers and dehydrate or oven-dry for quick fruit leather strips.
- Freeze small portions in ice cube trays to use as fruity additions to drinks or smoothies.
Sensory: leftover purees keep their bright color and fresh aroma, and dried fruit leather has a chewy, satisfying texture kids enjoy handling.
Unique and Fun Gummy Shapes to Attract Kids
Shapes are a big part of the appeal. I keep a variety of small cookie cutters and silicone molds so kids can pick themed treats for different days.
- Try animal, star, and heart molds — small shapes make portion control easy.
- For parties, match gummy shapes to themes (dinosaurs, space, ocean) and let kids assemble a small scene on their plates.
- Consider DIY molds using small clean toys or shapes pressed into cling film over a shallow tray for unique silhouettes.
Sensory: the sight of bright, shaped gummies often encourages hesitant eaters to try them, and the tactile handling is part of the fun.
Troubleshooting
I keep a short list of fixes handy because I’ve hit most of these snags while making gummies with kids around.
- If gummies are too soft: you likely didn’t use enough gelatin or overheated the mixture; next time reduce heat and ensure gelatin fully dissolves.
- If the mixture is grainy: make sure gelatin is fully dissolved and whisk thoroughly off direct high heat to dissolve any remaining granules.
- If gummies are too rubbery: avoid boiling too long and try slightly less gelatin or a gentler simmer.
- If sugar becomes wet after storage: coat at serving time only and store plain gummies in airtight containers.
I often test a single small mold first so I can tweak texture without wasting a full pan.
Frequently Asked Questions
How long do I need to refrigerate the gummy mixture?
You should refrigerate the gummy mixture for at least 30 minutes to allow them to set properly.
Can I use fresh or frozen peaches for this recipe?
Both fresh and frozen peaches work great! If you’re using frozen peaches, just make sure to thaw them before pureeing.
Is it necessary to add sugar to the gummies?
No, sugar is optional! The peach flavor is naturally sweet, but if you like, you can coat them in sugar just before serving.
How do I store the leftover gummies?
Store the gummies in an airtight container in the fridge. If you’ve coated them in sugar, it’s best to consume them quickly as the sugar can get watery.
Can I make these gummies vegan?
Yes! You can use agar-agar as a substitute for gelatin to make a vegan version of these gummies.

Homemade Peachy Gummies
Ingredients
Method
- Puree the peaches in a food processor or something similar.
- Put the peaches in a saucepan and heat them up. Whisk in the gelatin. Once it gets to a boil, let it bubble (while stirring) for 2 minutes.
- Pour the peach mixture into the 8x8 pan. It does not need to be greased. Stick them in the fridge for at least 30 minutes.
- After the gummies have set, slice them and take them out of the pan. If you want, you can add sugar just before eating, otherwise just eat them as peach gummies, they don't really need any sugar! Note: don't store the ones coated in sugar as the sugar will get watery. Store them without being sugar coated.