I make watermelon jelly in my kitchen whenever the melon is at its peak: bright pink flesh, that fresh, green-tinged aroma when I slice through the rind. It feels like bottling sunshine—no fuss, just ripe fruit turned into a glossy, spreadable jam that livens toast, cheese, and desserts. I love how little hands-on time it takes; most of the work is blending and waiting while the jelly cools and sets.
Over the years I’ve learned a few small habits that keep the jelly clear and gleaming instead of cloudy or grainy: strain well, avoid over-stirring once the sugar goes in, and respect the pectin’s timing. Those small changes make a big difference when you open a jar later and see that beautiful translucence catching the light.
This recipe is one of my go-tos for last-minute hostess gifts. I’ll pop a jar into a basket with a loaf of crusty bread or tuck it alongside a small baked good. It’s also unfussy enough to make with kids underfoot—give them the easy job of scooping seeds (if any) while you handle the hot pot.
I want you to feel confident the first time you try this: fresh watermelon, a little tartness from lime, and the right pectin will give you a shiny jelly that sets in a day. Below I’ll walk through why it works, what you need, and the quick fixes I use when something doesn’t go exactly as planned.
Why This Watermelon Jelly Is Perfect for Busy, Sunny Days
Watermelon jelly is bright, breezy, and forgiving. The fruit’s natural sweetness and high water content mean prep is minimal—blend, strain, and cook briefly. I rely on this recipe when a last-minute brunch idea or neighbor gift pops into my head because it moves fast without skimping on flavor.
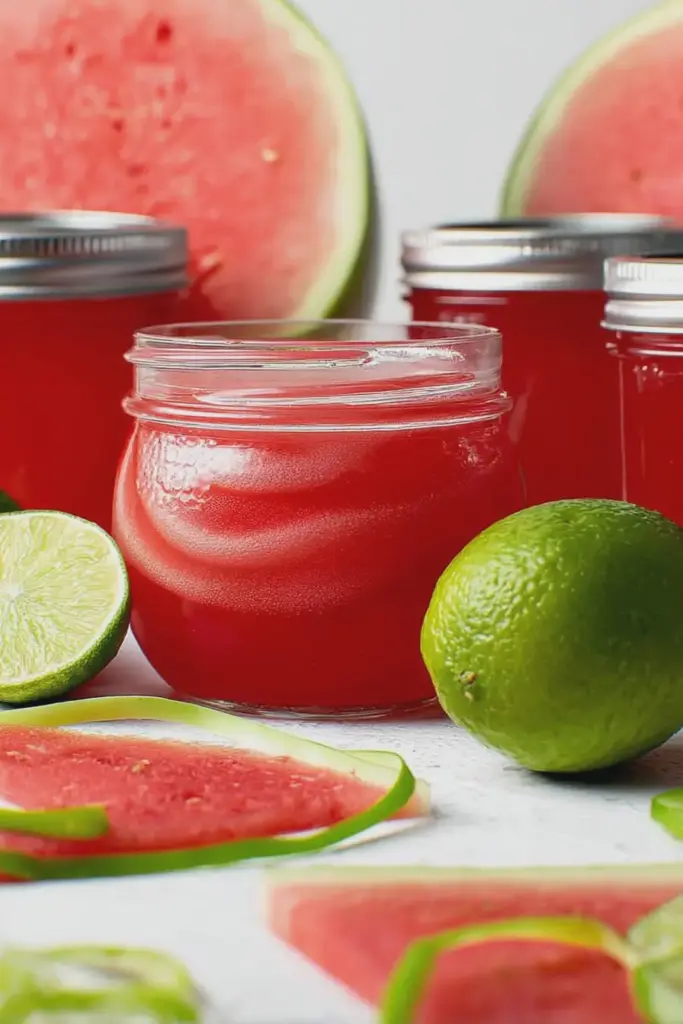
Visually, a jar of watermelon jelly is like a little sun-catcher; the color alone brings that fresh-watermelon scent into your kitchen the moment you open it. And because jelly is so versatile, it can be spooned over breakfast items, swirled into yogurt, spread on a biscuit, or tucked into a gift basket.
Because you asked for practicality: keep in mind that a quick clean-up routine and a lined sieve make the process feel truly effortless. I’ve brought jars to picnics and potlucks, and people always ask how I made something that tastes like summer and looks so neat in a jar.
Everything You Need for Watermelon Jelly
Before you start, gather your tools and ingredients so the short cooking window doesn’t catch you off guard. Picture the bright pink juice and the stainless tools glinting on your counter.
- Watermelon – The star: choose ripe, sweet melon. Seedless works best for ease, but if you use seeded, remove seeds before blending.
- White granulated sugar – Balances fruit flavor and helps pectin set; you can reduce slightly if you prefer less sweet, but expect a change in set and texture.
- Bottled lime juice – Provides reliable acidity for consistent gel formation; bottled juice keeps your acidity steady compared with variable fresh limes.
- Sure-Jel (low-sugar pectin) – A low-sugar pectin specifically formulated for fruit with higher water content like watermelon; follow the product instructions closely.
- Fine mesh sieve and cheesecloth or jelly bag – For a clear jelly, straining the purée well is essential.
- Blender or food processor – For a smooth purée to maximize juice extraction.
- Heavy-bottomed saucepan – Even heat distribution prevents scorching during the brief boil.
- Jars, lids, and canning tools – If you plan to shelf-stable can, have sterilized jars and a water bath canner ready; otherwise use clean jars for refrigeration.
- Substitutions – For lower-sugar options, consider a pectin formulated for low- or no-sugar jellies and follow its directions; specialty sweeteners can be trialed but may change texture and setting time.
The Secret to a Clear, Well-Set Jelly
Clarity and a firm set come down to three things: clean juice, correct pectin use, and precise timing. I’ve seen jellies cloud up when the purée hasn’t been strained enough, or when cooks add sugar too early and break the pectin’s setting action.
- Straining: Line your sieve with a double layer of cheesecloth or use a jelly bag and let gravity do the work—don’t force liquid through by pressing too hard, or you’ll push through solids that cloud the jelly.
- Pectin timing: Add the pectin to the juice and bring it to a full boil before adding sugar. That initial boil activates the pectin properly.
- Boil times: Keep the high-heat sessions short and exact—a minute or two as directed is usually sufficient; overcooking can darken flavor and affect texture.
The end result should be smooth and shiny to the eye and springy to the touch when set—no graininess, no cloudy haze. That glossy look is what I aim for first; the flavor follows beautifully.
How Much Sugar and Pectin You Actually Need
It helps to think of sugar and pectin as partners: pectin provides structure; sugar helps pectin form a gel and balances the fruit’s tartness. If you reduce sugar, you’ll often need a pectin designed for low- or no-sugar recipes to get the same reliable set.
Always read and follow the package instructions for the pectin you’re using—brands and formulations are not interchangeable. If you prefer less sweet jelly, start by reducing sugar modestly and testing a small batch so you can adjust pectin accordingly without wasting a full run.
As the syrup cooks, you’ll smell a warm, fruity sweetness rising; that aroma is a good cue that flavors are concentrating and the mixture is approaching gel-ready temperatures.
How to Make Watermelon Jelly (Step-by-Step)
- Blend chopped watermelon until it’s a smooth purée. Aim for no large pieces so the juice strains easily.
- Line a fine mesh sieve with cheesecloth or use a jelly bag. Pour the purée into the lined sieve and let the juice drip into a bowl—don’t press too hard or you’ll cloud the juice.
- Measure the strained juice so you know how much you have to work with; if you have extra, enjoy it as a beverage or freeze it for later.
- Transfer the juice to a saucepan. Stir in bottled lime juice and sprinkle in the low-sugar pectin; heat to a full rolling boil, whisking to dissolve the pectin thoroughly.
- Boil the juice with pectin for the time recommended on the pectin package (usually about a minute). Then stir in the sugar and return to a full boil for the final minute to activate the setting.
- Remove from heat and skim foam if needed. Ladle the hot jelly into prepared jars, leaving a small headspace, then wipe rims and seal with lids.
- If you’re canning, process jars in a hot water bath for the time appropriate for your altitude. Transfer jars to a towel-lined surface and let them cool undisturbed; check seals after 12–24 hours.
When you open a cooled jar, the jelly should hold its shape and shimmer. If a jar didn’t seal, refrigerate and use within a few weeks.
Note: The Pro-Tips, Troubleshooting, and Variations sections below are presented as bulleted lists so you can scan them quickly while you’re working.
Pro Tip for Watermelon Jelly: Fixes for Runny or Grainy Jelly
- I’ve saved runny jelly by re-cooking it with the correct type of pectin—measure the volume, add the recommended pectin for that amount of liquid, bring to a boil, and follow the package timing. Re-jar and process if you want shelf-stable jars.
- If your jelly looks grainy, it’s often from undissolved sugar or over-crystallization; gently reheat with a little water, stir until the sugar dissolves, and finish with a short boil—watch texture carefully.
- Foam on the surface is harmless; skim it off with a spoon for a neater jar and better visual clarity.
- If you prefer a clearer jelly, avoid pressing the purée during straining and allow extra time for gravity to pull the liquid through the cloth or bag.
How to Store, Can, and Gift Watermelon Jelly
Proper handling determines whether a jar will last months or only weeks. For short-term use, refrigerate sealed jars and enjoy within a few weeks. For long-term storage, process jars in a boiling water bath to make them shelf-stable for up to 18 months when stored in a cool, dark place.
- Refrigerated jars: Store upside down briefly after cooling for an extra-tight seal, then right-side up; use within a few weeks.
- Canning jars: Process in a hot water bath for the time appropriate to your altitude, then cool undisturbed and check seals—unsealed jars go in the fridge.
- Gifting: Dress jars with simple labels and a ribbon; pair with a loaf of bread or a small baked good for a charming present. If you’re looking for a delicious treat to give away alongside your watermelon jelly, consider making old-fashioned easy apple crisp.
- Visual inspection: A properly sealed jar will have a concave lid and will not flex when pressed in the center; any jar that fails this test should be refrigerated and used first.
Creative Serving Suggestions and Pairing Ideas
Think outside the toast: watermelon jelly brings a bright counterpoint to rich and savory items, and it also plays well with fresh fruit desserts.
- Spoon over vanilla ice cream or swirl into plain Greek yogurt for a quick summer dessert.
- Serve alongside a soft goat or ricotta cheese on crostini for a simple, elegant appetizer. Watermelon jelly pairs beautifully with savory dishes like creamy garlic butter lobster tails.
- Use as a glaze for grilled pork or chicken, or brush onto shrimp burgers for a sweet-tart finish—impress your guests at your next barbecue by serving watermelon jelly with tasty shrimp burgers.
- For a refreshing dessert option, try combining watermelon jelly with strawberry shortcake kabobs as a finishing drizzle.
- Variations (presented as a bulleted list for quick scanning):
- Infuse a small amount of fresh mint or basil while heating, then strain for a herbal twist.
- Swap some sugar for a lighter sweetener designed for canning if you want a less-sweet spread—test a small batch first.
- Add a splash of citrus liqueur to cooled jelly for an adult-only spread used in cocktails or dessert sauces.
Potential Health Benefits of Watermelon
Watermelon is mostly water, which makes it naturally hydrating and a low-calorie base for a sweet spread. It contains vitamin C and antioxidants like lycopene, which contribute mild health benefits alongside its refreshing flavor. Turning watermelon into jelly concentrates flavor but also concentrates sugars, so it’s best enjoyed in moderation as a treat that carries some of the fruit’s bright nutritional profile.
Troubleshooting Common Issues
- I found that if the jelly won’t set, the most common reason is not enough pectin for the amount of juice—re-cook with the right pectin ratio for that liquid volume.
- If the jelly is cloudy, check your straining technique and avoid pressing solids through the cheesecloth; letting the juice drip slowly yields the clearest result.
- For jars that don’t seal after processing, I reheat the jelly, ladle it into a freshly sterilized jar, and reprocess; if you prefer not to reprocess, refrigerate and use the jelly first.
- If sugar crystallizes on cooling, gently reheat with a little water and stir until dissolved, then re-jar—this rarely happens with careful stirring and complete dissolution of sugar during cooking.
Frequently Asked Questions
Is watermelon jelly hard to make? Not at all! Watermelon jelly is quite simple to make. With just a few ingredients and straightforward steps, you’ll have delicious jelly ready in no time!
How do I know when my watermelon jelly is set? Your watermelon jelly will take about 12-24 hours to set. It should have a smooth and firm texture. If it doesn’t set after that time, you may need to troubleshoot or use the runny jelly fix tips.
Can I use fresh watermelon instead of store-bought juice? Yes, fresh watermelon works perfectly! Just chop it up and blend it to make your own watermelon juice as the base for your jelly.
How long will my watermelon jelly last? If stored properly, your canned watermelon jelly can last up to 18 months in a cool, dry place. If refrigerated, it should be enjoyed within 3 weeks.
What can I pair watermelon jelly with? Watermelon jelly is delicious on toast, waffles, pancakes, ice cream, and even as a filling in pastries and cakes. The options are endless!

Watermelon Jelly
Ingredients
Method
- Add chopped watermelon to a blender and purée until smooth.
- Line a fine mesh sieve with folded cheesecloth or a jelly strainer bag. Pour the puréed watermelon through the sieve into a large bowl or measuring cup.
- Measure out 4 cups of watermelon juice. Reserve leftover juice for later.
- Transfer watermelon juice to a saucepan, add lime juice and pectin, and bring to a boil without sugar.
- Boil for 1 minute and then whisk in sugar until dissolved. Boil for another minute.
- Ladle the mixture into prepared jars, leaving 1/4-inch headspace.
- Wipe rims with a clean towel and apply lids until fingertip tight.
- Refrigerate for up to 3 weeks or can by processing in a hot water canner for 10 minutes.