
I still remember the first time I roasted two full heads of garlic and folded that sweet, mellow paste into hummus for a weekend gathering. The kitchen smelled like warm caramel and something familiar yet elevated; guests kept drifting into the kitchen just to breathe it in. I made this hummus because I wanted something effortless that looked polished on a platter—and it became the thing people asked me to bring to every party after.
In my kitchen I favor small rituals that cut stress: pop the garlic in the oven while you arrange the crudités, blend just long enough for silkiness, and set the bowl out with a glossy drizzle of olive oil. I learned by trial and error that a little patience with the garlic and a few professional tricks make a dramatic difference in texture and flavor.
What I like most is how flexible this dip is for hosts. It earns space on an elegant charcuterie board, and it also disappears in seconds at casual backyard gatherings. Below I’ll walk you through what I use, how I roast garlic to coax out sweetness, the exact tricks I rely on for an ultra-smooth finish, and smart scaling tips when you’re feeding a crowd.
Read on and you’ll have a party-ready hummus that looks like you fussed for hours, even when you didn’t.
Why This Roasted Garlic Hummus Is Perfect for Hosts and Parties
This version uses slow-roasted garlic to replace the sharp bite of raw cloves with a deep, honeyed sweetness—think browned butter, but in vegetal form. That transformation makes the hummus feel special without adding steps that steal your attention from guests.
It’s versatile: serve it as an appetizer with bread and veg, use it as a spread on sandwiches, or add a shallow pool to a warm grain bowl as a sauce. Because roasting tames the garlic, even people who usually avoid raw garlic will scoop this right up.
And it’s low-lift. Once the garlic is roasting, most of the work is hands-off. That’s a host’s dream: you get impressive aroma and depth with minimal babysitting.
Everything You Need for Roasted Garlic Hummus
High-quality core ingredients and a few simple tools are all you need to make this hummus sing. Below I list what I reach for most often and why each item matters. Note: these ingredient notes avoid exact measurements—those will be in the recipe card handled separately.
- Garlic heads – The base of the flavor: roasting turns harsh bite into caramelized creaminess. Use full heads for maximum depth.
- Chickpeas – The body of the hummus. Rinsed and drained canned chickpeas are convenient; cooked-from-dry offers a silkier, fresher taste.
- Tahini – Adds nuttiness and helps create that luscious, spreadable texture. Choose a runny, well-stirred tahini for best emulsification.
- Lemon juice – Brightness and acidity to balance the sweet garlic. Fresh squeezed is best.
- Olive oil (extra virgin) – For both blending and finishing. A fruity, peppery oil makes the final drizzle pop.
- Salt – Simple seasoning; adjust to taste.
- Ice cubes – Yes, ice. I use them to lower blender temperature and firm the emulsion so the hummus finishes velvety.
- Garnishes (parsley, whole chickpeas) – For presentation and textural contrast.
Dietary considerations: this recipe is naturally gluten-free and vegan, so it’s an easy win for mixed groups. If someone is allergic to sesame, sunflower seed butter or a mild nut butter can stand in for tahini—more on swaps later.
The Secret to a Silky, Spreadable Texture
Getting hummus that’s glossy and spreadable is more technique than magic. Here’s what I do every time to hit that ideal texture without over-processing the flavors.
- Emulsify tahini and lemon first to create a creamy base before adding chickpeas—this helps trap air and yields a lighter texture.
- Blend in short bursts at first, then run the processor continuously for a controlled period to reach smoothness without overheating.
- Incorporate cold elements (ice cubes or very cold water) toward the end of blending. The drop in temperature tightens the emulsion so oil and water bind into a silky suspension instead of separating.
- Avoid over-blending to the point where the mixture becomes gummy—stop when it’s smooth and pillowy, not gluey.
How to Roast Garlic for Maximum Sweetness
Roasting is where raw garlic learns to taste like candy. The slow heat breaks down sulfur compounds and encourages caramelization, bringing out a rounded sweetness with savory depth.
- Trim the tops off the heads to expose the cloves but keep the skins on—the paper protects the cloves and concentrates the flavors.
- Drizzle the exposed cloves with olive oil; this promotes browning and prevents drying out.
- Wrap the heads securely in foil and roast until the cloves are uniformly golden and give easily when pressed—timing varies with size.
- Let the garlic cool slightly before squeezing the softened cloves from their skins; they should slide out like butter. If a few cloves are underdone, the hummus will still be fine, but remove any tough bits.
- Alternative methods: if you’re short on oven space, you can pan-roast halved heads gently in a covered skillet over low heat, turning occasionally until soft—watch closely to avoid burning.
Scaling for a Crowd: Batch Sizes, Timing & Tools
When I cater a party, timing and vessel choice matter more than exact multiples. Scale ingredients proportionally and think about how you’ll blend and serve larger volumes.
- Work in batches if your food processor is small; overfilling reduces airflow and makes achieving silkiness harder.
- For big parties, roast several garlic heads on a sheet pan—they roast together beautifully and keep you from babysitting multiple trays.
- Serve hummus in shallow wide bowls or a couple of wide baking dishes so guests can access it easily and you can create pretty garnish zones.
- Timing tip: roast garlic a day ahead and blend on the day of the event for maximum freshness; keep chilled until serving and bring to room temperature before presenting.
- Dietary planning: make a plain small batch without garnishes for guests with allergies, and a separate flavored batch for those who want extras.
If you’re coordinating a larger menu, pairing this hummus with other dishes helps build a memorable spread—consider serving it alongside garlic shrimp pasta for a hearty station that guests remember.
How to Make Roasted Garlic Hummus (Step-by-Step)
I keep the hands-on portion short so you can focus on plating and conversation. The following step-by-step checklist is how I do it in my kitchen—follow it and you’ll be set.
- Roast garlic as described above and let it cool until you can handle it.
- Squeeze the soft roasted garlic from the skins into the bowl of your food processor.
- Add tahini and lemon juice first; process until creamy and pale.
- Add drained chickpeas and salt, then pulse to combine before blending continuously.
- Add ice cubes one at a time while the processor runs until the texture is smooth and spreadable—stop and taste for seasoning adjustments.
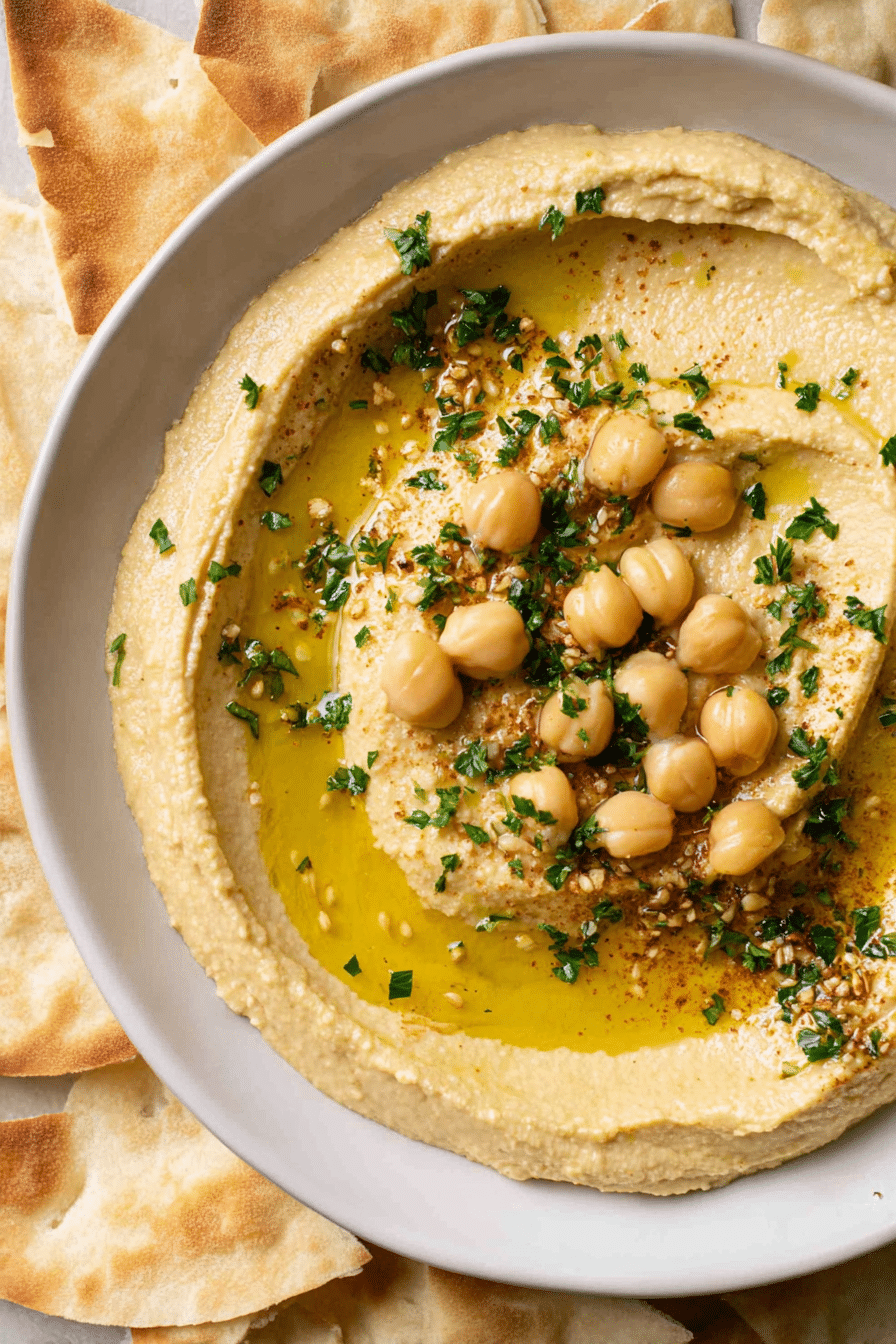
- Spoon into serving bowls, smooth the surface, drizzle with olive oil, and finish with parsley and a few whole chickpeas for texture.
Common pitfalls I see: under-roasted garlic that tastes sharp (roast longer), overheated hummus that becomes pasty (use ice), and under-salted hummus that tastes dull (always taste and adjust). Below I list quick troubleshooting points so you can fix problems fast.
Pro-Tips, Troubleshooting, and Variations are presented below as bulleted lists for quick scanning.
- Pro-Tips – I recommend you read these before starting: I always reserve a little of the olive oil to pour on top at serving time for shine and mouthfeel; I also pulse the chickpeas first so they break down evenly before full blending.
- Troubleshooting – If your hummus is grainy, blend longer and add a splash of cold water or an extra ice cube; if it’s too thin, add a small spoonful of tahini or a few more chickpeas.
- Variations – To vary the profile, fold in roasted red peppers, a spoonful of harissa for heat, or mix in chopped herbs for a fresher finish.
Pro Tip for Roasted Garlic Hummus: Use Ice Cubes for an Ultra‑Smooth Finish
The ice-cube trick is used in many professional kitchens because cold stops heat buildup and tightens emulsions. When I incorporate ice while blending, the hummus achieves a glossy, spoonable texture that scoops cleanly and holds a ripple when plated.
- Add ice near the end of processing—too early and you dilute the base; too late and it won’t incorporate well.
- One to a few ice cubes is usually enough; you’re aiming for a cooler, creamier texture, not a slushy blend.
- If you’re concerned about dilution, use very cold water instead of ice; it has a similar effect without melting concerns when making big batches.
How to Store, Make-Ahead, and Serve (Pairings & Garnishes)
This hummus keeps well and actually benefits from a short rest in the fridge—the flavors settle and deepen. Store it in an airtight container for several days and always stir and adjust acidity before serving if it’s been sitting.
- Refrigerate in a shallow container to allow faster cooling and easier scooping.
- Bring to room temperature before serving and finish with a fresh drizzle of oil and chopped parsley to revive aromas.
- For make-ahead: roast the garlic up to two days ahead and blend the hummus the day of your event for peak freshness.
For an impressive entrée, serve your roasted garlic hummus with creamy garlic butter lobster tails. This hummus also pairs beautifully with vegetarian stuffed peppers for a delightful meal, or enjoy it as part of a cozy spread with a bowl of Greek lemon chicken soup.
Dietary Swaps and Alternatives
I want every host to feel confident serving this to a mix of eaters—here are friendly swaps that keep flavor and texture intact.
- Tahini substitute – Use sunflower seed butter or a mild nut butter if someone has a sesame allergy; texture will be similar though flavor shifts slightly.
- No canned chickpeas – If you cook chickpeas from dry, they’ll yield an even creamier finish; roast one or two extra heads of garlic to match the larger batch.
- Lower fat option – Reduce the olive oil used in blending and increase lemon and tahini slightly for body without losing richness.
- Spice-free – Keep a plain batch for guests with spice sensitivities and a separate bowl with chiles or cumin for those who want more punch.
Health Benefits of Individual Ingredients
Part of why I bring this hummus to gatherings is that it tastes indulgent but is built from nourishing ingredients. I like to mention a few highlights to guests who ask.
- Garlic – Roasted garlic retains antioxidants and develops compounds that are gentler on the stomach than raw cloves while still contributing immune-supporting nutrients.
- Chickpeas – A great plant-based source of protein and fiber, they keep guests satisfied and pair well with whole-grain crackers and vegetables.
- Olive oil & tahini – These provide heart-healthy fats and a dose of vitamin E; tahini also brings calcium and plant-based protein to the bowl.
Frequently Asked Questions
Can I use raw garlic instead of roasted garlic in this hummus?
While you can use raw garlic, roasting it adds a sweet and mellow flavor. If you prefer raw garlic, consider letting it sit in lemon juice for a bit to cut the rawness.
How long can I store roasted garlic hummus?
Roasted garlic hummus can be stored in an airtight container in the fridge for about 4 to 7 days.
What’s the best way to serve roasted garlic hummus?
Serve it with pita bread, fresh vegetables, or crackers. You can also drizzle it with olive oil and top it with chopped parsley for added flavor!
Can I make roasted garlic hummus ahead of time for a party?
Absolutely! You can make it a day or two in advance. Just store it in the fridge and give it a good stir before serving.
Are there any alternatives to tahini for this recipe?
Yes! If you need a tahini substitute, you can use creamy peanut butter or sunflower seed butter for a different twist.
Roasted Garlic Hummus
Ingredients
Method
- Preheat the oven to 400°F.
- Cut about ½ inch off the tops off of the head of garlics and remove any loose papery outer layers.
- Place garlic cut side up on enough foil to wrap the garlic. Drizzle oil on the exposed surface of the garlic. Wrap the sides up and place the foil wrapped garlic onto a baking tray.
- Roast in the preheated oven until golden and soft, about 40-45 minutes. Roasting time will vary based on the garlic size.
- Set aside to cool, then squeeze out the soft garlic from the paper cloves into the food processor.
- Add drained chickpeas to the food processor along with lemon juice, tahini, salt, and the ice cubes. Blend for about 5 minutes until smooth. Taste and adjust as needed.
- Spoon the hummus onto a plate or bowl, spread it to create swirls, and drizzle with olive oil, add whole chickpeas for garnish and fresh parsley. Serve with pita bread.