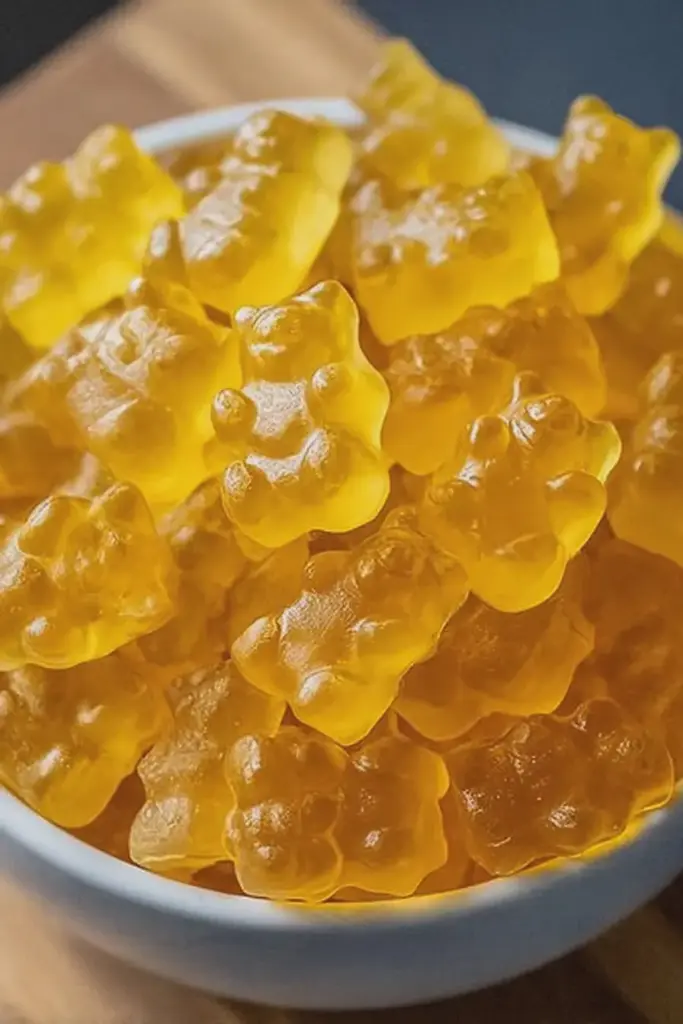
I make these honey lemon gummy bears in my kitchen whenever I want a small, wholesome treat that feels special but doesn’t come loaded with ingredients I can’t pronounce. Over the years I’ve adjusted the balance of tart lemon and floral honey so the kids ask for them and I feel good about what’s going into their snack boxes. The aroma of fresh lemon brightens the room while the honey adds a gentle sweetness that feels like a tiny reward.
What I love most is how forgiving the recipe is: the color is cheerful, the texture is pleasantly chewy, and the molds make them look like a treat you’d buy at a specialty candy shop — except you control every ingredient. I often make a batch while the kids are doing crafts, and they help press the mixture into molds; it’s a small ritual that turns candy-making into family time.
Keeping things homemade lets me swap ingredients easily for allergies or preferences. If you’re health-conscious or feeding little ones, this is a recipe that scales: you can emphasize tartness with more lemon, dial sweetness back with less honey, or choose a vitamin-rich juice to sneak in an extra dose of fruit. For other delicious and healthier treats, try our homemade strawberry truffles which are perfect for families.
Below I’ll walk you through what I keep on hand, why each ingredient matters, and the little temperature and texture tricks that make these gummies reliably chewy and bright every time.
Why DIY Honey Lemon Gummy Bears Are a Healthier Treat for Families
Homemade gummy bears let you control the entire ingredient list so you can reduce processed sugars, avoid artificial colors and flavors, and pick fruit juices that add real nutrients. I swapped out high-fructose syrups and artificial dyes years ago, and the difference — in both flavor and my peace of mind — is worth it.
Using real honey and fresh lemon juice adds antioxidants and vitamin C along with a more complex, natural flavor profile than store-bought candy. You can also customize batches for dietary needs: make them lower in sugar, alcohol-free for kid-friendly events, or use plant-based gelling agents for a vegan option. The bright color and fresh lemon scent make them as appealing to the eyes as they are to the palate.
When I plan a candy tray for a family party, I like to pair these gummies with one other homemade treat so the plate feels varied. For a fun sweet pairing at a gathering, consider serving them alongside delicious blueberry cheesecake cupcakes — the contrast of textures and flavors is lovely.
Everything You Need for DIY Honey Lemon Gummy Bears
Before you start, gather fresh, bright ingredients and a few simple tools so the process flows quickly. I always line up my molds, a small whisk, a silicone spatula, and a dropper or small measuring cup for precise pouring. Using smooth, reliable molds makes unmolding easier and keeps the gummies looking polished.
- Unflavored gelatin – Provides the classic gummy texture and contributes collagen; the backbone of chewiness.
- Honey – Natural sweetener that adds floral notes and rounds out the lemon’s acidity; you can swap for other liquid sweeteners if needed.
- Lemon juice – Adds brightness and vitamin C; fresh-squeezed offers the best aroma and clarity of flavor.
- Fruit juice (100% juice) – Carries most of the flavor and color; choose juices with good flavor intensity for the best result.
- Cold water – Used to bloom gelatin so it hydrates evenly before warming.
- Gummy bear molds – Silicone molds work best for easy release and even setting.
- Tools – Small saucepan, whisk, silicone spatula, dropper or small pourer, and a shallow tray to stabilize molds in the fridge.
The Health Benefits of Each Ingredient — Honey, Lemon & Gelatin
Each main ingredient plays a purposeful role beyond flavor. Honey is a natural sweetener with some antioxidant activity and a flavor complexity that simple syrups lack. Lemon brings vitamin C, which supports immunity and gives that refreshing, tangy lift. Gelatin supplies dietary collagen-like proteins that many people appreciate for joint and skin support.
When I want to layer lemon into other desserts, I sometimes use its bright acidity to complement richer, creamier items — it plays beautifully with citrus-forward desserts such as a luscious lemon lime cherry pistachio cheesecake.
Keep in mind these gummies are still a sweet treat, but making them from whole-ingredient components allows you to make smarter choices (like using 100% juice and real honey) instead of relying on long-ingredient lists from commercial candy.
Choosing the Right Juice and Sweetness Level for Better Nutrition
Not all juices are created equal. Some are mostly water with flavoring, while 100% fruit juices bring vitamins and natural sugars. I pick juices with bright, concentrated flavor so I need less added honey — tart cranberry, pomegranate, or concentrated orange blends work very well. For a milder gummy, white grape or apple juice is gentle and kid-friendly.
If you want to lower sugar, choose a tart juice and cut back on honey; the lemon will help the flavor read as bright even when sweetness is reduced. Alternatively, try mixing juices—use one with robust flavor as the base and a milder one to smooth the profile. If you’re experimenting with sweeteners, keep in mind how they pair with lemon: maple syrup adds depth and caramel notes, while monk fruit or erythritol change the mouthfeel and may need blending for a natural finish.
If you’re exploring recipes with honey, check out our honey butter garlic glazed salmon bites that beautifully balance flavors while remaining nutritious.
The Secret to Firm, Chewy Gummy Bears
Getting the texture right is mostly about gelatin ratio, gentle heating, and cold setting. Too little gelatin and your gummies will be floppy; too much and they’ll be overly firm. I learned to tune firmness to the molds I use — shallow molds tend to firm faster and can handle slightly less gelatin.
Troubleshooting:
- If gummies are too soft, the quickest fix is to gently warm the mixture, add a bit more bloomed gelatin, stir until dissolved, and reset in the molds.
- If the texture is grainy, the gelatin may not have fully dissolved; reheat gently while stirring until completely smooth (do not boil).
- If gummies are rubbery or very firm, you likely used too much gelling agent; for future batches, reduce the gelatin slightly or increase the liquid ratio.
- If the molds are sweating or you see condensation, chill in a stable fridge temperature to avoid moisture collecting on the surface.
The final chew should be firm enough to hold shape but yielding when bitten — a pleasant, not plasticky, resistance.
Why Temperature Matters When Dissolving Gelatin
Gelatin needs to be properly hydrated (“bloomed”) in cold liquid before being warmed; this step ensures it dissolves evenly without clumping. Bloom time is short — I usually let the gelatin sit in cold water for a few minutes until it swells and becomes spongy.
After blooming, gently warm the juice-honey mixture and whisk the gelatin in until it has fully dissolved. Do not bring the mixture to a boil; boiling can break down gelatin’s setting properties and make the texture weak or gummy. I watch for steam and small bubbles at the edge — that’s the cue to keep the heat low and stir. If the mixture cools and begins to thicken before you pour, briefly rewarm it over low heat until pourable again.
How to Make DIY Honey Lemon Gummy Bears (Step-by-Step)
- Bloom the gelatin: sprinkle the unflavored gelatin evenly into cold water and let it sit until the granules swell and the mixture is spongy.
- Warm the liquid: in a small saucepan, gently heat your chosen juice with the lemon juice and honey, stirring to combine. Heat until warm and steam rises but do not boil.
- Dissolve the gelatin: add the bloomed gelatin to the warm liquid and whisk over low heat until completely dissolved and smooth.
- Taste and adjust: remove from the heat, taste, and adjust sweetness or acidity as needed. Remember that chilling mutes flavors slightly, so aim for slightly brighter than you want at room temperature.
- Pour into molds: use a dropper or small pourer to fill gummy bear molds carefully. Tap the mold gently to remove air bubbles and ensure even fills.
- Chill until set: refrigerate the molds until fully firm; most molds need at least a couple of hours.
- Unmold and store: pop the gummies out gently and store them in an airtight container in the refrigerator.
Pro Tip for diy honey lemon gummy bears: Vegan swaps & sugar alternatives
- Agar-agar – A plant-based gelling agent that sets firmer and requires boiling and precise timing; texture differs from gelatin and often yields a more brittle set.
- Pectin – Works well with higher-sugar recipes and acid; often used in fruit-based candies but needs a different technique than gelatin.
- Maple syrup or brown rice syrup – Good liquid alternatives to honey that give a different flavor profile; they pair nicely with darker fruit juices.
- Monk fruit, erythritol, or stevia blends – Use cautiously and taste as you go; these can change mouthfeel and sometimes introduce cooling or metallic notes.
- Texture note – When using vegan gelling agents, expect a textural shift. Agar sets more quickly and firmly, so work in small batches and pour while still hot.
How to Store, Serve, and Vary Your Gummy Bears
Store your finished gummy bears in an airtight container in the refrigerator; they generally keep well for about one to two weeks. I separate layers with a sheet of parchment if I’m stacking them so they don’t stick together. For gifting, a small jar with a ribbon looks charming and keeps them fresh in transit.
Serve them chilled for the best chew. They make a fun addition to party favor bags, a bright garnish on a kids’ dessert table, or a small bite in a snack box. For texture play, try mixing gummy shapes and sizes — mini fruit shapes and larger bears look playful together.
Variations:
- Use tart cranberry or pomegranate juice for a jewel-toned gummy with more antioxidants.
- Blend citrus juices—lemon with a touch of orange or grapefruit—for layered brightness.
- Add a few drops of natural food coloring from beet or spirulina extracts for visual pop without artificial dyes.
- Create two-tone gummies by pouring a thin set layer first, chilling, then adding a second flavor on top for a striped effect.
For a sweet variation, consider making delicious blueberry cheesecake cupcakes to accompany your gummy bears when serving them at parties.
Frequently Asked Questions
Can I use different types of juice for the gummy bears?
Absolutely! Feel free to experiment with your favorite fruit juices. Just make sure to choose 100% juice for the best flavor and health benefits.
How long do these gummy bears last?
When stored in an airtight container in the refrigerator, your homemade gummy bears should last for about 1-2 weeks.
Is there a way to make these gummy bears vegan?
Yes! You can substitute the unflavored gelatin with agar-agar or pectin, which are plant-based alternatives.
What can I do if my gummy bear mixture is too thick?
If your mixture thickens before you can pour it into the molds, gently warm it over low heat until it becomes pourable again.
Can I adjust the sweetness of the gummy bears?
Definitely! You can add more or less honey based on your taste preference or choose a different sweetener if you want a lower sugar content.

DIY Honey Lemon Gummy Bears
Ingredients
Method
- In a saucepan, heat the fruit juice, lemon juice, and honey until warm. Do not boil.
- In a separate bowl, mix the gelatin with cold water and let it bloom for 5 minutes.
- Add the bloomed gelatin to the juice mixture and heat over low flame, stirring until gelatin is completely dissolved.
- Pour the mixture into a gummy bear mold and refrigerate for at least 2 hours.
- Once firm, remove gummy bears from mold and enjoy.